


Accessories
Stepping up your travel photos with camera filters
No, definitely not your in-app filters

With access to an array of available travel cameras, consumers have been getting more and more engrossed on documenting their trips. Action cameras are available left and right and more consumer drones have popped out of nowhere featuring the latest technologies.
Although while these cameras boast high-quality images, one can still go for better output and achieve more creative shots by using extra accessories. Such is the case for this feature’s spotlight. Freewell has sent a couple of travel necessities if you want to step up your travel photos.
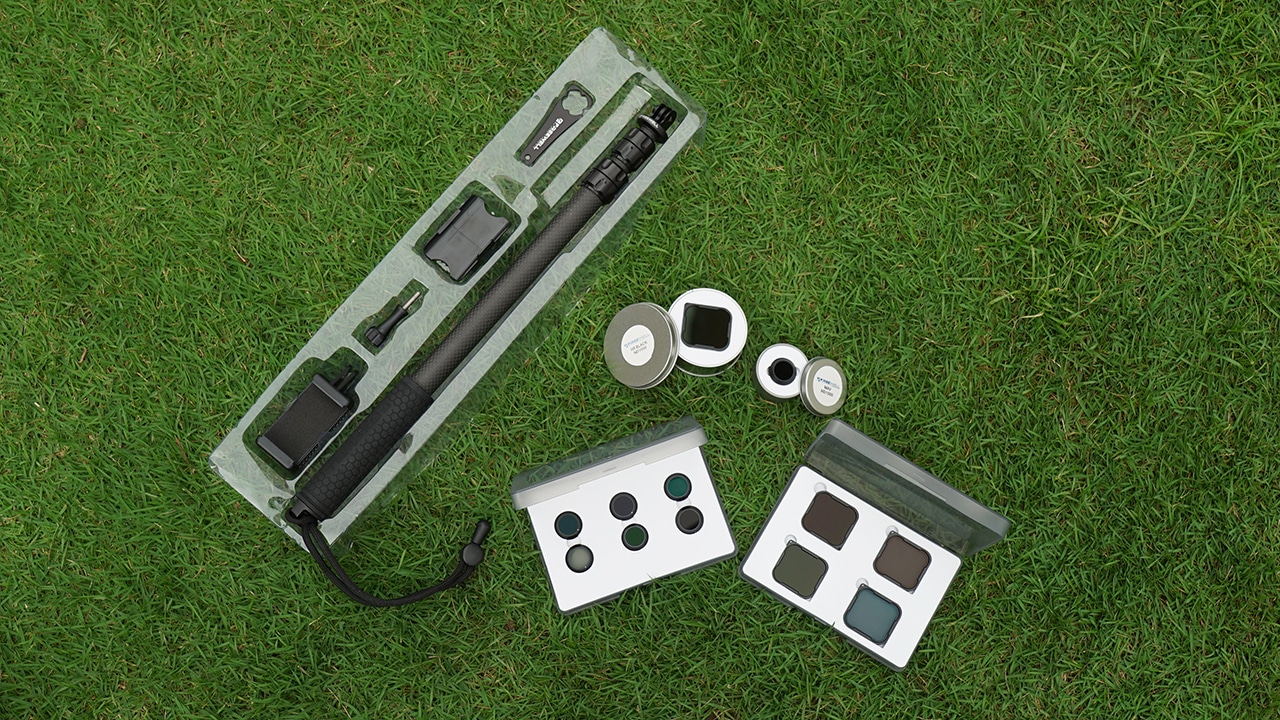
The gear we received from the HongKong-based company consists of the following sets:
- 4-pack Standard Day Filters for GoPro Hero 5 Black and onwards
- ND4 filter
- ND8 filter
- ND16 filter
- ND32 filter
- 6-pack All Day Filters for DJI Mavic Pro and Mavic Pro Platinum
- ND8 filter
- ND16 filter
- ND32 filter
- ND8/PL filter
- ND16/PL filter
- Pro M3 Carbon Action Camera Monopod
- Snap-fit remote holder
- Smartphone clamp
- Aluminum thumbscrew
- Aluminum thumbscrew wrench
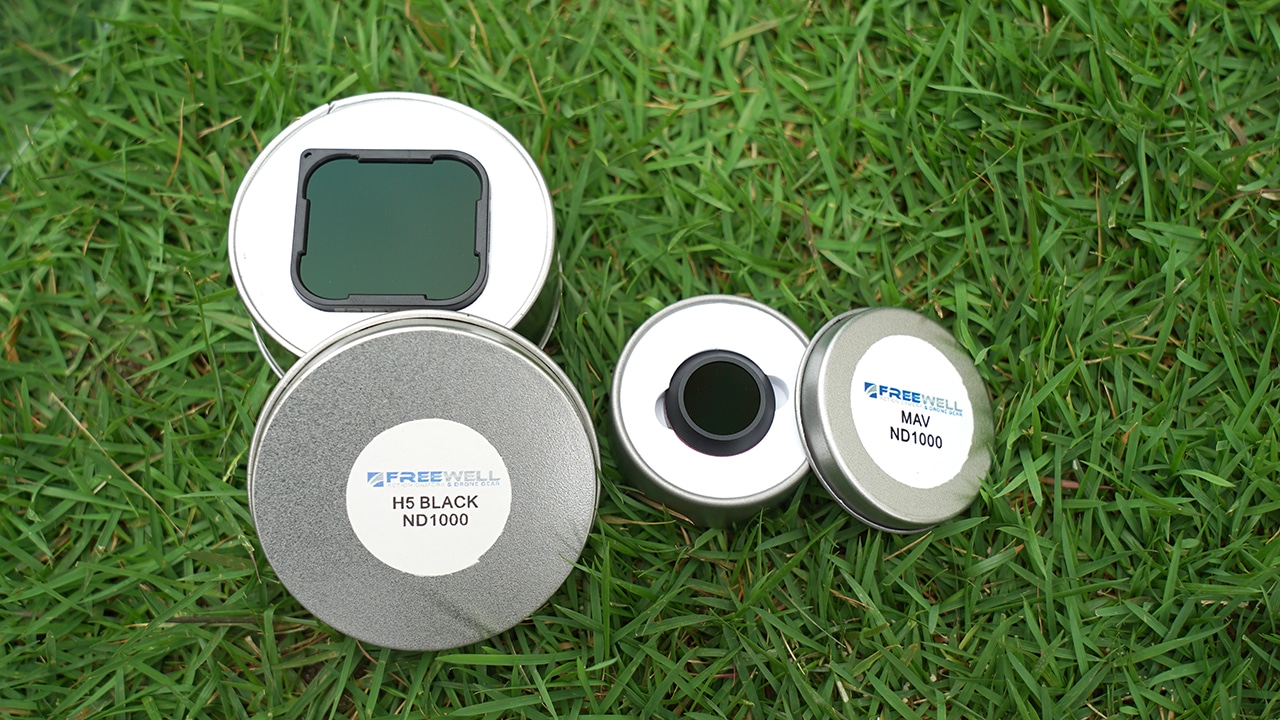
Apart from the monopod and its included mounts, the sets consist of neutral density (ND) and polarizing (PL) filters which we’ll get to know better in just a bit. They range from ND4 to ND32 but on top of those, Freewell also threw in single ND1000 filters for both the GoPro Hero and DJI Mavic.
What are ND filters and what do the numbers represent?
For the unfamiliar, ND filters lessen the light coming into the camera’s sensor. You can think of them as sunglasses for your lens. Whether it’s a DSLR, mirrorless camera, action camera, or a drone, you can use ND filters to have more control over light coming in.
The number that usually follows indicates the ‘stop’ or basically by how much it darkens the image. Filters usually start from ND4, then ND8, ND16, ND32, and so on as it gets darker and darker.
Applying filters
You might ask, “what instances could I use ND filters for?” Basically, a good rule of thumb is to use an ND filter whenever there’s an abundance of light in your scene. This way, you still get an image with the right exposure when the camera’s shutter speed doesn’t go as fast as you need it to be.
Another good use of ND filters is when you want to achieve time lapse during the day. By now, a lot of people know the principle behind shooting time-lapse photos at night: By lowering the shutter speed, the camera’s sensor allows more light to come in and capture more movement that can produce unique images.
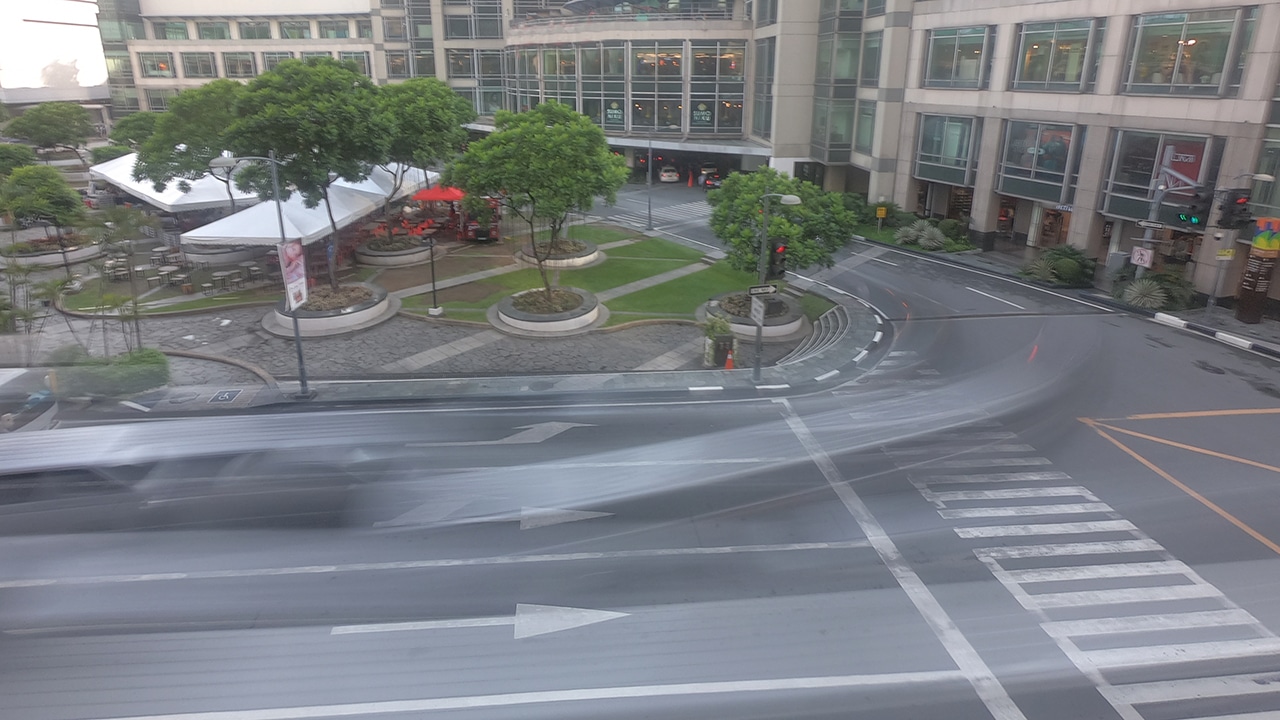
Shot at 5 seconds shutter with Freewell ND1000 filter for GoPro HERO
Although did you know that you could also pull this same effect during the day? You still need to lower your shutter speed but with the help of an ND filter. Without it, what you’ll get is just a washed-out photo due to overexposure.
Having the appropriate filter, you can lower your shutter speed to show motion while at the same time, limit the light going into your camera.
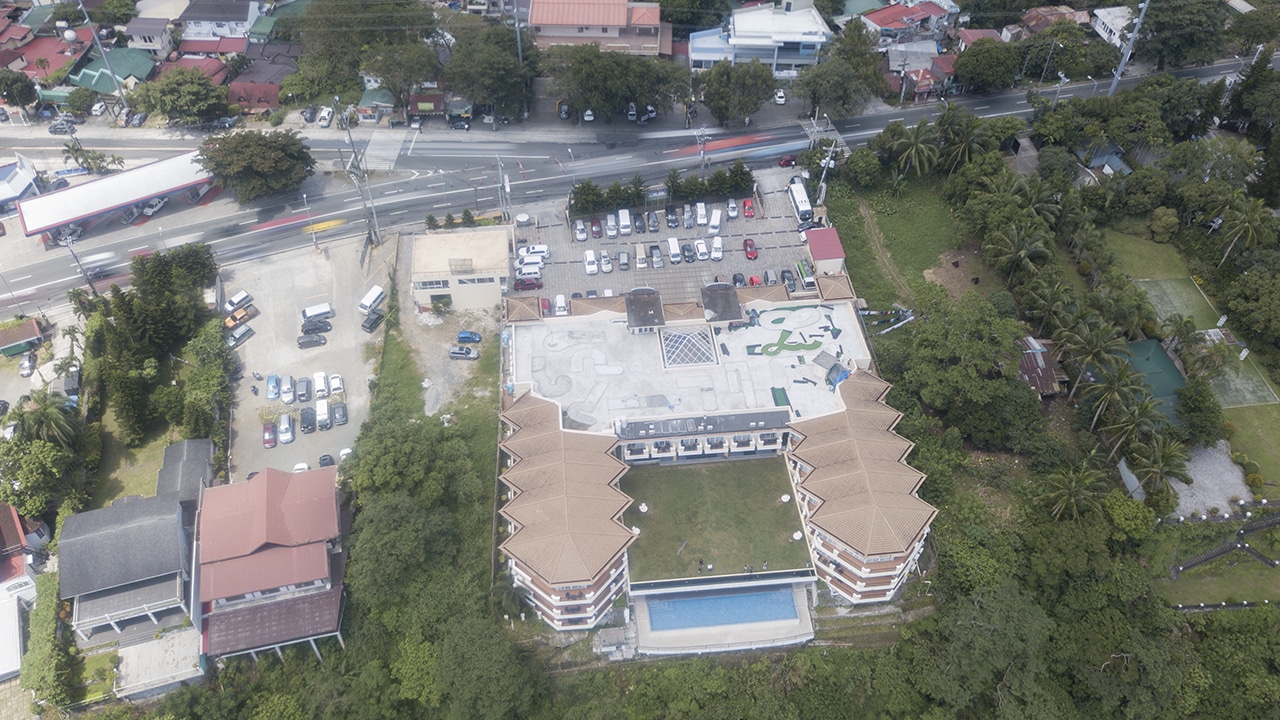
Shot at 2-sec shutter speed with Freewell ND1000 filter for DJI Mavic Pro
The above photo may look like an ordinary aerial shot I took with my Mavic Pro but look closely and you’ll notice that I was able to capture a short time-lapse through the movement of vehicles passing by. You can pick up this technique and apply it to different scenarios and achieve creative shots.
While these filters will mostly be used when the sun is bright, you can also use them even at night when you want to capture certain effects.
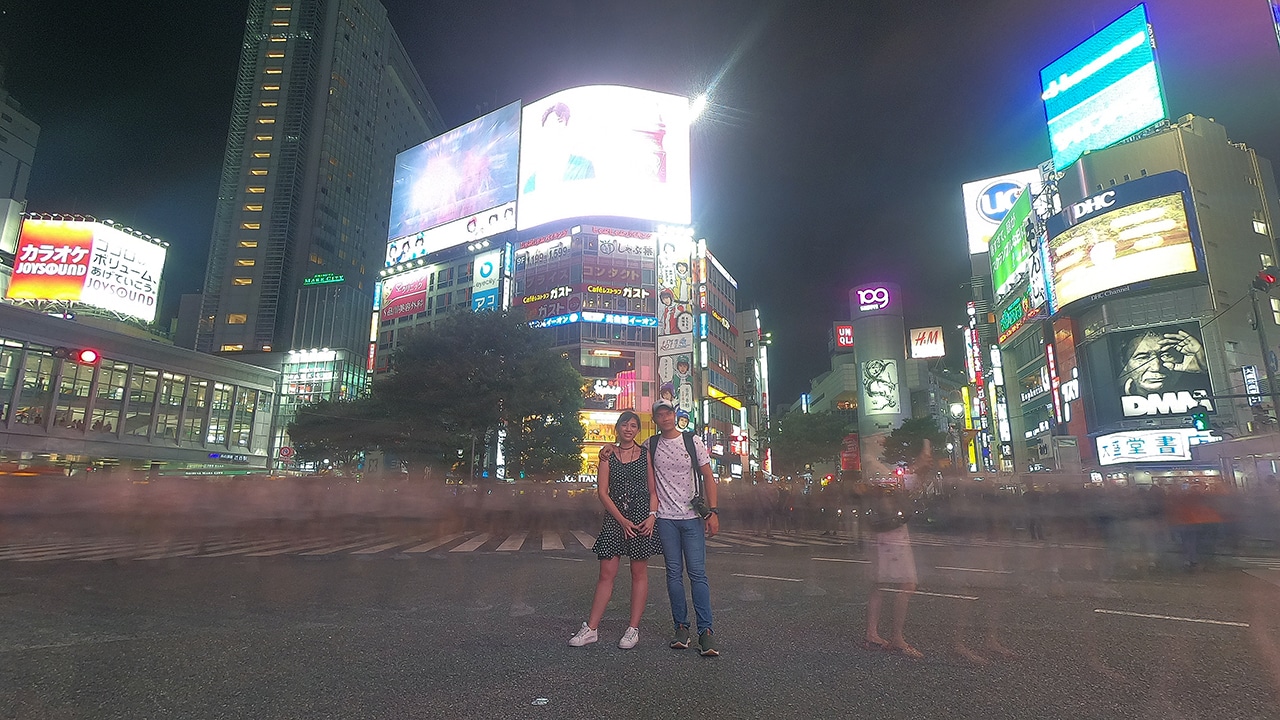
Check out the sample photo above taken at Tokyo’s Shibuya Crossing. Me and my wife remained focused while groups of people around us appeared as ghosts and the lights behind us illuminate the shot.
The ND16 filter I used was able to dial down the lights while the shutter was set to a low speed, capturing the flow of people while me and my wife just had to stand there and not move for a few seconds.
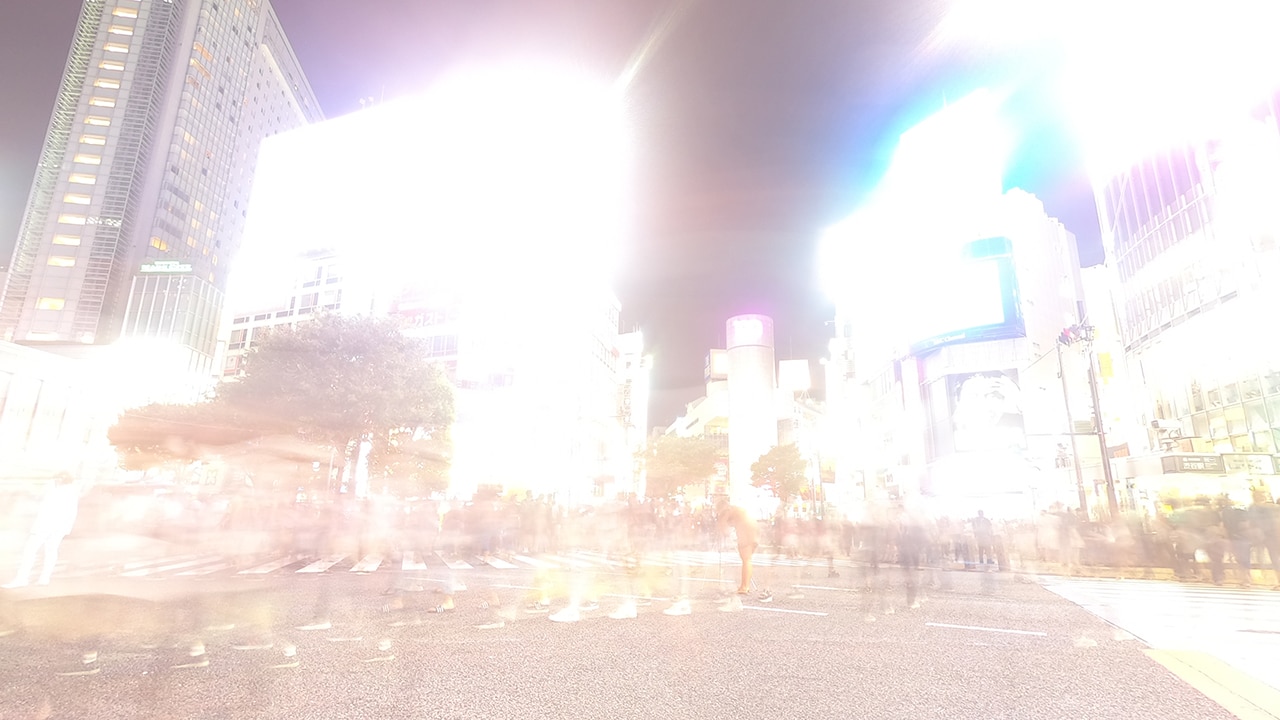
Slow shutter speed with no ND filter
Although it was night time, I still used Freewell’s ND16 filter since I had to lower the shutter speed to show the motion of people crossing. As I’ve mentioned earlier, if I do that without any filters on, the above photo is what you’ll get.

Akihabara without ND filter
Additionally, you can also use ND filters to show more details in both the ground and sky. What happens usually when shooting a landscape is that the subject has the right exposure but the sky gets overblown. By using this kind of filter, you can retain the details of the sky and make clouds appear while keeping your subject’s exposure.
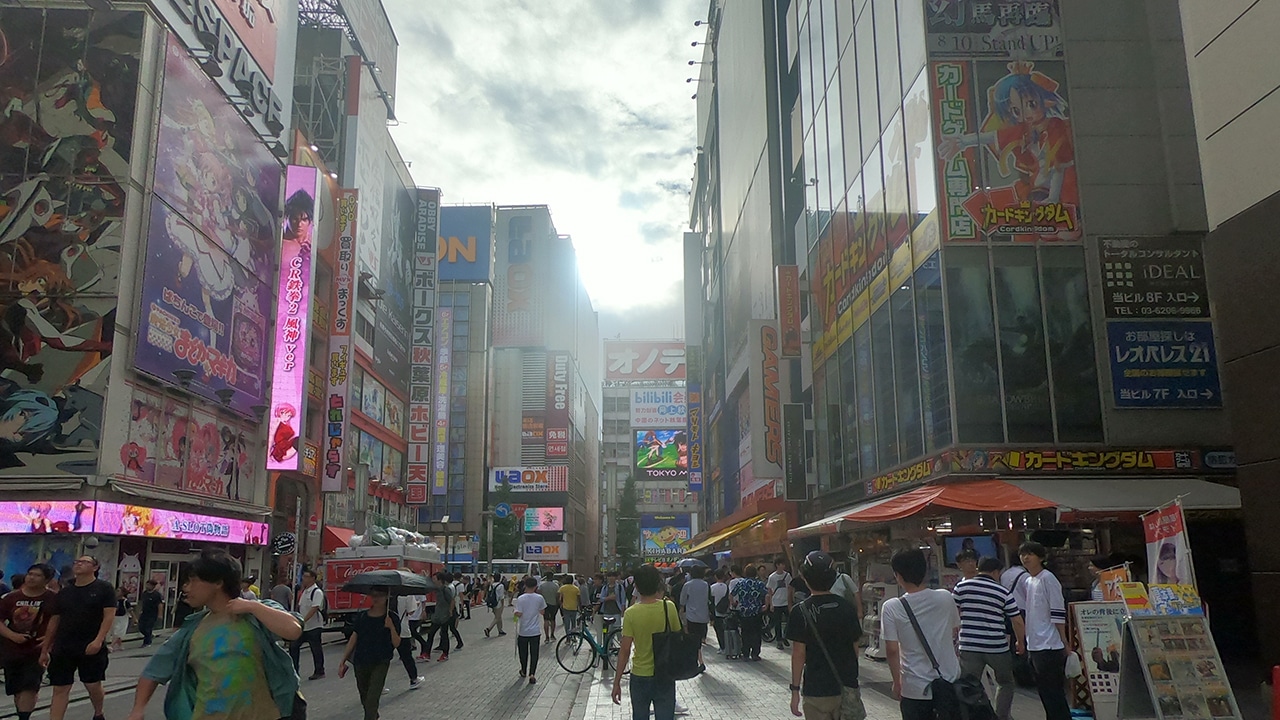
Shot with ND8/PL filter
We’ve covered getting the right exposure in tricky situations but one final example is about removing glares using polarizing (PL) filters. Just like the two example shots above, we see a huge improvement in the photo when I used a neutral density filter with a polarizer. The unwanted glare was minimized and more details on the clouds could be seen.
In conclusion, there are still different kinds of accessories one can use to further improve the quality of photos for different scenarios, but being ready with a couple of sets of ND filters for your cameras are some of the considerably inexpensive things you can buy to achieve a more professional and creative output.

Accessories
Jackery Explorer 300D: Power and portability in one
Uninterrupted workflows for digital nomads, freelance creatives, more

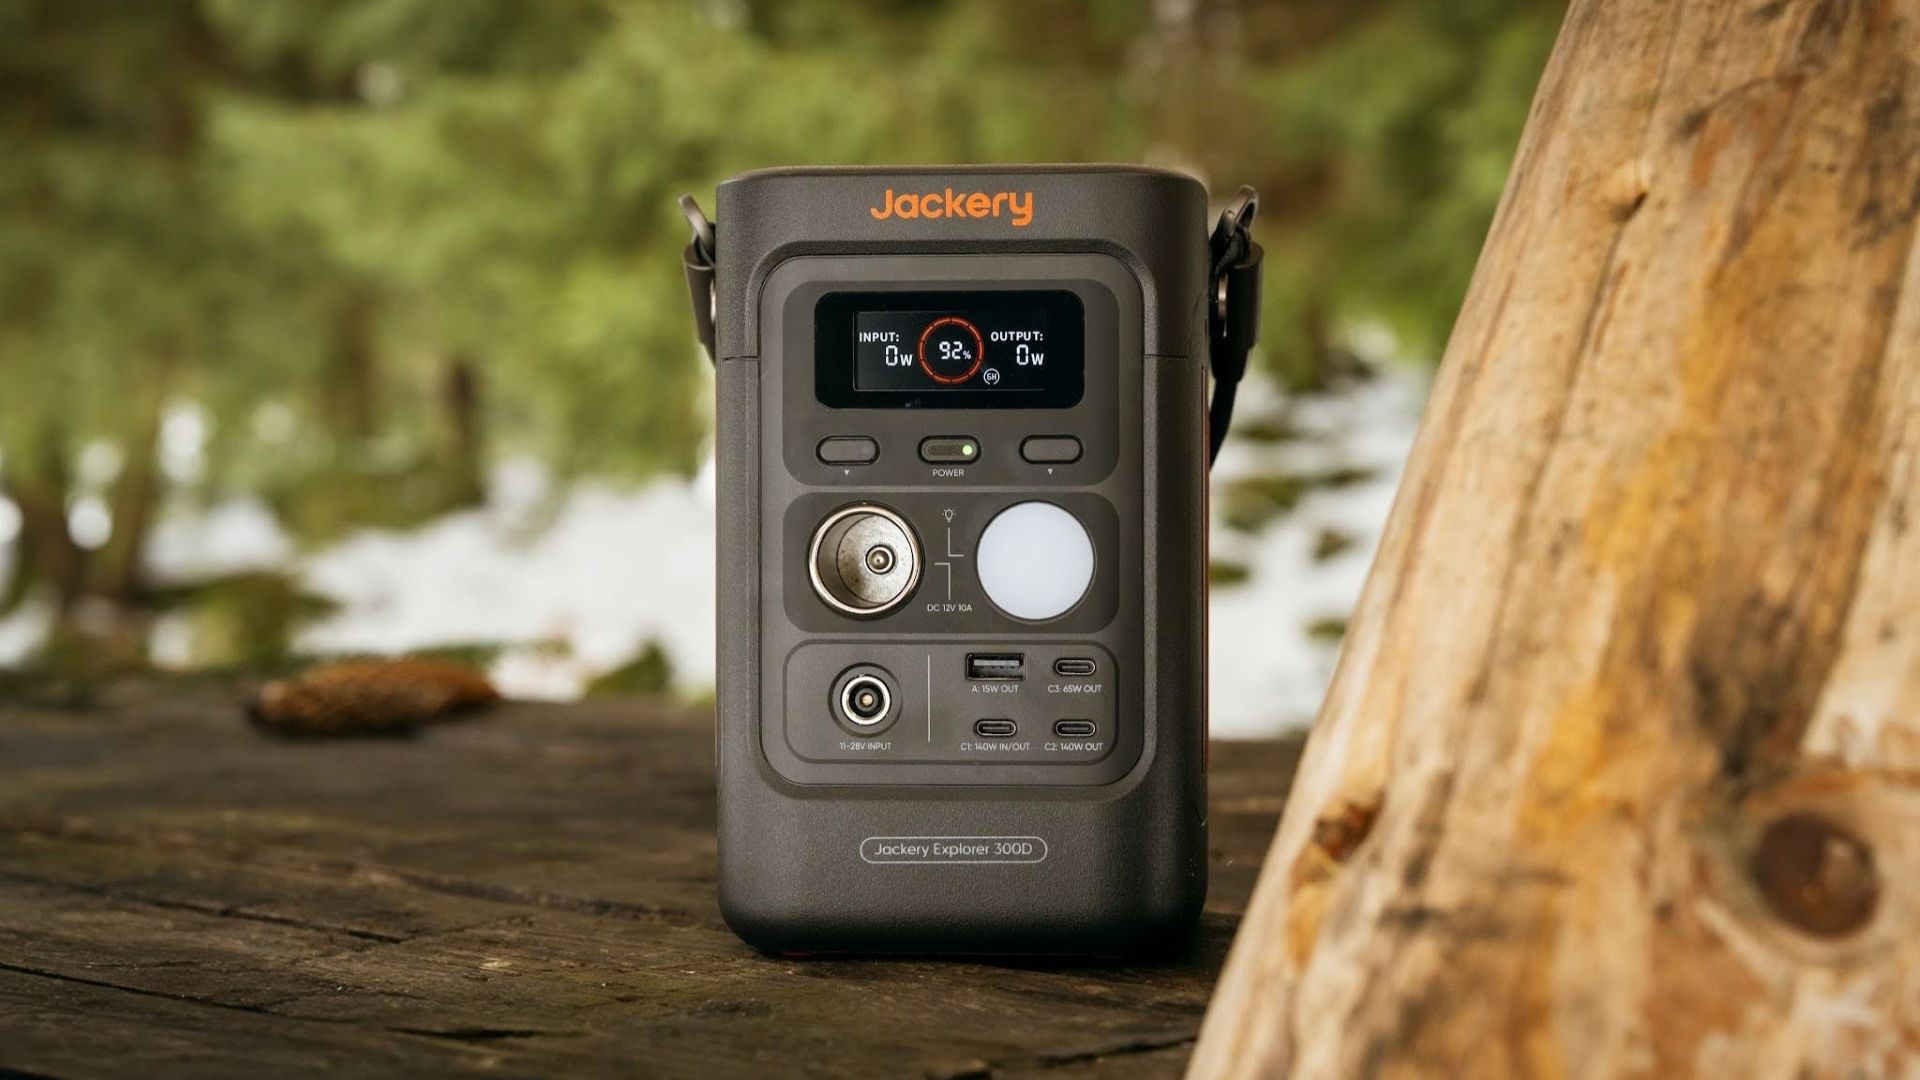
For digital nomads, freelance creatives, and even work-from-home professionals, staying productive on the move means carrying around multiple gadgets, cords, adapters, and power banks to survive the day.
Having to carry such weight, quite literally, is vital for maintaining workflow continuity.
For a more seamless experience and to have just one extra portable device to power all working parts, there’s the Jackery Explorer 300D.
Launched just last month, this grab-and-go offering from Jackery is designed for the modern lifestyle.
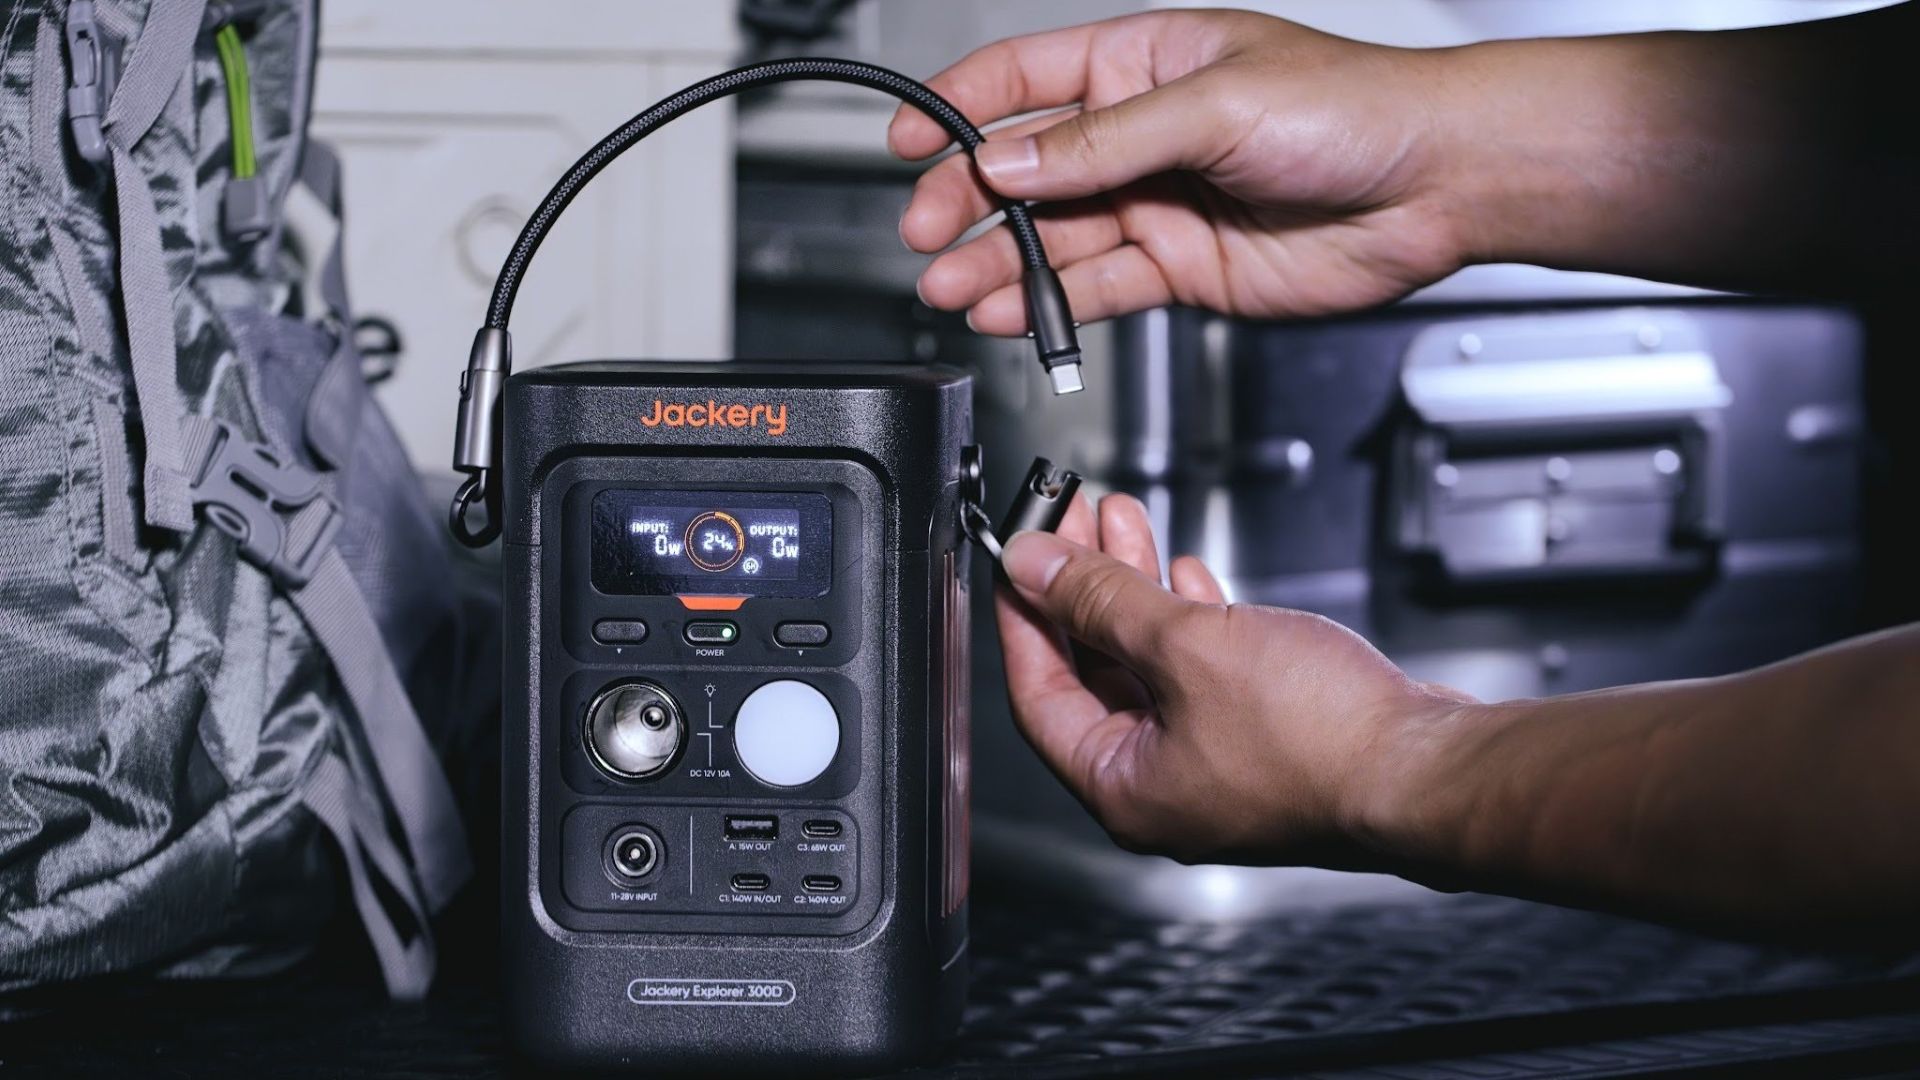
It moves away from Jackery’s traditional aesthetic with a sleek, speaker-like form factor. It weighs just 2.5 kilograms and is 64% smaller than standard 300W units in the market.
This ultra-compact size was made possible by a smart engineering choice of swapping bulky traditional AC wall outlets for highly efficient DC-only and USB-C ports — which also helps eliminate idle power loss.
With a 288Wh capacity, the Jackery Explorer 300D holds enough juice for up to nine power banks.
It can keep a Type-C fast-charging laptop for up to three to four full cycles, a Wi-Fi router alive for hours, and recharge cameras or drone batteries up to five times for a lengthy production day.
For smaller gadgets like smartphones and portable fans, the power station can juice them up for up to 22 times.

It can even charge five devices simultaneously with a total of three USB-C ports, a USB-A port, and a DC 12V car charger port.
All these ensure users are never disconnected, wherever they may set up their mobile office.
Another brilliant touch is the two-in-one shoulder strap that easily unclips to double as a heavy-duty 140W USB-C charging cable.
The everyday carry is available via Lazada and Shopee, and at the official Jackery kiosk in SM Fairview, as well as other partner stores.
Accessories
Apple is reportedly working on its own gaming controllers
It might launch under the Beats brand.

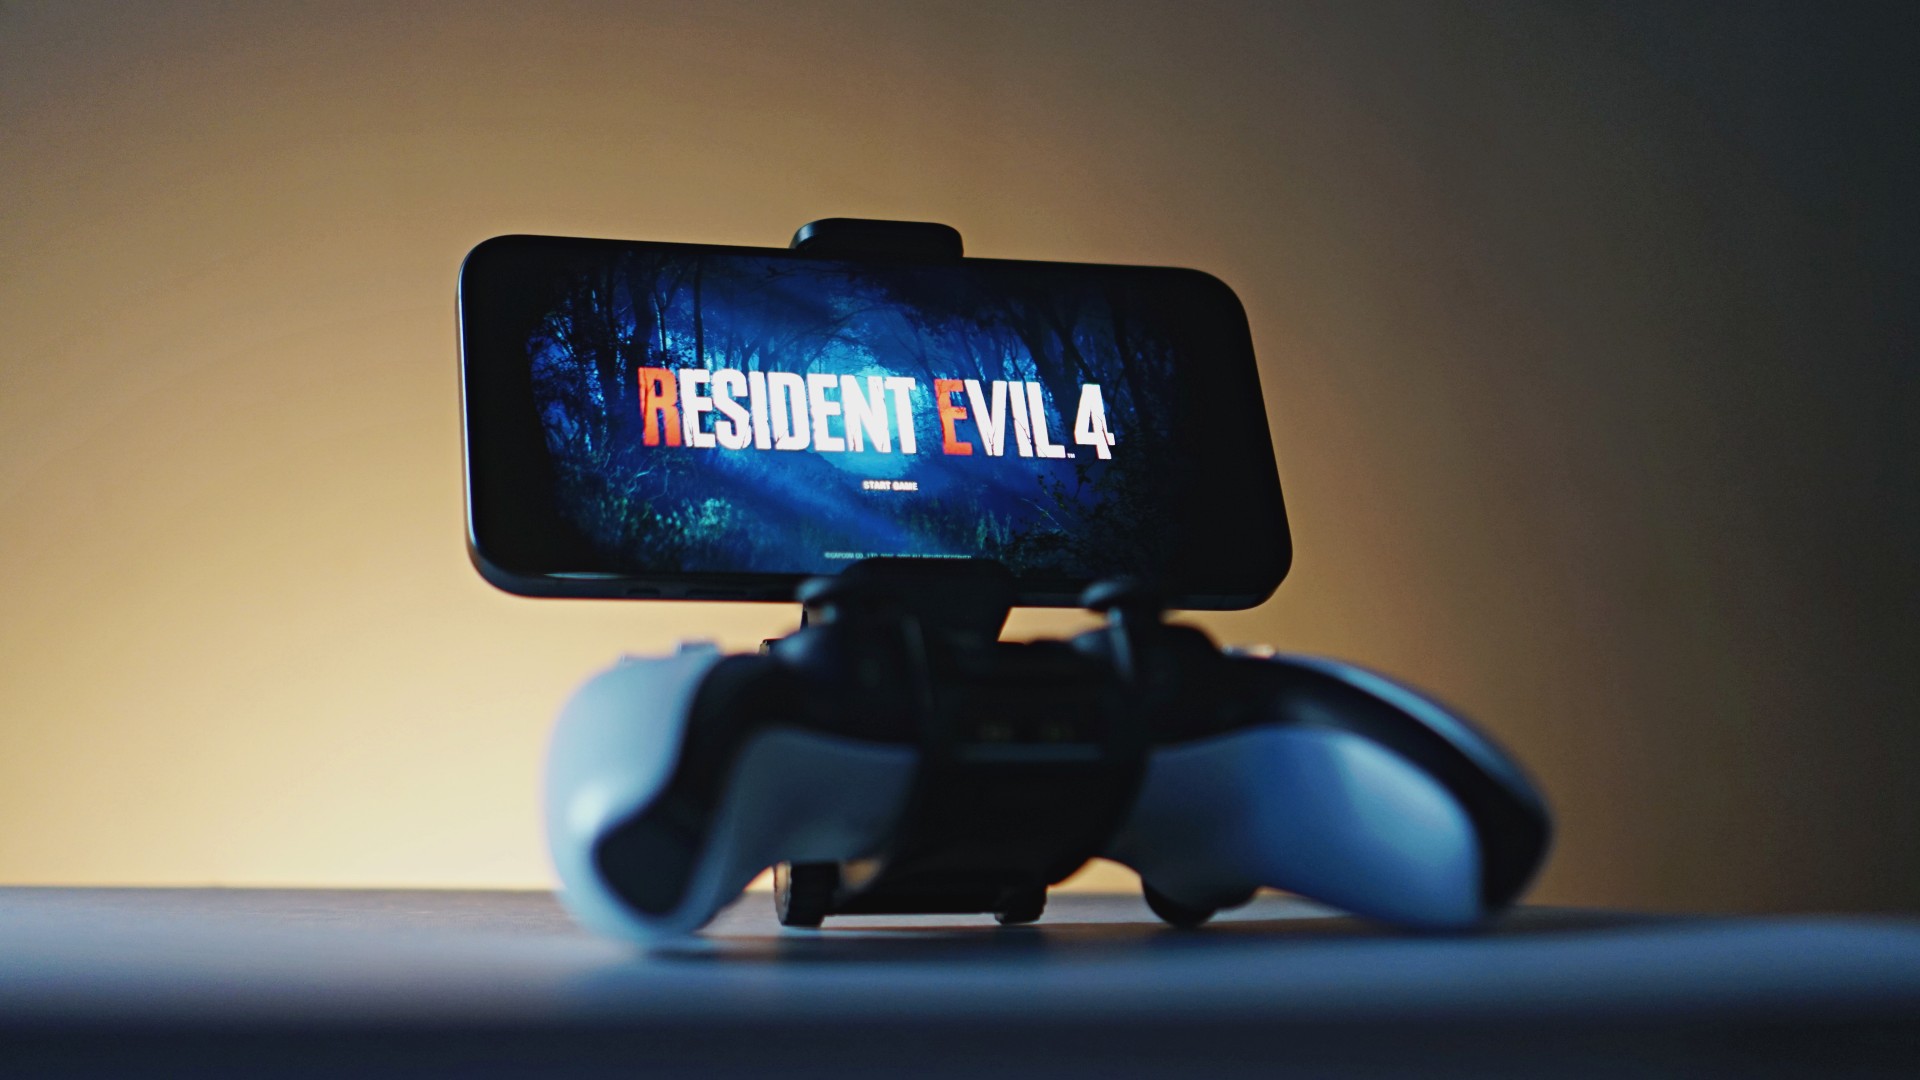
Last week, the iPhone Duo changed how you look at the ubiquitous smartphone. Foldables are in, and Apple is right there with it. But the company isn’t stopping with the foldable segment. Apple is reportedly working on its own branded game controllers.
According to Bloomberg, Apple has been working on a controller since last year. Further, a piece of code linked to macOS 27.4, spotted by MacRumors, includes references to two unknown gaming controllers.
Because Apple just concluded its huge event this month, it will likely be a while before we see confirmation of this controller. And it could be anything. Of course, because the Duo is fresh on our minds, the easiest answer is a mobile controller than can maximize the foldable’s ability to stand by itself. It could also use Apple’s larger screens like the iPad, the MacBook, or the Mac. Some even speculate that this could be Apple’s stronger push into the gaming market.
Outside of the actual hardware, the reports are also claiming that the controller will arrive by way of Beats, rather than from Apple itself. At first, the branding comes off as a surprise, but then again, Beats hasn’t really evolved past an audio brand in a long, long time. Is it time to revitalize Beats as something more than just a peddler of headphones?
SEE ALSO: First Look: Apple iPhone Duo
Accessories
New AGON gaming monitor features up to 1000Hz refresh rate
New level of speed, flexibility for competitive gaming


AGON by AOC has released the new AGON Pro AGP277QK dual-mode gaming monitor for the competitive segment.
This new offering features up to 1000Hz refresh rate at HD and 540Hz at QHD so gamers have the flexibility to prioritize either clarity or speed.
The 27-inch IPS gaming monitor comes with NVIDIA G-SYNC, synchronizing the monitor’s refresh rate with the GPU to help minimize screen tearing, stuttering, and input lag.
This is combined with 0.3ms MPRT and 1ms GtG response times for fast-moving action that is sharp and responsive, giving competitive players a clear visual advantage.
Moreover, the AGON Pro AGP277QK features VESA DisplayHDR 400 certification for enhanced contrast and more vivid, lifelike visuals.
Delta E < 1 color accuracy also provides precise color reproduction not just for gaming but even other scenarios like content creation.
For even smoother high frame-rate gameplay, MBR Sync combines motion blur reduction with variable refresh rate (VRR) technology. This helps maintain clarity during rapid movements.
The monitor also includes Low Input Lag, customizable Light FX ambient RGB lighting, Gaming Mode presets, and Shadow Control.
The display comes with HDMI 2.1 and DisplayPort 2.1 connectivity, along with a height-adjustable stand and G-Menu support.

DJI Lito X1 review: Is this the best lightweight drone for creators?
Making a strong case as a travel companion and a capable B-cam!

REDMI Note 17 Pro Max review: A new breed born from AI greed
Welcome to the new normal


Marvel’s Wolverine review: When the claws come out
A brutal, cinematic superhero adventure

Epson Lifestudio Grand Plus EH-LS970B with 4K projection, more launches

Jackery Explorer 300D: Power and portability in one

Nike’s Alphafly 4 is built for the part of the marathon ~that actually hurts~

SEGA, Netflix announce Crazy Taxi film adaptation

Smart launches LiveSmart App for exclusive deals

TECNO MEGAPAD 2 review: Eyes on the size

realme 16T 5G with 8000mAh battery, IP69 Pro rating launches in PH

HUAWEI Pura X View is 2026’s first WIDE slab-type smartphone

REDMI reveals the refreshed Note 17 and Note 17 Pro series

REDMI Note 17 Series: Price, availability in Singapore


-
 News2 weeks ago
HUAWEI Pura X View is 2026’s first WIDE slab-type smartphone
-

 News2 weeks ago
The CAMON Slim 5G is TECNO’s latest ultra-slim smartphone
-
 News1 week ago
iPhone 18 Pro series: Price, availability in the Philippines
-
 Singapore1 week ago
iPhone 18 Pro series: Price, availability in Singapore
-
 News1 week ago
iPhone Duo: Price, availability in the Philippines
-
 News2 weeks ago
HUAWEI Mate XT 2 tri-fold launches with Kirin 9050 Pro
-
 News1 week ago
vivo introduces refurbished versions of X300 FE, X300 Ultra for less
-

 News1 week ago
iPhone Duo: Price, availability in Singapore