

Cameras
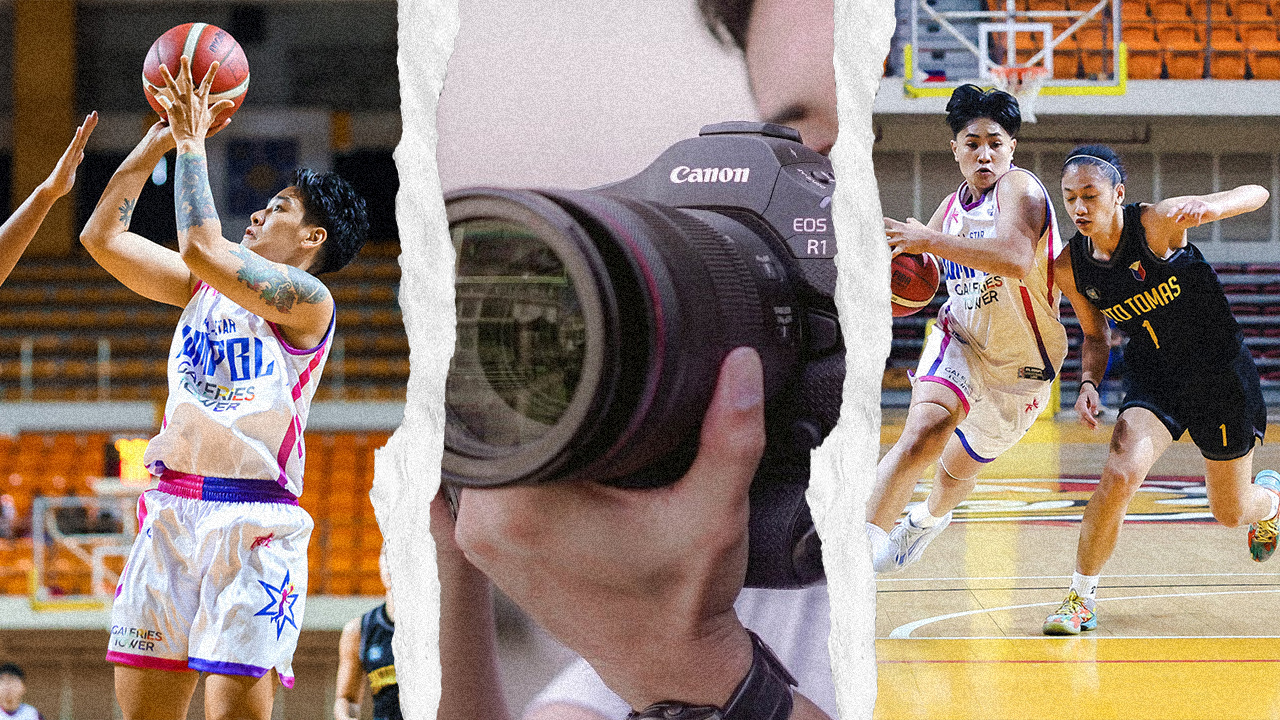
Covering the Women’s Maharlika Pilipinas Basketball League with the Canon EOS R1
Shooting basketball isn’t for the faint of heart.

Shooting basketball isn’t for the faint of heart.
Unlike the steady pace of road running or the controlled energy of a trail race, basketball is a fast-paced, emotional rollercoaster.
You’re not just chasing players; you’re anticipating sharp cuts, lightning-quick shots, and moments so fast they might as well be in fast-forward. And when you’re capturing those moments on camera, you need something that can keep up.
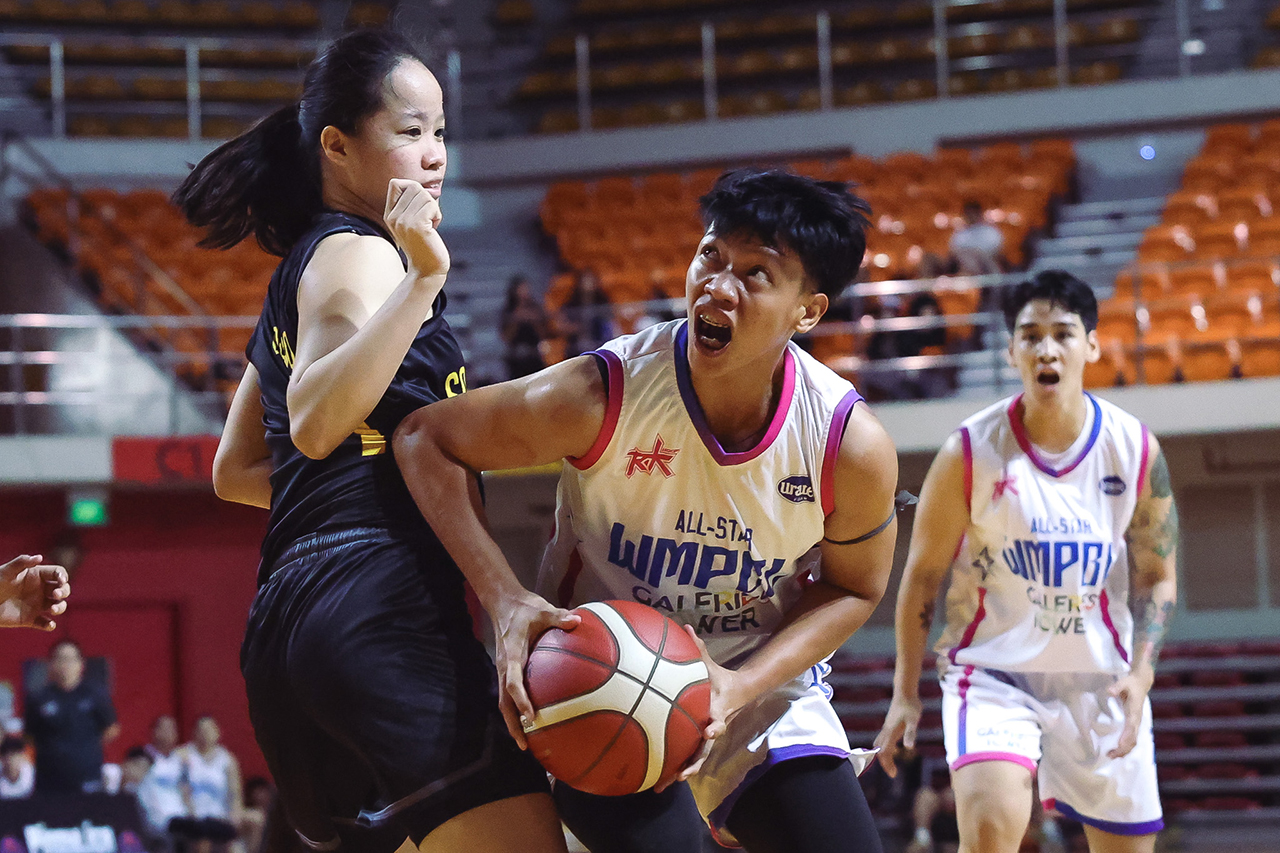
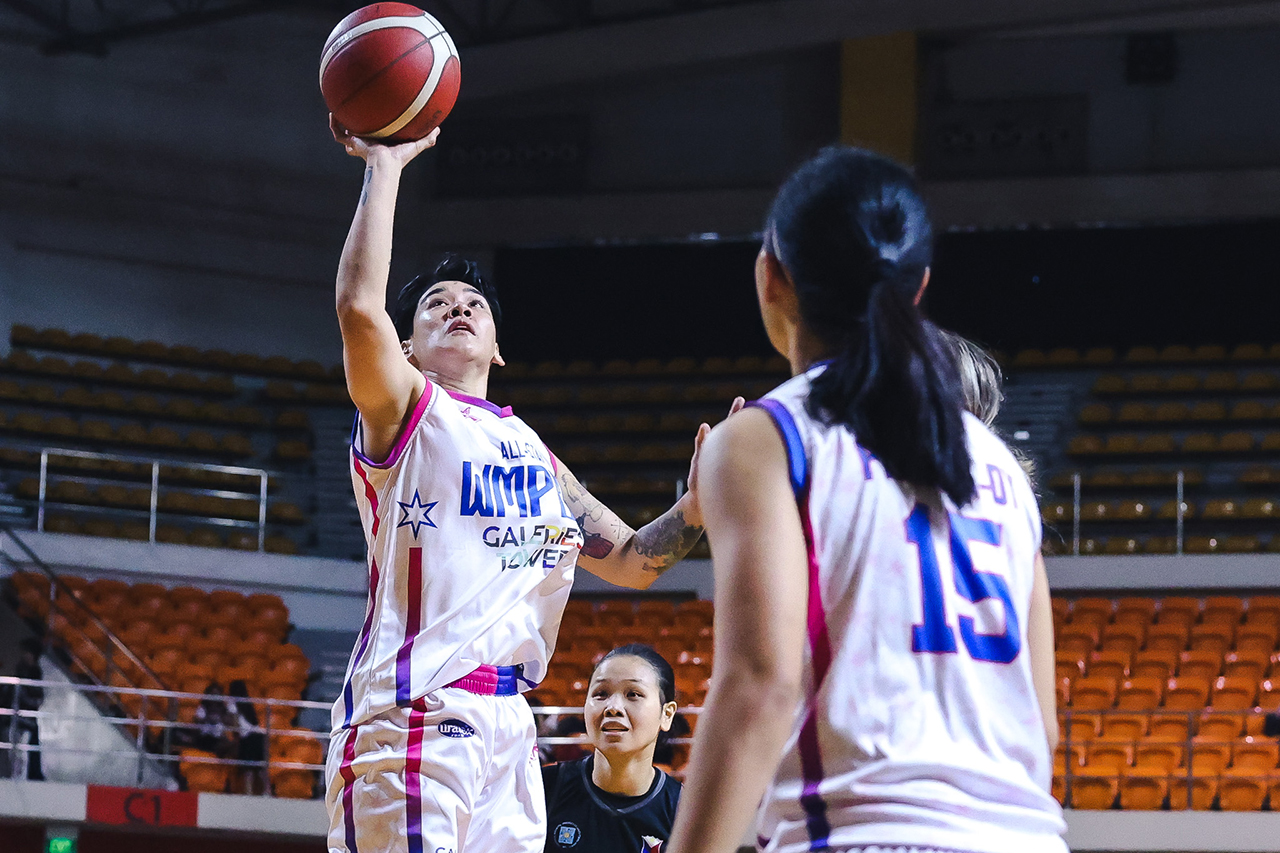
This is when we’ve used the Canon EOS R1, along with its 24-70mm lens. This powerhouse performed like an all-star during the Women’s Maharlika Pilipinas Basketball League (MPBL).
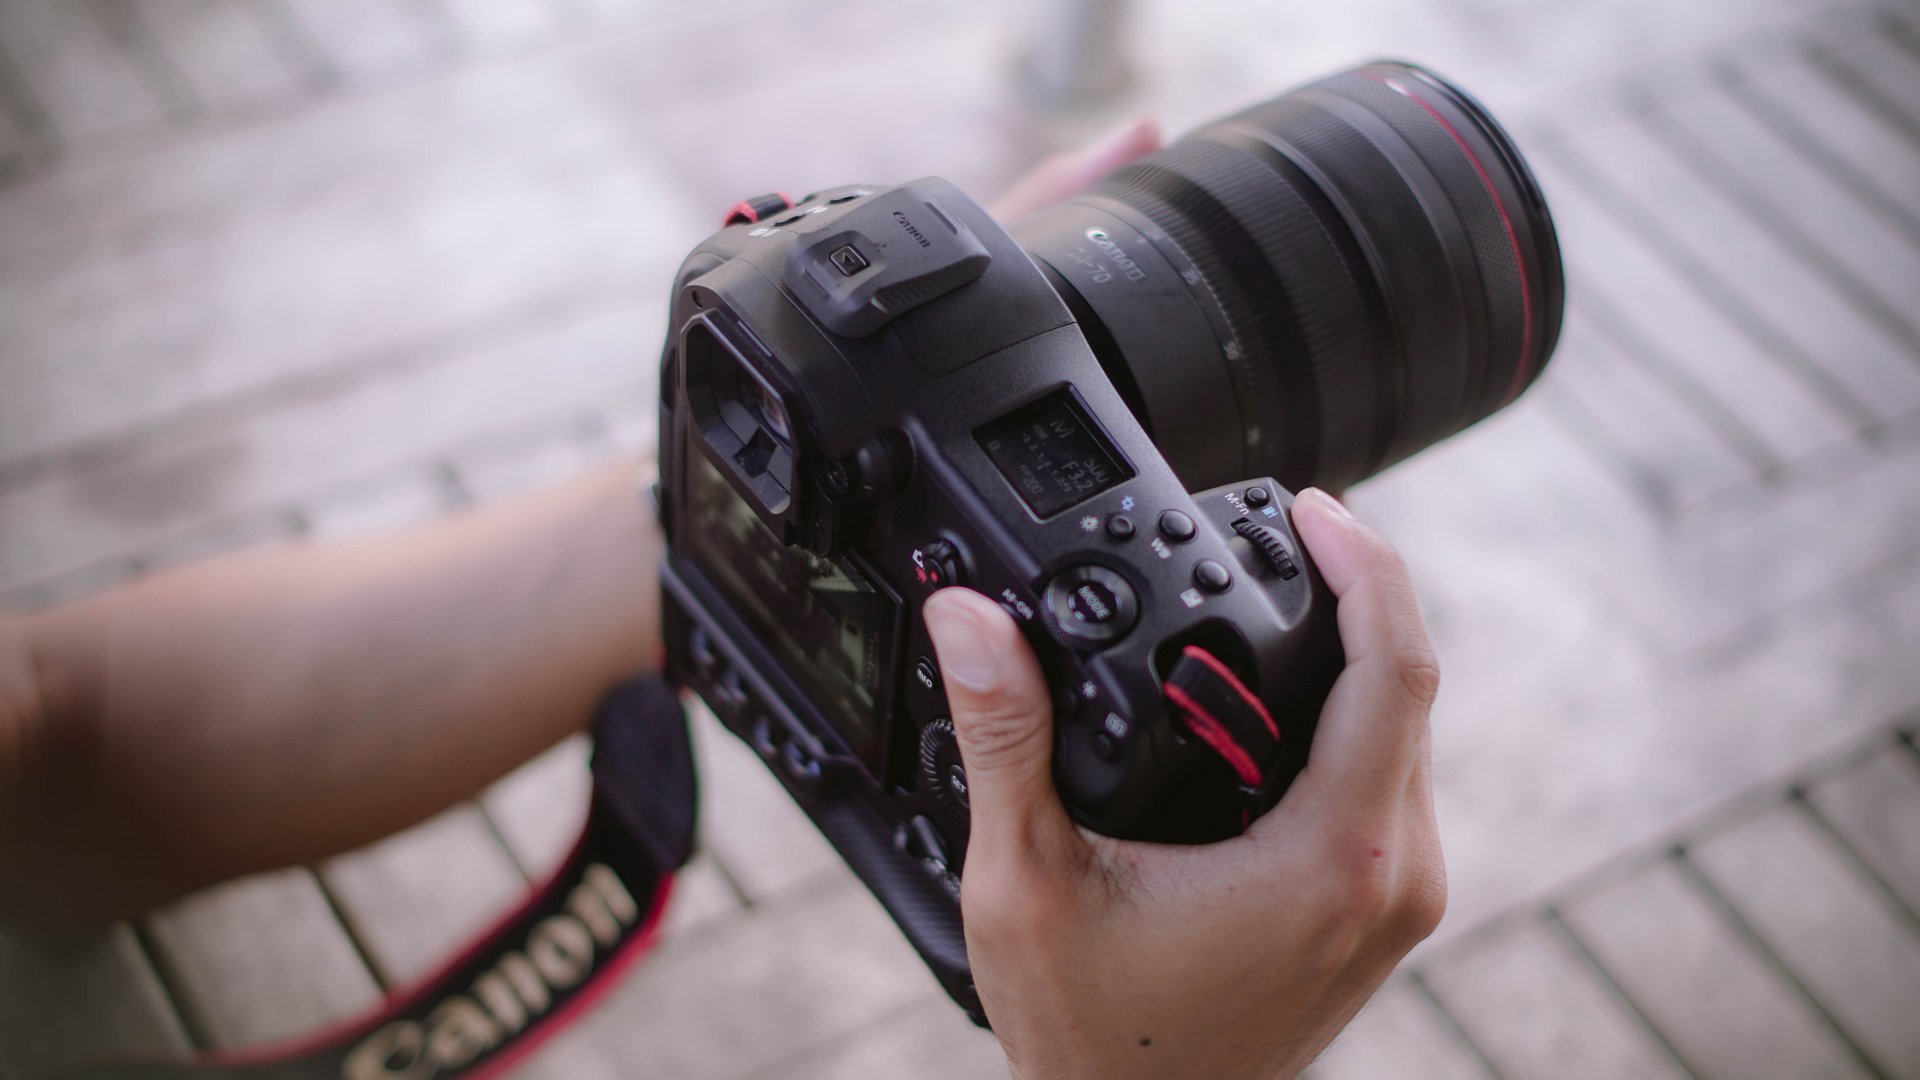
But more than just the technical brilliance of the Canon EOS R1, it was also a reminder of the incredible talent that women bring to the court.
Basketball has often been a male-dominated sport, but women in the Philippines are proving, game after game, that they’re just as fierce, skilled, and passionate.
And when you’re shooting women’s basketball, it’s not just about capturing action; it’s about celebrating the power, grace, and heart of female athletes.
Speed that keeps up
Here’s the thing about sports photography: speed matters.
In basketball, there’s no time to fumble with settings. A split second can make or break the shot, and if you’re not ready, you’ll miss the magic.
That’s exactly what the Canon EOS R1 was built for. We’re talking about a camera that can keep up with lightning-fast plays and snap every important detail in sharp focus.

The Canon EOS R1’s autofocus system is one of the smartest we’ve ever used. It automatically detects and locks onto the players — even when they’re moving quickly or blocked by someone else.
Whether the player is charging toward the hoop or pulling off a fast pass, the R1 makes sure you get a shot that’s in perfect focus.
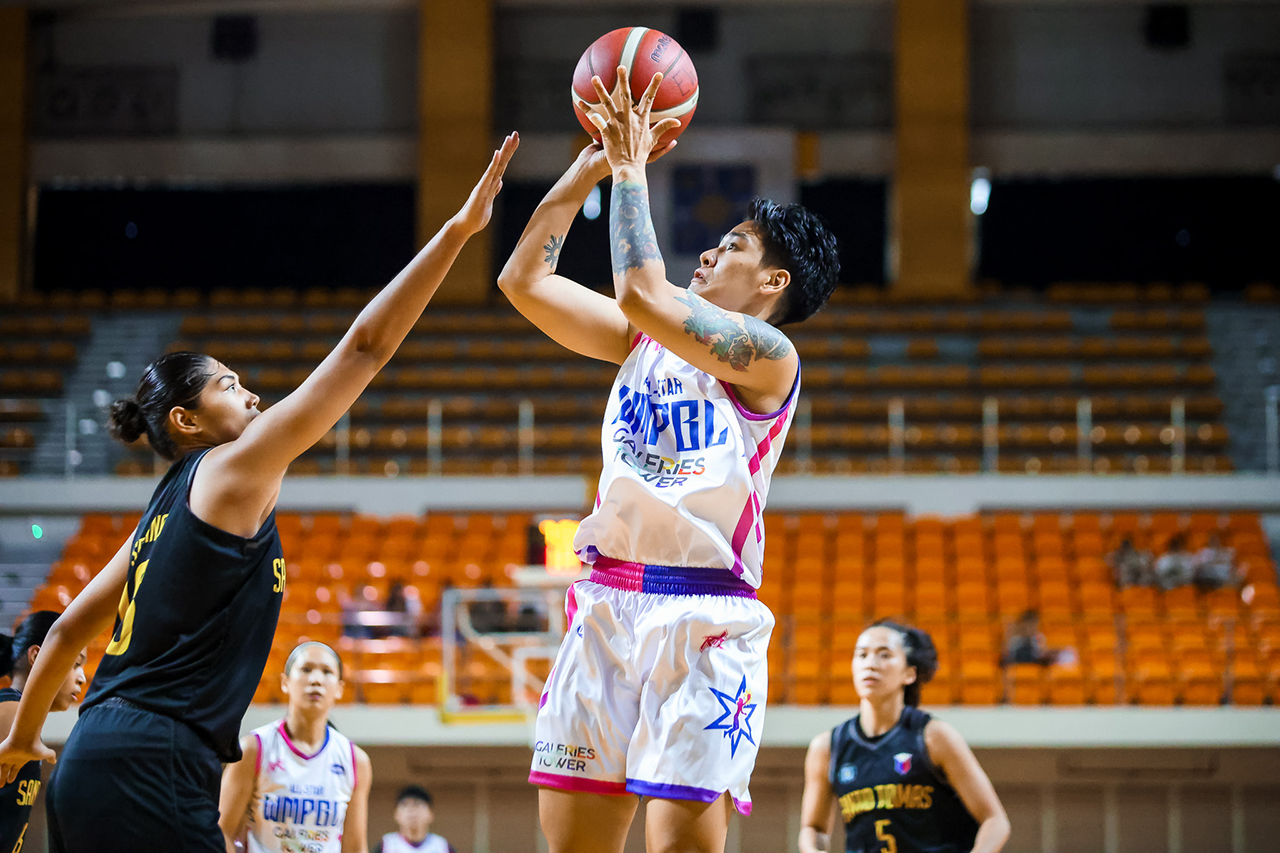


This camera is fast — and we mean really fast. The Canon EOS R1 shoots up to 40 frames per second. With that speed, you could capture a series of fast, consecutive actions, like a player’s fingertips releasing the ball or the exact moment a player sinks a three-pointer.
It felt like shooting video in still photos. Every frame was clear, crisp, and packed with emotion. Imagine capturing the instant a point guard’s eyes light up after scoring. The R1 let us freeze those emotions in time, exactly when they happened.

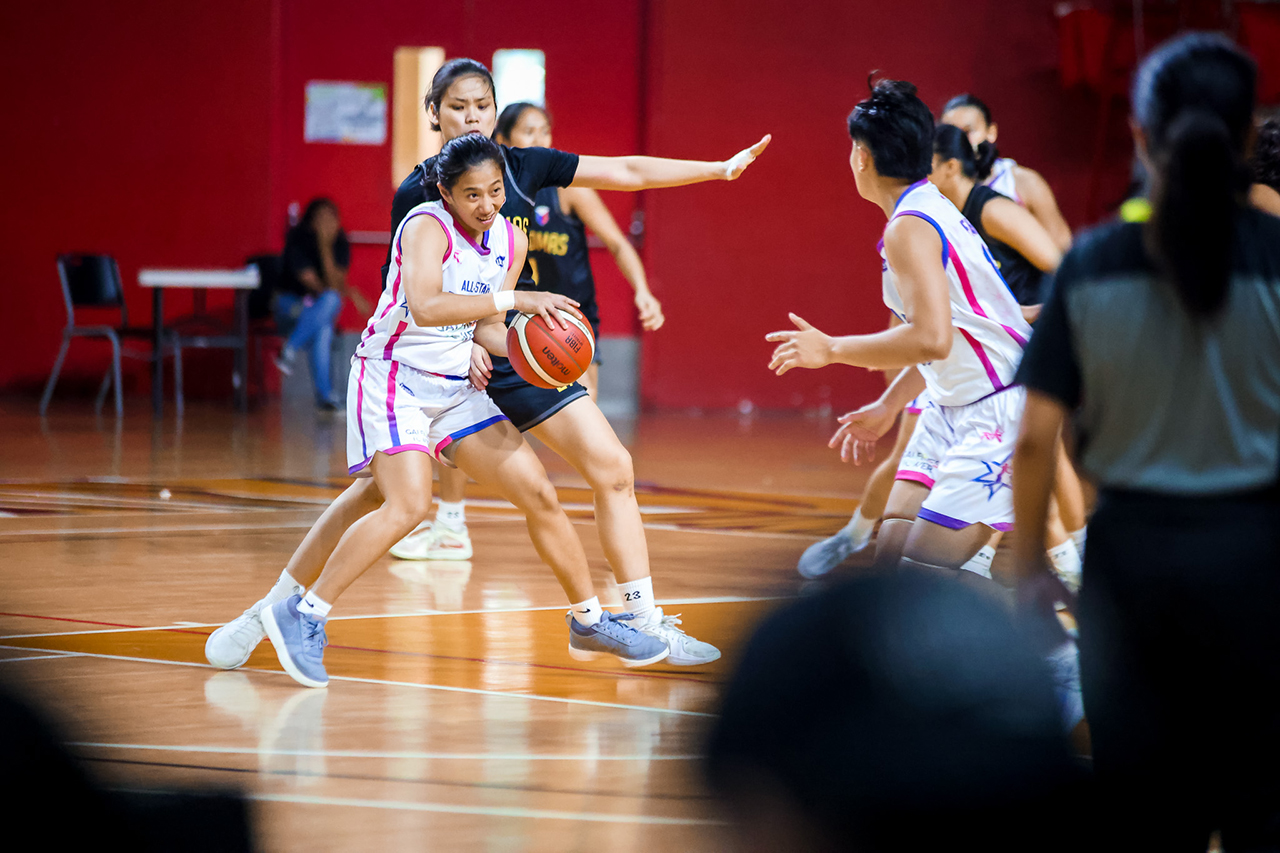
Even in low-light situations, the Canon EOS R1 doesn’t break a sweat. Indoor courts are notoriously tricky when it comes to lighting. They’re often dim, with harsh spots that can make shooting feel like a challenge.
With its ability to handle low light and keep things clear, we didn’t miss a single moment, even when the lights were low and the action was heating up.

Solid and reliable like the women in court
The camera’s build is like the women we’ve taken photographs of. Strong, robust, and enduring. If you’re used to smaller, lighter cameras (like we do), the Canon EOS R1 might feel a bit hefty at first.
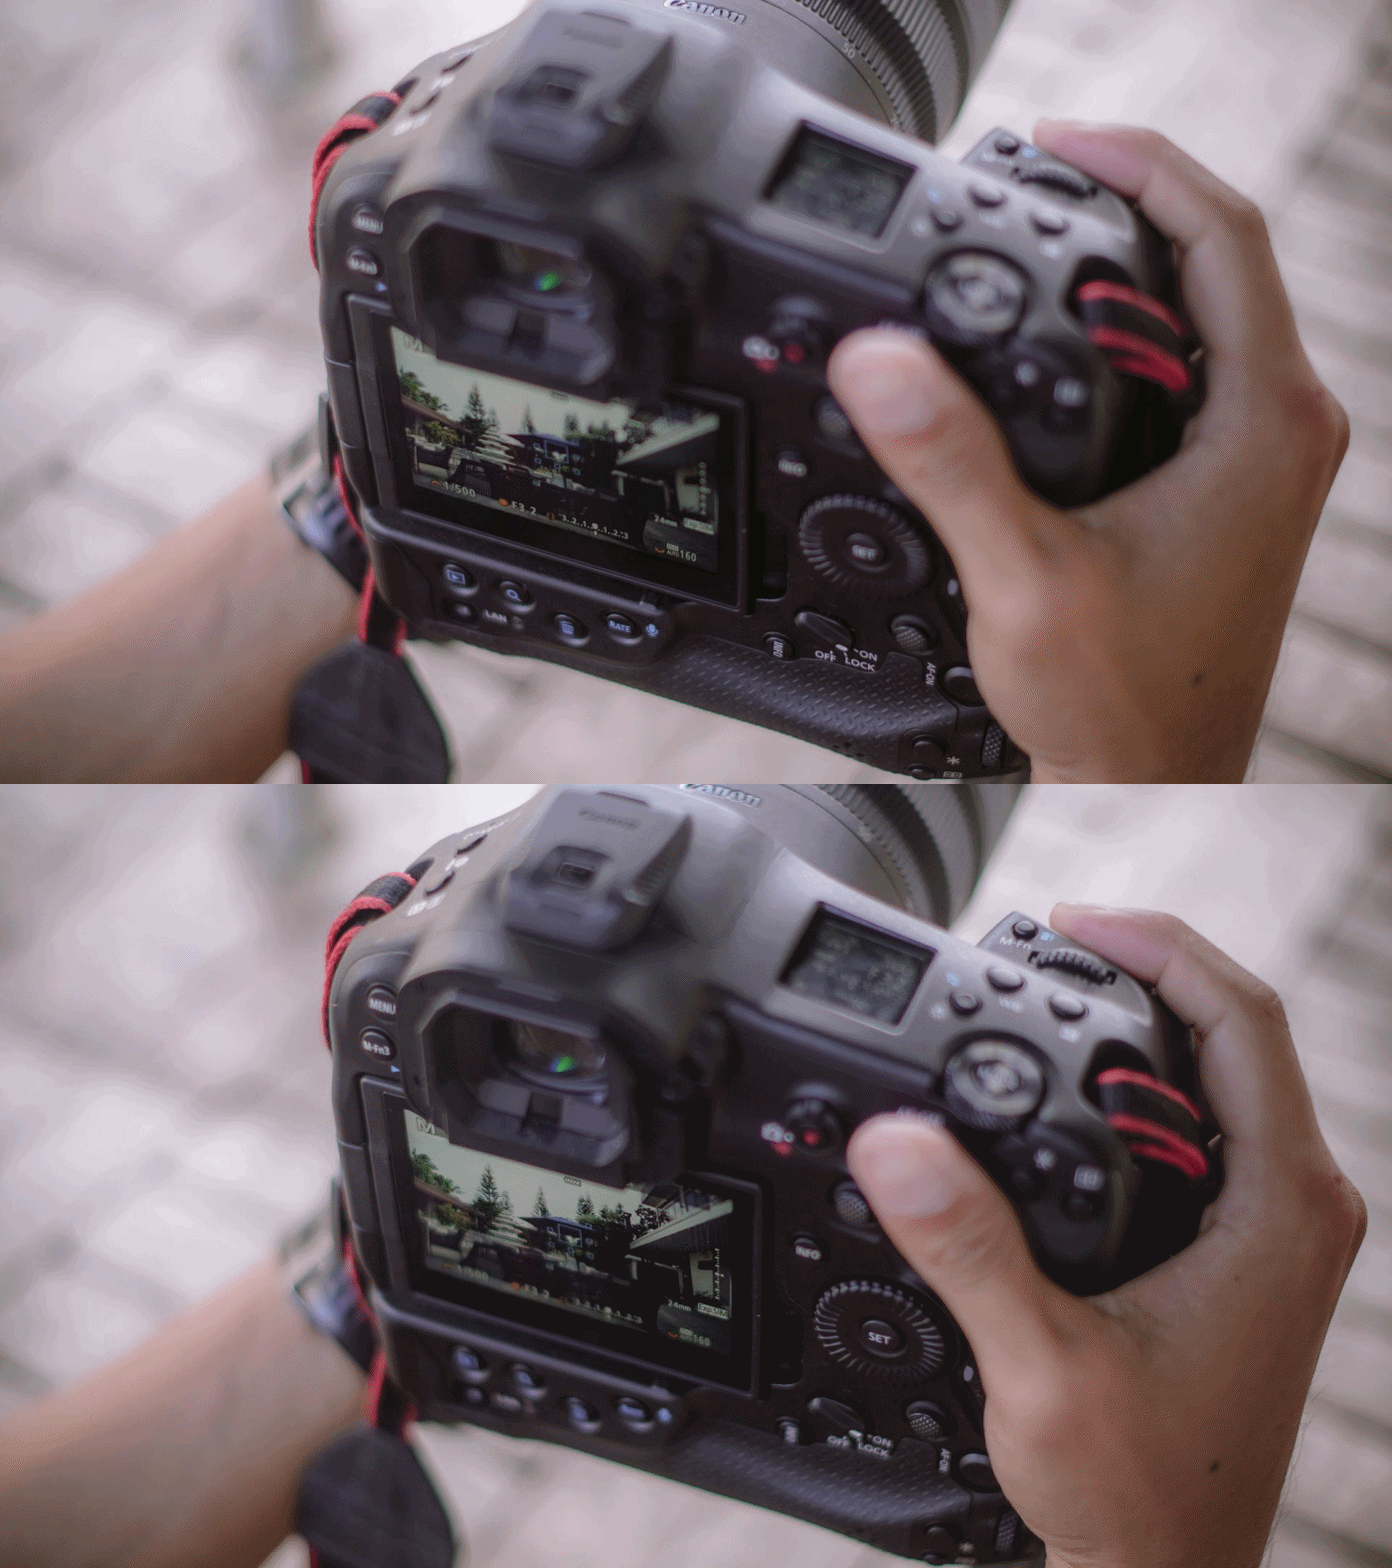
But once you get used to it, you’ll appreciate how solid and reliable it feels in your hands. It has a battery grip built in, which adds some weight but means you’ll get more shots without needing to recharge. Plus, the R1 feels comfortable to hold, even for long shoots.
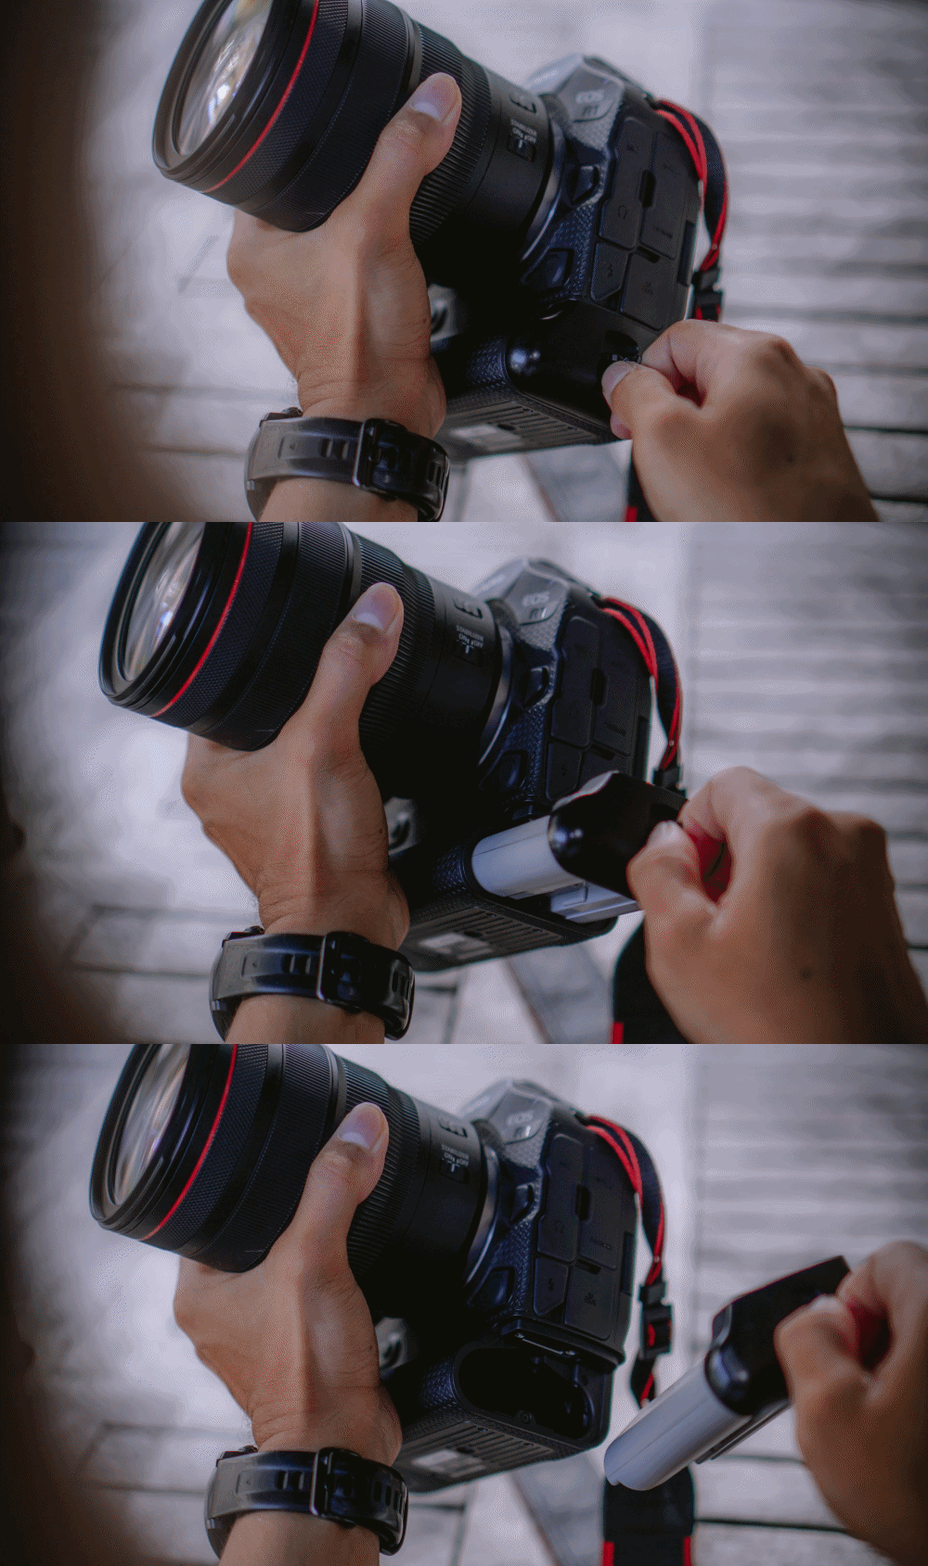
We’re used to shooting handheld, and while this one was a little heavier than what we’re used to, the comfort and sturdiness made up for it. If you’re a pro or serious photographer, the R1’s weight and build are more than just practical, they add to the overall experience.

For the more serious photographers who need to shoot a lot of action without worrying about storage, the Canon EOS R1 comes with dual high-speed card slots.
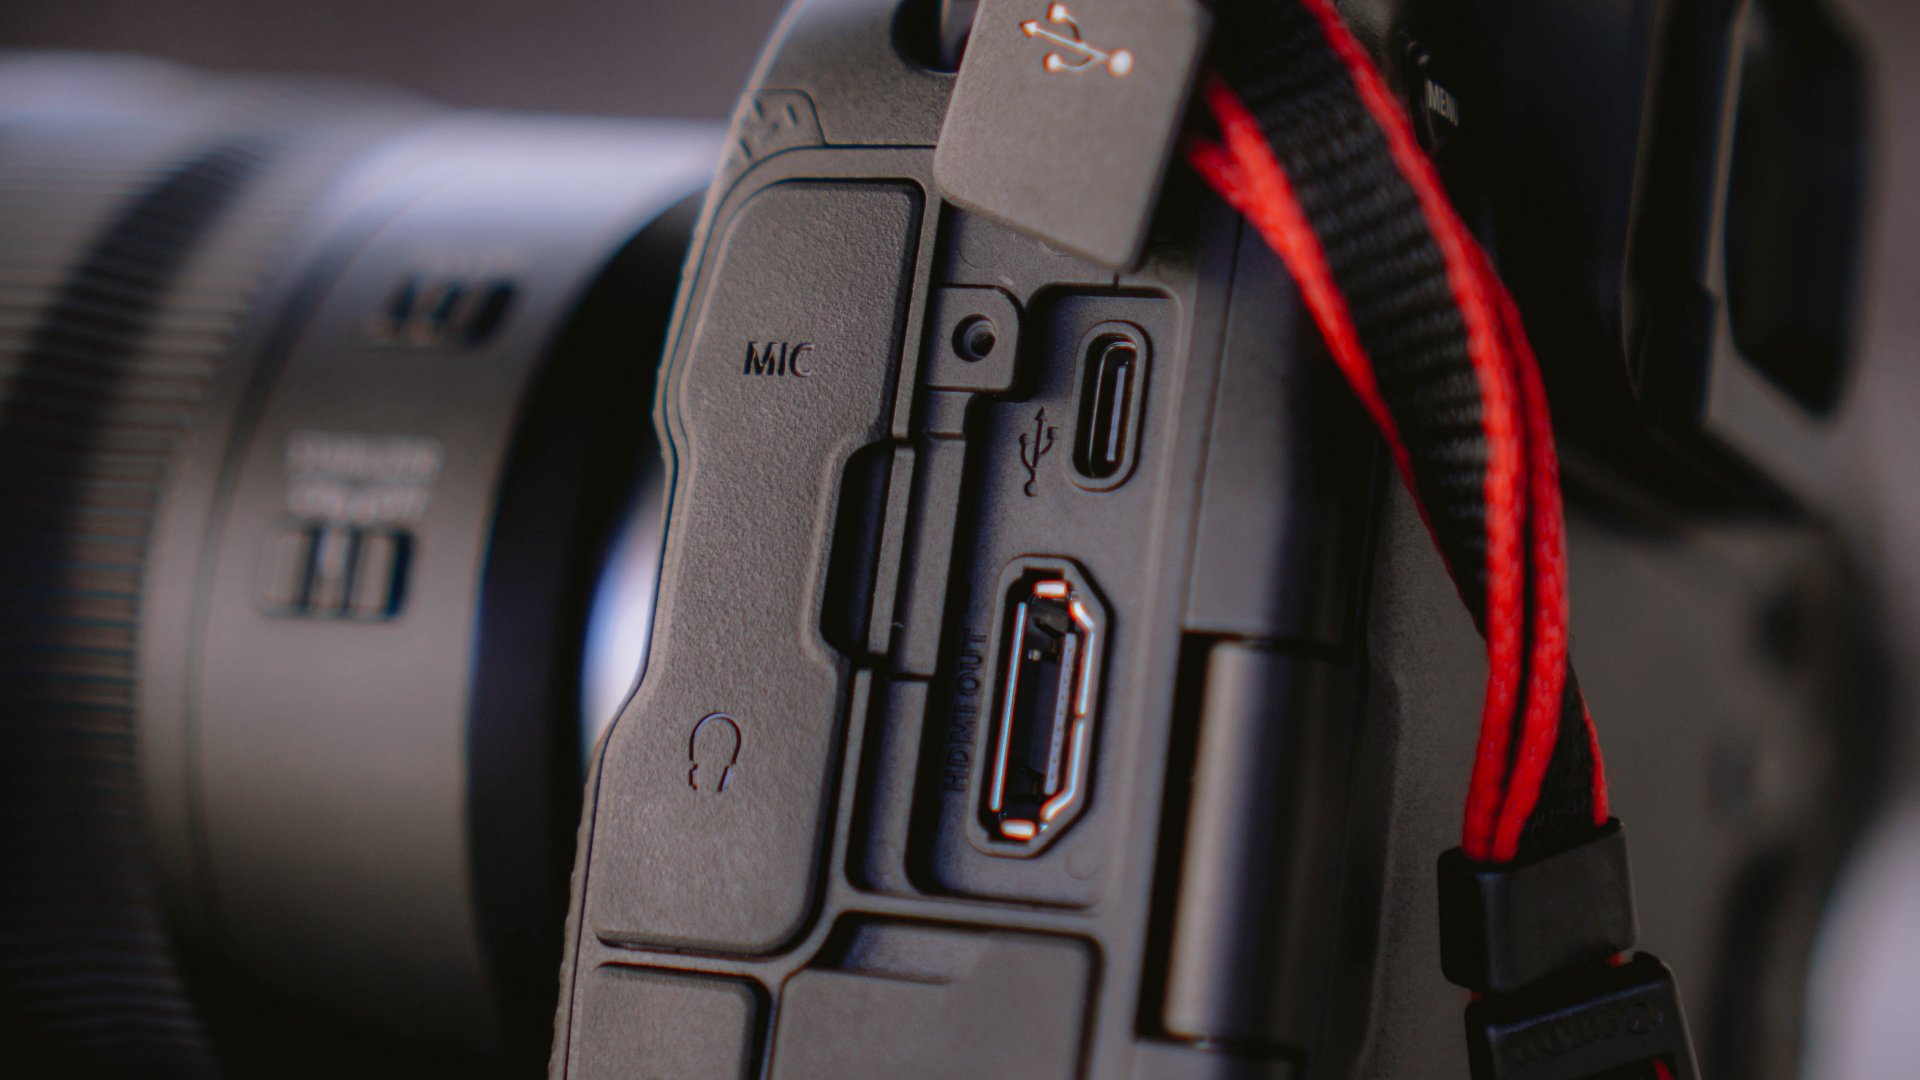
This means you won’t have to stop mid-shoot to swap out memory cards. And with USB-C and full-size HDMI ports, the R1 is all about speed, making transferring your shots or sharing your work a breeze.
Smart features for every moment
Of course w’ve loved the impressive autofocus and speed. It’s the highlight of this flagship camera. But since it’s a flagship, it has some other features that sports photographers would love and make shooting even easier.

For instance, there’s Action Priority Mode where it automatically detects fast movement, so you don’t have to worry about setting everything manually.
Then there’s Face Detection, where the R1 can prioritize specific players’ faces. It’s perfect if you want to focus on your team’s star player or you just want to capture those emotions from key individuals.

And even if you’re moving around or shooting at a lower shutter speed, the Canon EOS R1’s stabilization makes sure your images are smooth and steady. You won’t have to worry about blurry shots while on the move.
Capturing the women’s heart and soul
After an affair with the Canon EOS R1, we can confidently say that it’s a camera and an experience.
From the fast autofocus to the ability to shoot at lightning speed, this camera made capturing every emotional and action-packed moment feel effortless.
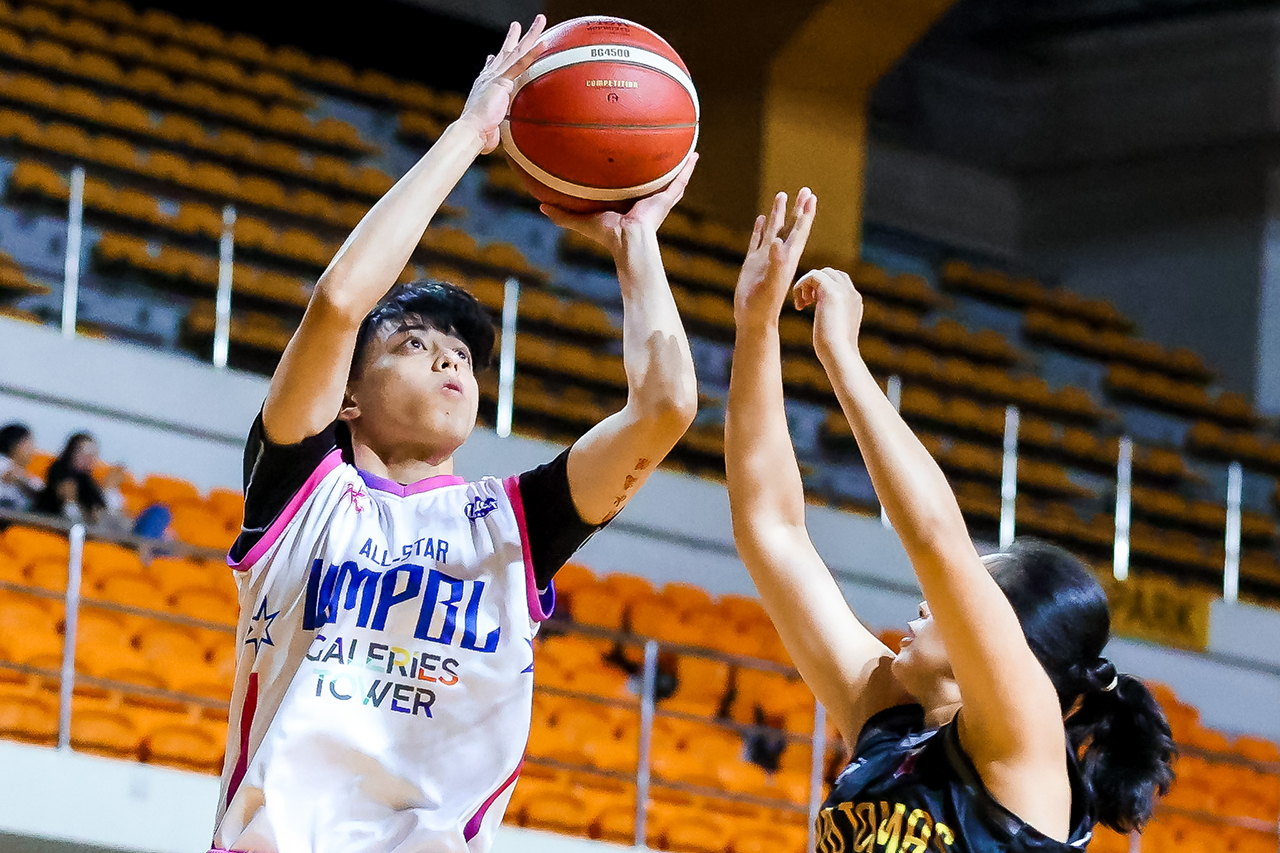
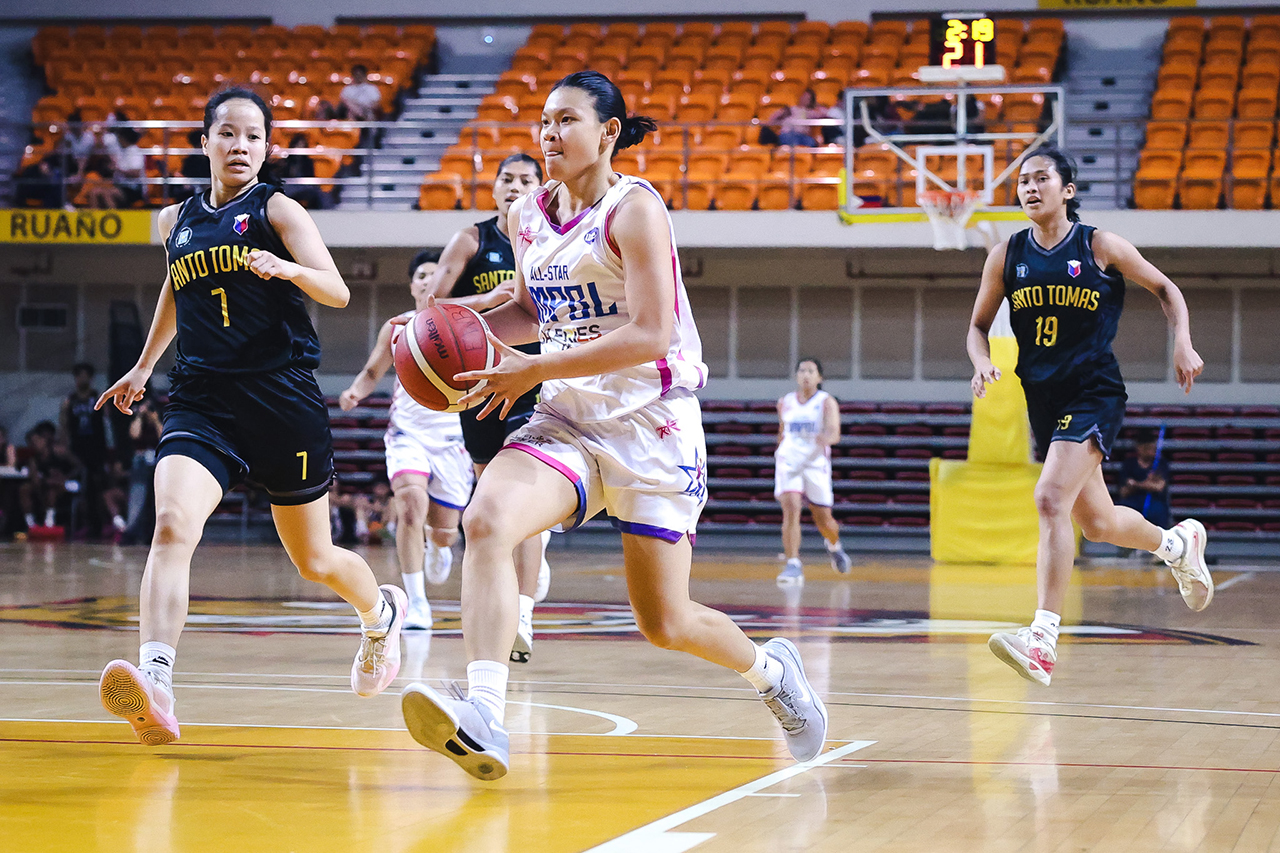
Whether you’re shooting fast-paced basketball or another sport, the Canon EOS R1 is designed to make sure you never miss a moment.
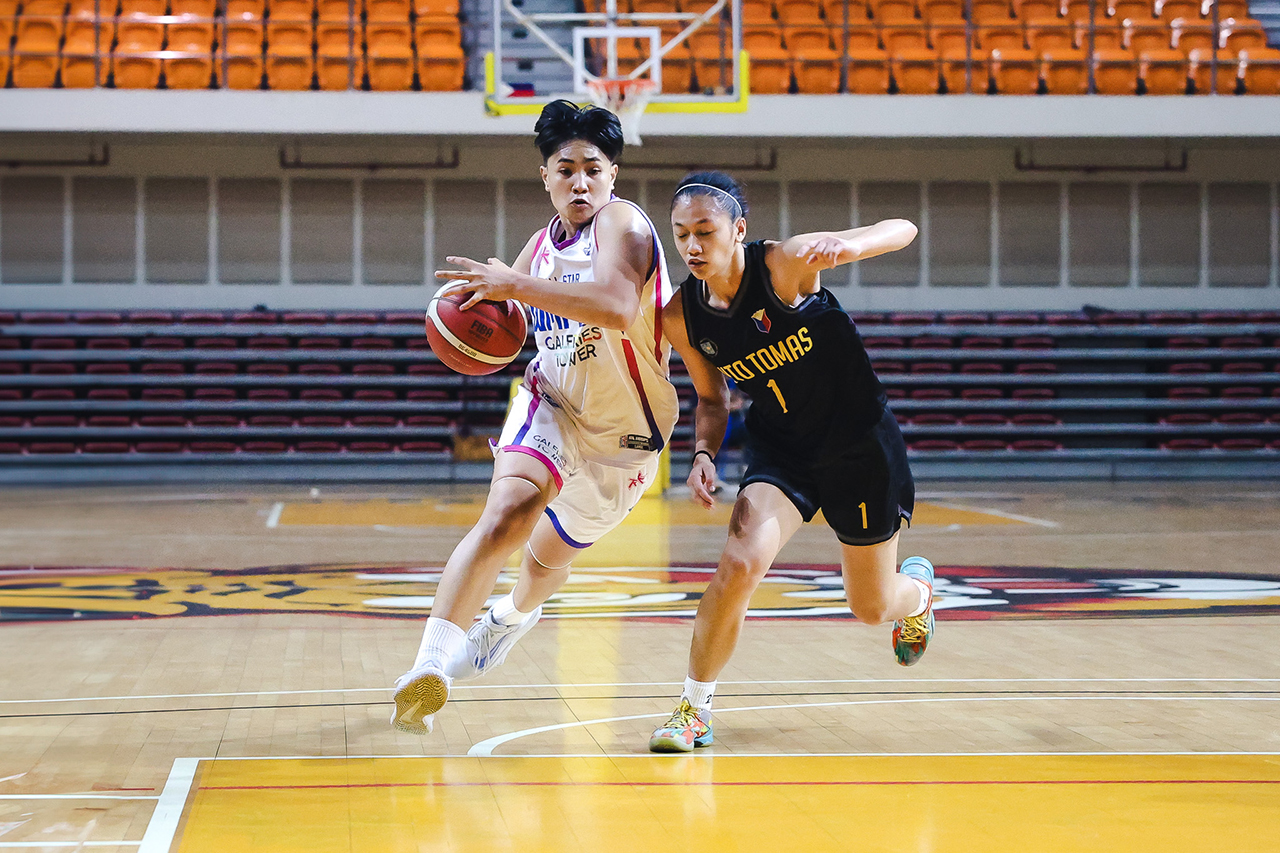
And when you’re photographing powerful female athletes, capturing their determination, skill, and spirit, it’s more than just about the game.

It’s about empowering women and showing the world just how much they bring to the court. The Canon EOS R1 helps you freeze those moments in time, and that’s something truly special.
This flagship camera is reliable, powerful, and built to keep up with the pace of the game — no matter how fast things get.






Cameras
Sony introduces its 1st Fisheye Zoom G Lens
Broad range for landscapes, architecture, sports, and video production
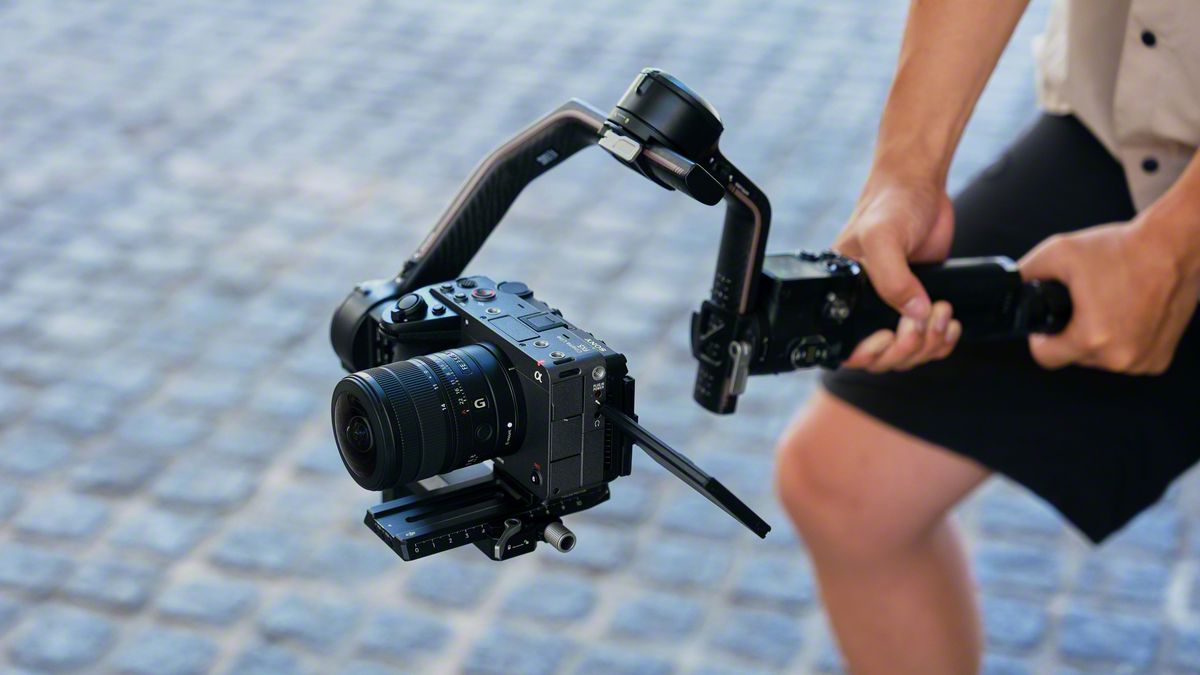
Sony has just launched its first fisheye zoom G Lens for full-frame Alpha E-mount cameras: the Sony FE 8-14mm F3.5 Fisheye G. It will be available from late September for an SRP of US$ 1,599.99 / SG$ 2,049.
The 8 mm to 14 mm zoom focal range covers a broad set of fisheye perspectives in one compact lens.
At 8 mm, the lens shoots circular fisheye with a 180-degree angle of view projected as a circular image on a full-frame sensor.
Meanwhile, at 14 mm, it shoots diagonal fisheye across the full frame with a 180-degree diagonal angle of view.
Users can match the angle of view and composition to the subject and creative intent, across various scenarios like landscapes, architecture, sports, and more.
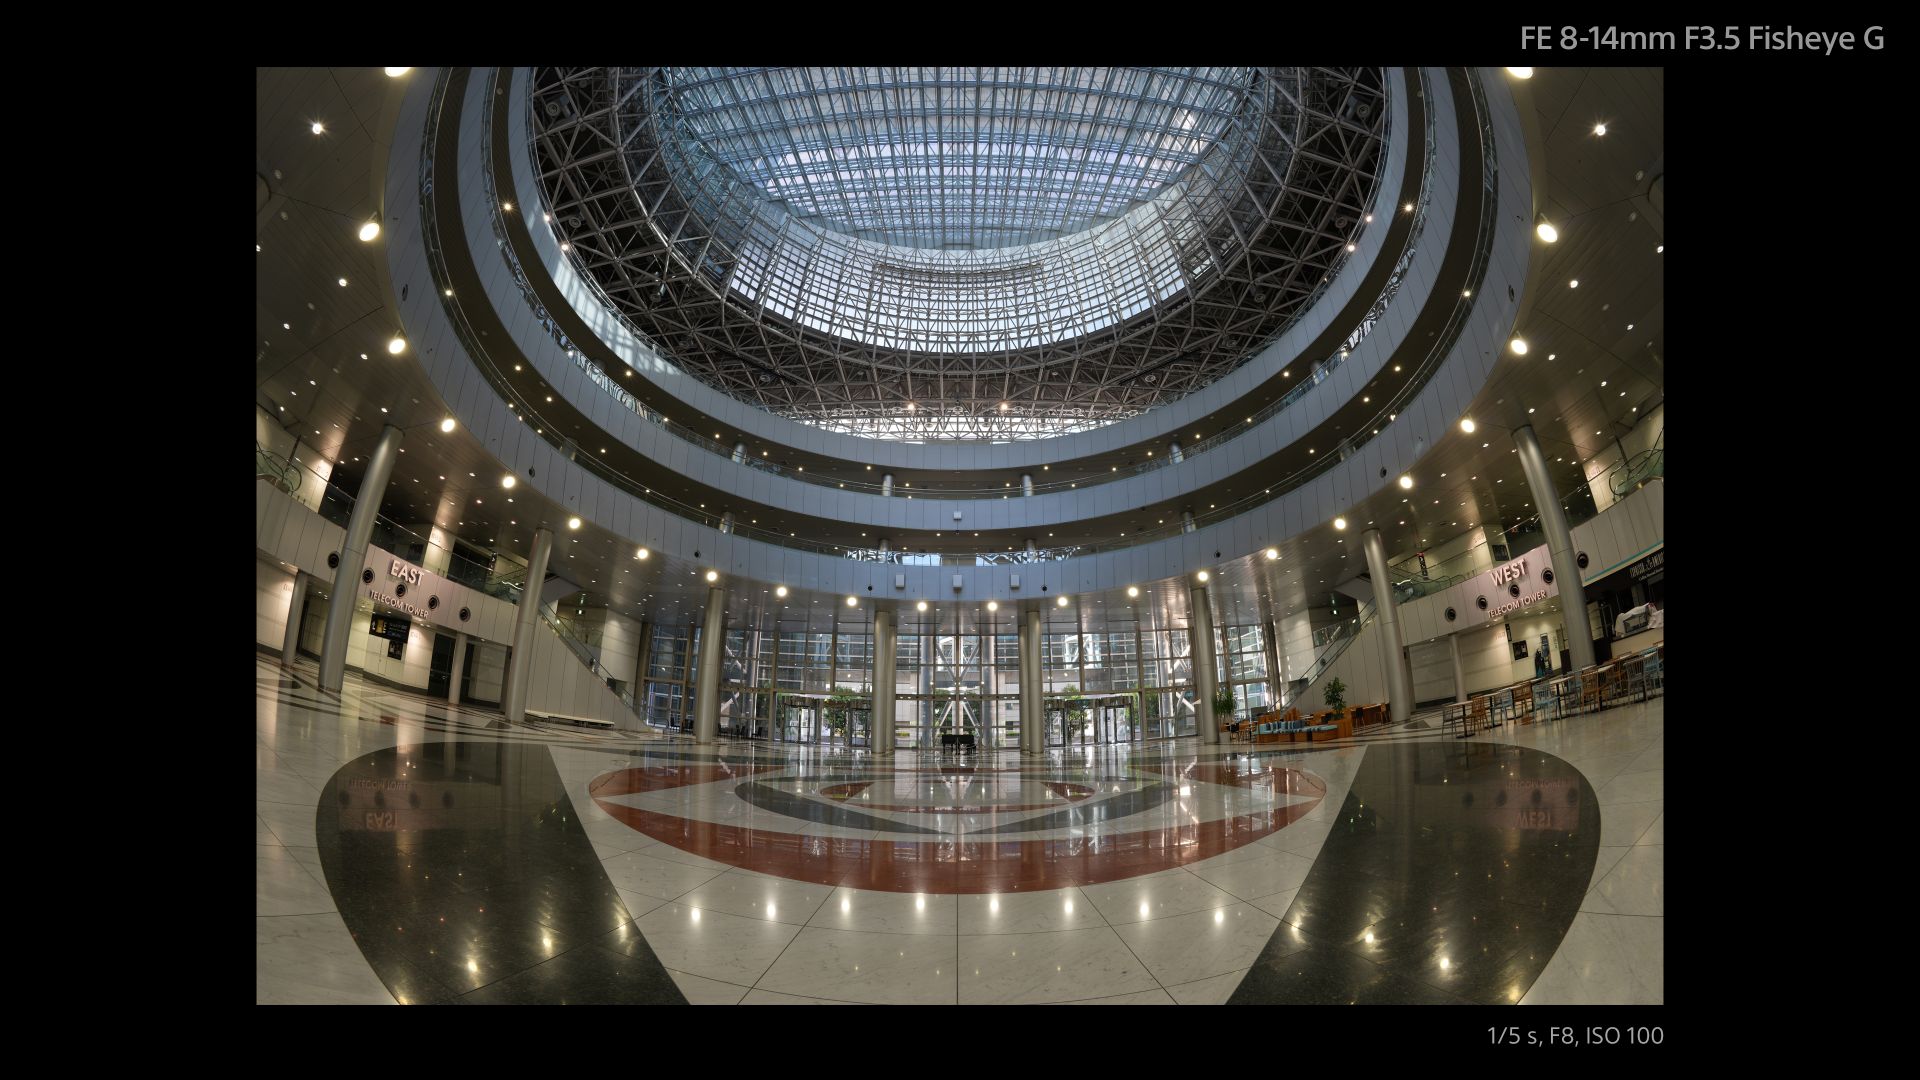
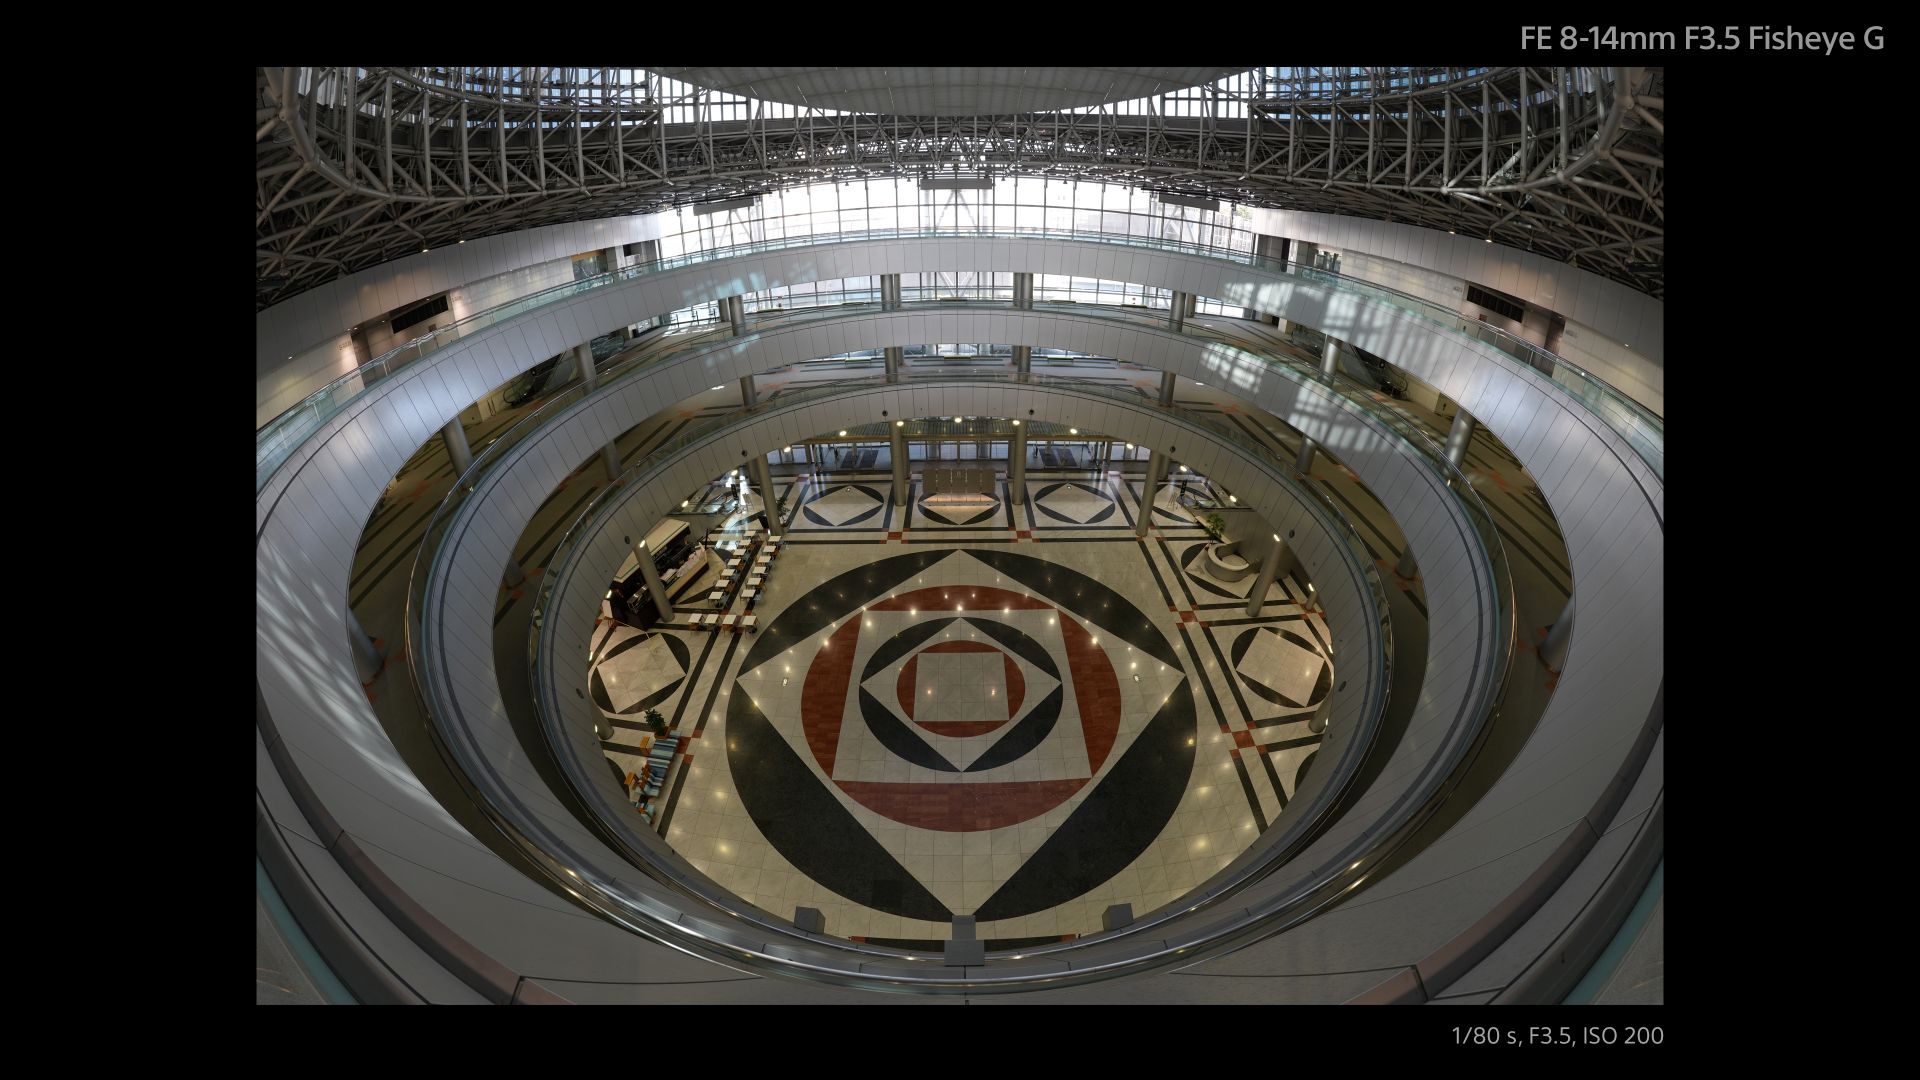
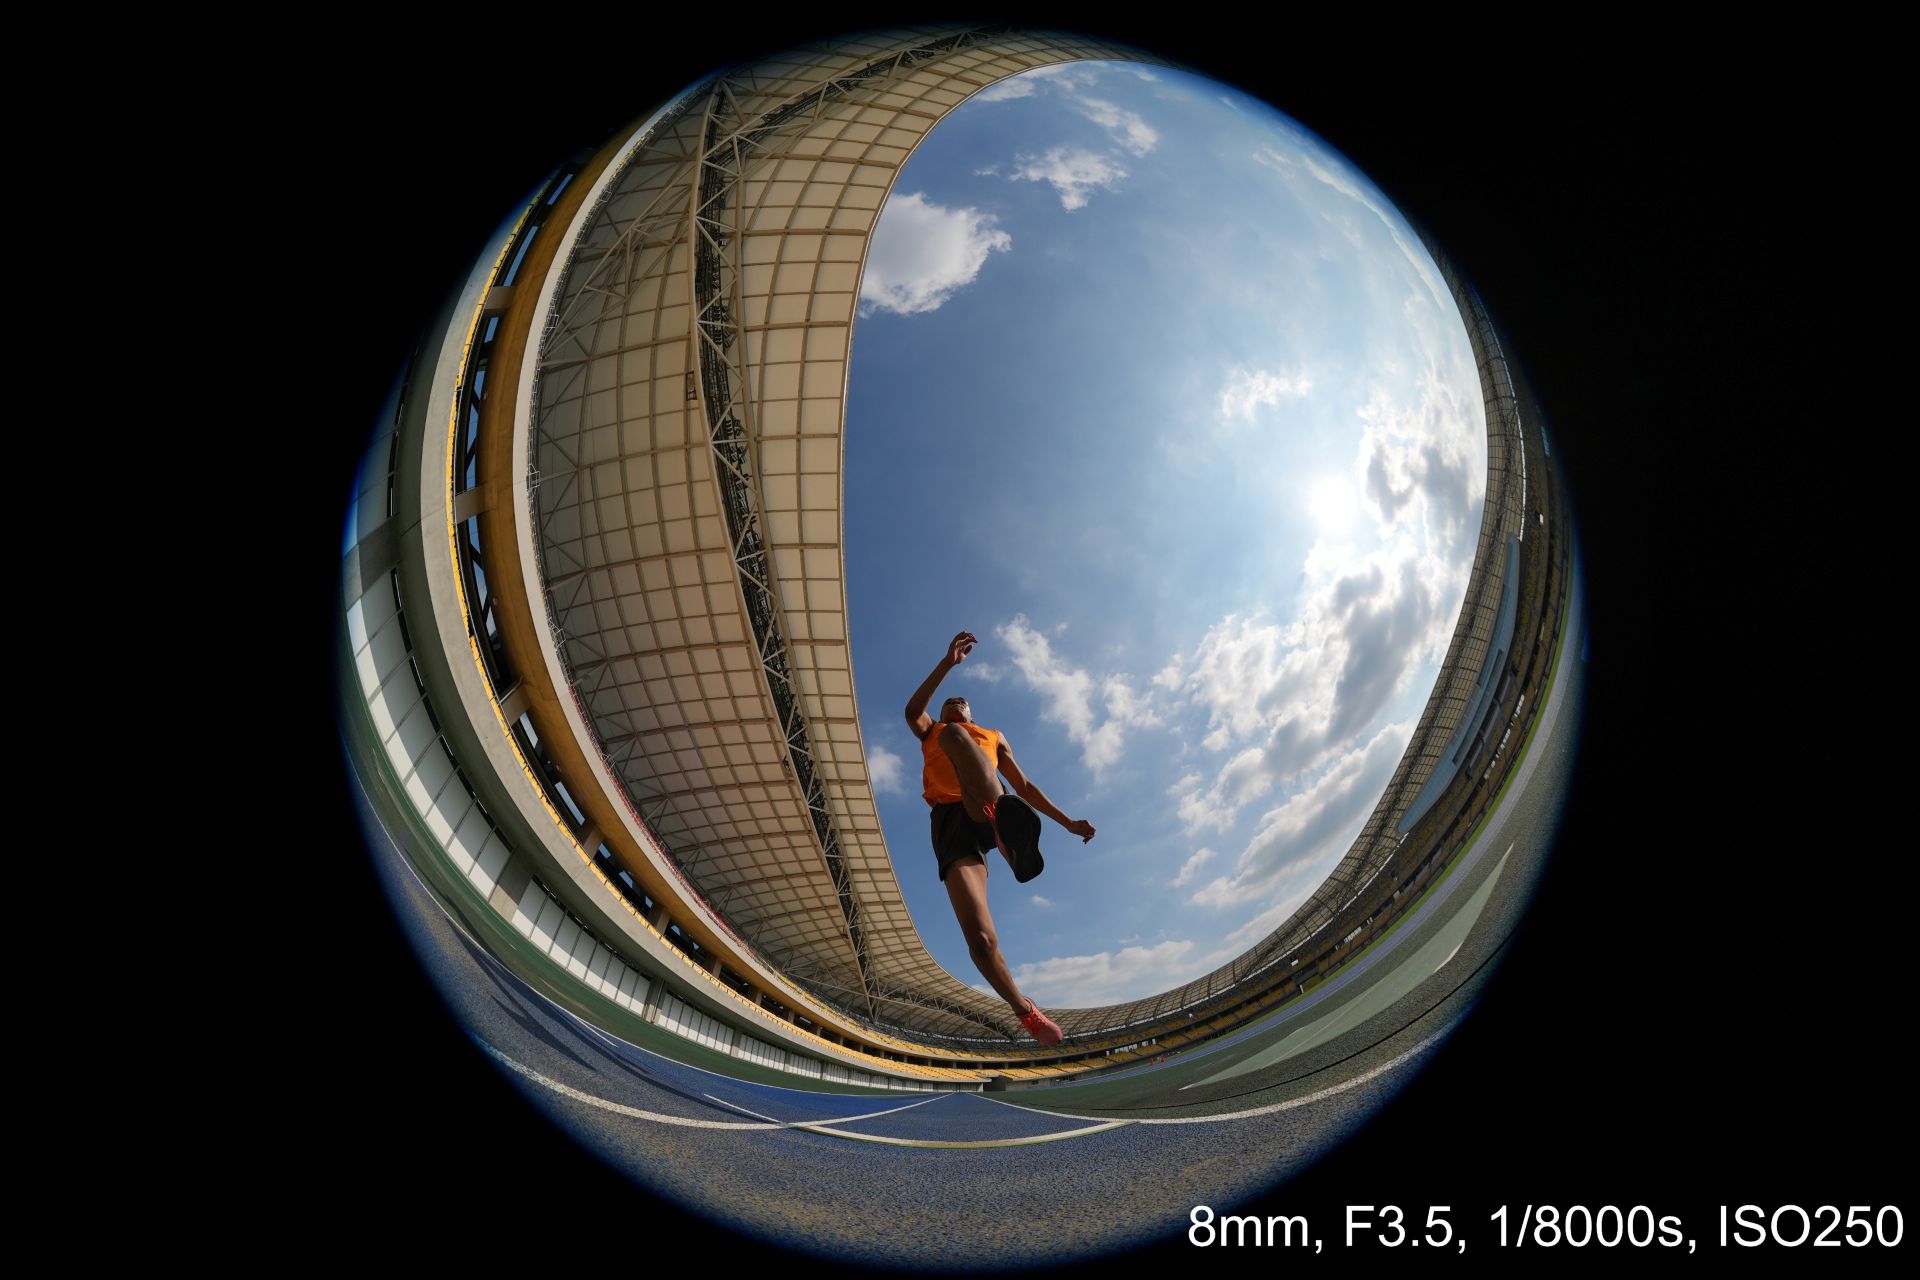
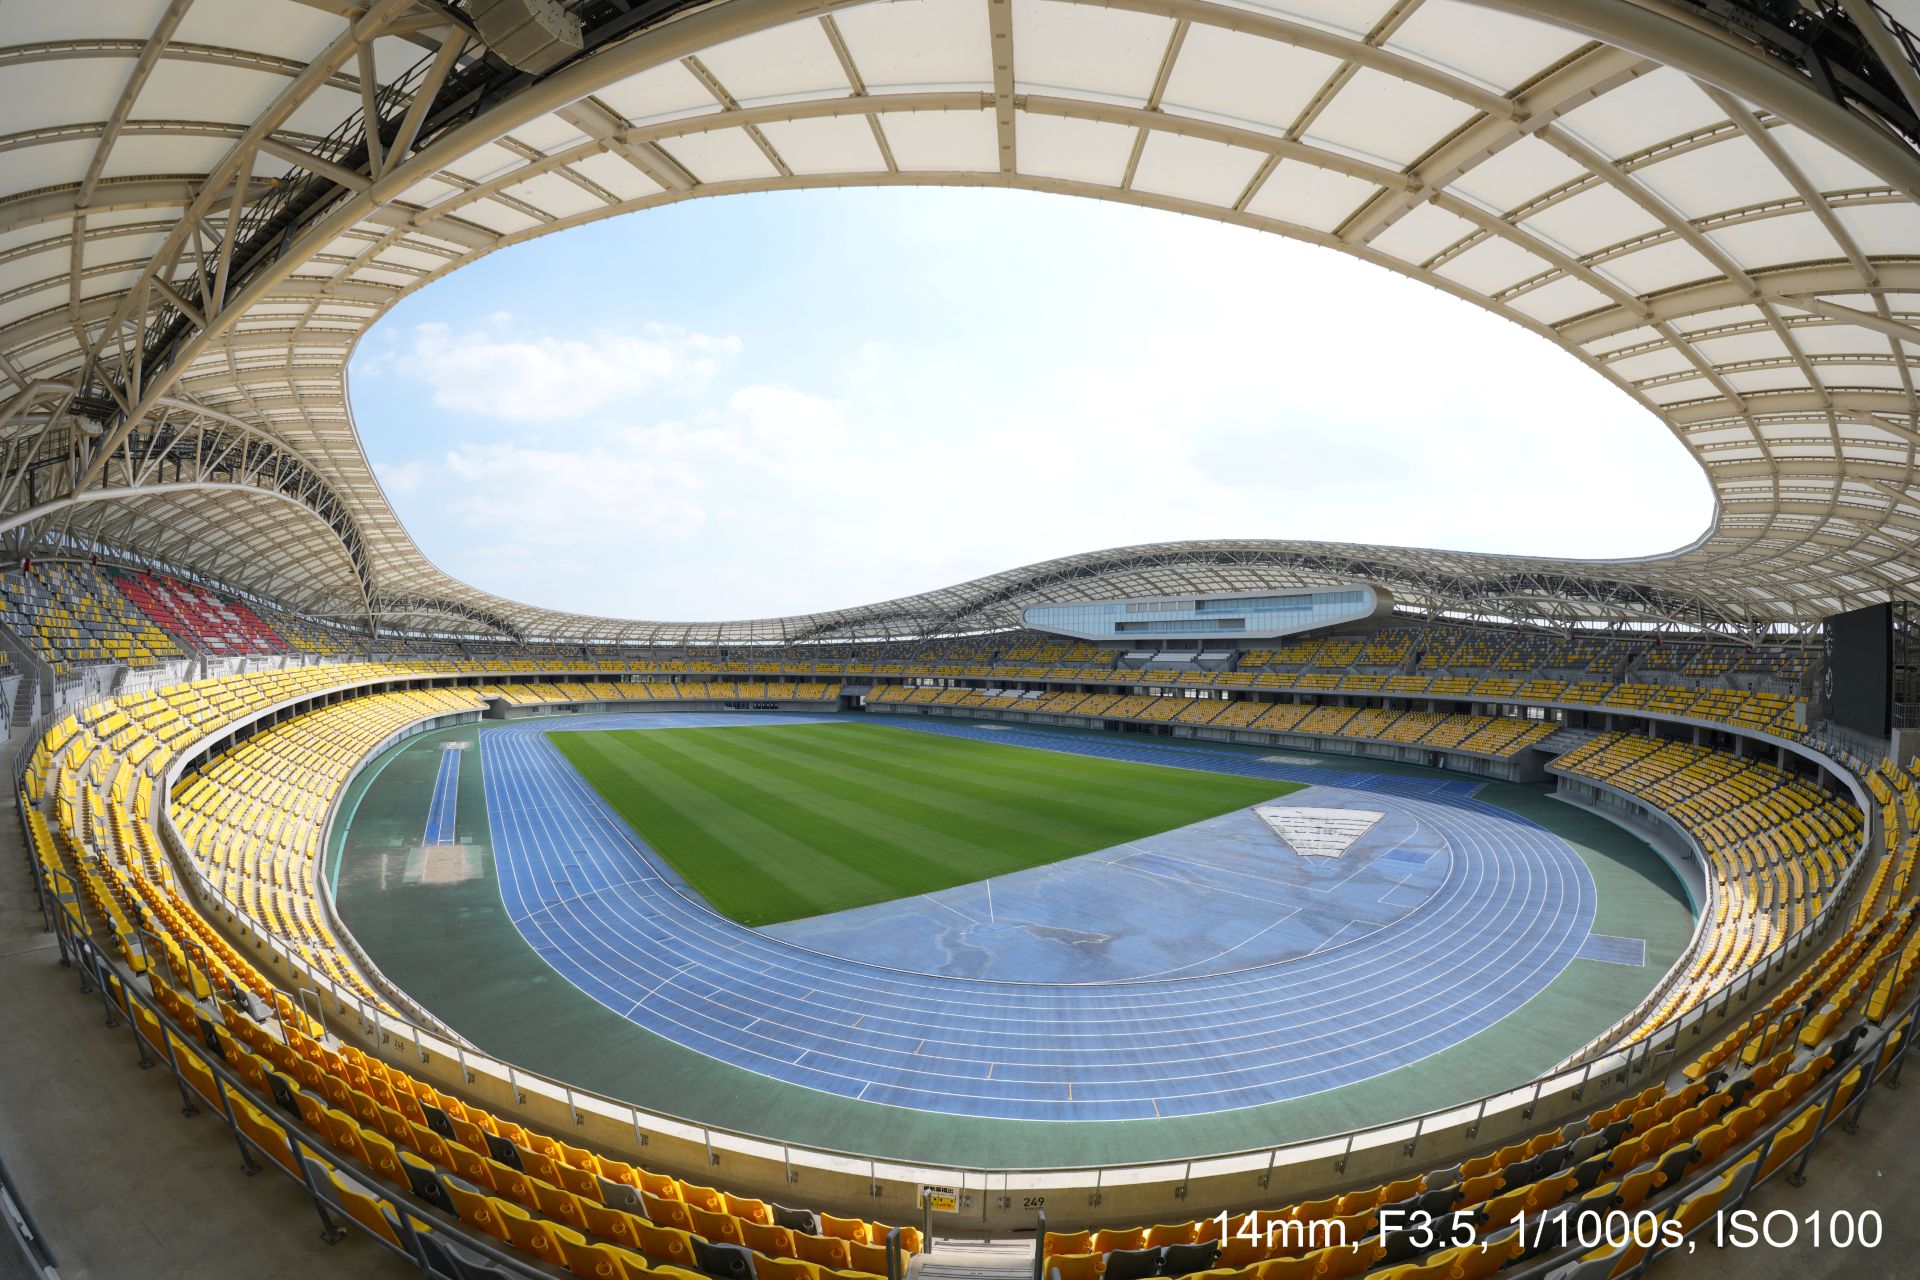


An optical design with ED (extra-low dispersion) glass and aspherical elements suppresses chromatic and other aberrations across the image area.
This enables high resolution throughout the zoom range with fast and precise autofocus and Linear Response MF. All these while suppressing focus breathing and operating quietly for movie production.
Controls include a focus mode switch, zoom lock switch, and an aperture ring with switchable click stops.
A minimum focusing distance of 0.15 meters and maximum magnification of 0.22x at the telephoto end also allow close-up fisheye perspectives both for stills and movies.
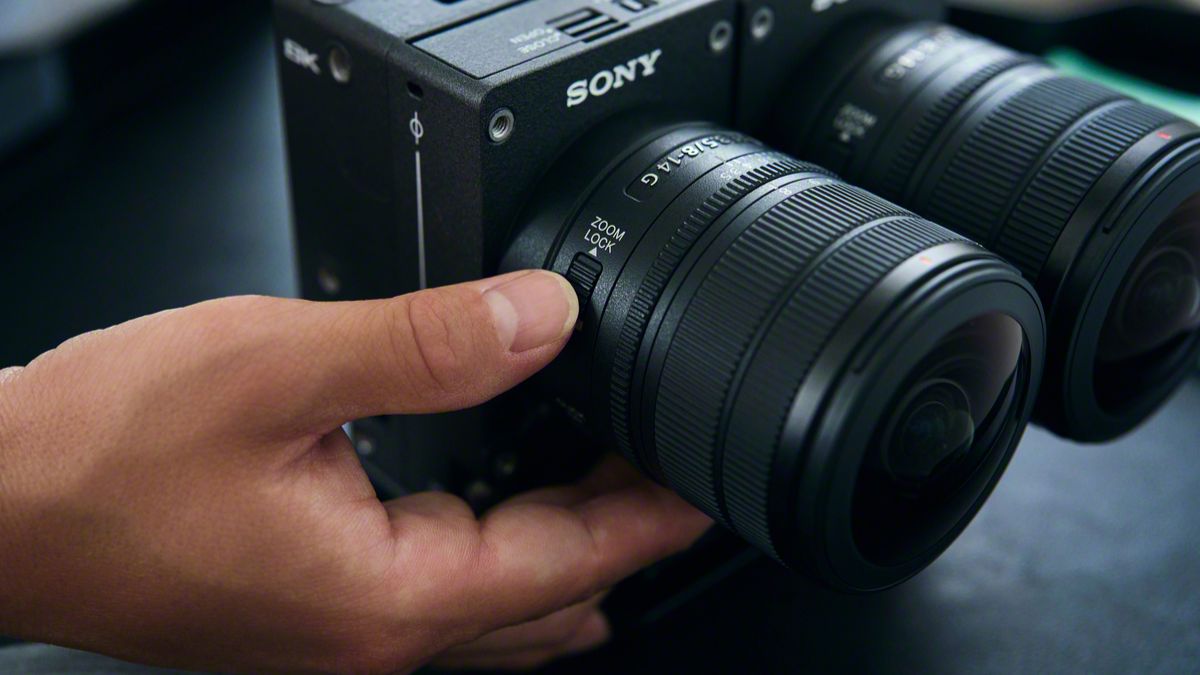
The Sony FE 8-14mm F3.5 Fisheye G measures about 63.1 mm in maximum diameter and 82.8 mm in length.
It weights about 314 grams, giving it mobility for handheld, gimbal, and rig-based shooting. It is also dust and moisture-resistant with a fluorine coating on the front.
In addition, users can opt for a dual-lens configuration with the VENCE Extension System Mini.
Cameras
DJI Osmo 360 II review: Going all-in on the ecosystem
I’m finally leaving my Insta360 X5 behind!

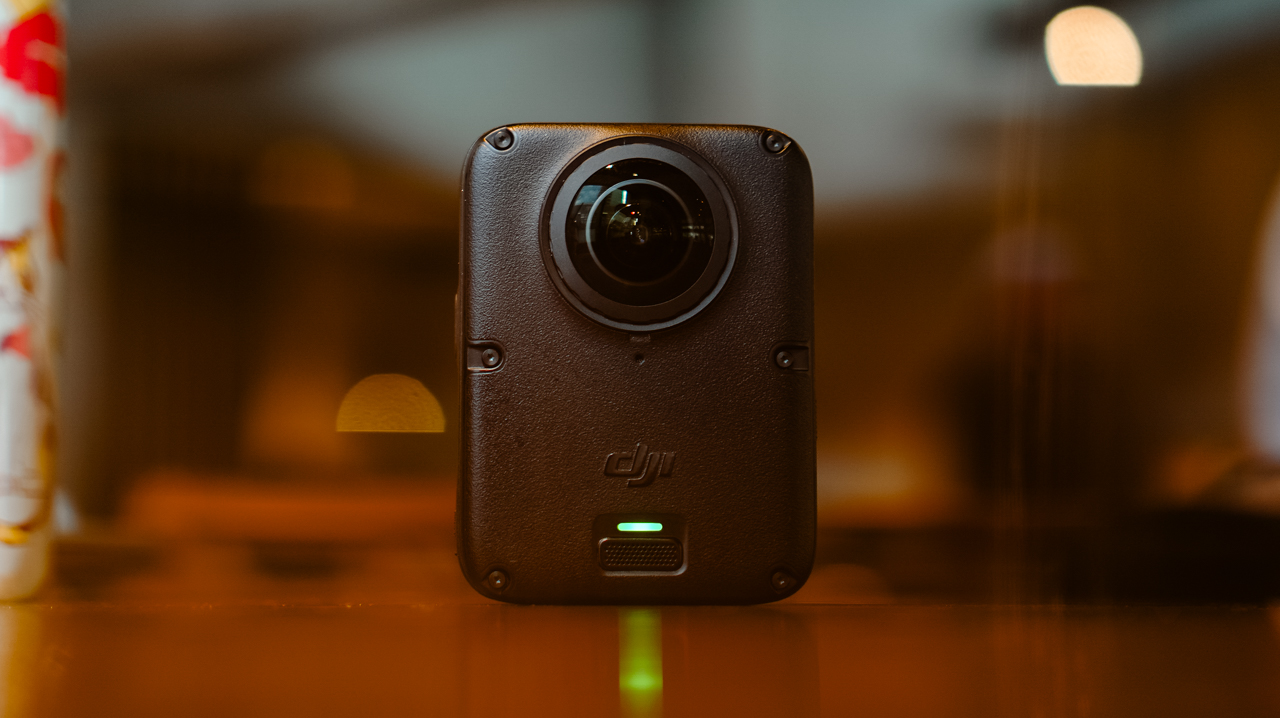
I’ve been shooting with the Insta360 X5 for a year. Trail runs, races, city trips, training sessions, all of it in 360.
I’ve held onto footage from that camera that I still watch back for no reason other than to remember what a particular morning felt like. I liked it enough that I wasn’t in a rush to switch anything.
After a month-long vacation carrying only the DJI Osmo Pocket 4P, I started thinking about consolidating it into a full DJI ecosystem instead, since I’d already tested and geared up with a Pocket, a Nano, an Action 6, and most recently, the Lito X1. The X5 was the one outlier left.
I never got to try the original Osmo 360, not until I saw my friend, Kyle Vergara, using one when we were in Boracay. Watching him shoot with it planted the idea before I even knew I wanted it.
So I waited for the DJI Osmo 360 II to see if it was worth the switch, half hoping it wouldn’t be, since switching meant admitting I was ready to let go of a camera that had been good to me.
Insta360 released the X6 around the same time, and as a creator, it was tempting. But between the workflow I already had and the cost of the gear, the math didn’t work out.
Anything leaning hard into AI these days comes with a jacked-up price tag, and the X6 wasn’t an exception. The Osmo 360 II has its own AI features, but the price is still bearable.
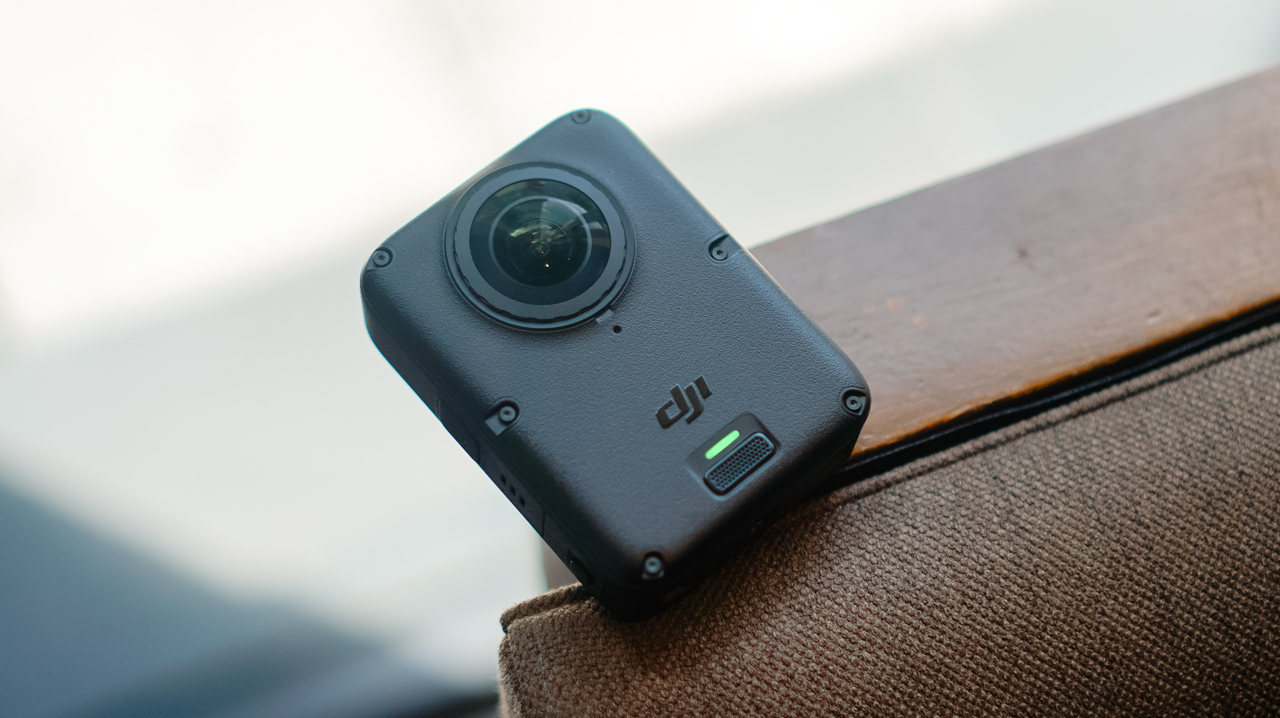
Price
The Standard Combo starts at PhP 32,490, with the Osmo Extreme Battery Plus, a Camera Protective Pouch, a cleaning cloth, an Osmo 360 Silicone Lens Cap, and a USB-C to USB-C PowerDelivery cable included.
@gadgetmatchThe new DJI Osmo 360 II is here with 1-inch 360° imaging, native 8K/60fps, and AI SuperNight 2.0! ✨♬ original sound – GadgetMatch
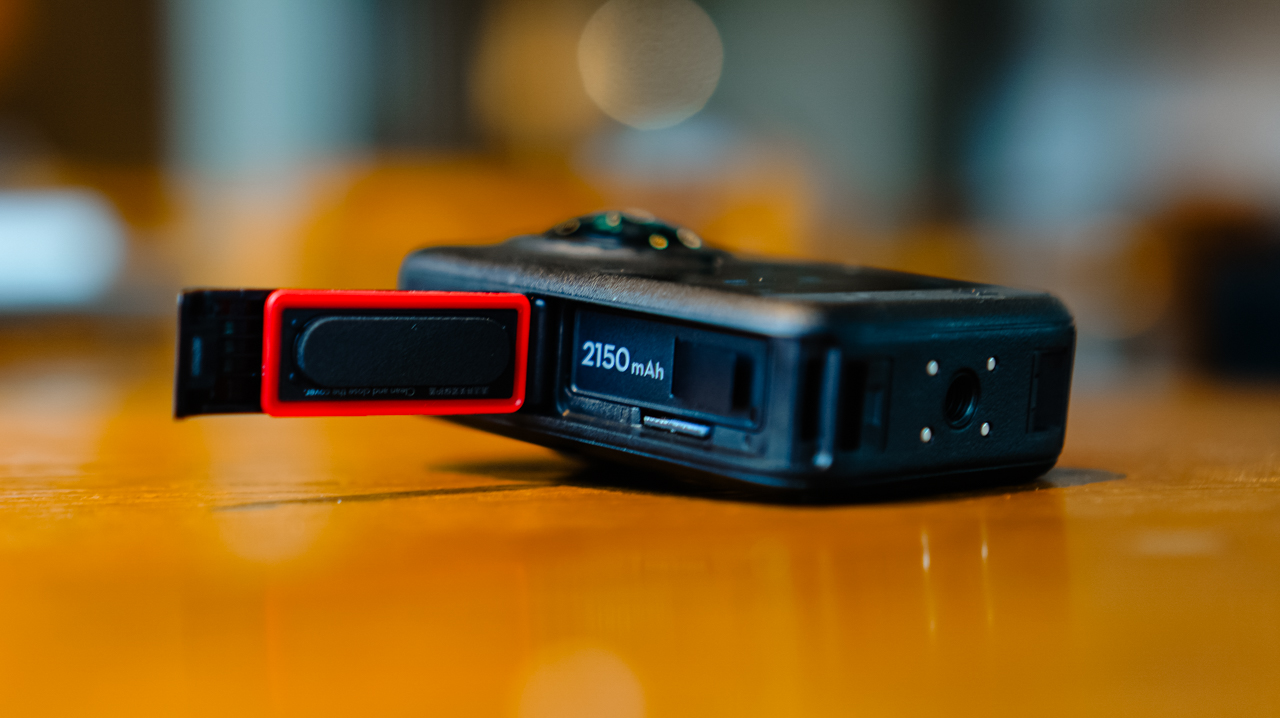
The Adventure Combo, which is what I got, runs PhP 39,490 and adds two extra Osmo Extreme Battery Plus (2150mAh), an Osmo Multifunctional Battery Case 3, an Adjustable Dual-Direction Quick-Release Adapter mount, and a 1.2m Invisible Selfie Stick.
For rider friends, there’s also a Limitless Riding Combo at PhP 34,490, which pairs the Standard Combo with an Osmo Heavy-Duty Clamp Mount kit.
Build
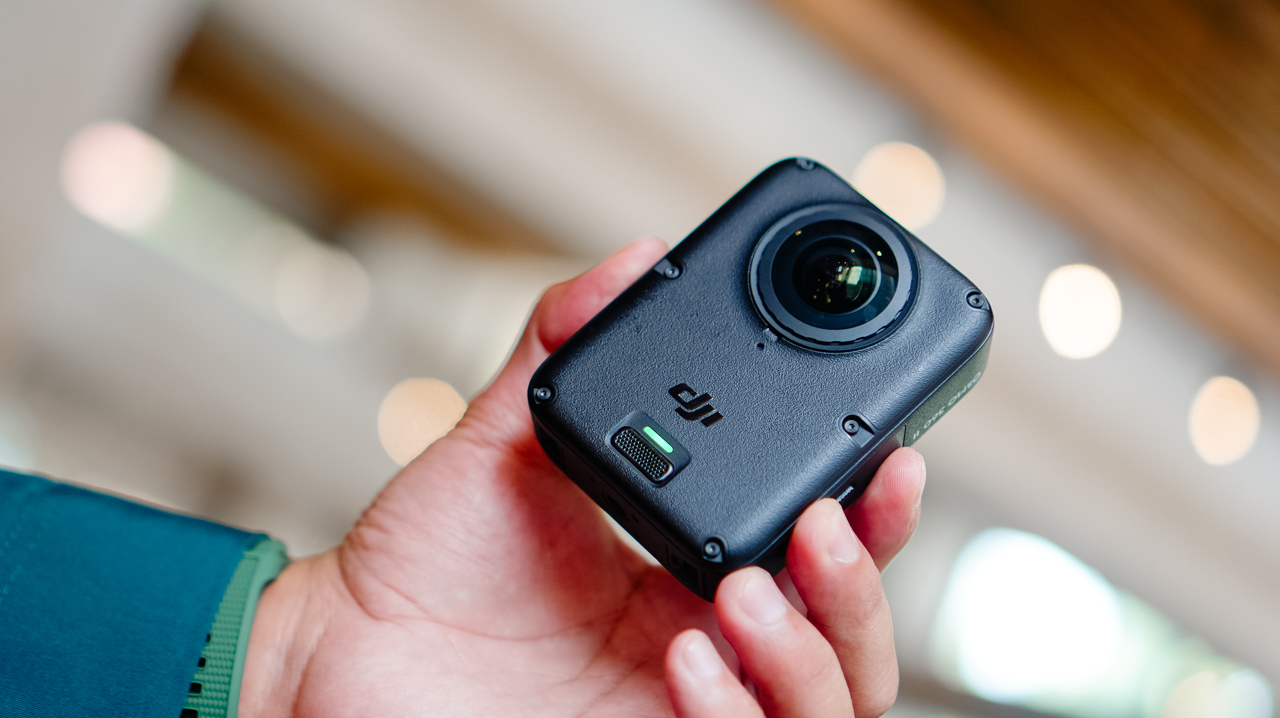
Coming from the X5’s lengthy monolith shape, the Osmo 360 II looks like a square monolith that fits in the palm of my hand.
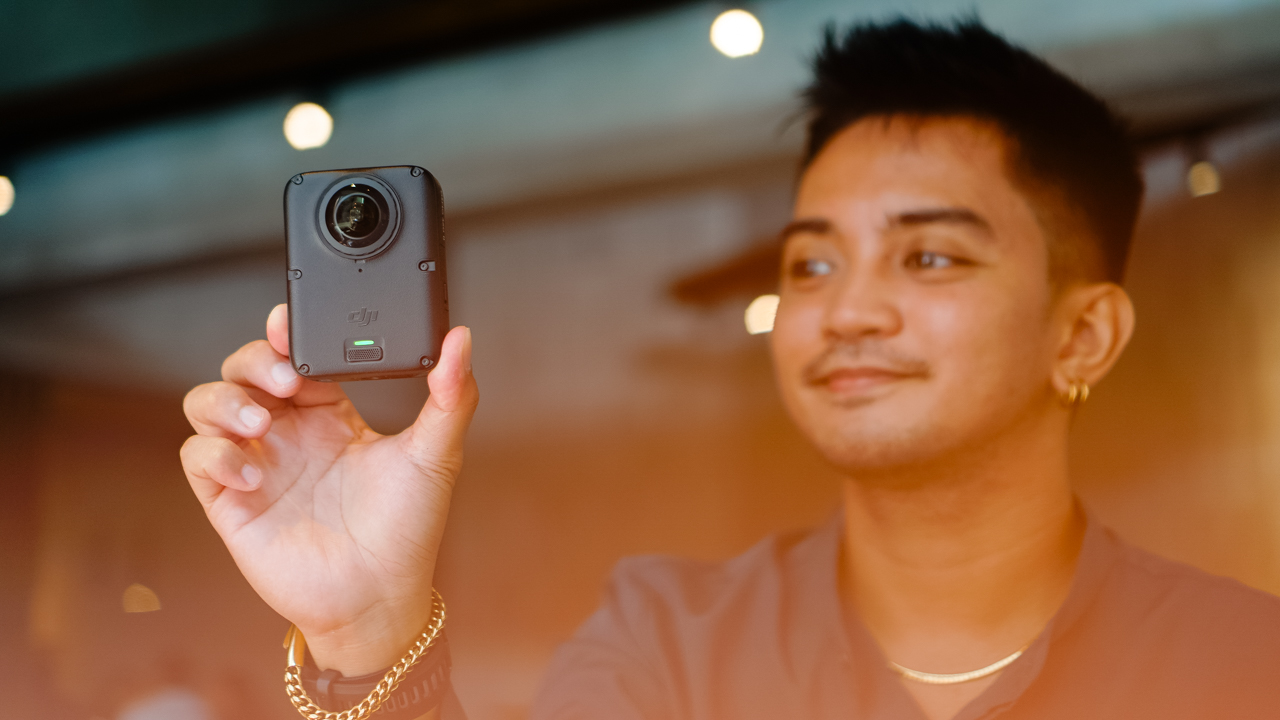
The smaller footprint makes it easier to switch between portrait and horizontal orientation when shooting single-lens.
It’s heavier than the X5, though, and I noticed that weight almost immediately the first time I clipped it onto a mount, like the camera wanted me to know it meant business.
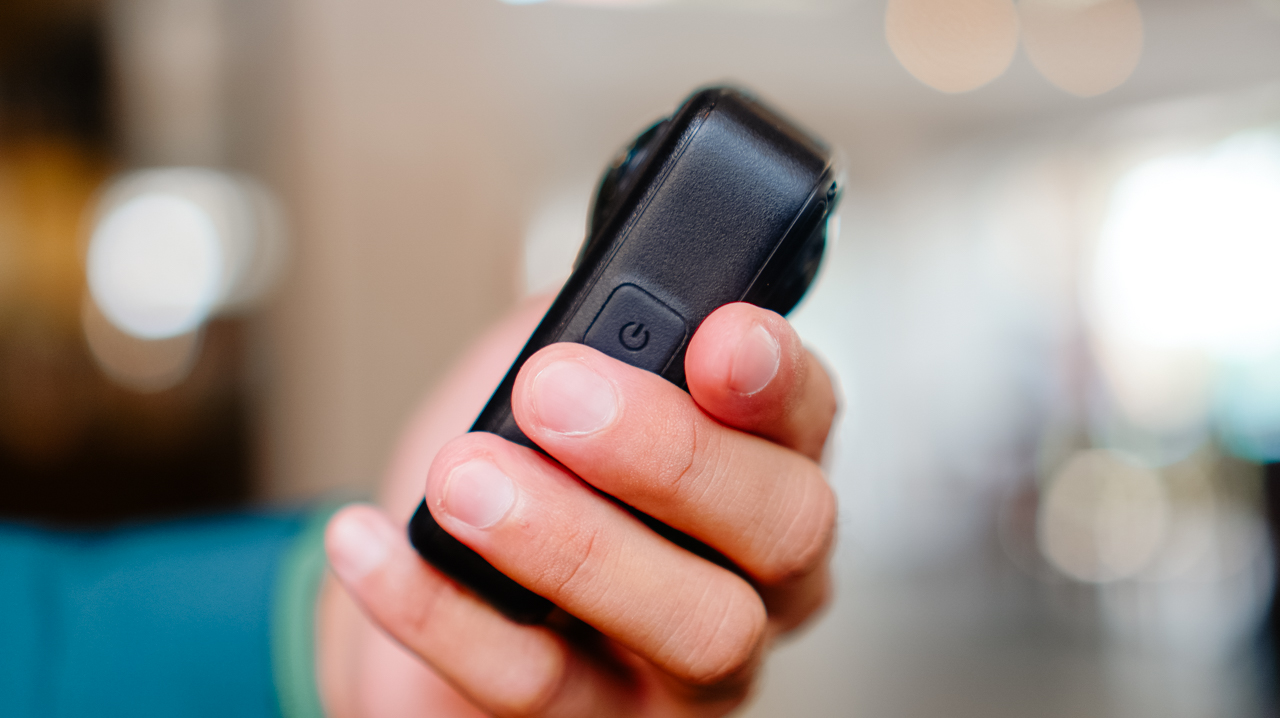
The design feels sturdier than its predecessor, and it now has a replaceable lens for when you scratch it, instead of a trip to a service center.
Performance
The Osmo 360 II arrived during a rough month for shooting in the Philippines. We were hit by one storm after another, with barely any sun in between, and there were days I genuinely wondered if I’d get to test this camera the way I wanted to before a deadline caught up with me.
I’d planned to test it on my usual trails, but landslides closed them off, so the next best option was a car-free Sunday in Ayala Triangle while the sun cooperated.
View this post on Instagram
It wasn’t the adventure footage I had in mind, but making a plain Sunday in the city look like it mattered turned out to be its own kind of satisfying.
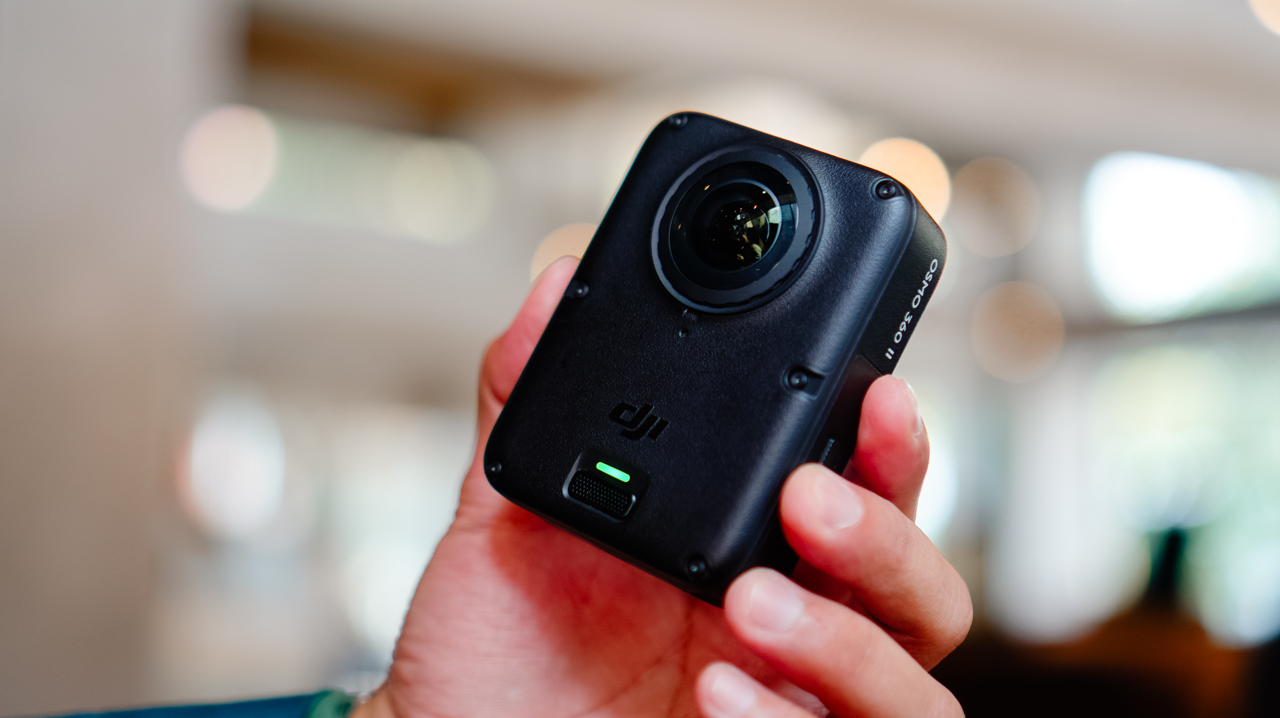
360 video now shoots at 8K60, up from 8K50 on the previous model, with the bitrate raised from 170Mbps to 220Mbps.
Single-lens shooting tops out at 4K60, though 4K50 is the recommended setting. Daytime footage looks excellent, especially for anything meant for social with a slightly different perspective than the usual flat shot.
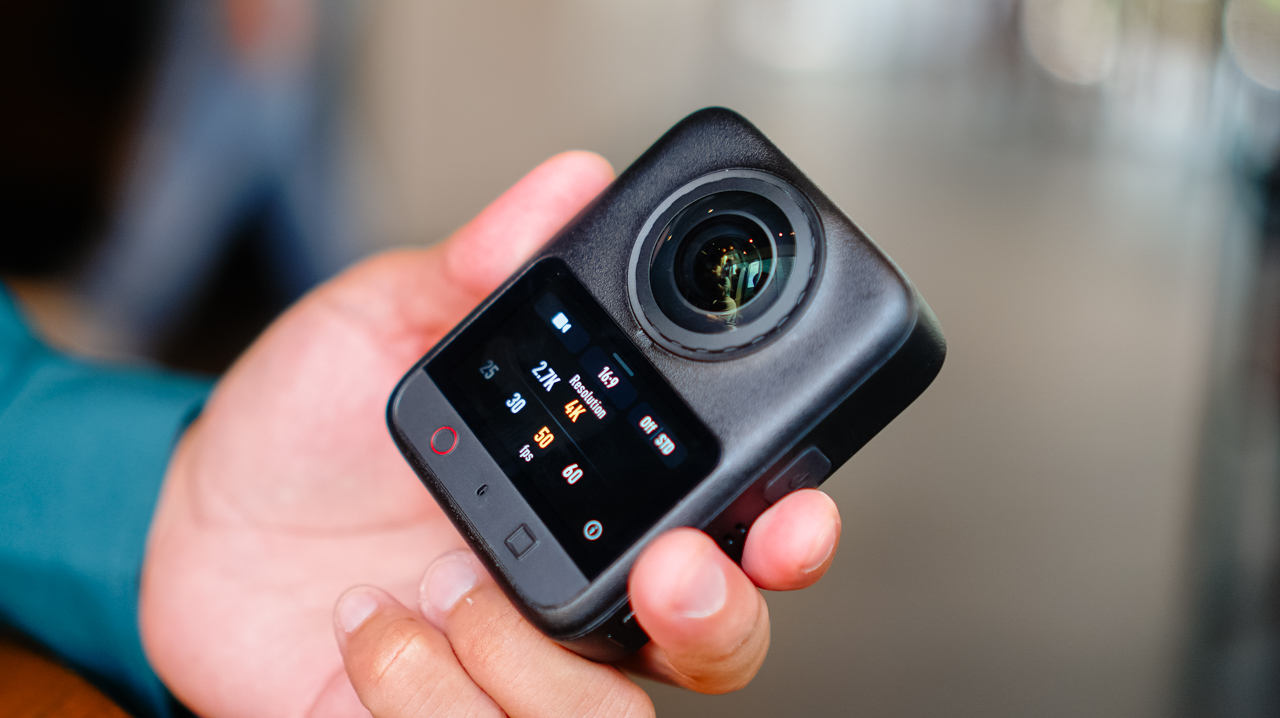
Scrolling back through those Ayala Triangle clips later that night, I caught myself smiling at angles I wouldn’t have thought to frame on a regular camera.
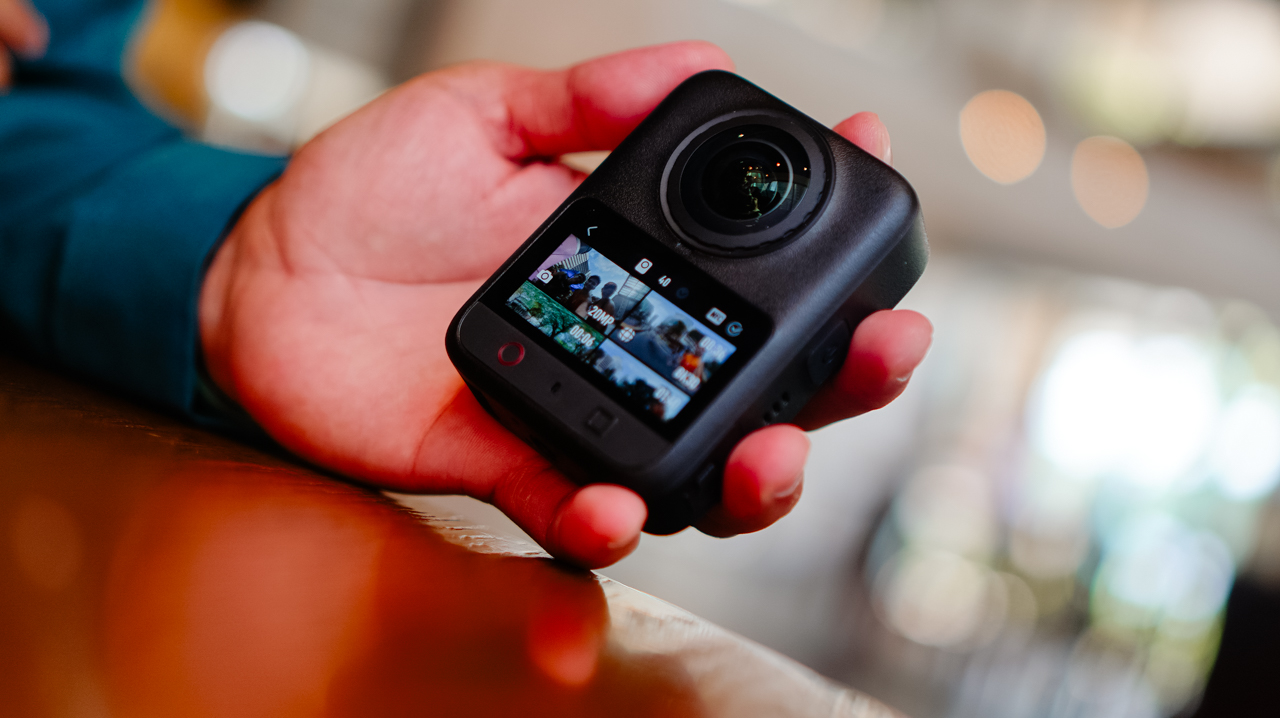
Night footage is where I’ve historically had issues with this category of camera, and I still don’t love straight Video mode after dark. But the new model claims 14.5 stops of dynamic range with its low-light processing, and shooting in Boost Video and SuperNight modes noticeably improves low-light results.
Photos hold up well too. Single-lens stills shoot ultra-wide at up to 30MP, and panoramic 360 photos go up to 120MP HDR.
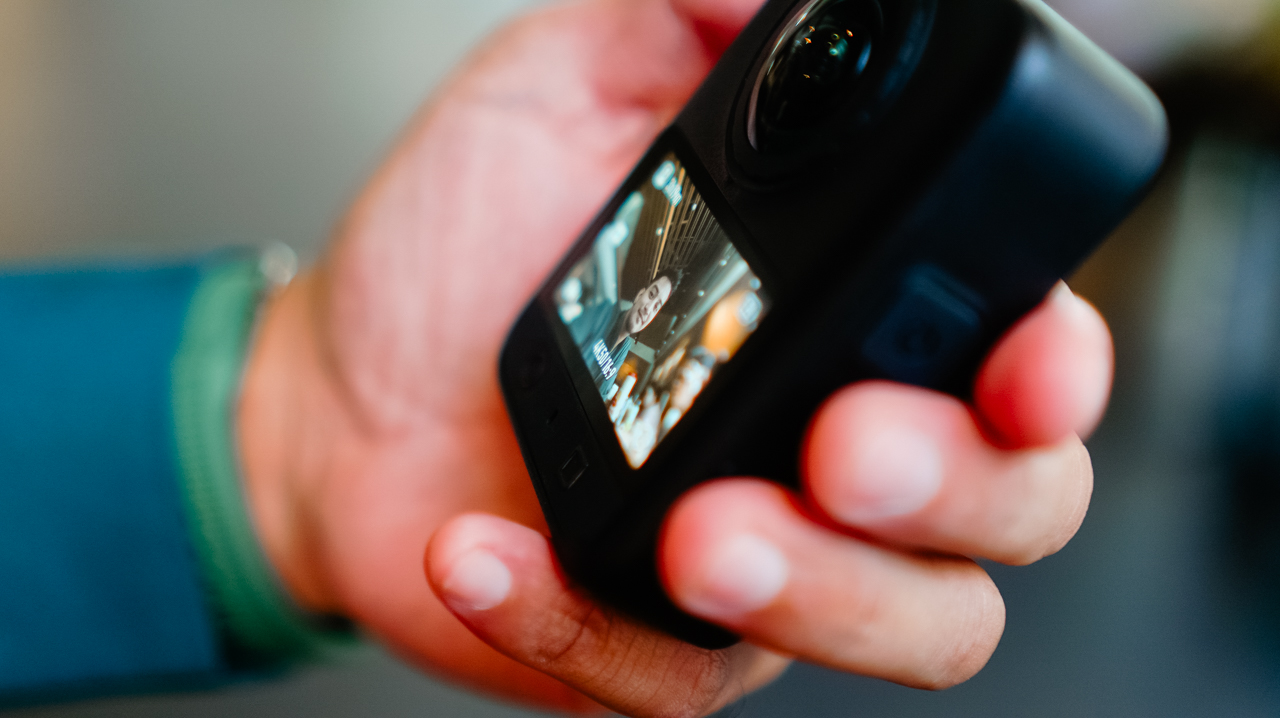
RAW photo support is new this generation, and it’s this type of addition that made me want to slow down and actually shoot stills again instead of treating this as a video-only device.
Storage
AI features pushing further onto these devices has driven up demand, and prices, for RAM and storage across the board.
MicroSD cards, SSDs, even cloud storage all cost more than they used to, and I’ve felt that pinch every time I’ve had to buy a new card just to keep shooting through a busy week.
What I appreciate about DJI’s new lineup this year is the built-in storage, over 100GB on the Osmo 360 II. Paired with a microSD card, I’m not scrambling to back up mid-shoot just to free up space, which matters given how fast 4K and 8K footage eats through storage.
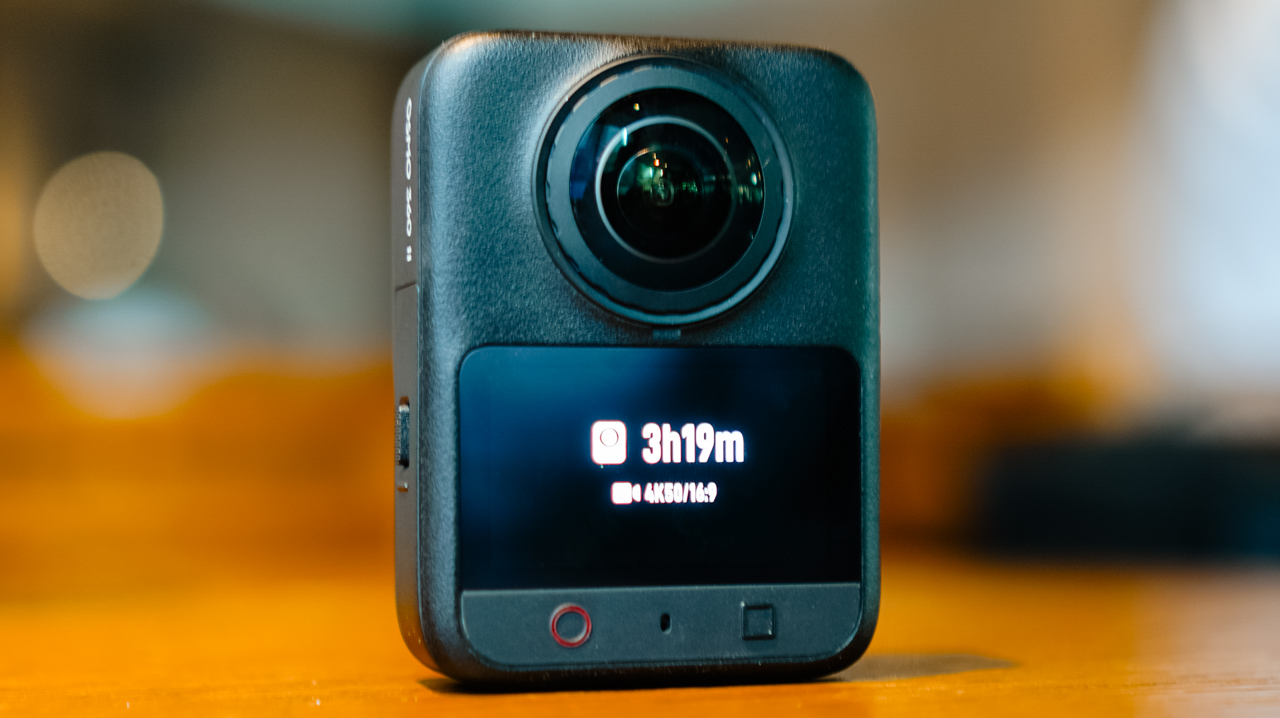
Not watching a storage warning pop up in the middle of something I can’t reshoot is a relief I didn’t know I needed.
Ecosystem
Before this, the X5 was the one device in my kit that didn’t run on DJI. Now that the Osmo 360 II is in the mix, footage lands in the DJI Mimo app the same way it does from everything else I own.
I’m not juggling two apps or two export flows anymore. Previously, files from the X5 would sit untouched longer than I wanted, simply because everything else I owned already funneled into Mimo and this one didn’t.
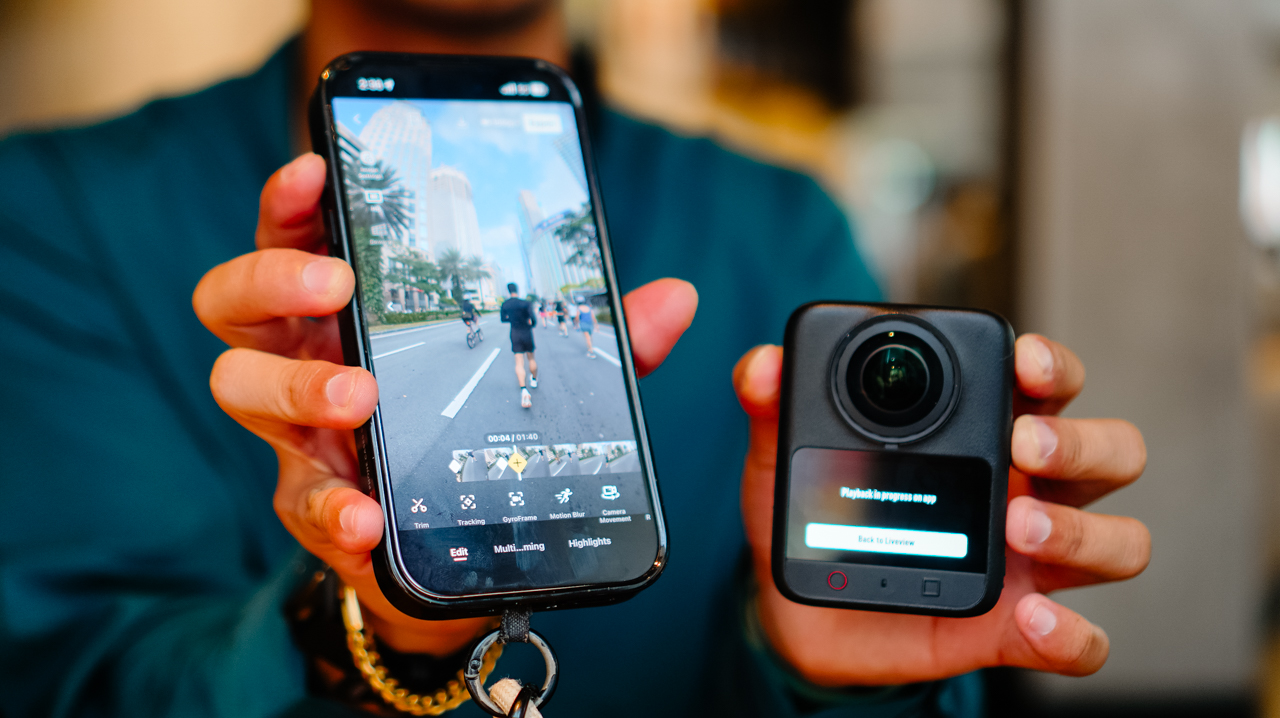
I can’t count how many times I opened my phone meaning to edit something, only to close it again because the file was sitting in the wrong app.
Editing 360 footage in the app is straightforward, with tools built for actually shaping the story rather than handing it off to AI.
Trimming, tracking, GyroFrame for dynamic movement, motion blur adjustments, multi-clip cuts and exports in one pass. If you do want AI in the loop, there’s Highlight Auto Selection to help surface usable scenes for reels.
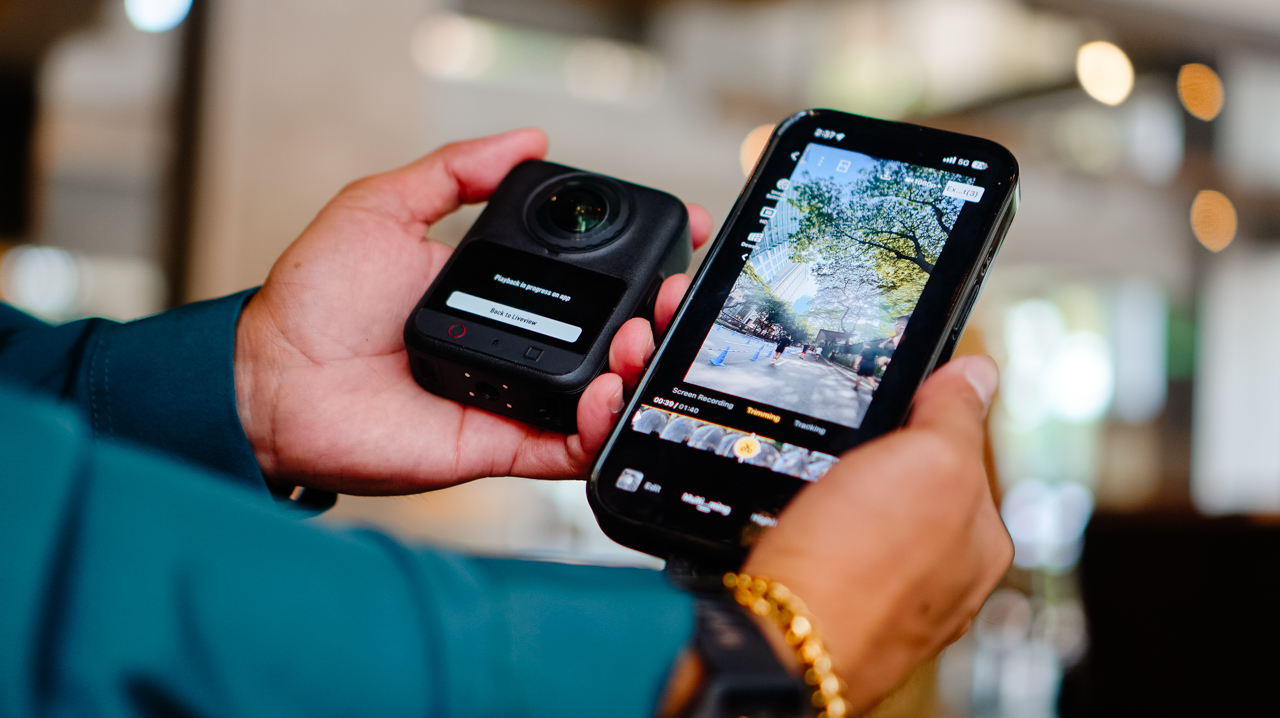
Insta360’s ecosystem likely has comparable editing depth. What’s different for me is having it all live in one app instead of splitting my workflow across two, and how much lighter that’s made the whole process feel by the end of a shoot day.
Is the DJI Osmo 360 II your GadgetMatch?
If you’re already using DJI across your gear and your workflow, the Osmo 360 II is an easy yes.
It fixes a real complaint from the first generation, folds into one ecosystem instead of two, and comes in at a price that’s hard to argue with.
Letting go of the X5 turned out to be less of a loss than I expected. It’s more like finally closing a tab I’d left open for a year.
Swipe Right if you want hardware upgrades that solve a genuine complaint from the first generation, one ecosystem instead of two, and a real price advantage.
The DJI Osmo 360 II is built for someone focused on storytelling and getting the most out of the gear they already own, rather than someone chasing the newest AI-editing tools.
Swipe Left if you want AI-driven editing front and center, or you’re already settled into Insta360’s ecosystem.

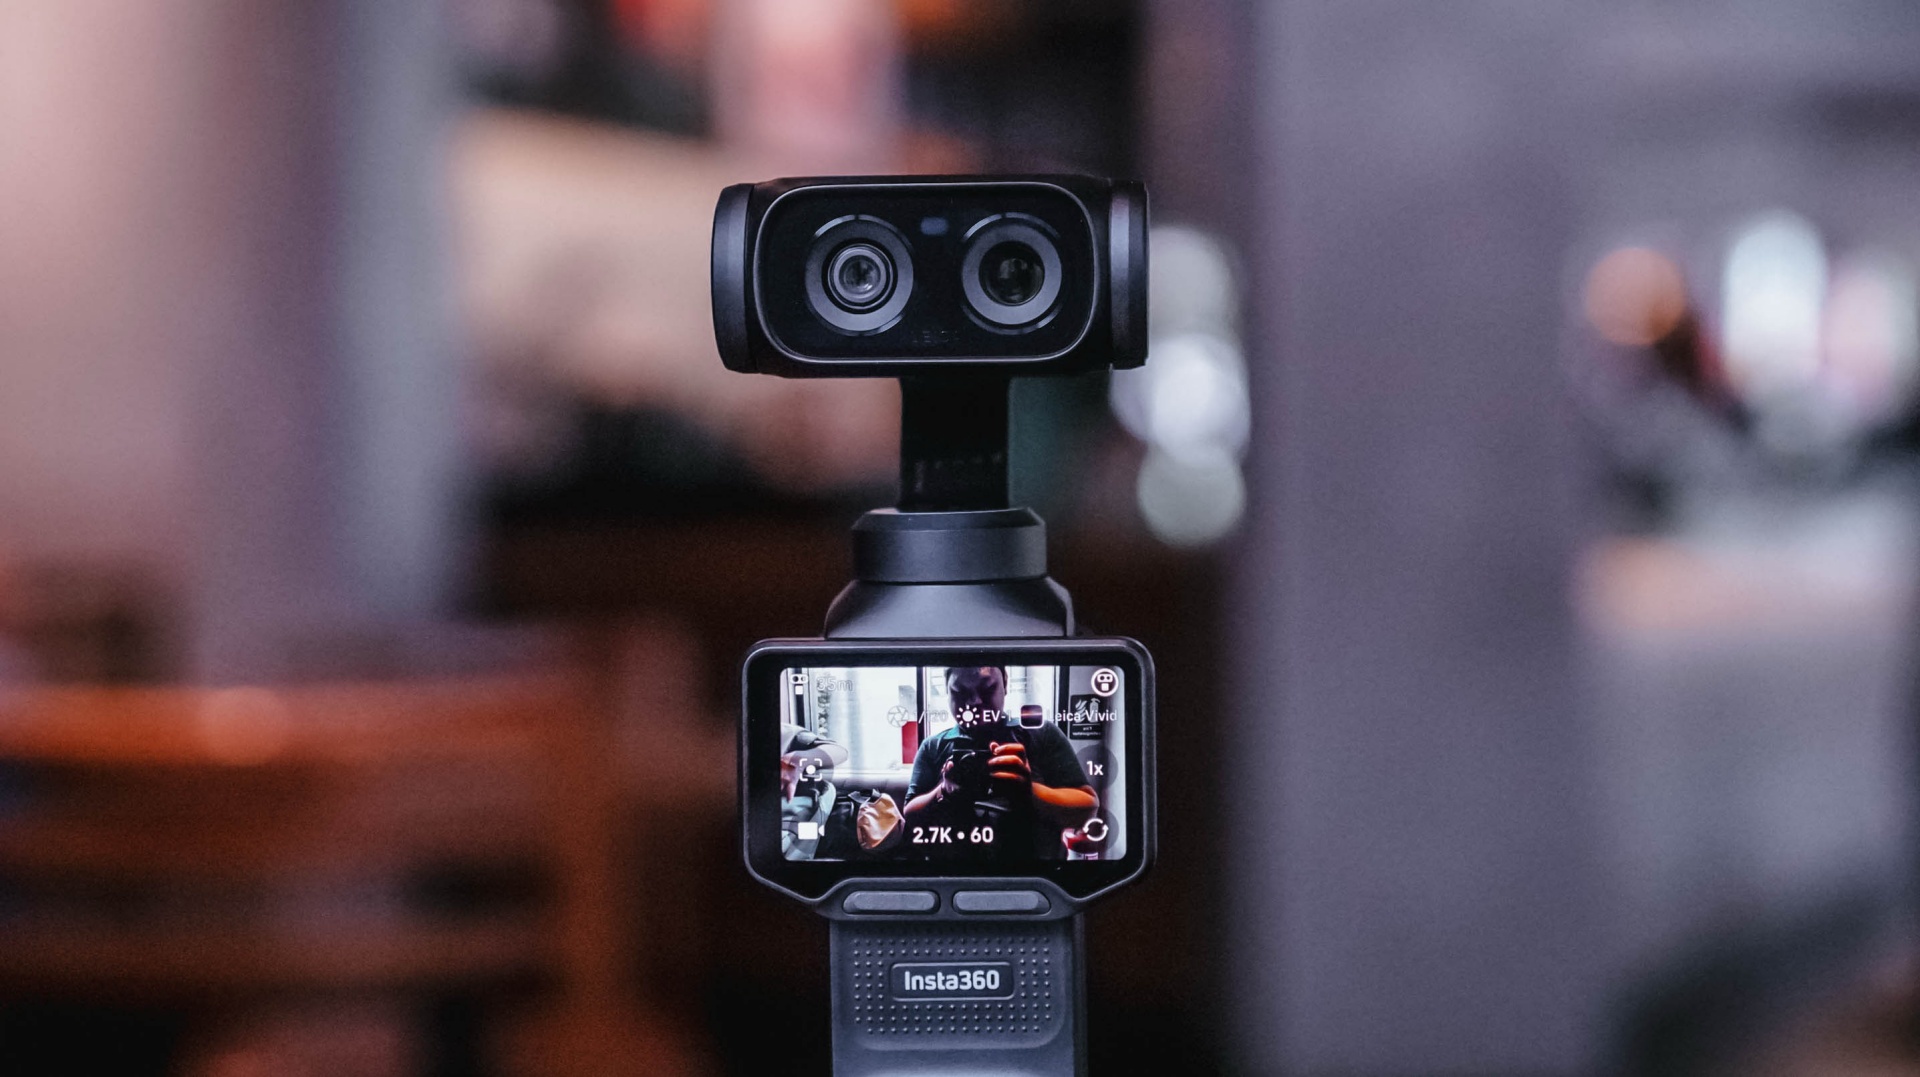
I’ve been using the Sony a6500 with a 35mm f/1.8 lens for the past six or seven years. There’s a certain level of comfort and familiarity that comes with using the same camera for that long. My workflow with it is automatic at this point.
That’s why it took some time for me to get comfortable with the Insta360 Luna Ultra.
I wasn’t familiar with using a gimbal camera. When I first started using the Luna Ultra, it felt awkward. I was also trying to figure out too many things at once.
But after several weeks of using it for different kinds of coverage, I’ve reached a point where I’m comfortable leaving my old reliable behind, especially when my priority is making Reels.
And it was my most recent overseas work trip to Shenzhen, China, where I finally realized that.
Finding my footing
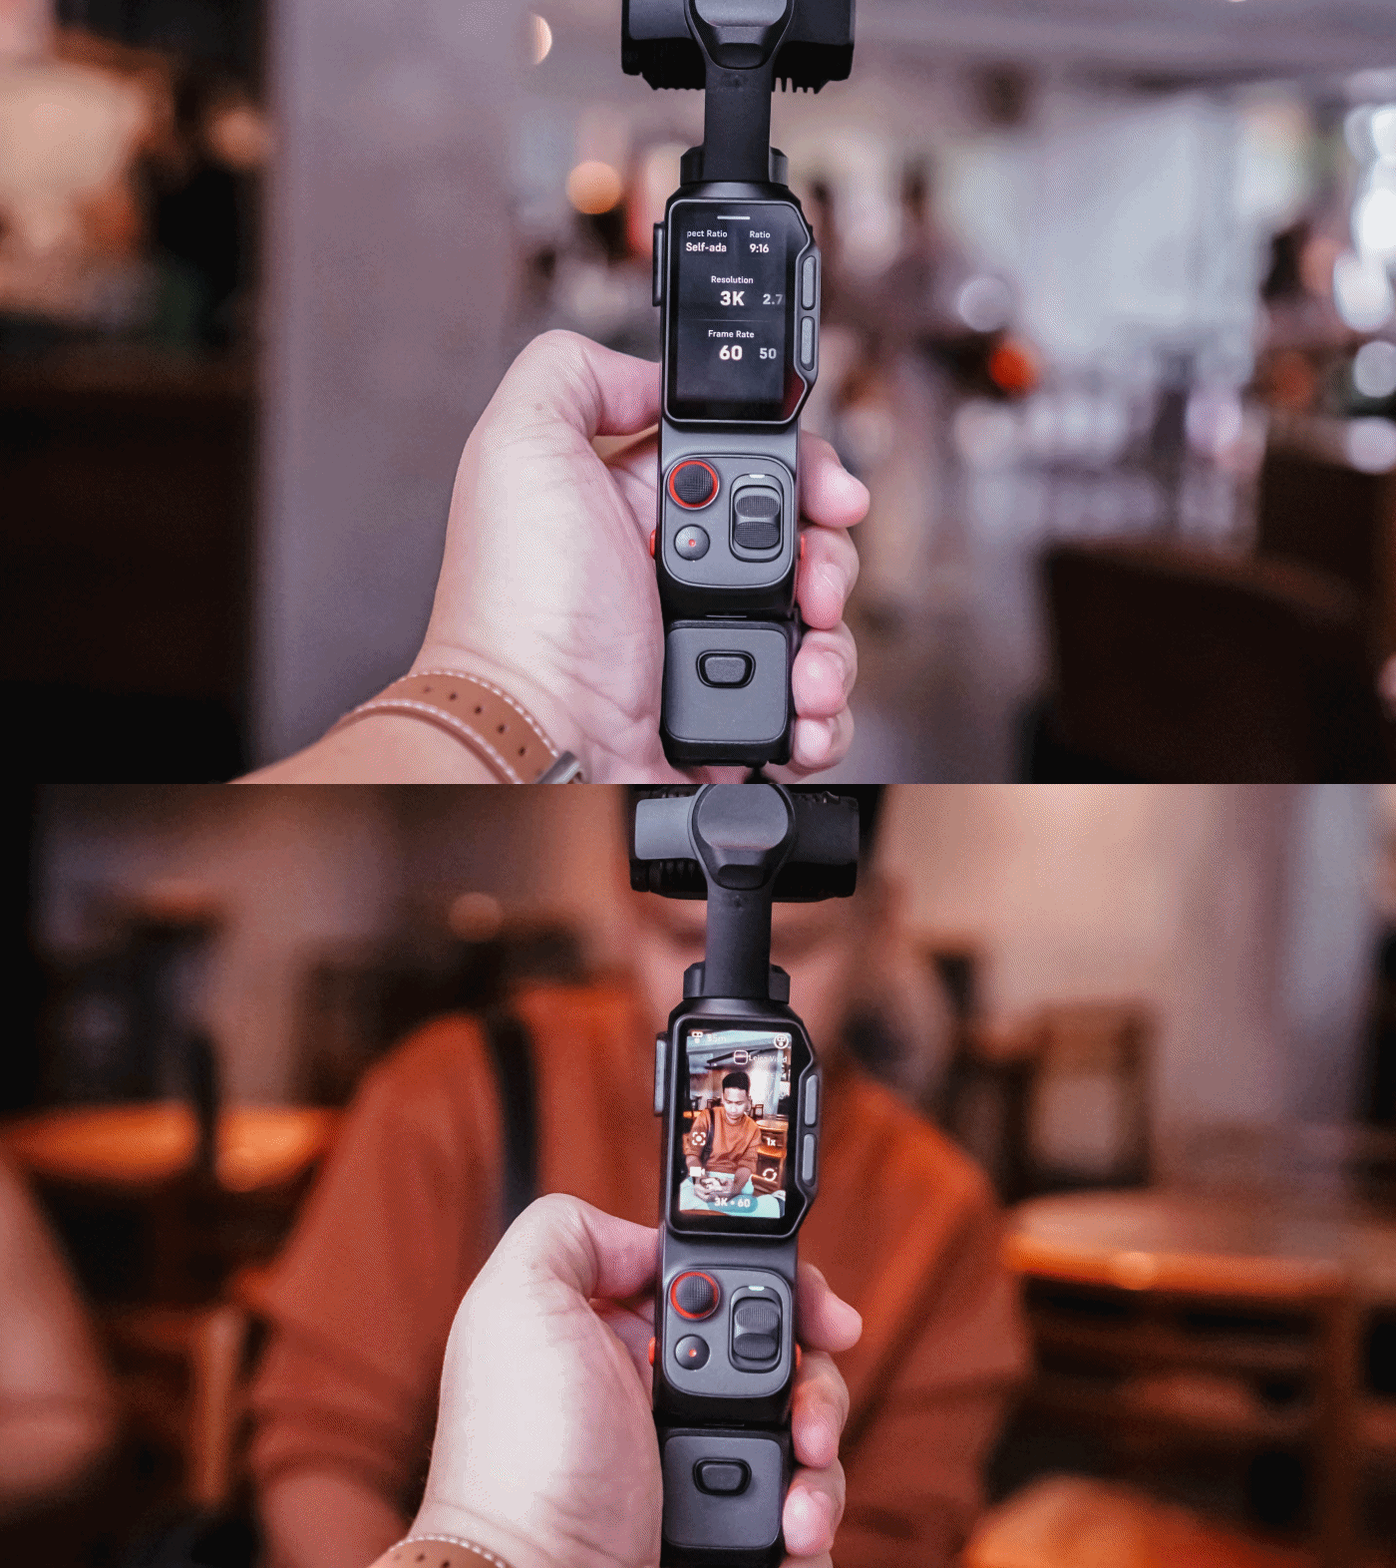
I brought the Insta360 Luna Ultra to three events almost immediately: Samsung Vision AI, the TCL A400 Art Launch, and an ROG event.
That first week was really experimental. I was trying out multiple features of the device for this review. I tried shooting horizontally because it seemed like that’s what the Luna Ultra was made for.
But my work over the past few years has focused heavily on vertical short-form video, so that contributed to the awkward feeling.
I also defaulted to PureVideo after a while because I tend to shoot in really not-well-lit locations. The colors look good as is, anyway.
I experimented with I-LOG, too. That taught me that it should probably be reserved for actual experimental outputs, rather than anything tied to a deadline. Our workflow is built for speed with quality, and I-LOG adds another step that isn’t always necessary for the kind of news-oriented Reels we make.
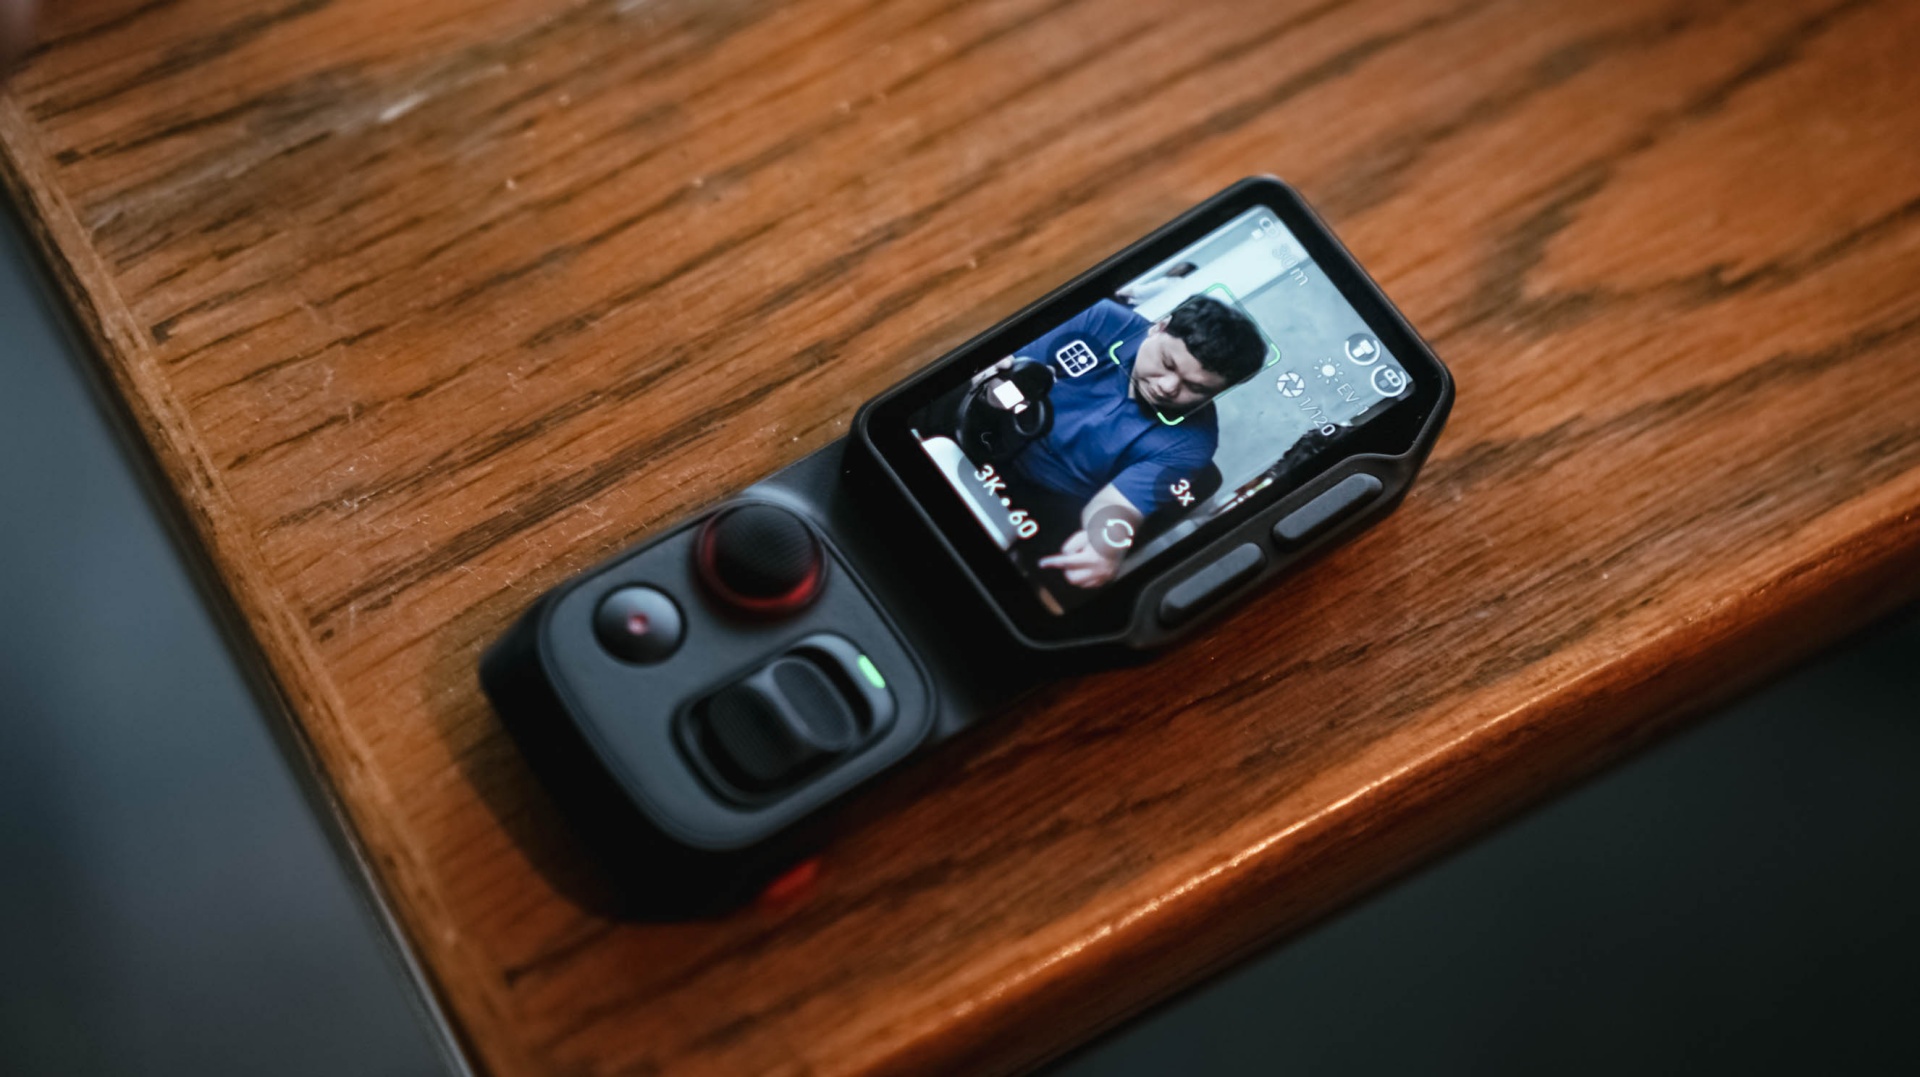
The detachable controller, meanwhile, was a godsend when I’m shooting by myself and want the Luna Ultra to be at a distance. I still had the preview and controls nearby, and that was extremely helpful.
The biggest thing I learned during that first week was that I was trying to speed-run through all of the features instead of figuring out which ones actually made sense for the Reels I needed to make.
It was only when I decided what I actually needed for each coverage that the Luna Ultra really clicked with me.
@gadgetmatchThe best way to test a creator camera? Use it while creating. We brought the Insta360 Luna Ultra to multiple media events to see how it handles real-world coverage. From low-light venues to fast-paced launches. Here’s what we learned so far. Full review coming soon. #Insta360 #LunaUltra♬ original sound – GadgetMatch
Getting more comfortable
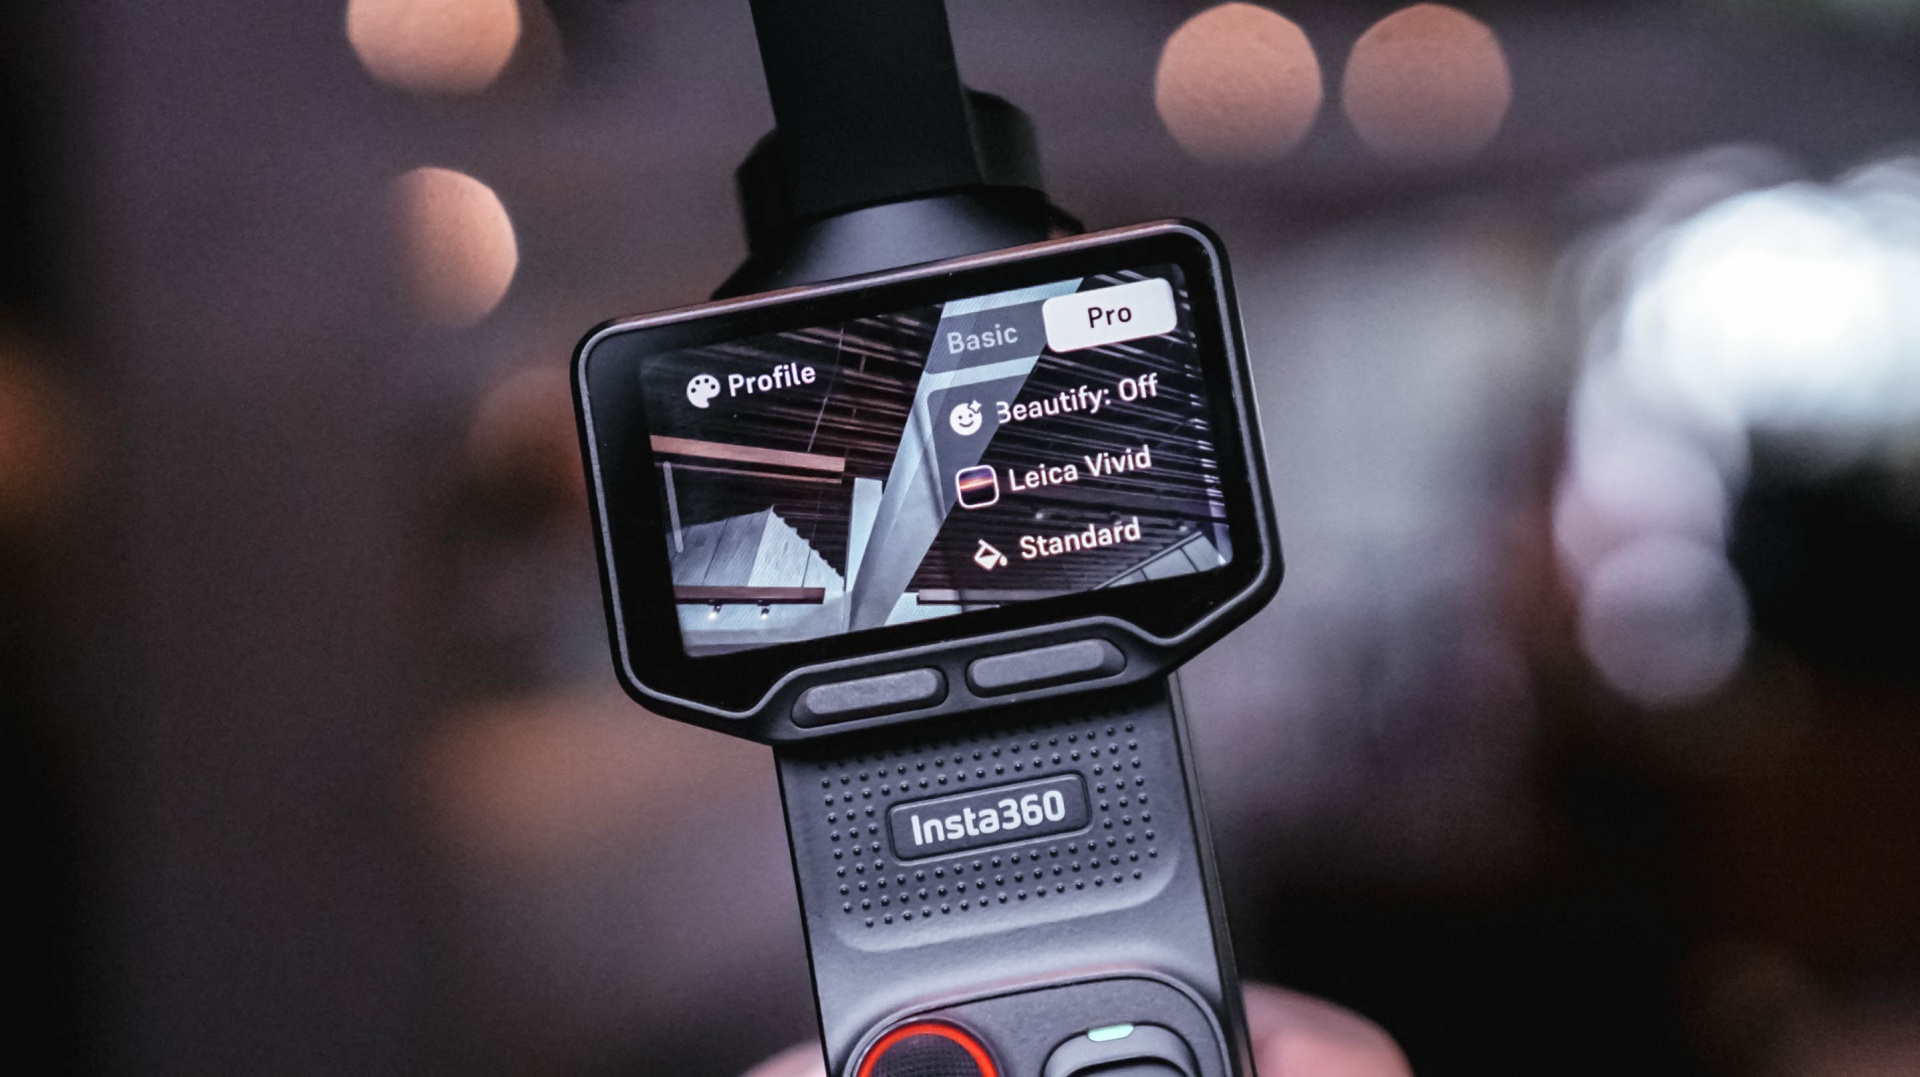
Most of the learning curve came down to overall usage and figuring out how I could maximize the camera.
There’s still plenty that I don’t know about the Luna Ultra. There are camera tricks and shots that can certainly elevate some of my footage. But I’ve decided to lock in on how it’s useful to me during fast-paced coverage and slowly unlock its capabilities as I spend more time with it.
Getting reps with a device is the best way to become familiar and comfortable with it.
For now, I can say I’ve found my preferred base settings that cover most of my needs. The next goal is to slowly level up, learn its capabilities more, and figure out how I can apply them to the Reels I make.
That process continued outside of traditional tech events.
Putting it to work
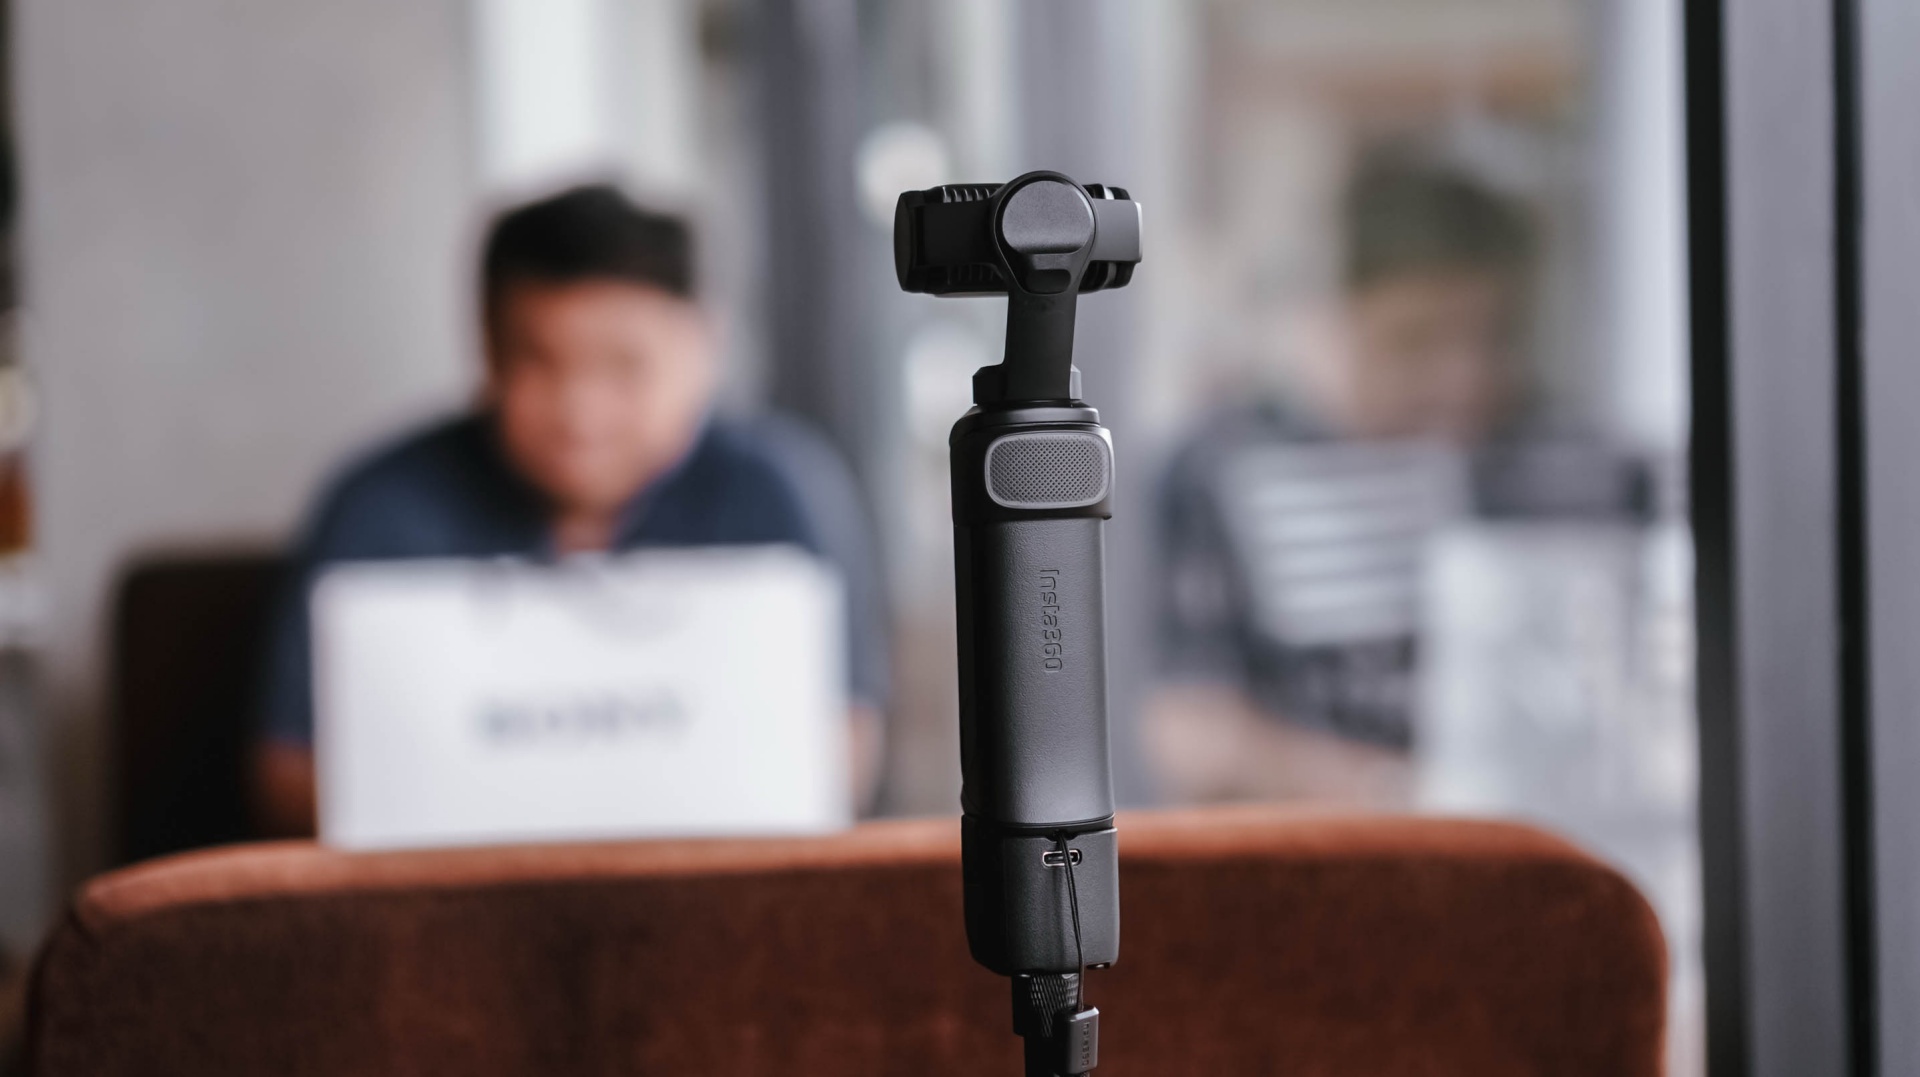
I brought the Insta360 Luna Ultra to a pottery session arranged by Shokz. It was a completely different kind of environment from the launches and media events I usually cover.
For the most part, I just set it up, pointed it at me, and let it roll.
My hands were busy, so I found myself wishing it had a way to automate certain capture features. Hands-free controls would be useful, for example. I’d also love an option to automatically record 30-second clips at a time for a set amount of time.
That would be useful when you’re shooting solo and doing an activity.
It was also around this time that I started figuring out some of the conditions necessary to get the bokeh effect I wanted.
@gadgetmatch Came for the pottery. Stayed for the vibes. 🏺 Featuring the Shokz OpenDots 2, because apparently good audio is required while discovering you have zero pottery skills. #PowerMacCenter @Power Mac Center @SHOKZ ♬ original sound – GadgetMatch
While unboxing the Shokz OpenDots 2 right before the pottery session, I got a sense of the distance needed when using 1x zoom to get that bokeh effect. Not long after, I also figured out the conditions necessary to get that effect with 3x zoom.
That was crucial for the mostly product-focused stuff that I shoot.
The more I used the Luna Ultra, the more I started understanding not just what it could do, but what I could realistically ask it to do during my work.
Then came the real test.
Shenzhen was the turning point
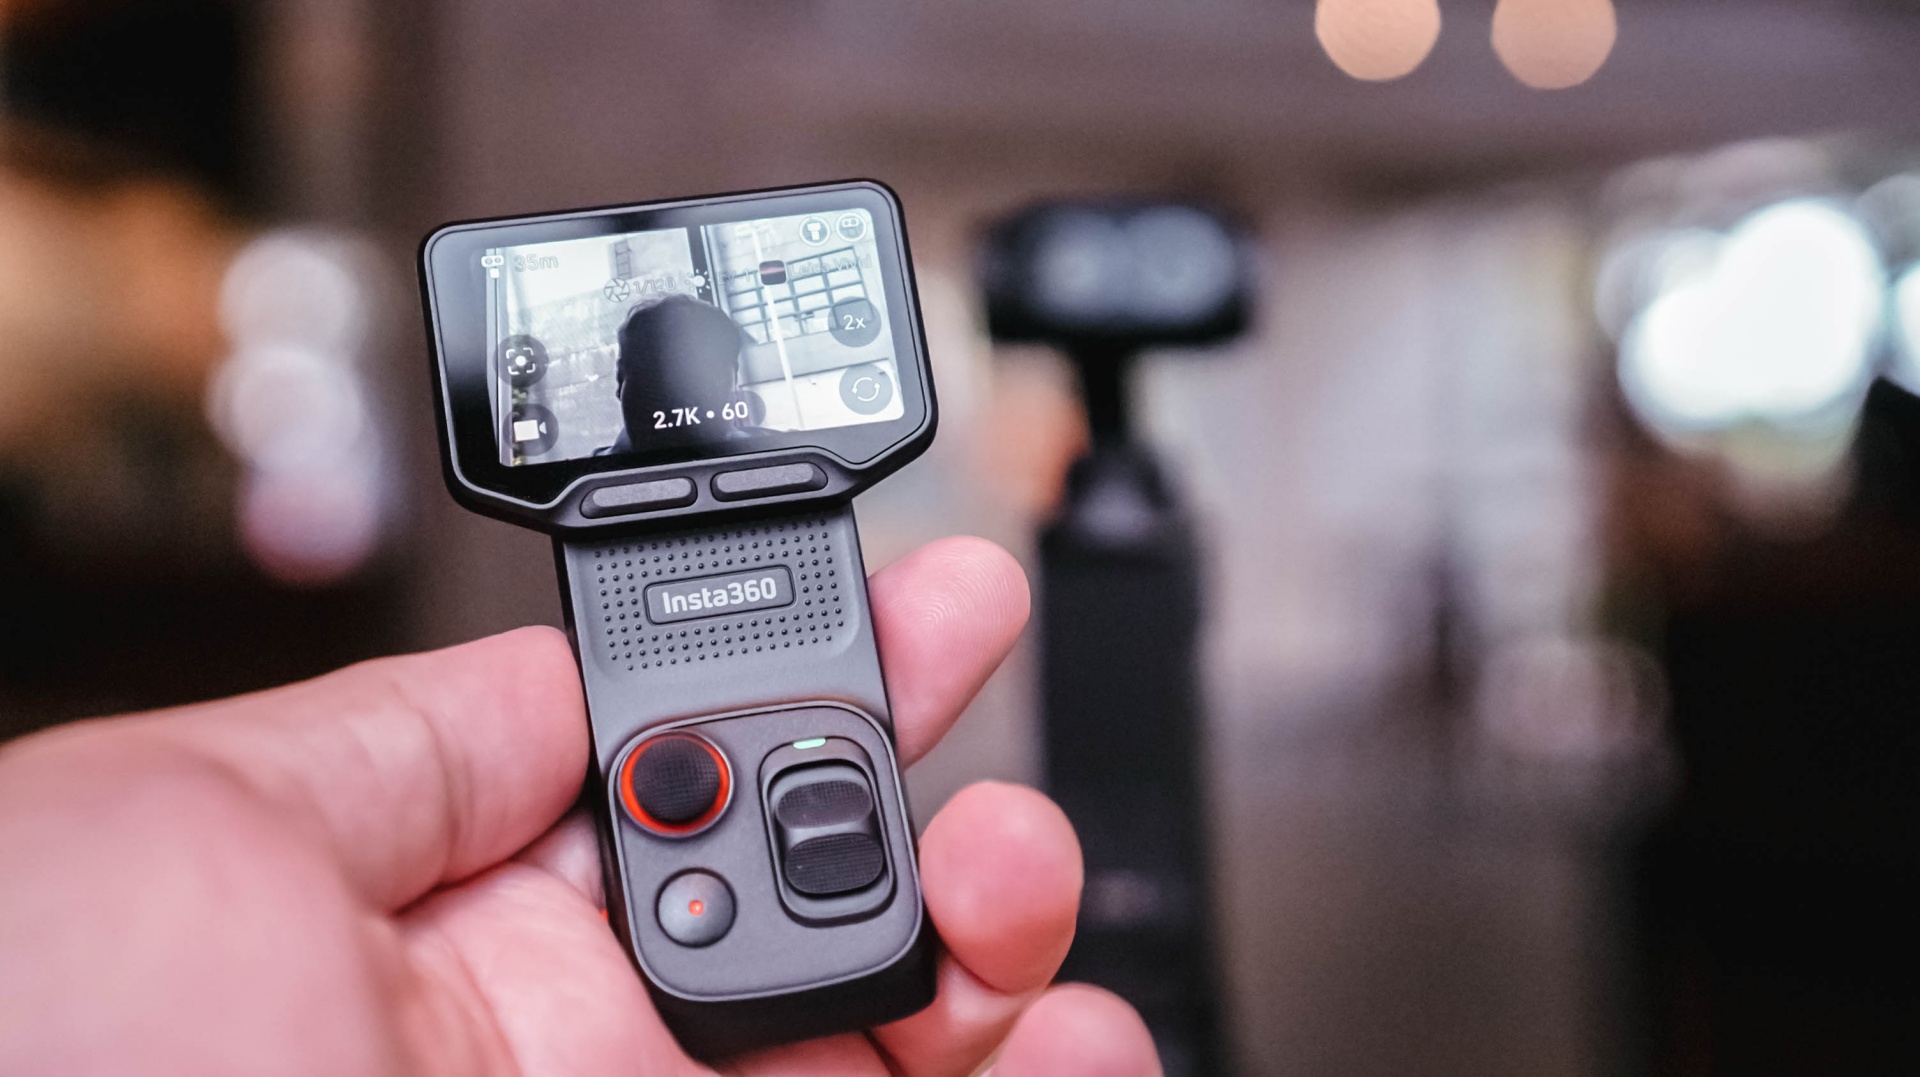
When I went to Shenzhen, China, to cover the launch of the HONOR Robot Phone, I didn’t have my old reliables as a crutch.
It was a make-it-or-break-it situation.
I needed to get as many product shots as possible. I had to show the design of the phone, its mechanical gimbal camera, and what it was like to shoot with it.
And the Luna Ultra was very capable.
The real issue was my unfamiliarity with it.
Once I figured out the settings I needed and narrowed down the shots I had to take, everything flowed rather smoothly.
@gadgetmatch HONOR Robot Phone 🤖📱 ✅ 4DoF mechanical gimbal ✅ 200MP Agile Gimbal Main Camera ✅ 200MP periscope telephoto camera ✅10-bit ARRI LogC3 recording ✅ 50MP ultra-wide camera ✅ Snapdragon 8 Elite Gen 5 Mobile Platform ✅ 7,060mAh silicon-carbon battery #HONORRobotPhone @honorglobal ♬ original sound – GadgetMatch
Some of it still felt unnatural because I’m used to using my camera for both photo and video. This time, I focused on shooting video with the Luna Ultra and used a flagship smartphone for the photos.
That whole setup still needs refinement, but I feel like I found a workflow I can lean on.
Most importantly, I got all the shots I needed.
Any challenges I faced were mostly due to the shooting environment and my own general familiarity with the Luna Ultra. As for the tool itself, it was fantastic.
The moment that really solidified this for me was when I started reviewing the footage and saw that many of the shots came out better than I expected.
That’s when I realized I could actually use this as my coverage camera.
View this post on Instagram
A different kind of coverage camera
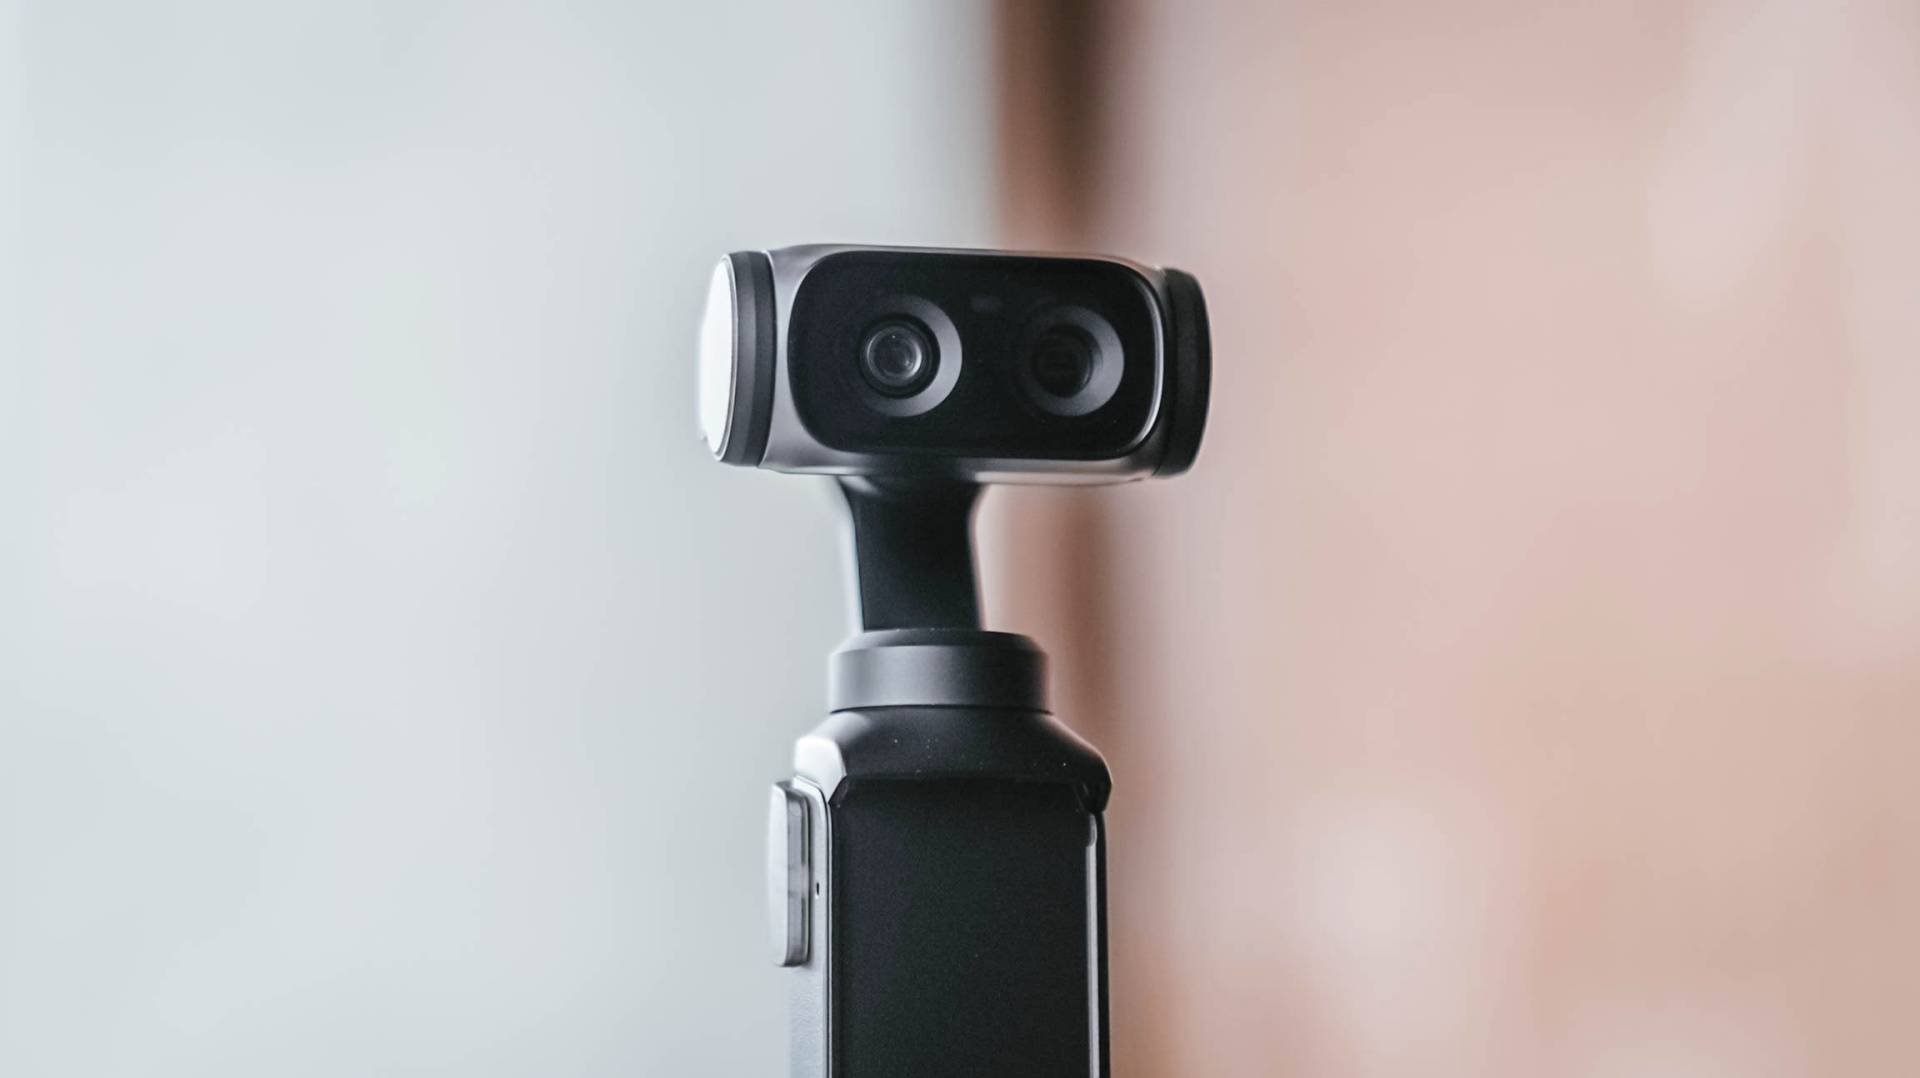
My usual event workflow is pretty straightforward. I secure the device, then get as much footage of it as possible from different angles, show different use cases, and capture its features as quickly as I can.
The Luna Ultra fit into that workflow better than I expected.
For one, I can include myself in the frame while still being able to preview what I’m shooting. That’s something I couldn’t easily do with my old reliable setup.
It’s also much lighter and thinner, making it easy to position in ways I couldn’t with my old setup.
I think the video quality is overall better than the smartphones I use, too. The bokeh I get is also natural.
That doesn’t mean my Sony a6500 is suddenly obsolete.
I think dedicated mirrorless cameras, paired with the right lenses, just have a certain look to them that I generally prefer. I’d definitely still reach for the a6500 for photos and shoots where I have a team with me.

But for solo coverage, my go-to video gear will now be the Luna Ultra.
That’s the biggest change for me.
The Luna Ultra didn’t necessarily change what I consider worth shooting at an event. That’s still a case-by-case thing.
Instead, it enabled me to shoot better even when I’m on my own, which honestly isn’t always the case.
There’s still room to grow
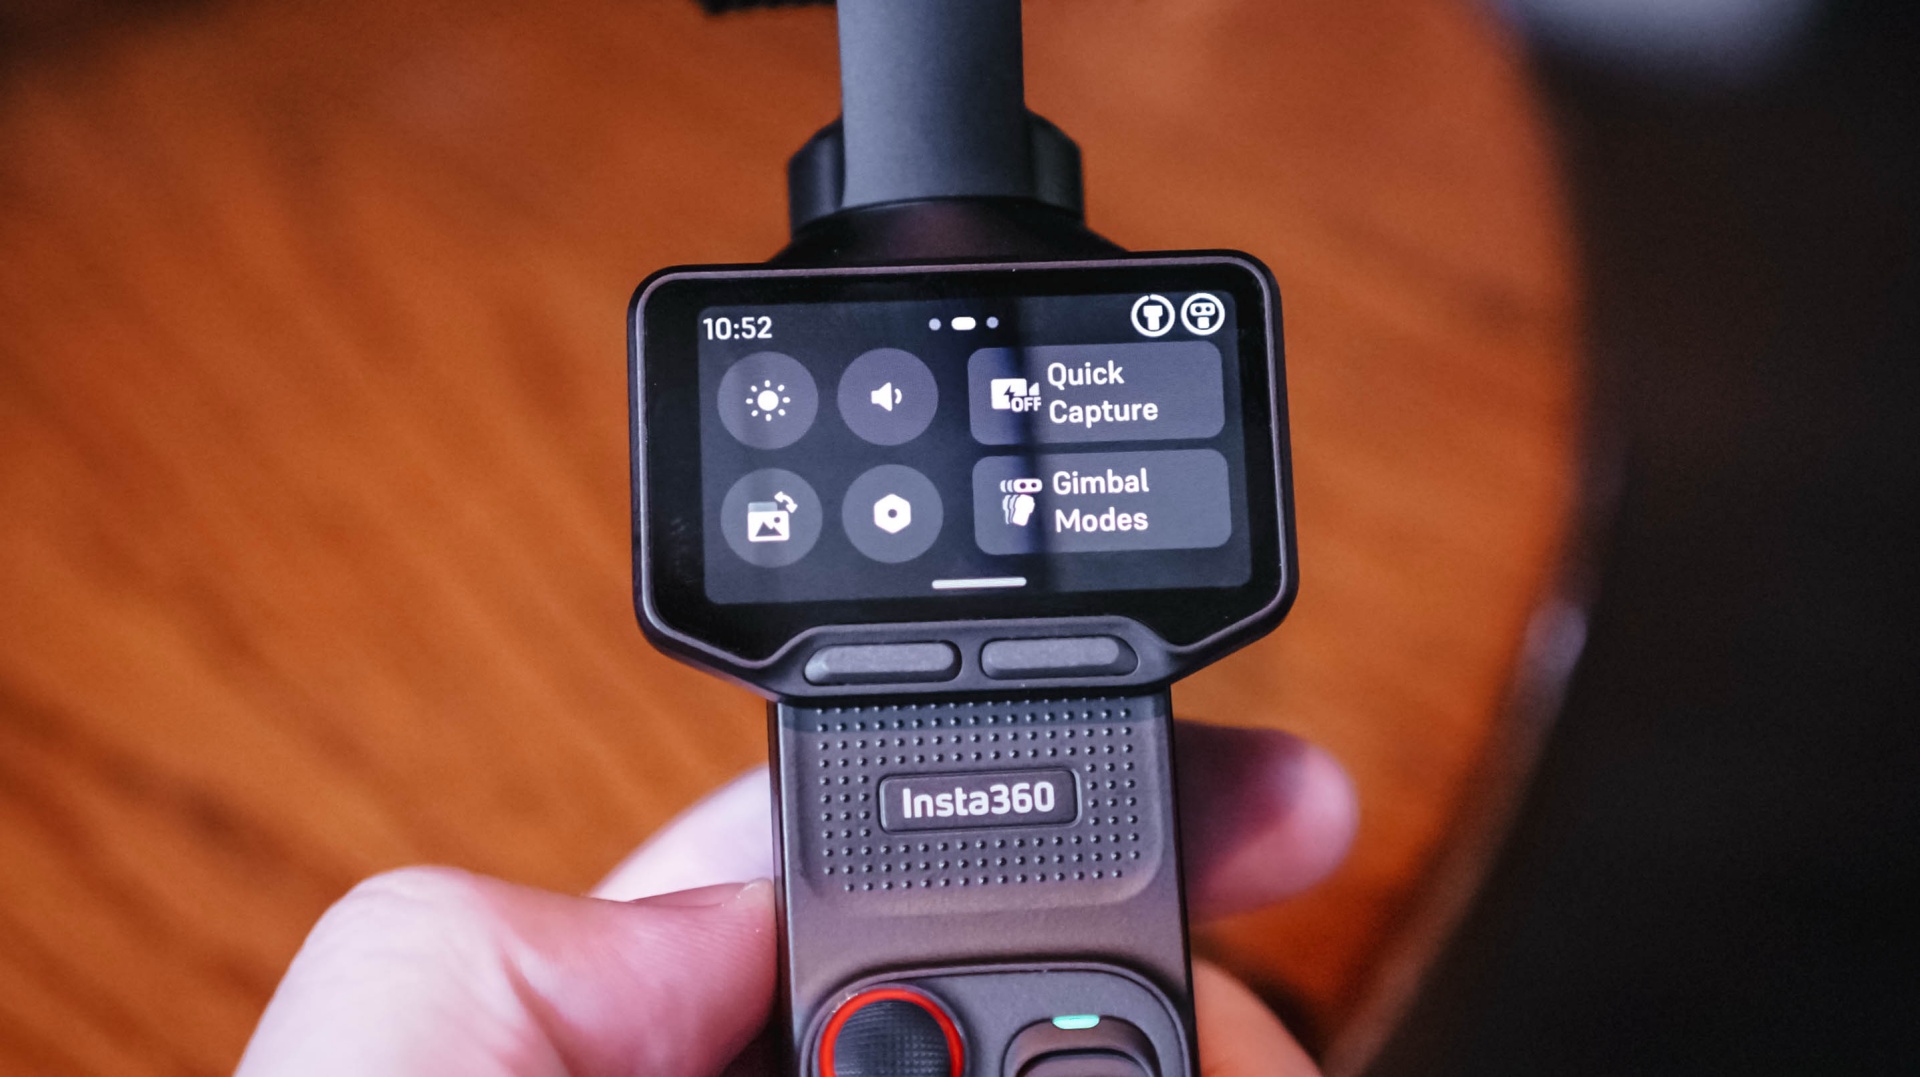
I don’t think I’ve come close to unlocking everything the Luna Ultra can do.
I-LOG is one obvious example. But that feels like something for a different type of project rather than the generally news-type Reels we do.
Our workflow is built for speed with quality, and the Luna Ultra, even when using its basic settings, fulfills that.
I definitely want to try more experimental shots, more shots with movement, and the like. I just haven’t found the right opportunity for them yet.
There are also some things I’d like to see improved.
As mentioned earlier, hands-free and preset shooting automations could help, especially for solo creators. That could make it easier to capture activities without having to comb through too much footage with enormous file sizes.
I also wish it had some form of open-gate recording. That would give the footage more versatility and make it easier to use the same footage for multiple aspect ratios.
And while the Luna Ultra is now my preferred tool for solo video coverage, I’d still choose the a6500 for photography or when I have another team member shooting with me.
Is the Insta630 Luna Ultra your GadgetMatch?
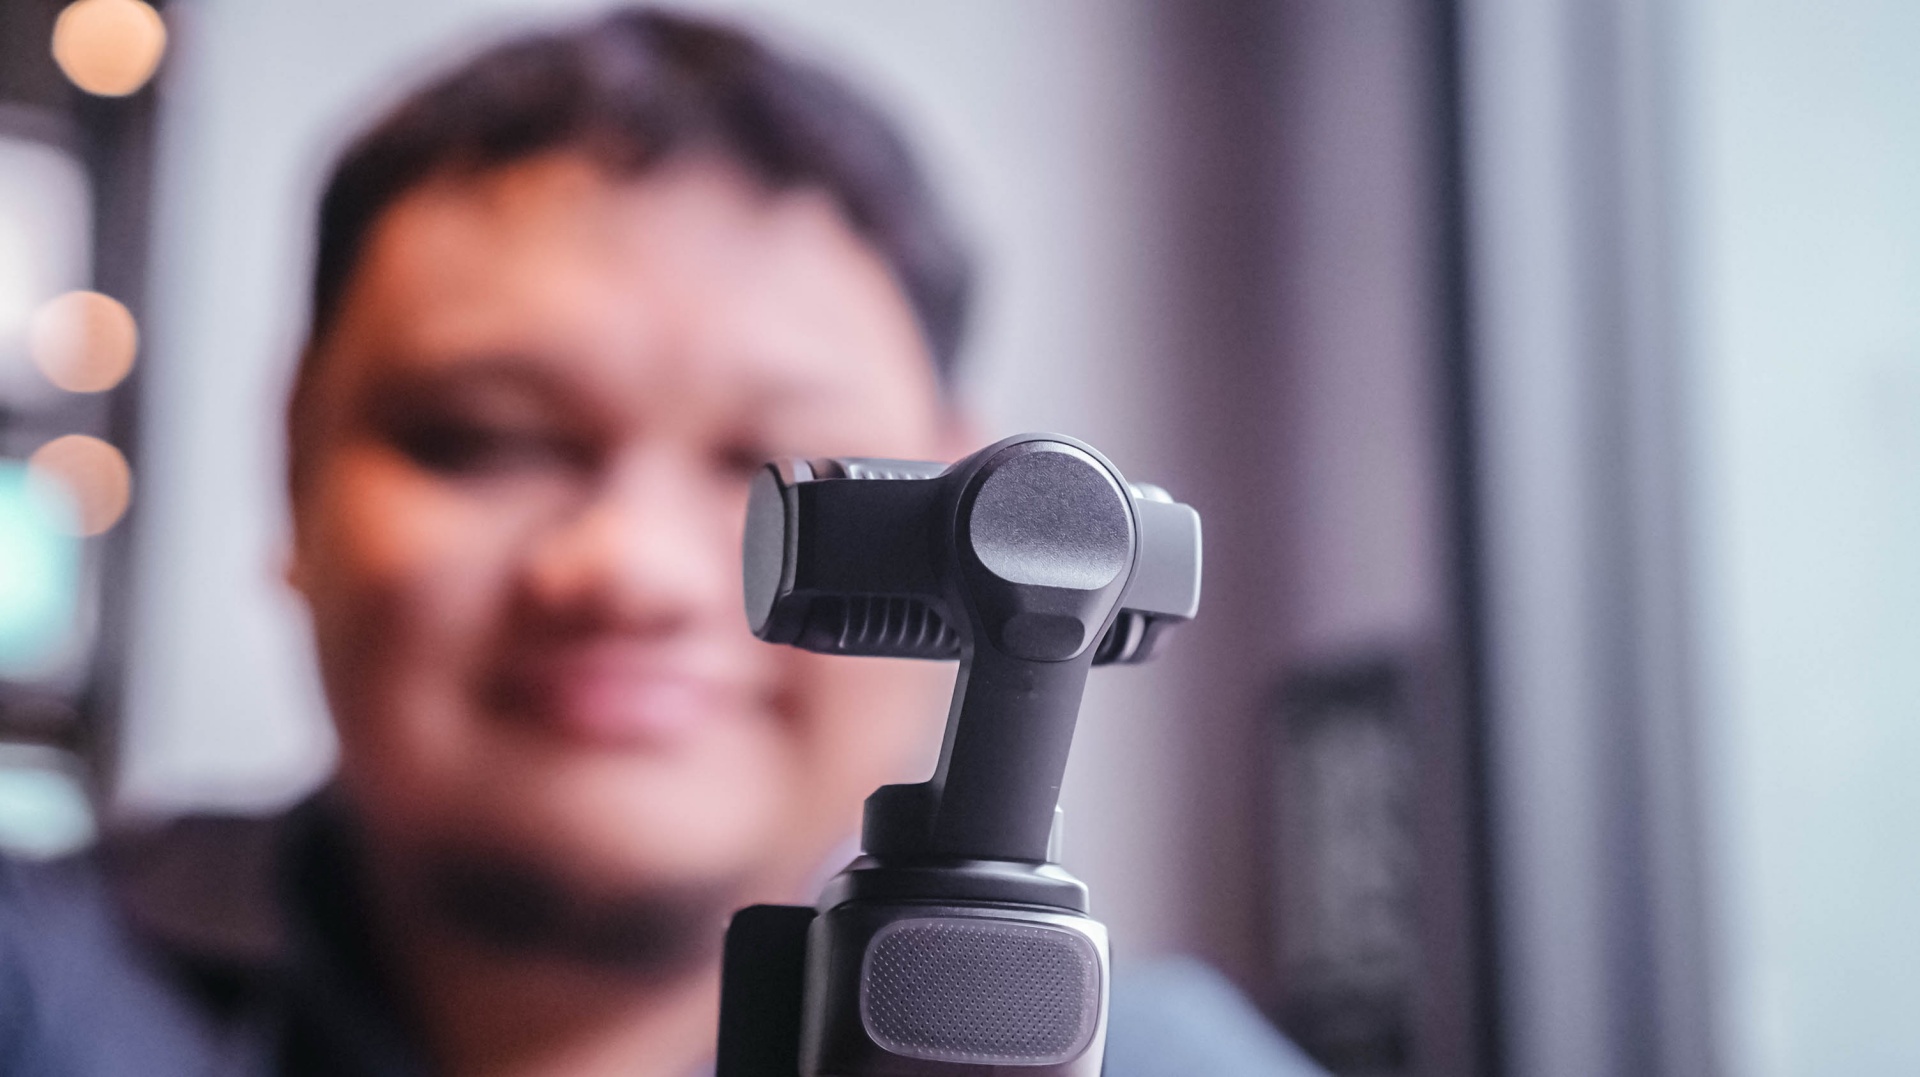
For anyone looking for a dedicated video-taking tool.
Content creation focused on video has skyrocketed. If you’re part of that movement, the Insta360 Luna Ultra is certainly a good investment to add a little extra to your videos.
It’s fairly easy to use, but it also supports deeper features that can elevate your footage and your content.
I think you should consider the Luna Ultra if you want to upgrade from shooting primarily with a smartphone, or if you want a video-shooting device that’s much easier and lighter to carry around than most traditional mirrorless cameras.
For me, the answer is a little more specific.
It’ll be my go-to now, especially for solo coverage trips.
If you asked me to leave just one camera at home tomorrow, though? Oof. Just one?
Maybe still the a6500. It’s hard to break a habit.
But the Luna Ultra is a very close second.
Still discovering what’s possible
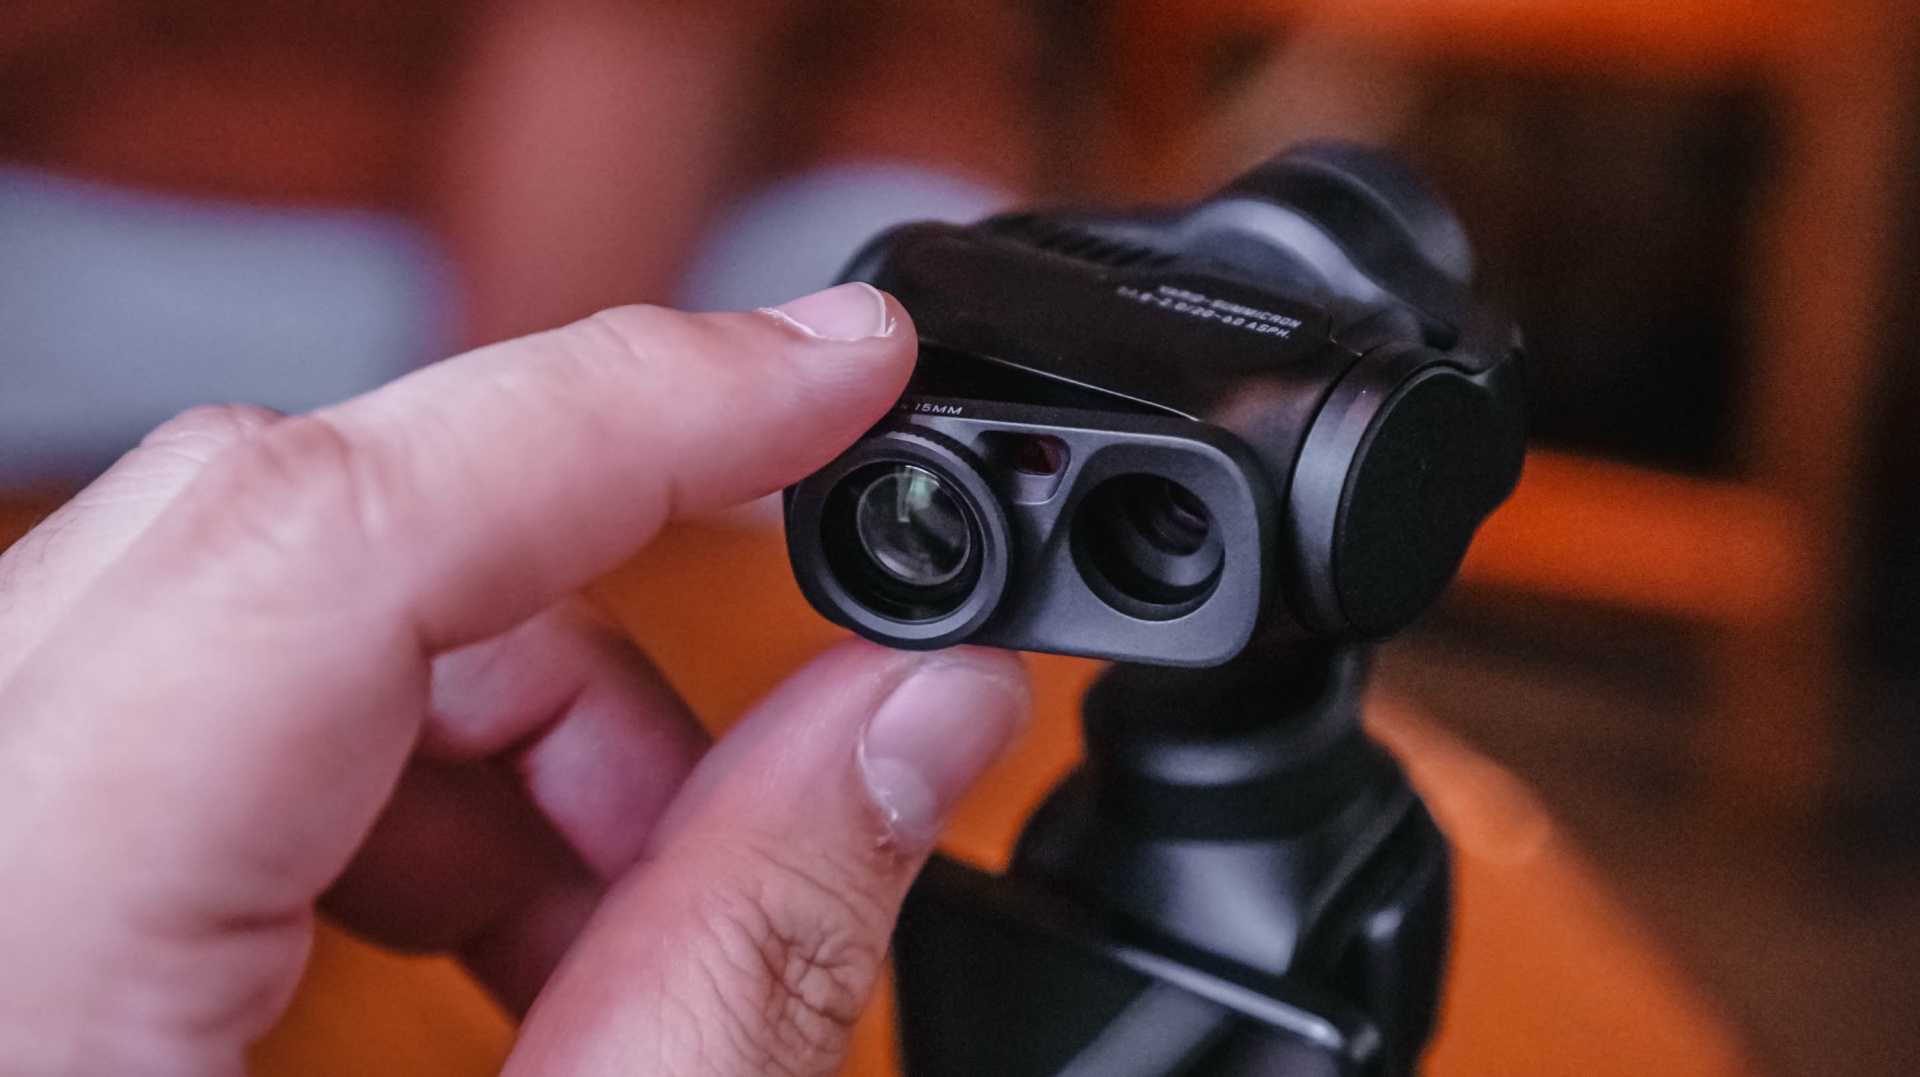
After using the Luna Ultra for all of this, I think it’s opened up new possibilities for the way I personally handle solo shoots.
It’s unlocked certain shots for me, and I haven’t even used it to its full potential.
That’s what excites me most.
I already found a workflow that suits the way I cover events. I already know I can leave my old reliable behind when the priority is video.
Now I want to see what happens when I actually learn everything else the Luna Ultra can do — that makes this an easy Swipe Right for me.
Pricing and availability
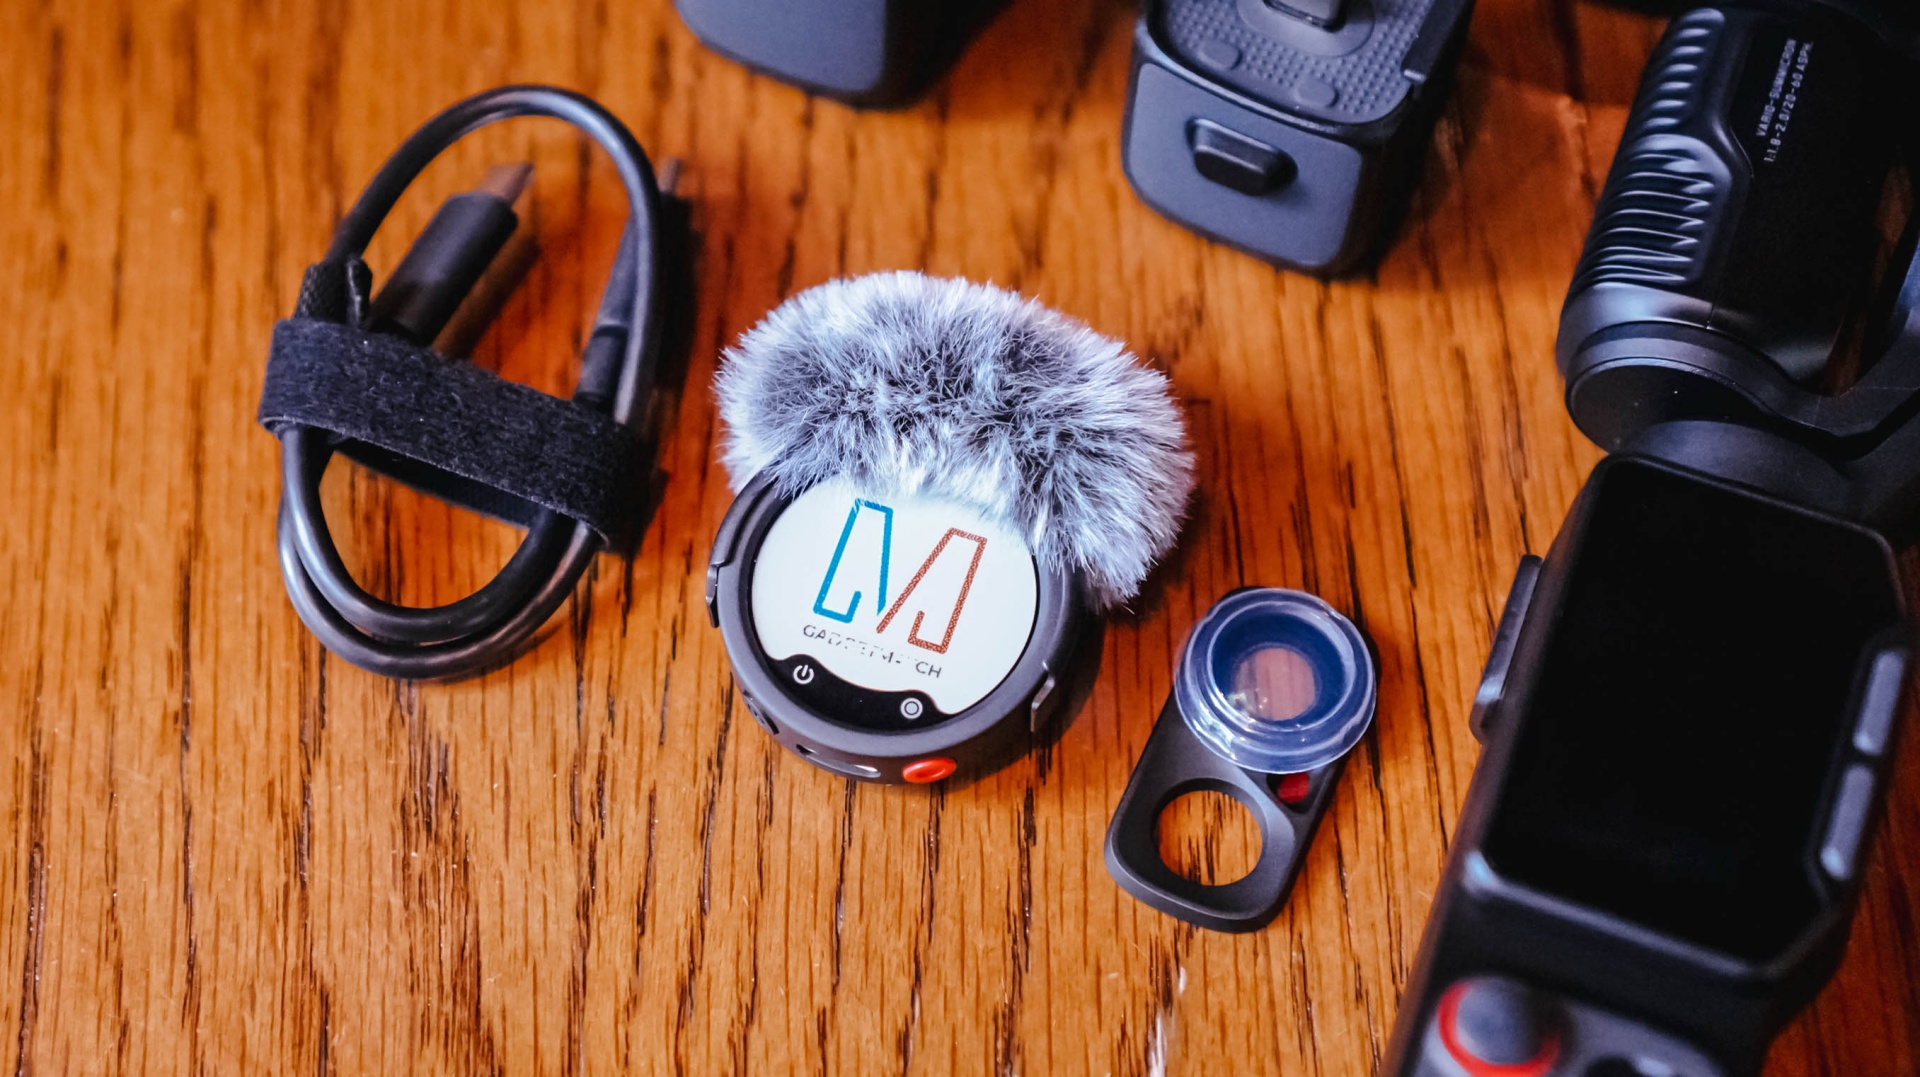
The Creator Bundle comes with the Insta360 Mic Pro which is great but I haven’t had the chance to use all that much because I am not a yapper on video.
The Insta360 Luna Ultra starts at US$799 (₱46,790) for the Standard Bundle, while the Creator Bundle retails for US$999 (₱59,490). It is available now through Insta360’s official channels and authorized retailers.
-
 News2 weeks ago
iPhone 18 Pro series: Price, availability in the Philippines
-
 Singapore2 weeks ago
iPhone 18 Pro series: Price, availability in Singapore
-

 News2 weeks ago
iPhone Duo: Price, availability in the Philippines
-

 News2 weeks ago
iPhone Duo: Price, availability in Singapore
-
 News2 weeks ago
vivo introduces refurbished versions of X300 FE, X300 Ultra for less
-

 Accessories2 weeks ago
CASETiFY upgrades iPhone 18 cases, teases iPhone Duo lineup
-

 News2 weeks ago
HONOR teases Magic9 Pro Max at Venice
-

 Editors' Choice2 weeks ago
GadgetMatch Awards: Best of IFA 2026