
Reviews
adidas SL20 review: Feel like running as fast as The Flash
adidas’ best running shoe so far!

About a month ago Adidas released a new running shoe called the Adidas SL20 — this shoe was part of the recent Adidas “Faster Than” campaign where they talked about how being “fast” is not something that’s only reserved for elite runners, and that speed isn’t always just about distance and time.
Instead, Adidas emphasises that “fast” is more of a personal feeling, which everyone can experience, even if you don’t think of yourself as a “fast” runner. They backed this up with a series of videos from all types of people, who run just because they enjoy it.
I have been really intrigued about this shoe because I saw a bunch of people post about it in the Adidas Runners Kuala Lumpur group. As you might already know Adidas has their own Runners group in major cities around the world and they can be super useful to keep you motivated — like right now in Malaysia we’re under a lockdown because of the current pandemic.
All runs are on pause but the Adidas Runners KL group has been posting live workout at home sessions which is pretty good and definitely motivates you to stay in shape and workout even from home.
Starting with a bit of a history lesson, the SL20 is a spiritual successor to the ol’ Adidas SL72 that dropped way back in 1972. This was a shoe that was designed to be used in the German Olympics at the time, and was worn by a bunch of athletes back then.
SL stands for “Super Light” and it lives up to its name. With the SL20, Adidas designed a lightweight running shoe that is meant to cater to all types of runners, and all speeds, made just for anyone who wants to feel fast. It weighs just about 238 grams, making it one of the lightest running shoes around. Though it is slightly heavier than the Adios 5.
You realize this from the second you slip these on. The SL20 is a shoe that just makes you feel fast, and you really feel like running when you’re wearing them which is a really good thing for a running shoe.
This is my first pair of really lightweight running shoes. If you’ve never worn a pair of lightweight running shoes before, this will feel like a whole new dimension. That being said, I should mention that these are meant more for short, fast runs rather than long-distance ones.
Design and Construction
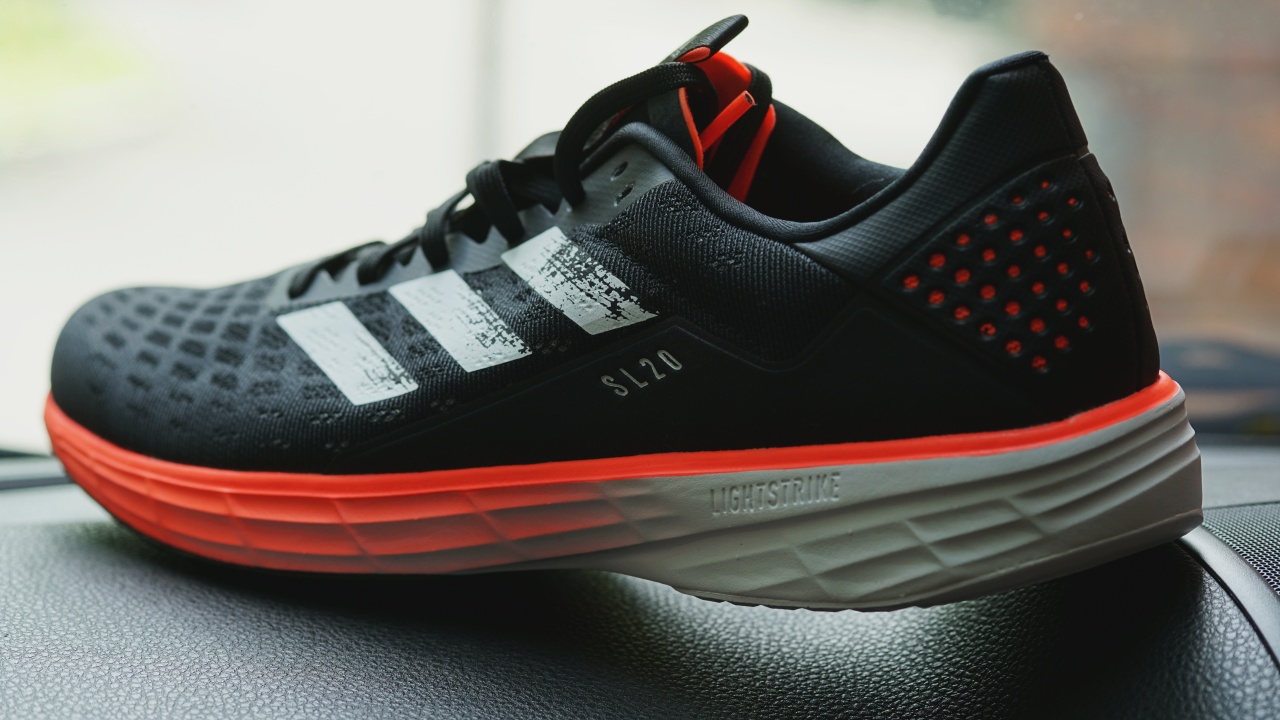
When you first pick up the SL20 it’s very clear that the choice of materials was meant to make sure the shoe is as light as possible. There’s a new Light Strike midsole which is much lighter than Boost. But it also has the torsion system, a heel counter, and Continental just like what you’d find on the much more expensive Adidas Ultraboost, which is sweet.
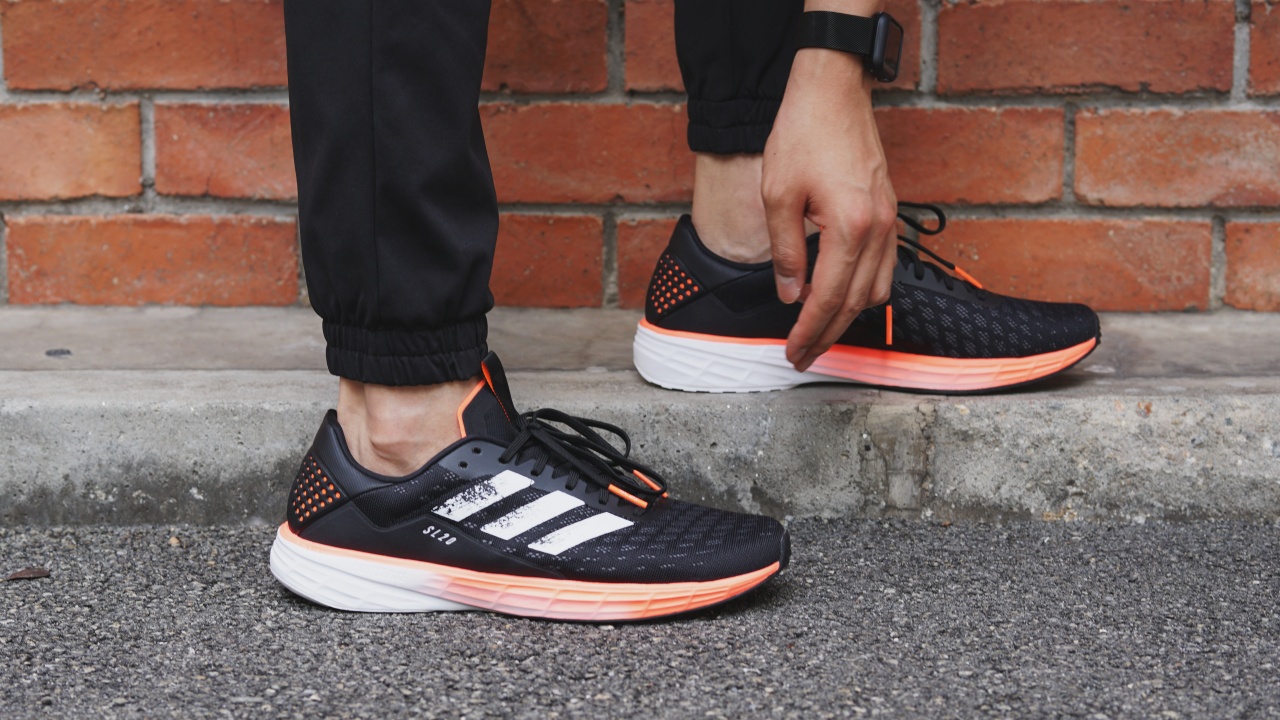
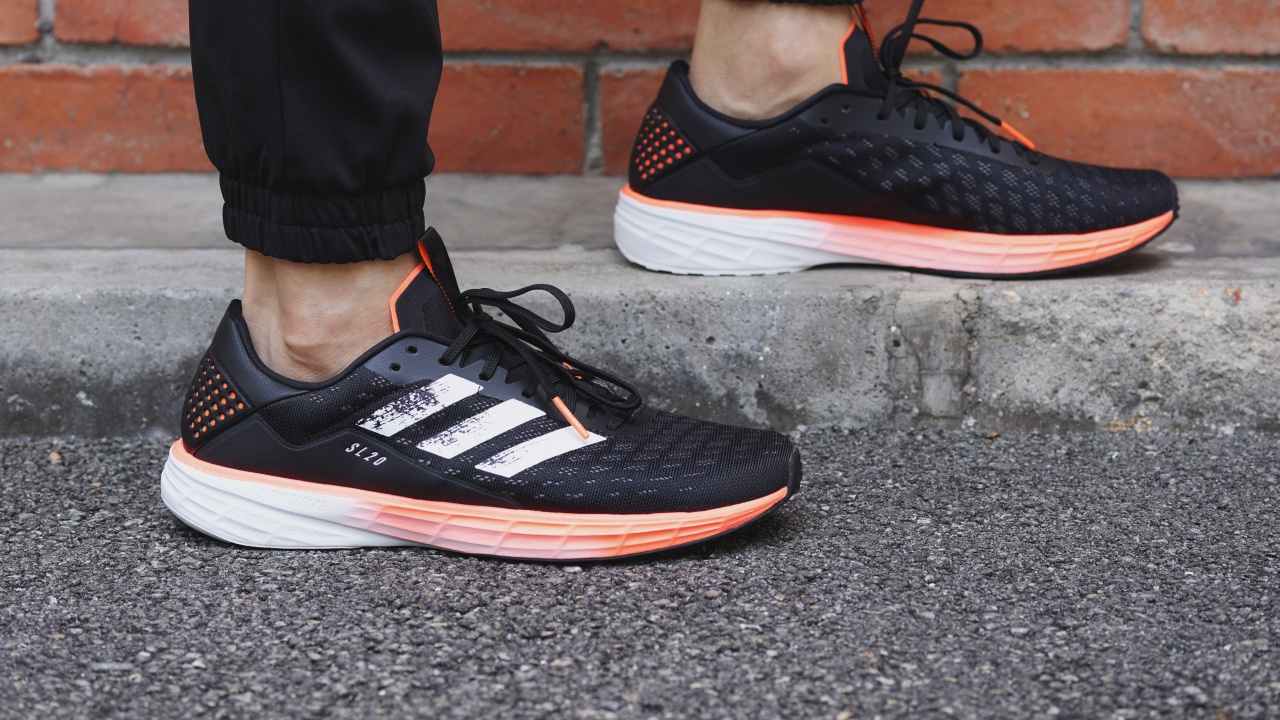
You can see we got the awesome Black-White-and-Orange colorway which is the main marketing colorway for the SL20.
The shoe also comes in a cool black-white-and-gold colorway, along with a more formal all-black colorway as well in case you want something a little more low-key.
Starting with the upper, the SL20 is made of an engineered mesh material which feels extremely thin and a major contributor to the whole lightweight nature of this shoe.
The material seems tough enough but as with any shoe with a thin, breathable upper you’ll want to make sure you wear thicker socks or keep a close watch on your toenails, so you don’t end up accidentally poking through it.
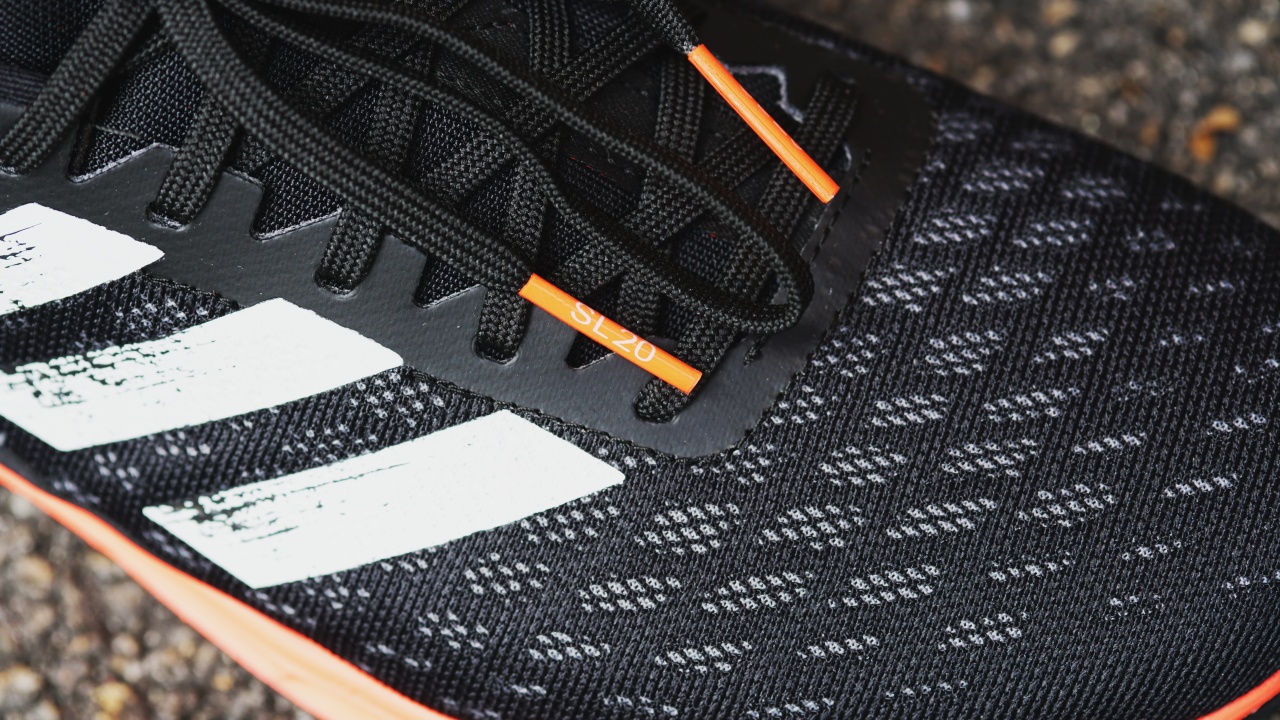
Similarly, the tongue also has no padding, being just a thin piece of lightweight fabric. The laces are also pretty soft and there are two extra eyelets up top in case you want an even more snug fit.
One small detail that I really liked was the SL20 branding on the lace tips that is color matched to the three stripes on the shoe.
I also noticed that the lacing is also slightly asymmetrical with a bias towards the medial side which helps with that lockdown feeling, and medial support.
Moving on to the heel area, the SL20 has an integrated heel counter which means that unlike the external heel counter which you’d see on the Ultraboost 20, this one is all internal. The heel counter is made of a hard material which allows you to easily slip your foot into the shoe, but also does a great job at locking your heel into place.

Coming to the midsole, as mentioned earlier, it’s made out of a new material called “Lightstrike ” which is significantly lighter than Boost, which most of y’all have probably heard about. But I’ll talk about the midsole later on.
Underneath that, you have the Continental stretchweb outsole with the red torsion propulsion system integrated into the sole. This gives the shoe more structure and control.
Then there’s the heel, which is more stiff and supportive but I’ll talk about the entire midsole and outsole later on. And for those of you who aren’t as familiar with Adidas sneakers, yes it’s that Continental, the tire maker.
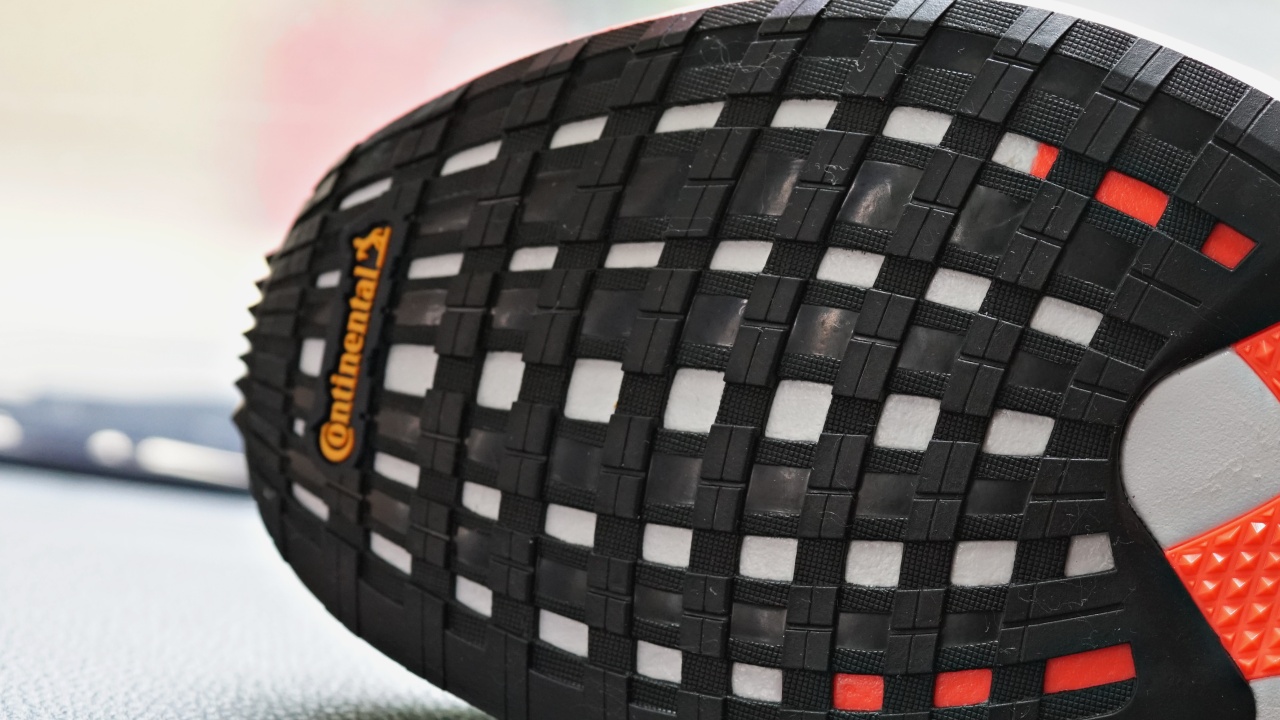
All in all it’s a great looking shoe, with a lot of visual attention to detail in its design.
Quite snug, go up at least half a size
In terms of fit, the SL20 is supposed to fit true-to-size but it’s a bit of a narrow shoe with a rigid toe-box. Since I have wide feet, Adidas sent me a size up which fits pretty well. I’d definitely advise trying these on in a store if you could, because the engineered mesh upper here is not a very stretchable fabric.
So if you have wide feet like I do, you might want to go up half a size or even up a full size. In case you were wondering, the heel-to-toe drop here is the usual 10mm with a stack height of 29/19.
The light in Lightstrike is truly light
Coming to performance, as I have mentioned — the SL20 feels incredibly light, and you feel it immediately as you start running with them. The engineered mesh upper is weirdly lightweight as if it’s not even there, and the new Lightstrike foam has a good amount of energy return as well.
The Lightstrike foam itself is pretty interesting. It was originally designed for use in basketball shoes, with the thought being that the foam would have enough cushioning, lightweight, but still be very responsive with some court-feel especially with the kind of lateral movement you see in basketball.
It was first introduced in 2018 in the signature sneakers of former NBA MVP James Harden, before also moving on to the Adizero series of running shoes.

With this purpose in mind, Lightstrike is slightly harder than Boost cushioning, sacrificing some of that soft comfort for better energy return instead. This cushioning, along with the lightweight upper, is the reason why you want to go faster in these shoes.
I found myself running slightly faster with these on, and I’m not even sure why. Maybe it was just a psychological feeling of wearing such lightweight shoes, or maybe it’s the overall package of the SL20.
The Torsion system allows for a nice, springy toe-off, and also helps with the energy transition from heel to toe, allowing your foot to go back into its normal state during each strike, and the heel counter keeps your feet firmly locked in.
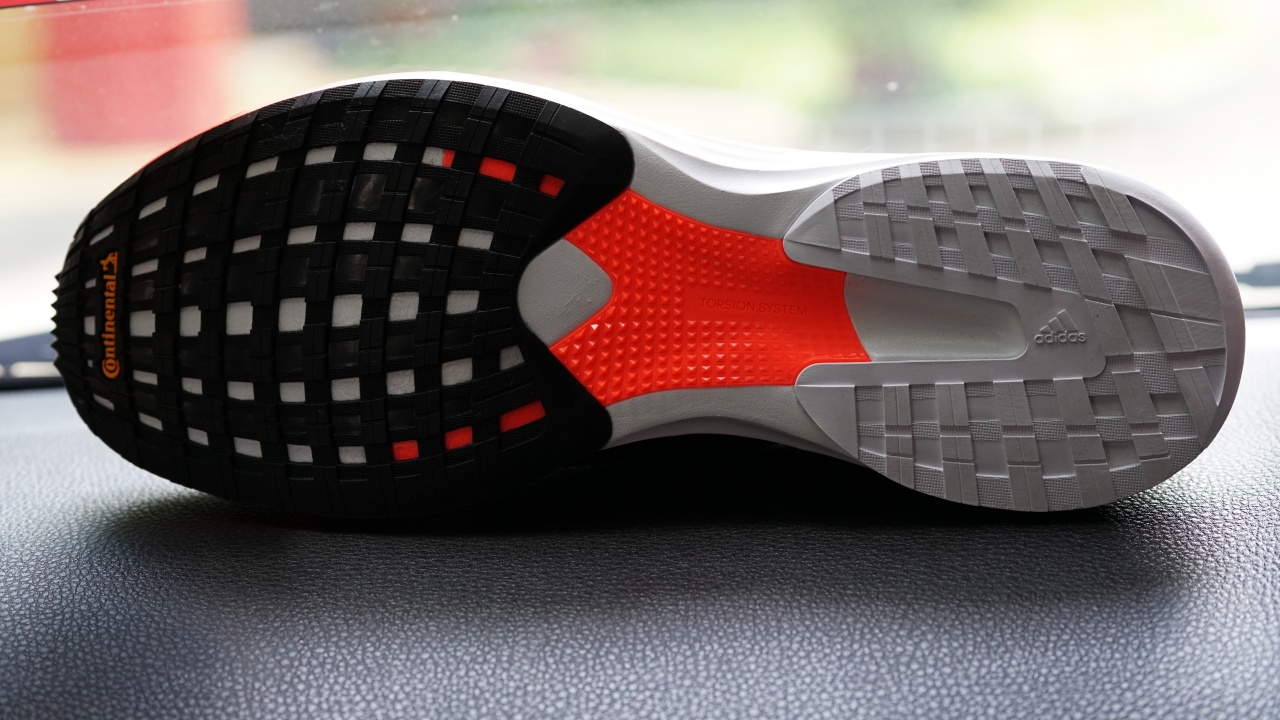
The slightly harder midsole does mean these are best suited for short distance runs. You could still wear them for long distance or marathon running, but the Lightstrike foam midsole is not as soft a cushion as one would like for a long distance running shoe.
For sprints and everyday jogs, the SL20 is freaking fantastic. But for long distance runs, you might want to check out the Ultraboost 20 or even the ASICS GEL-Nimbus 22 instead.
These shoes really are a lot of fun to run in because they’re just so darn lightweight, with great energy return, that push-off sensation really is amazing so maybe some of y’all might actually like them for long distance runs as well.
Coming to the SL20 outsole, it’s worth noting that you can also feel any stones or pebbles under your foot with these so they really aren’t meant for off-road or cross country runs either — just a road or street runner.
The Continental stretchweb outsole is a great addition, just like what we’ve experienced on Ultraboost for a while now. These are some of the grippiest rubber outsoles around and this means running on even wet roads is not an issue.
I wouldn’t recommend testing these out on icy streets. I’m always paranoid about falling where ice is involved because I’ve only lived in tropical weather countries, but apart from that, the outsole has no issues gripping and keeping traction even on the rainiest of days.
Overall the Adidas SL20 falls more in the stable end of the spectrum, compared to many other lightweight running shoes. While I still think of it as a neutral running shoe, it has a pretty reasonable amount of stability.
Is this your SneakerMatch?
The Adidas SL20 is just a fantastic running shoe designed for runners who want to run fast. It doesn’t matter what your definition of fast is, because this pair will honestly just make you feel fast when you’re running with them.

If you’re looking for a pair of lightweight running shoes, this is pretty much one of the best options out there right now.
The only real alternative comes from Adidas itself — the Adidas Adizero Boston 8 and the Adidas Adizero Adios 5 — both of which look very similar now to the SL20.
All three belong to the lightweight running shoe category, and they weigh almost the same but the primary difference is their uppers and midsoles, and how they feel when running. Both the Boston and Adios have slightly more premium upper construction, and both have Boost in the midsole, which also means they cost a lot more than the SL20.
The Adios feels more like a racing shoe and offers the least in terms of comfort, whereas the Boston is more of an all-round running shoe. It’s firmer and harder than the SL20 but also softer and more comfortable than the Adios.

Out of all three, I think the SL20 is the most comfortable, though of course not as comfortable as the heavier SolarBoost or Ultraboost sneakers.
Bif you’re looking for a lightweight running shoe to get you started with running or just to be your first lightweight running shoe, I think the SL20 is for you. Even if you are a trained runner who wants a secondary pair of “fast” shoes — these are definitely for you.
The Adidas SL20 is just for anyone who wants to feel fast, without shifting too far away from a comfortable daily running shoe, but still wanting a pair of lightweight running shoes.
Definitely recommended.








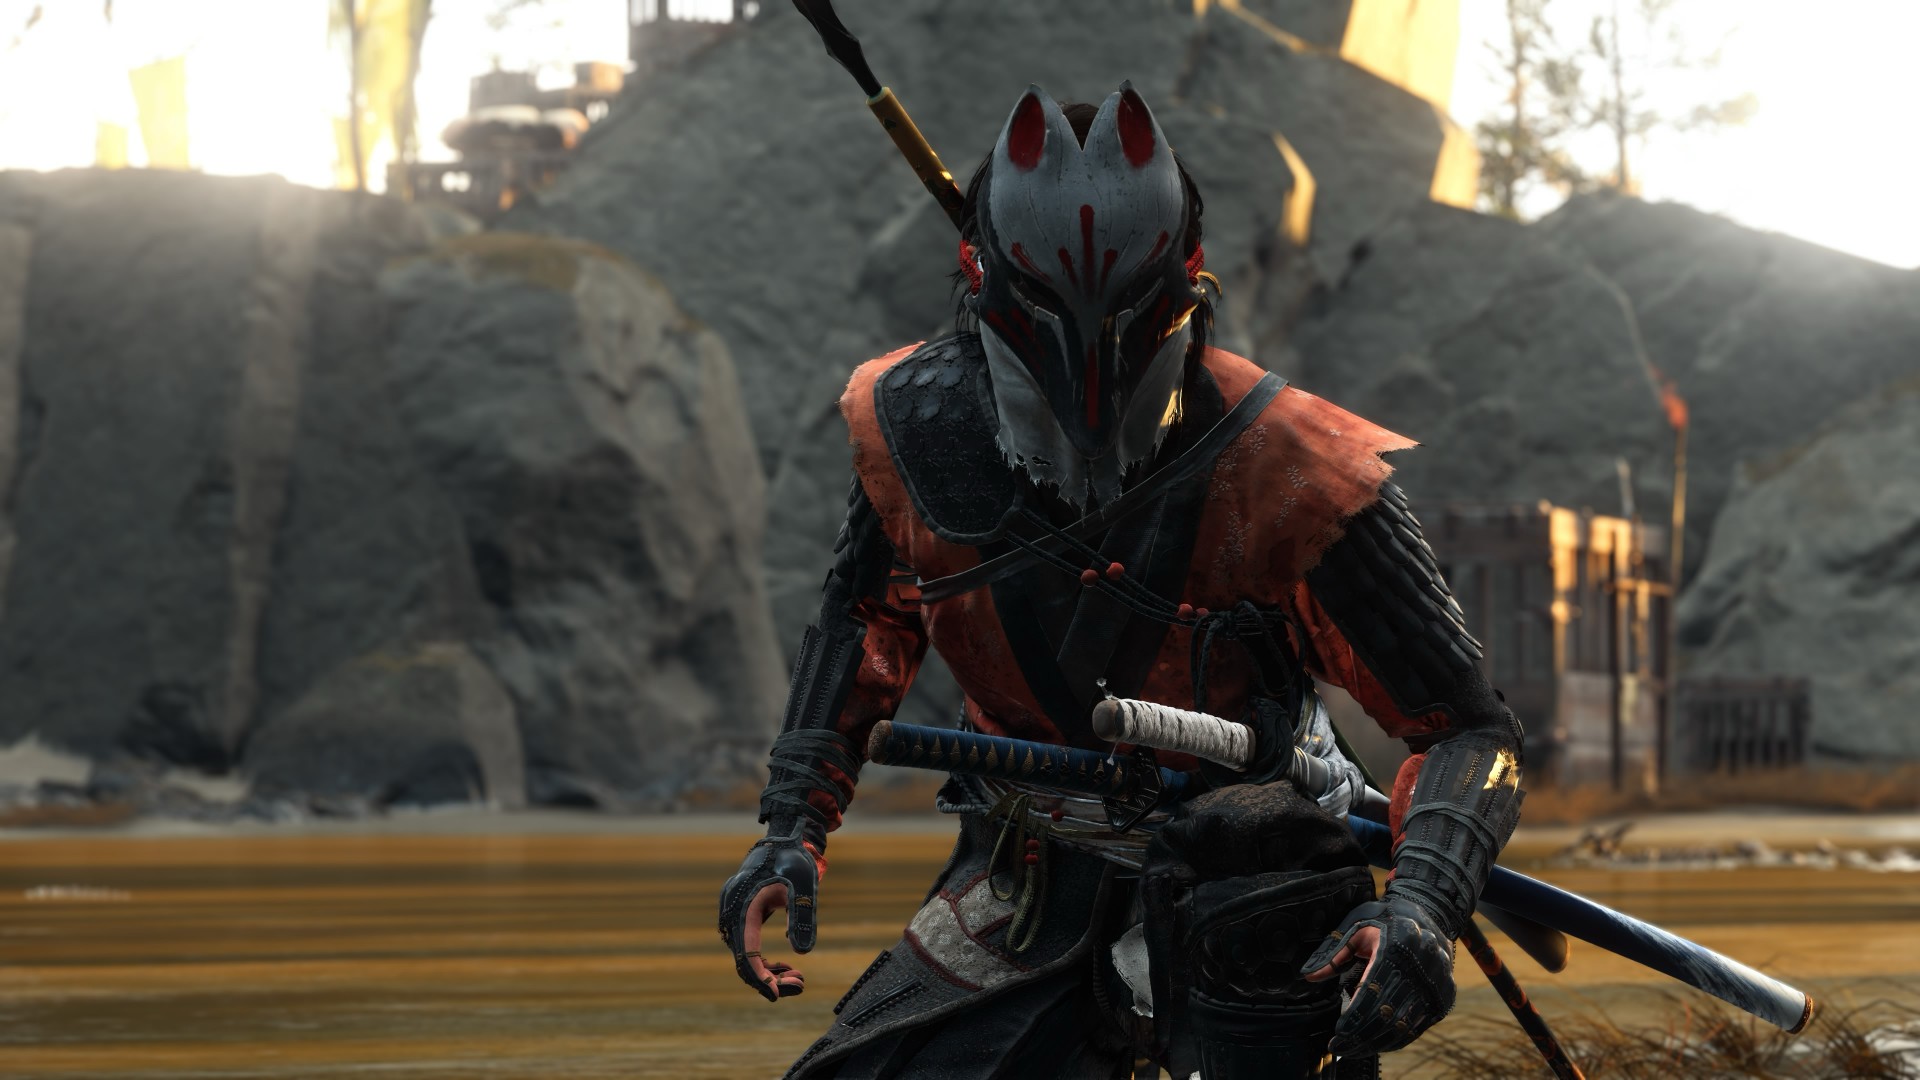
A year away from Ghost of Yōtei was enough to make me rusty. It wasn’t enough to make me forget why I loved it.
What immediately jumped out to me is how beautifully connected this game’s open-world mechanics are. Moving about and exploring felt like picking up where I left off after roughly a year of not really touching the game.
The Guiding Wind, the birds that point you toward locations of interest, and the encounters scattered throughout Ezo all work together to keep you busy without the tasks ever feeling like a chore. There is always something worth looking toward, whether it is a quest, a hidden location, or simply another reason to stop and appreciate the scenery.
And of course, the new area is just as beautiful as everything else we’ve seen in the base game.
That is probably the biggest compliment I can give Ghost of Yōtei Complete Edition. It does not feel like an expansion bolted onto an existing game. It feels like another excuse to step back into a world that already knew how to pull me in.
Picking up where I left off
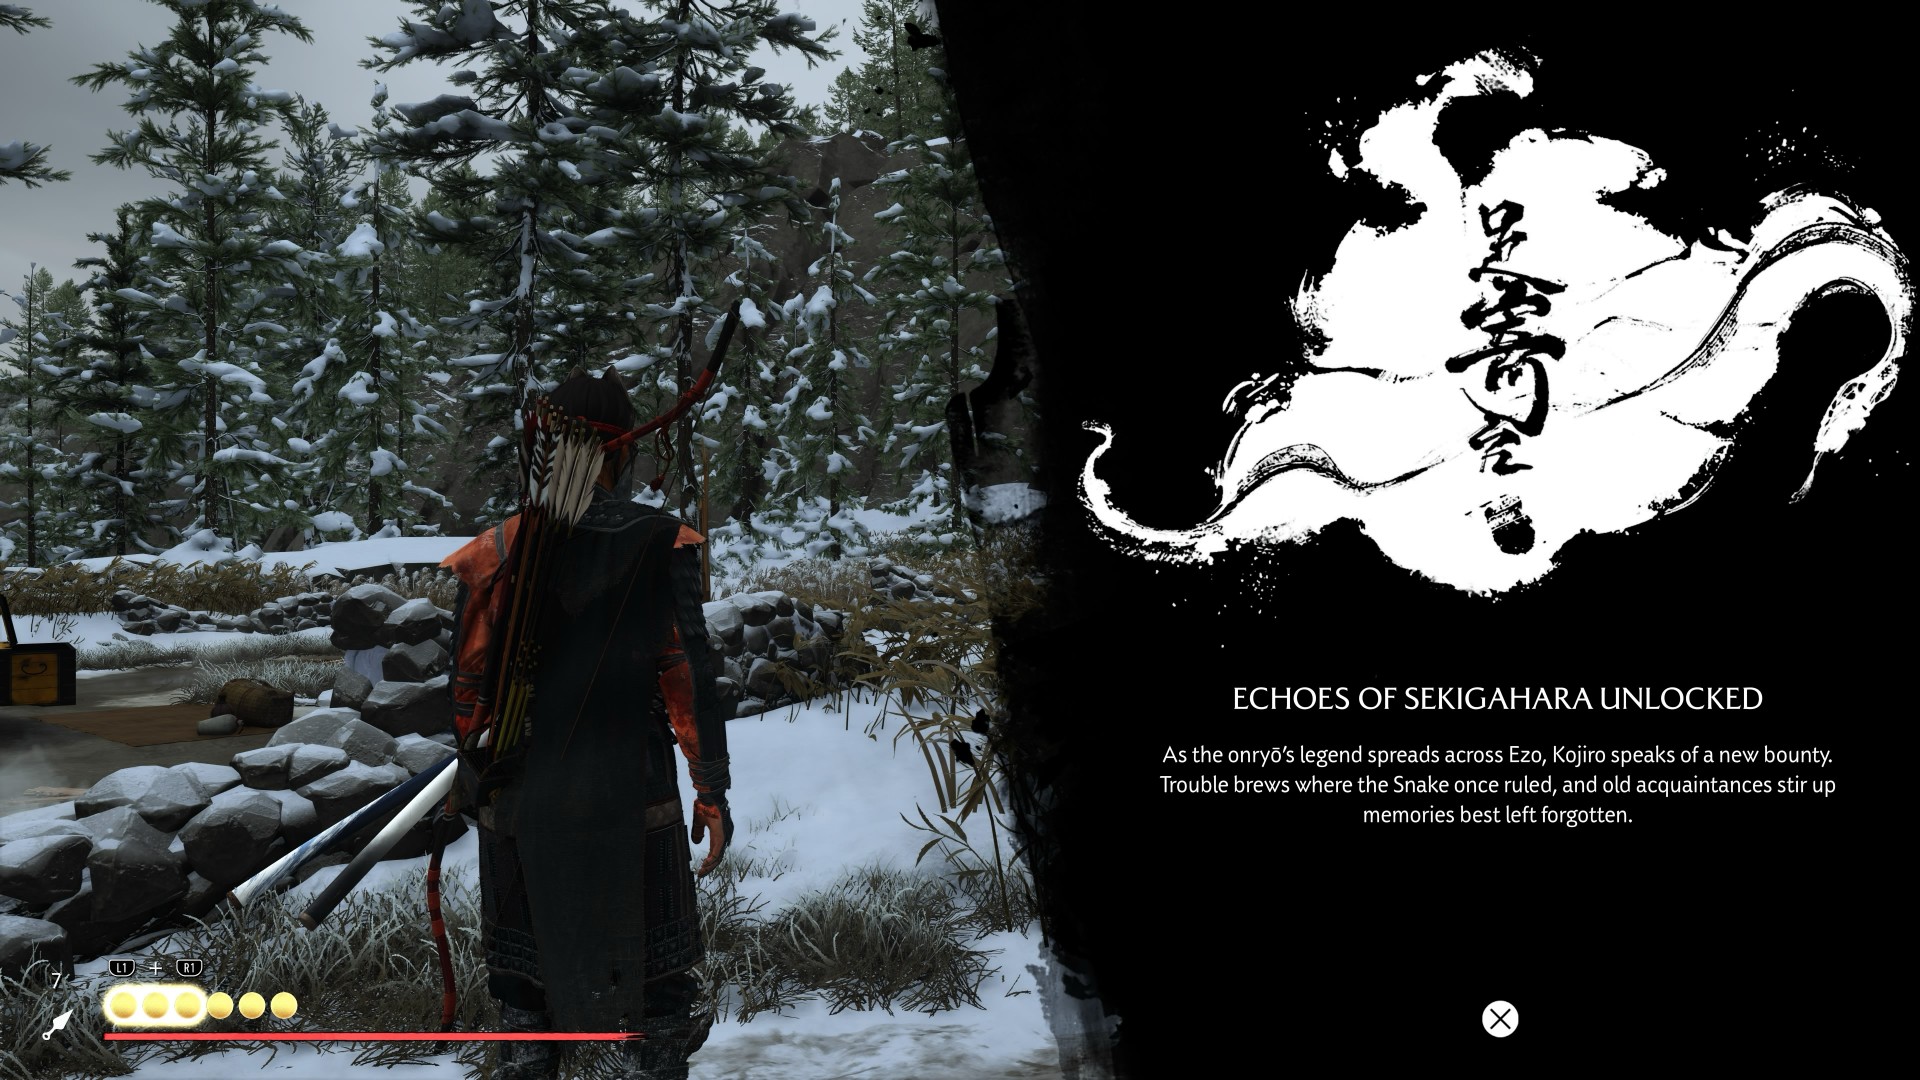
I started my playthrough of the Complete Edition with Echoes of Sekigahara. I thought it was going to be a quick romp, but it’s proving to be a longer experience than I initially thought it would be.
I’ve spent roughly five to six hours playing through it, and I don’t think I’m anywhere near completing the story.
That said, I did get sidetracked quite a bit.
Which tends to happen with these Ghost games.
Not to their detriment, though. Every other quest and encounter in the open world feels like a contained story on its own that is well worth your time. The game has a way of presenting distractions that never really feel like distractions. You can set out with one objective in mind, stumble into something else, and suddenly realize an hour has passed.
That familiarity came back surprisingly quickly.
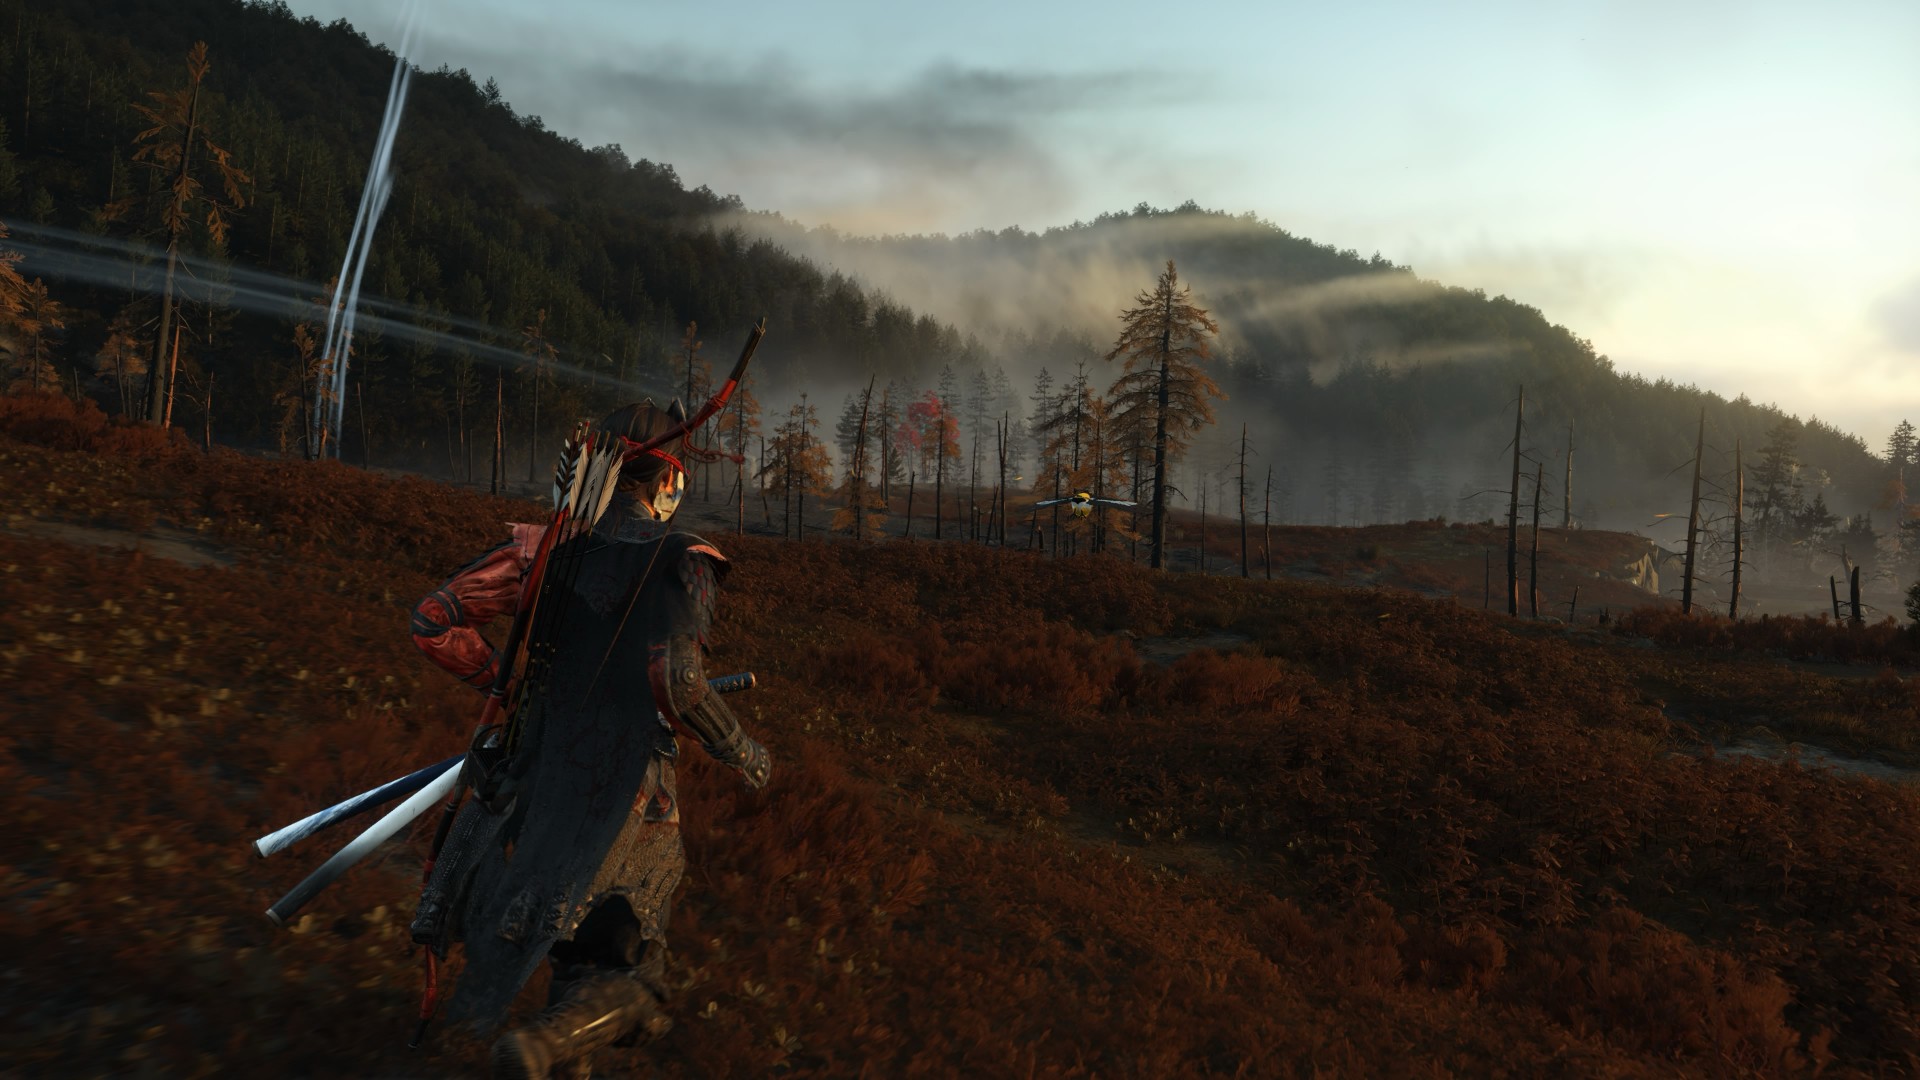
The new region introduced in Echoes of Sekigahara brings unfamiliar enemies, new weapons, and memories tied to Atsu’s past, giving the expansion its own identity while still operating within the systems that made the base game so easy to lose yourself in.
The Wolf quest line in particular was the first one I tackled, and it was quite a ride.
I’m deliberately leaving the details there.
This is the kind of story that is better experienced without knowing too much going in, and the review guidelines themselves ask reviewers to avoid major narrative developments and surprises.
Finding my footing again

While movement and exploration felt natural, it took me a while to get reacquainted with the combat.
My Atsu had many skills mastered, but being a year removed from the game meant I was rusty. I was dying against what I would consider fodder enemies.
There is something humbling about returning to a game where you once felt completely in control, only to discover that your muscle memory has apparently packed its bags and moved somewhere else.
Even now as I write this review, I don’t think I’ve gotten to the level I was when I first completed the game.
But I’m getting by just fine.
And that is partly because Yōtei gives you another toy to play with.
Massive weapons make a massive difference

Massive Weapons
The new wrinkle in combat is the Massive Weapons you get to pick up and swing around.
They are an absolute joy to use.
More importantly, they bailed me out of a few encounters already.
There is a satisfying weight to picking up one of these weapons and simply going to town on enemies. It changes the rhythm of a fight without asking you to relearn the entire combat system. After spending several hours trying to remember how I used to fight as Atsu, having the option to grab something enormous and start swinging was a welcome change of pace.
This was a definite win.
It also highlights one of the strengths of Yōtei’s combat. The foundation is already strong enough that adding another layer does not need to completely reinvent it. Sometimes, giving Atsu something massive to hit people with is enough.
Most Wanted keeps the blade moving

If you want to dive deeper into combat, Most Wanted is where it’s at.
PlayStation first-party games have had a habit of adding these roguelike-inspired modes to some of their games. There’s Valhalla for God of War Ragnarök and No Return for The Last of Us Part II.
Most Wanted takes that idea and puts Yōtei’s combat front and center.
The mode is a single-player combat survival experience built around escalating bounties, different playable characters, and experimenting with the game’s combat system. Unlike Echoes of Sekigahara, you can jump into it immediately without existing save data or base-game progression.
I’ve only had a couple of runs so far, but I can say I thoroughly enjoy the mode.
Mostly because I love the game’s combat mechanics.
That is what you engage with for much of Most Wanted, and it gives you a reason to keep testing yourself. You start a run, make your choices, fight your way through increasingly demanding encounters, and inevitably reach a point where things stop going according to plan.
Then you try again.
And again.
There is a particular satisfaction to a mode like this when the underlying combat is already enjoyable. Losing doesn’t necessarily feel like wasted time because every run gives you another opportunity to get better at the thing you were already having fun doing.
It can also be frustrating.
That is part of the appeal.
More Yōtei is still more Yōtei

The biggest strength of Ghost of Yōtei Complete Edition is also the simplest.
It gives me more Ghost of Yōtei.
Echoes of Sekigahara gives Atsu another story to tell. Most Wanted gives the combat another place to shine. The Complete Edition also adds cosmetics, Trophies, Photo Mode content, and other extras. Meanwhile, the October 1 update brings additional Watanabe Mode tracks, Beauty of Yōtei mode, quality-of-life improvements, and a new high-contrast accessibility option to all Ghost of Yōtei players.
After roughly a year away, I was surprised by how quickly I settled back into the rhythm.
The wind blew, birds flew, a quest turned into another quest, and a random encounter became a story.
Then I picked up a massive weapon and started remembering why I enjoyed this game so much in the first place.
That cohesion remains Yōtei’s greatest strength. Its world constantly gives you reasons to move forward without making the journey feel like work. The Complete Edition simply gives you more reasons to keep going.
Is Ghost of Yotei Complete Edition your Play Match?

Ghost of Yōtei was already one of the best experiences on PlayStation 5.
The Complete Edition gives you more of it.
Echoes of Sekigahara is shaping up to be a substantial addition rather than a short side adventure, while Most Wanted offers a compelling excuse to keep coming back to Atsu’s combat long after you’ve finished the main story.
I still have plenty more of both to see. But even after only a handful of hours with the new content, I know exactly how I feel about returning to Yōtei.
It feels familiar, fresh, and Most Wanted will both frustrate and hook you.
It’s absolutely thrilling.
Ghost of Yōtei Complete Edition is an easy Swipe Up.
After a year away, I came back rusty.
I’m still swinging. And I’m still having a damn good time.

There is nothing particularly wrong with the HONOR 600S.
It works. It looks decent. The display is nice enough. The cameras can capture perfectly usable photos. Battery life is excellent. It even has a collection of AI features that can keep you entertained for a while.
The problem is that “perfectly fine” becomes a harder sell when the 8GB + 256GB version carries a PHP 22,999 SRP and launches at a PHP 19,999 promo price.
The HONOR 600S feels like a phone that sits comfortably in the lower mid-tier. It has enough going for it to be perfectly serviceable as an everyday smartphone, but it doesn’t quite deliver the kind of experience that makes you want to recommend it over the alternatives.
That becomes particularly apparent when HONOR puts so much emphasis on its AI capabilities.
It feels every bit like a lower mid-tier phone

The HONOR 600S feels well-built, but nothing about it feels particularly premium.
At 216.5 grams and 8.3mm thick, it isn’t exactly a featherweight phone. It comes in Velvet Black, Desert Gold, and Misty Purple, with the latter being the finish we spent time with.
There is a reassuring heft to the phone, and the build doesn’t give off the impression that HONOR cut corners just to hit a price point. It also carries IP68, IP69, and IP69K ratings for water and dust resistance, along with SGS five-star drop resistance according to HONOR’s materials.
Those are meaningful practical advantages.
Still, pick it up and you immediately get that lower mid-tier feeling.
That’s not necessarily a bad thing. Phones in this segment have gotten remarkably good at feeling solid without costing a fortune. But the HONOR 600S doesn’t really give you that extra bit of refinement that makes it feel more expensive than it is.
The display is a pleasant surprise
The display is probably one of the better parts of the HONOR 600S.
It uses a 6.872-inch TFT LCD with a 1592 x 720 resolution. HONOR lists typical brightness at 860 nits, with up to 1,020 nits in HBM, and it also includes Eye Comfort and Dynamic Dimming technologies.
Those specifications don’t exactly scream “media powerhouse,” but actual use tells a more favorable story.

Reacher and Lila
I spent time watching episodes of Reacher Season 4 on the phone, and the experience was pretty good. It’s not the sort of display that makes you forget you’re looking at an LCD, but it gets the job done well enough for movies and shows.

Certified Isa-holic
The same applies to watching fancams of STAYC Isa, who currently occupies a frankly unreasonable amount of rent-free real estate in this Managing Editor’s mind.
The HONOR 600S is a perfectly competent little entertainment machine.
It also has stereo speakers, with HONOR Sound 7.3 listed in the specifications. That helps round out the media experience.
The cameras are serviceable
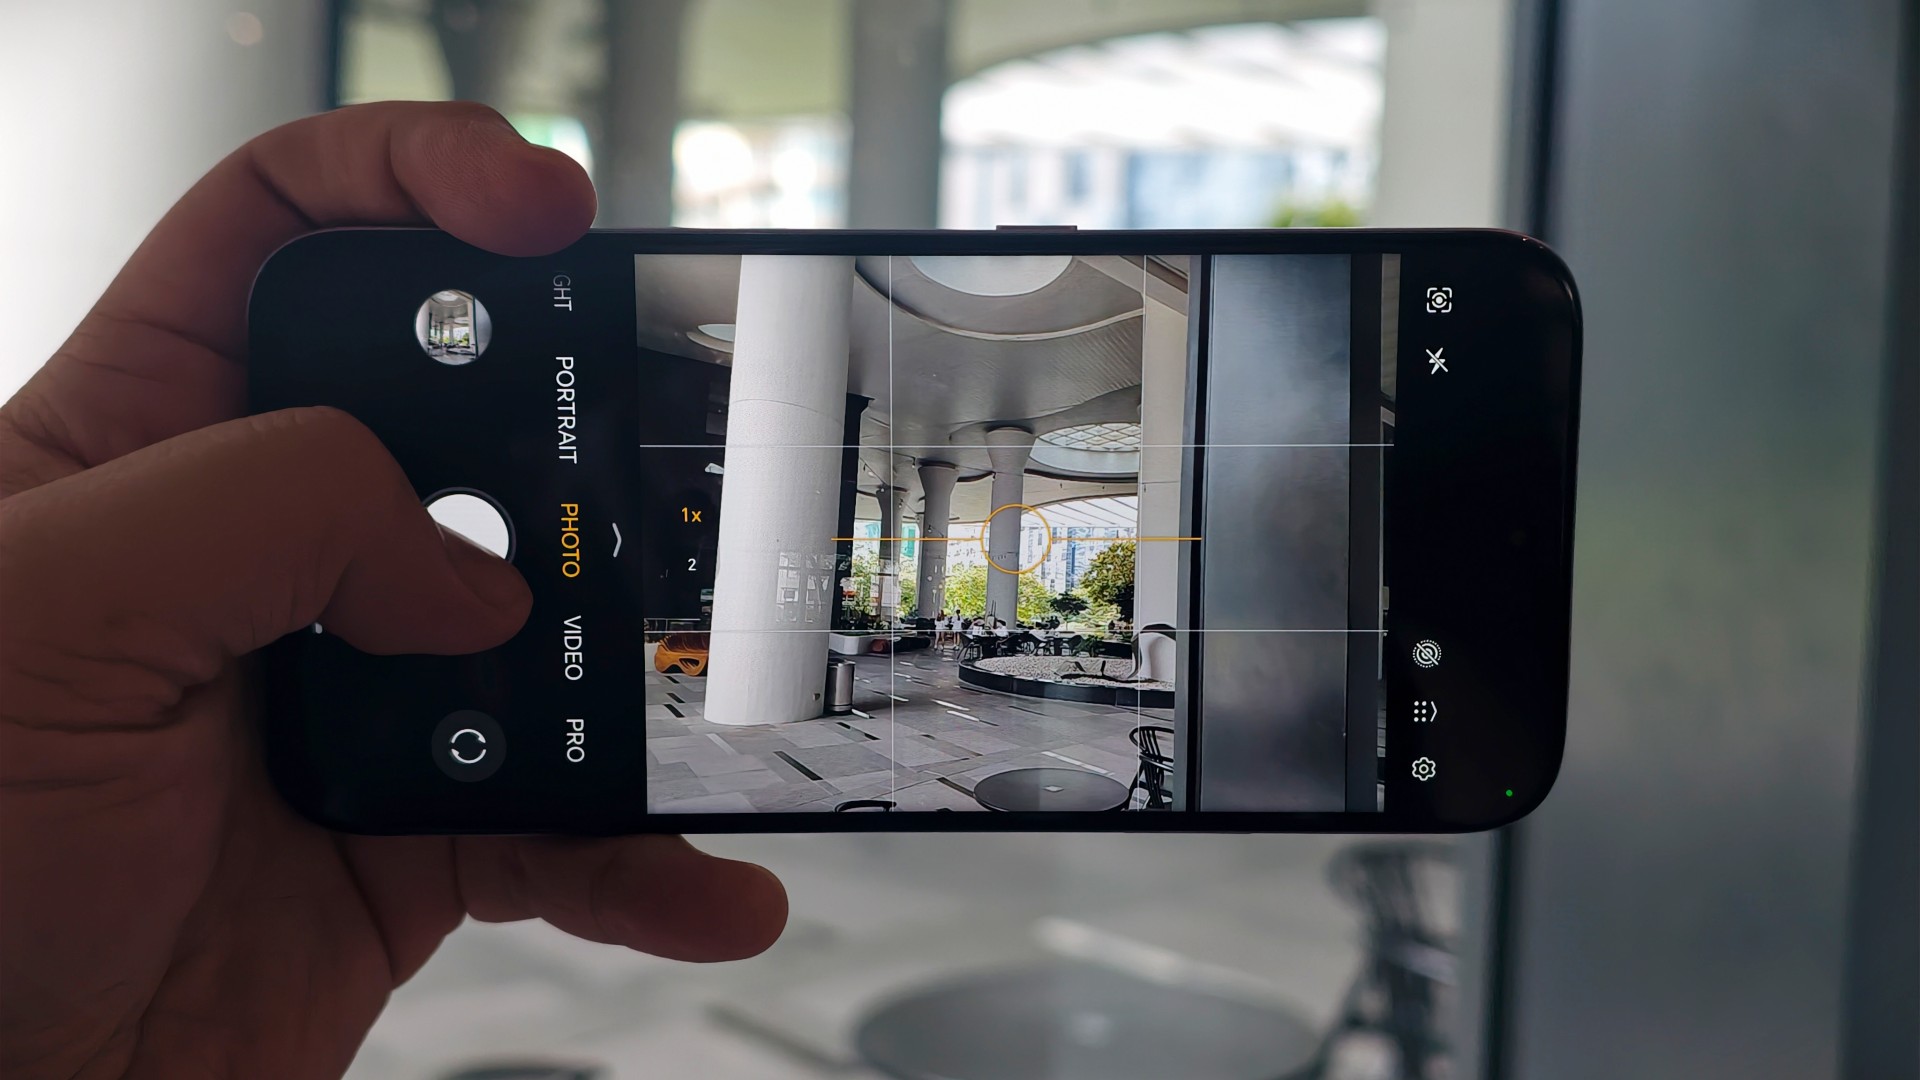
The HONOR 600S has a 50-megapixel f/1.8 main camera paired with an auxiliary lens. Around the front is a 5-megapixel f/2.2 camera. Rear video tops out at 1080p, while the phone offers up to 8x digital zoom.
And “serviceable” is probably the best word for the cameras.
They’re not necessarily something you’d use to show off your mobile photography chops. You won’t be reaching for the HONOR 600S when you want to make a serious photographic statement.


But that’s not necessarily what this phone needs to do.
For capturing moments with friends, taking photos of food, documenting whatever happens during the day, and throwing the results onto social media, the cameras are mostly okay.




That’s enough for the intended audience.



There are also several shooting modes available, including Portrait, Night, High-Res, Panorama, Pro, Slow-Mo, and the usual Photo and Video modes.
The problem is that the cameras don’t give the HONOR 600S much of an identity. They’re there, they work, and they do what you expect.
Nothing more.
The Snapdragon 4 Gen 4 keeps things moving
The HONOR 600S runs on Qualcomm’s Snapdragon 4 Gen 4 with an octa-core CPU and Adreno 613 GPU. Depending on the configuration, you get either 6GB of RAM with 128GB of storage or 8GB of RAM with 256GB. It runs MagicOS 10 based on Android 16.
That combination tells you pretty much what to expect.

The phone should be perfectly capable of handling everyday tasks, social media, messaging, streaming, and other non-demanding workloads. You shouldn’t expect it to suddenly become a gaming powerhouse, though.
The Snapdragon 4 Gen 4 suggests that less demanding mobile games should run without much trouble. Games that ask for more horsepower will probably require some tweaking to the graphics settings to get things running properly.

Had our best run while taking photos for this review
On our end, we mostly ran the app version of the web game 82-0. It’s addicting.
And, frankly, that’s about as much gaming as the HONOR 600S really needed to handle during our time with it.
AI is entertaining, but that’s about it

Every HONOR 600 phone and up has this feature
HONOR really wants you to know about the AI.
The HONOR 600S supports AI Image-to-Video 2.0, Moving Photo Editing, AI Photos Agent, Magic Color, and Magic Pose. The Image-to-Video feature can work from multiple images, two images representing a first and last frame, or automatically through a no-prompt option.
And, yes, you can have some fun with it.
The problem is that there’s a fairly significant gap between “this is a neat toy” and “this is a feature that makes the phone worth buying.”
In the hands of someone who knows what they’re doing, AI Image-to-Video can produce something interesting. The more specific prompt templates give users a little more control over the result, too.
In the hands of the unskilled, however, it mostly results in a bunch of AI slop.
We typically don’t look at generative AI particularly positively. There is still something undeniably entertaining about watching your photos turn into weird little videos, though.
That’s ultimately where I land with the HONOR 600S’s AI features.
They’re fun. They’re occasionally useful. But I wouldn’t buy this phone for them.
And if the cost of putting all these AI features into the phone is contributing to a price that doesn’t otherwise match the hardware and experience, that’s a bigger problem.
The battery is the highlight

26% left but last charge when this was taken was a day and a half ago. Light to medium usage.
Now we get to the HONOR 600S’s strongest argument.
The battery is huge.
The phone packs an 8,100mAh battery, with HONOR listing 7,900mAh as the rated capacity. It supports 45W wired HONOR SuperCharge, although there is no wireless charging.
And you can feel that capacity in everyday use.
The HONOR 600S is hard to drain.
If you leave home early in the day and put the phone through medium to heavy usage, you can expect to still have some juice left after a typical nine-to-12-hour day outside your home.
That’s genuinely useful.
Battery anxiety is one of those things that disappears into the background when you have this much capacity. You can watch some videos, scroll through social media, take photos, play games, and use your phone throughout the day without constantly wondering where the nearest charger is.
The 45W charging isn’t particularly exciting, but the combination of a big battery and reasonably fast wired charging makes the HONOR 600S dependable.
And sometimes dependable is exactly what you want from a phone.
There’s nothing wrong with the HONOR 600S. That’s the problem.
The HONOR 600S is alright. Its display is good. The battery is excellent. The cameras are serviceable. Performance is appropriate for the hardware. The build is solid. The AI features can be entertaining.
Put everything together and you get a phone that does most things it needs to do without making too many mistakes.
But that’s also why the pricing is difficult to swallow.
Is the HONOR 600S your GadgetMatch?
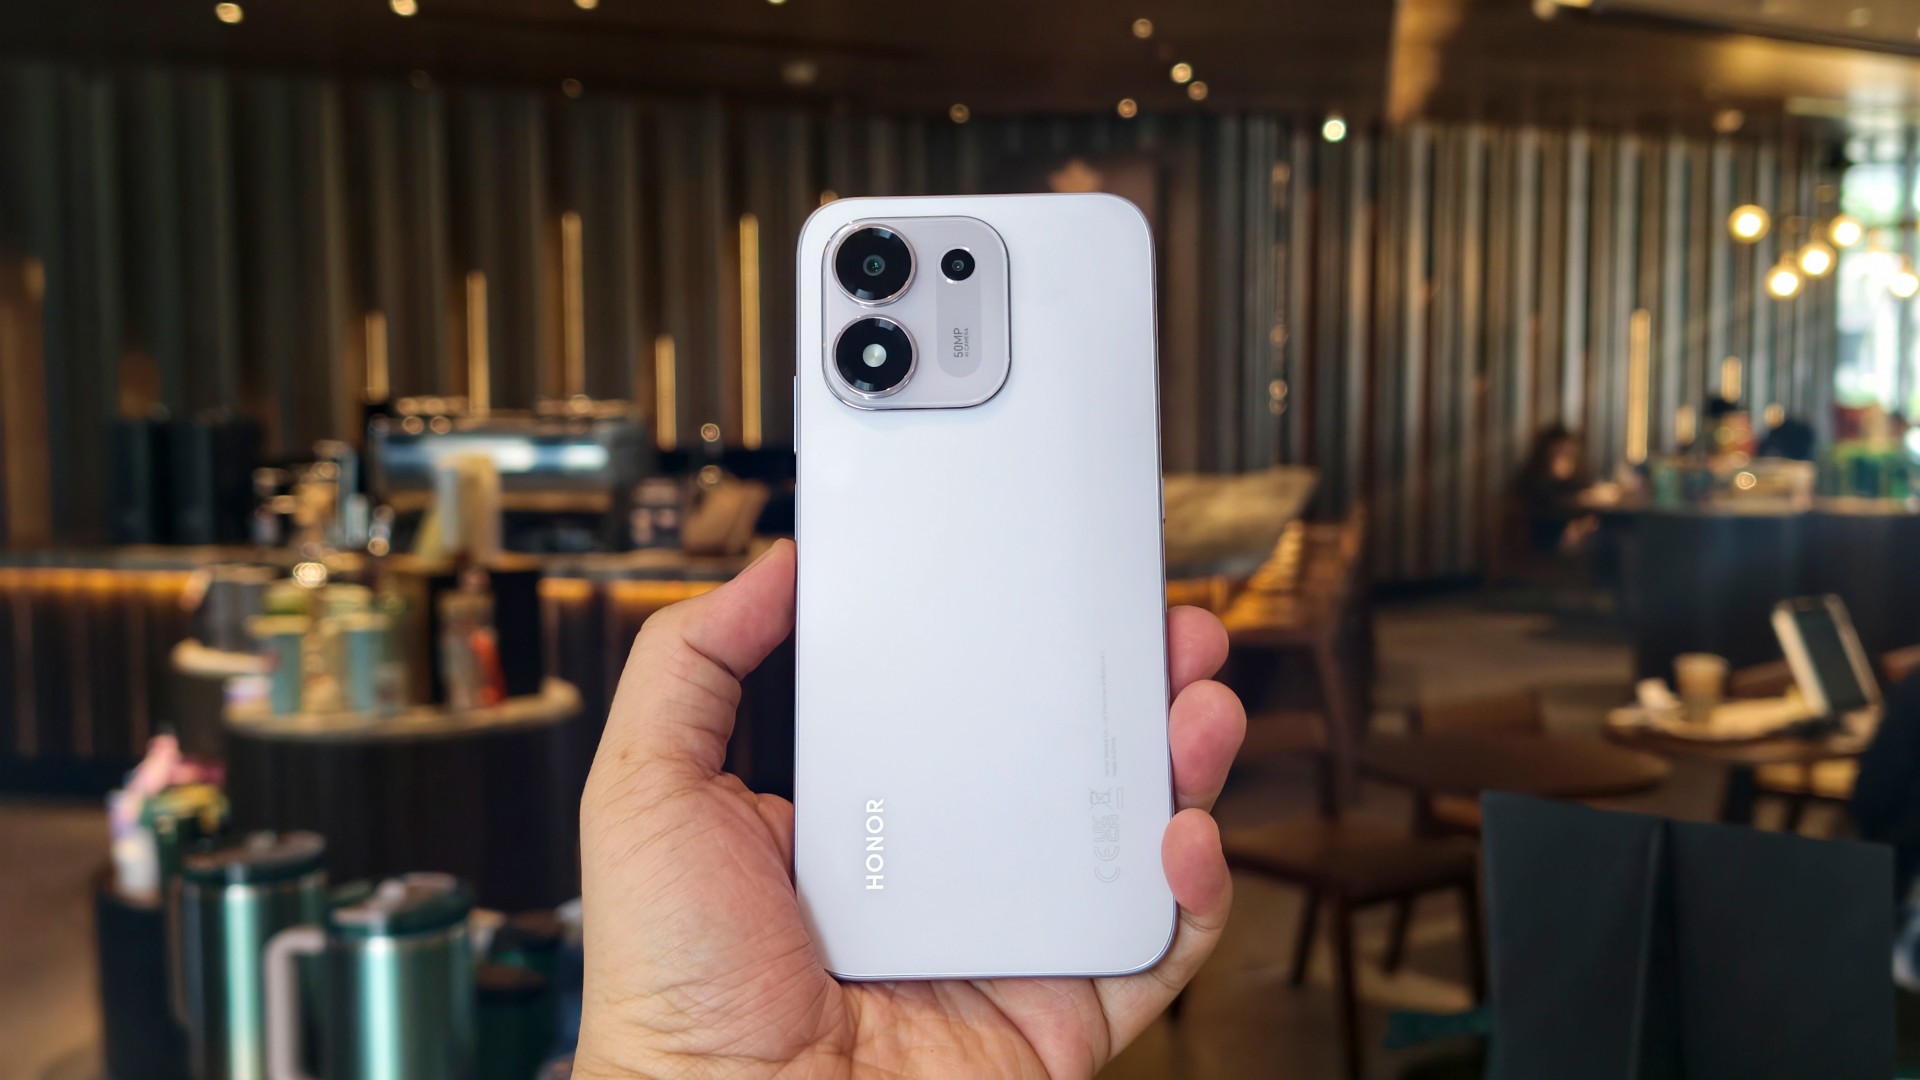
The 8GB + 256GB HONOR 600S has an SRP of PHP 22,999, although it will be available at a PHP 19,999 promo price. There is also a 6GB + 128GB version priced at PHP 18,999 during its first month of sales, exclusively online.
At those prices, the HONOR 600S needs to offer more than “mostly okay.” The hardware itself doesn’t feel particularly premium, the cameras don’t stand out, and the Snapdragon 4 Gen 4 is firmly positioned toward the entry-level end of Qualcomm’s smartphone lineup.
Then there’s AI.
HONOR is clearly positioning AI Image-to-Video 2.0 and the rest of its AI toolkit as major selling points for the HONOR 600S. The company’s own brief calls out AI as one of the phone’s primary product strengths alongside its battery and 50-megapixel camera.
But after spending time with the phone, I don’t think the AI features provide enough value to bridge the gap between what the phone offers and what it costs.
And that’s just the reality we’re going through at the moment.
You might be better off setting your sights on the other models in the HONOR 600 family.
The HONOR 600S isn’t a bad phone.
It’s just a difficult one to recommend at these prices.
Swipe Left.

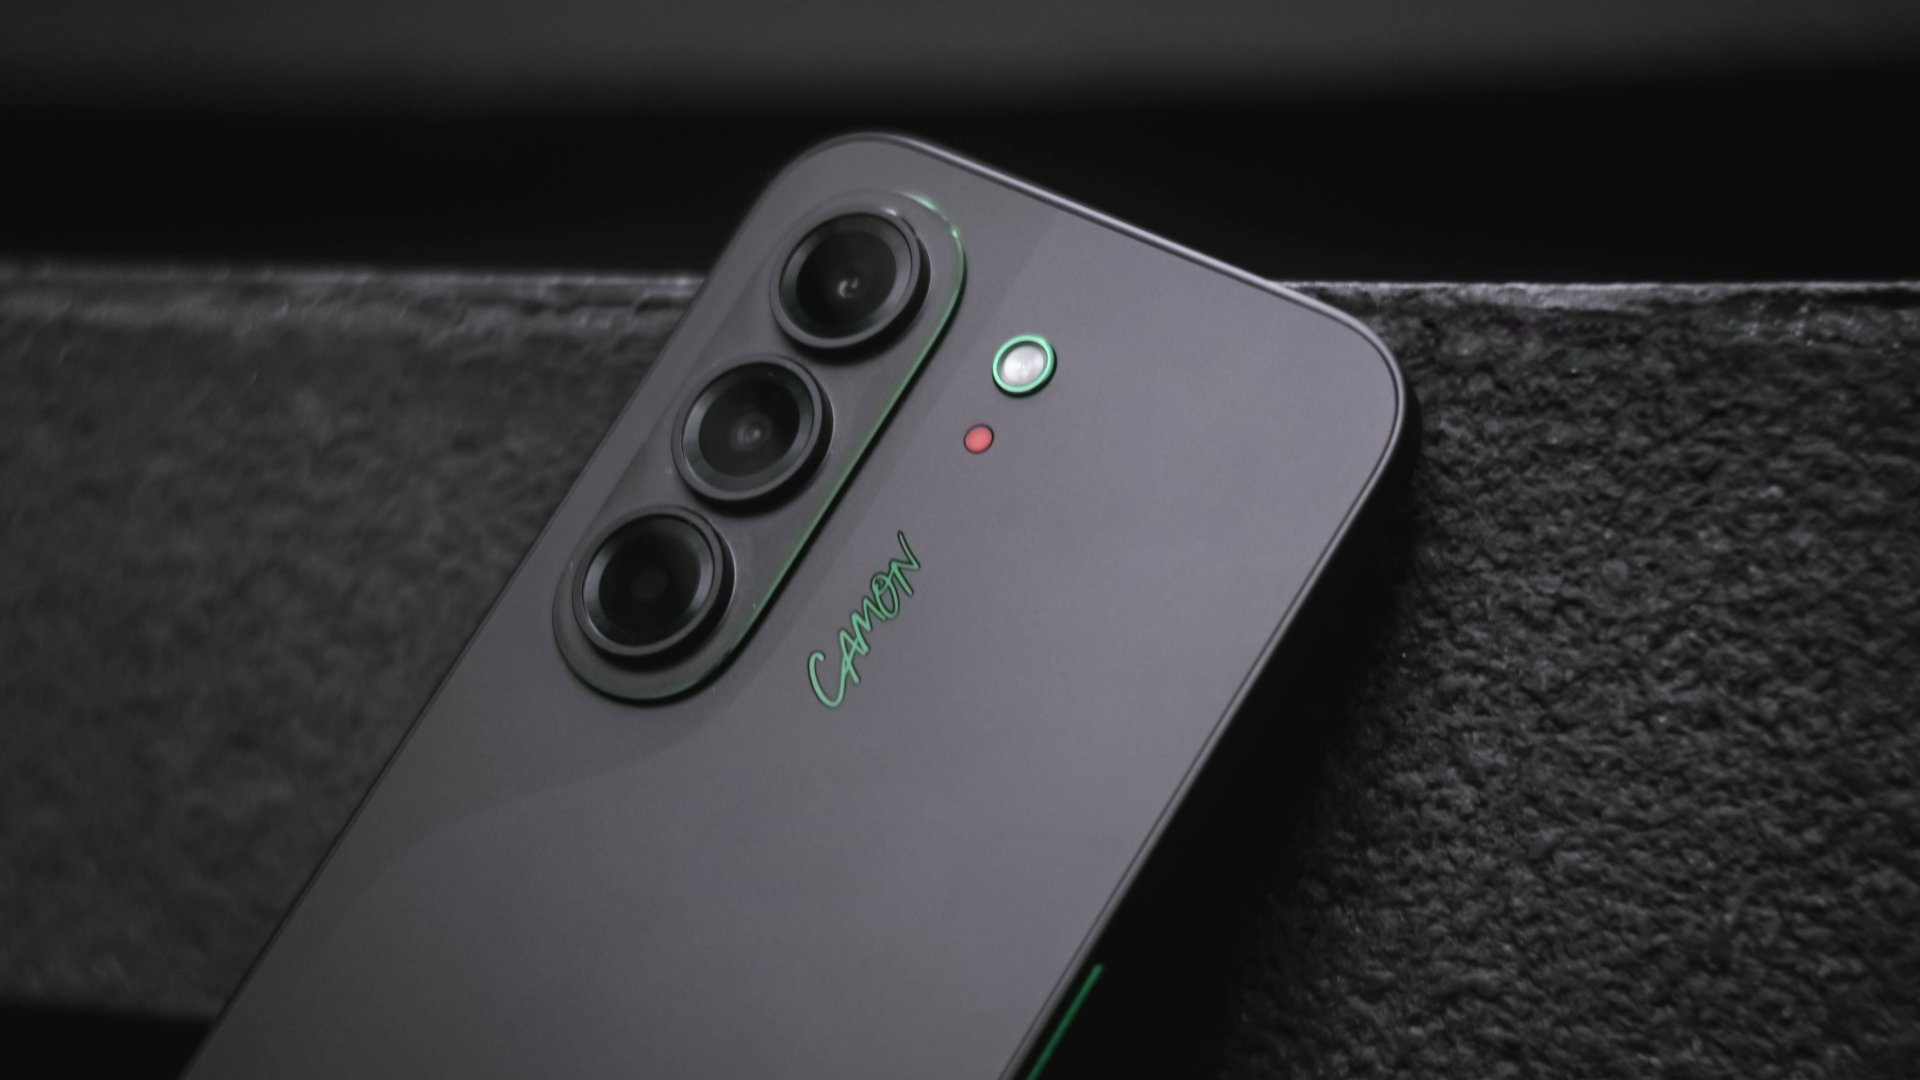
Despite the resurgence of WIDE-bodied slabs and folds trying to dominate the smartphone space again, slender smartphones aren’t done just yet.
From last year’s SPARK Slim and POVA Slim, TECNO brings in the CAMON Slim to the table.
As we transition into an era where smartphones rock beyond the 5000mAh battery mark, the Chinese brand aims to hit two birds with one stone in the latest TECNO CAMON Slim 5G.
Slim and clean that isn’t mean
At just 6.39mm, there’s no denying that the TECNO CAMON Slim 5G is a true skinny legend.
For the record, it’s not the slimmest phone around nor is it the most striking smartphone design to ever exist.
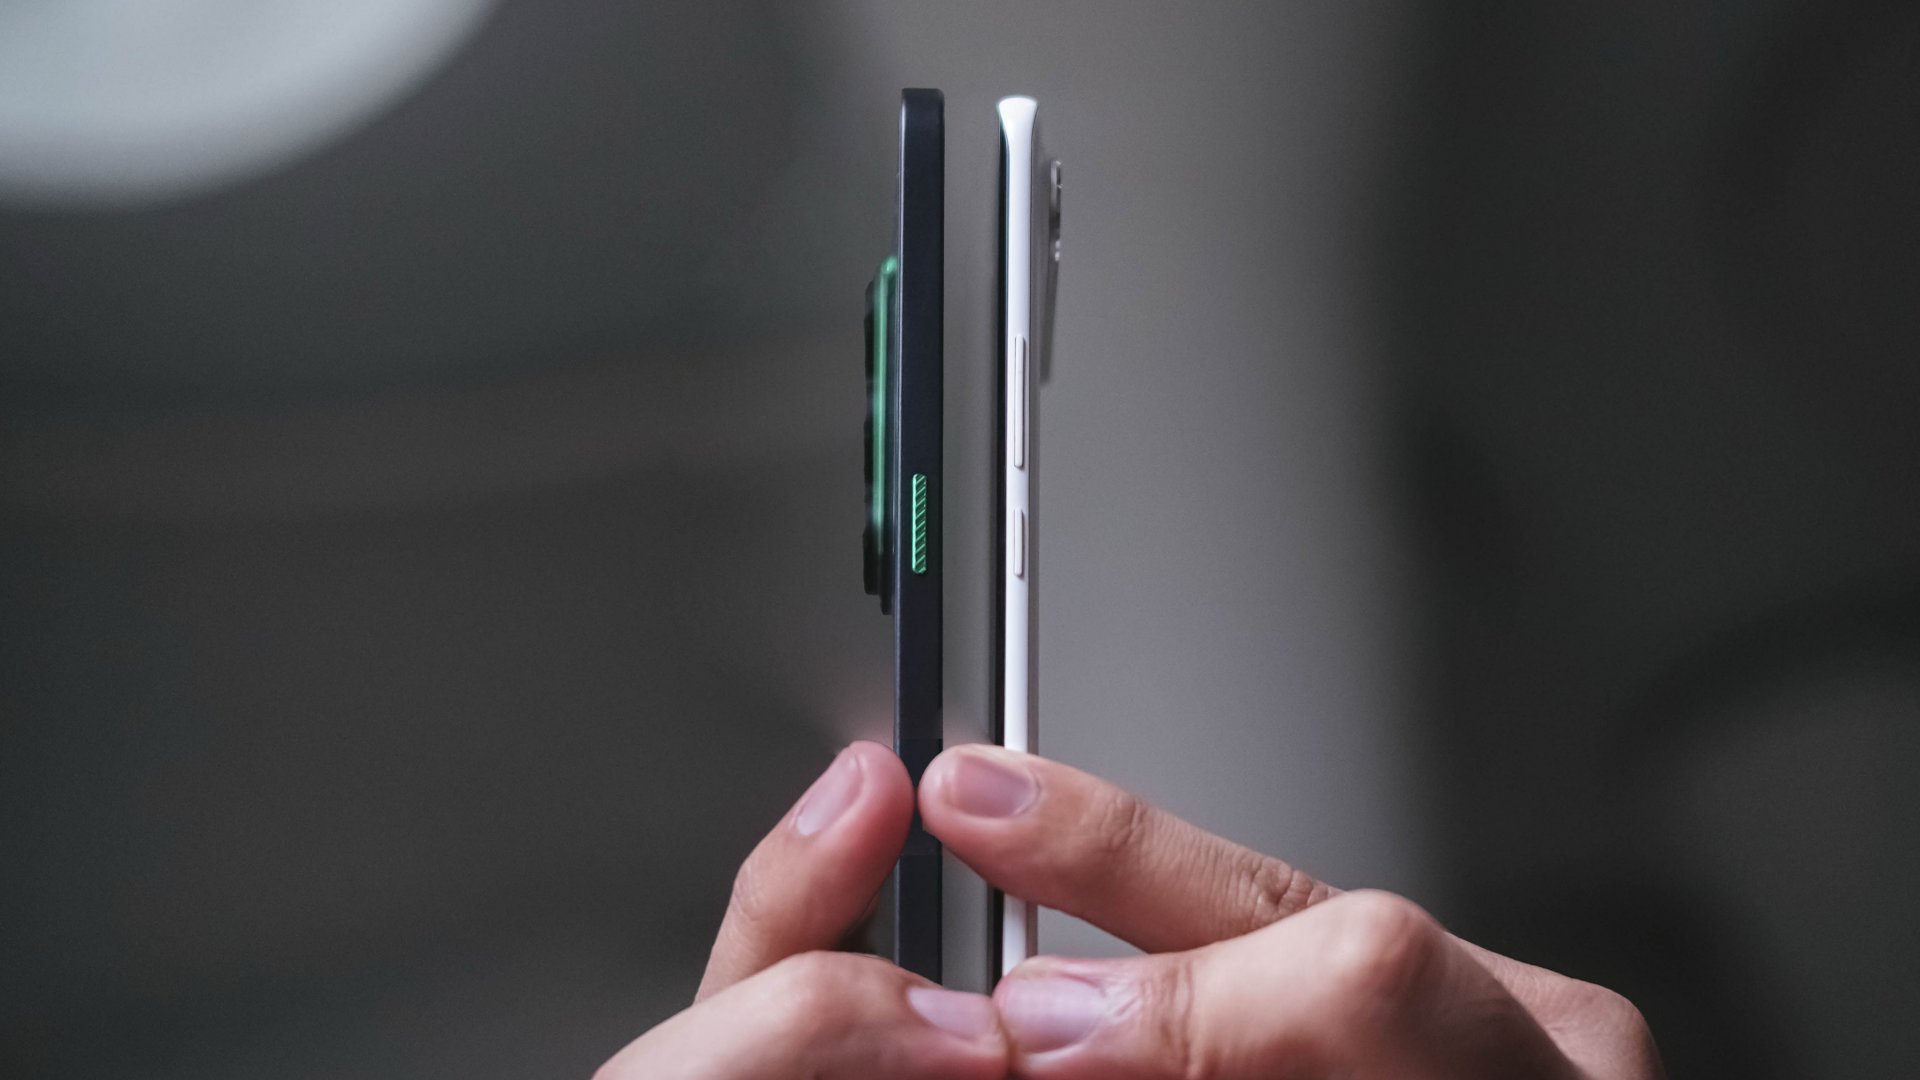
Last year’s SPARK Slim still holds the slimmest phone title — at least when it comes to TECNO’s product portfolio alongside other smartphones with curved displays.
Honestly, the existence of SPARK Slim still bedazzles me. It’s one of the best-looking smartphones out there that also happened to nail its slimness from within. That added razor-sharp illusion from the side still amazes me.

While the CAMON Slim 5G isn’t as iconic as the “Baymax phone,” its clean look is commendable, nonetheless.
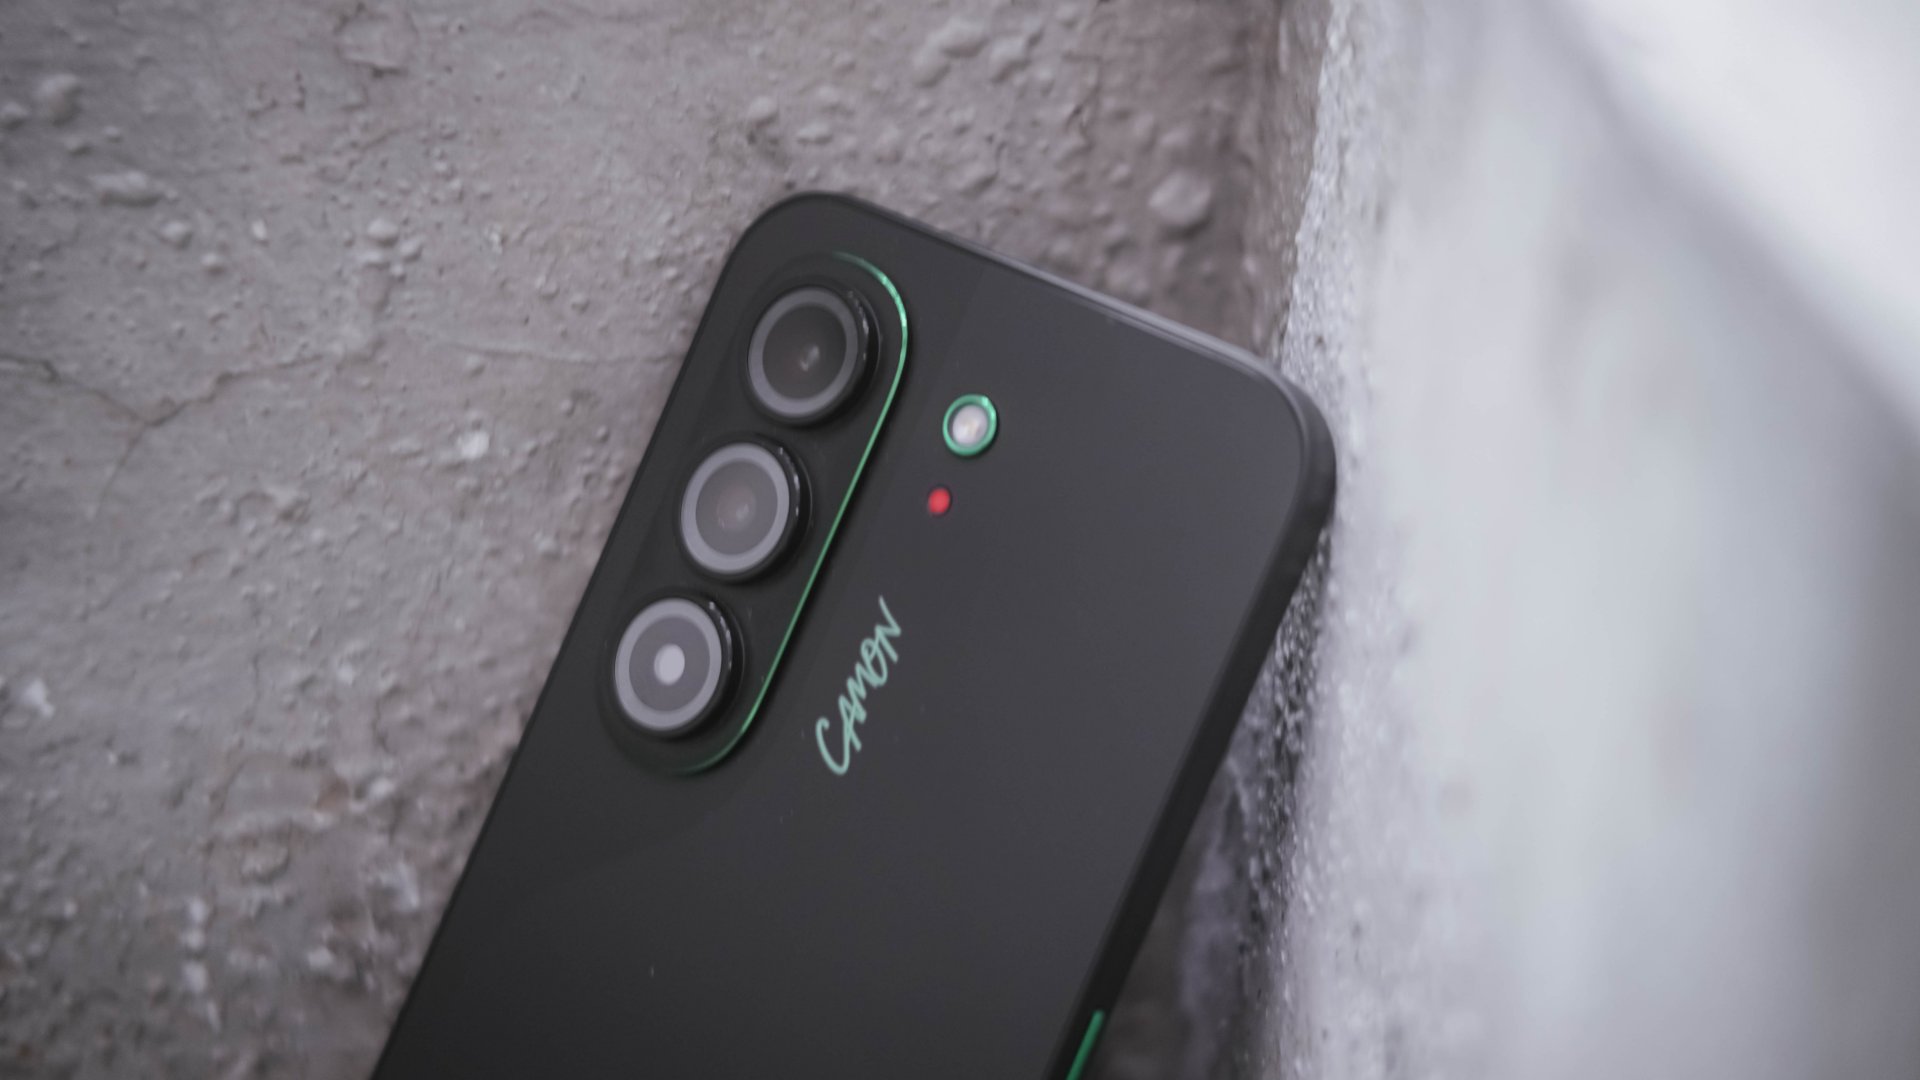
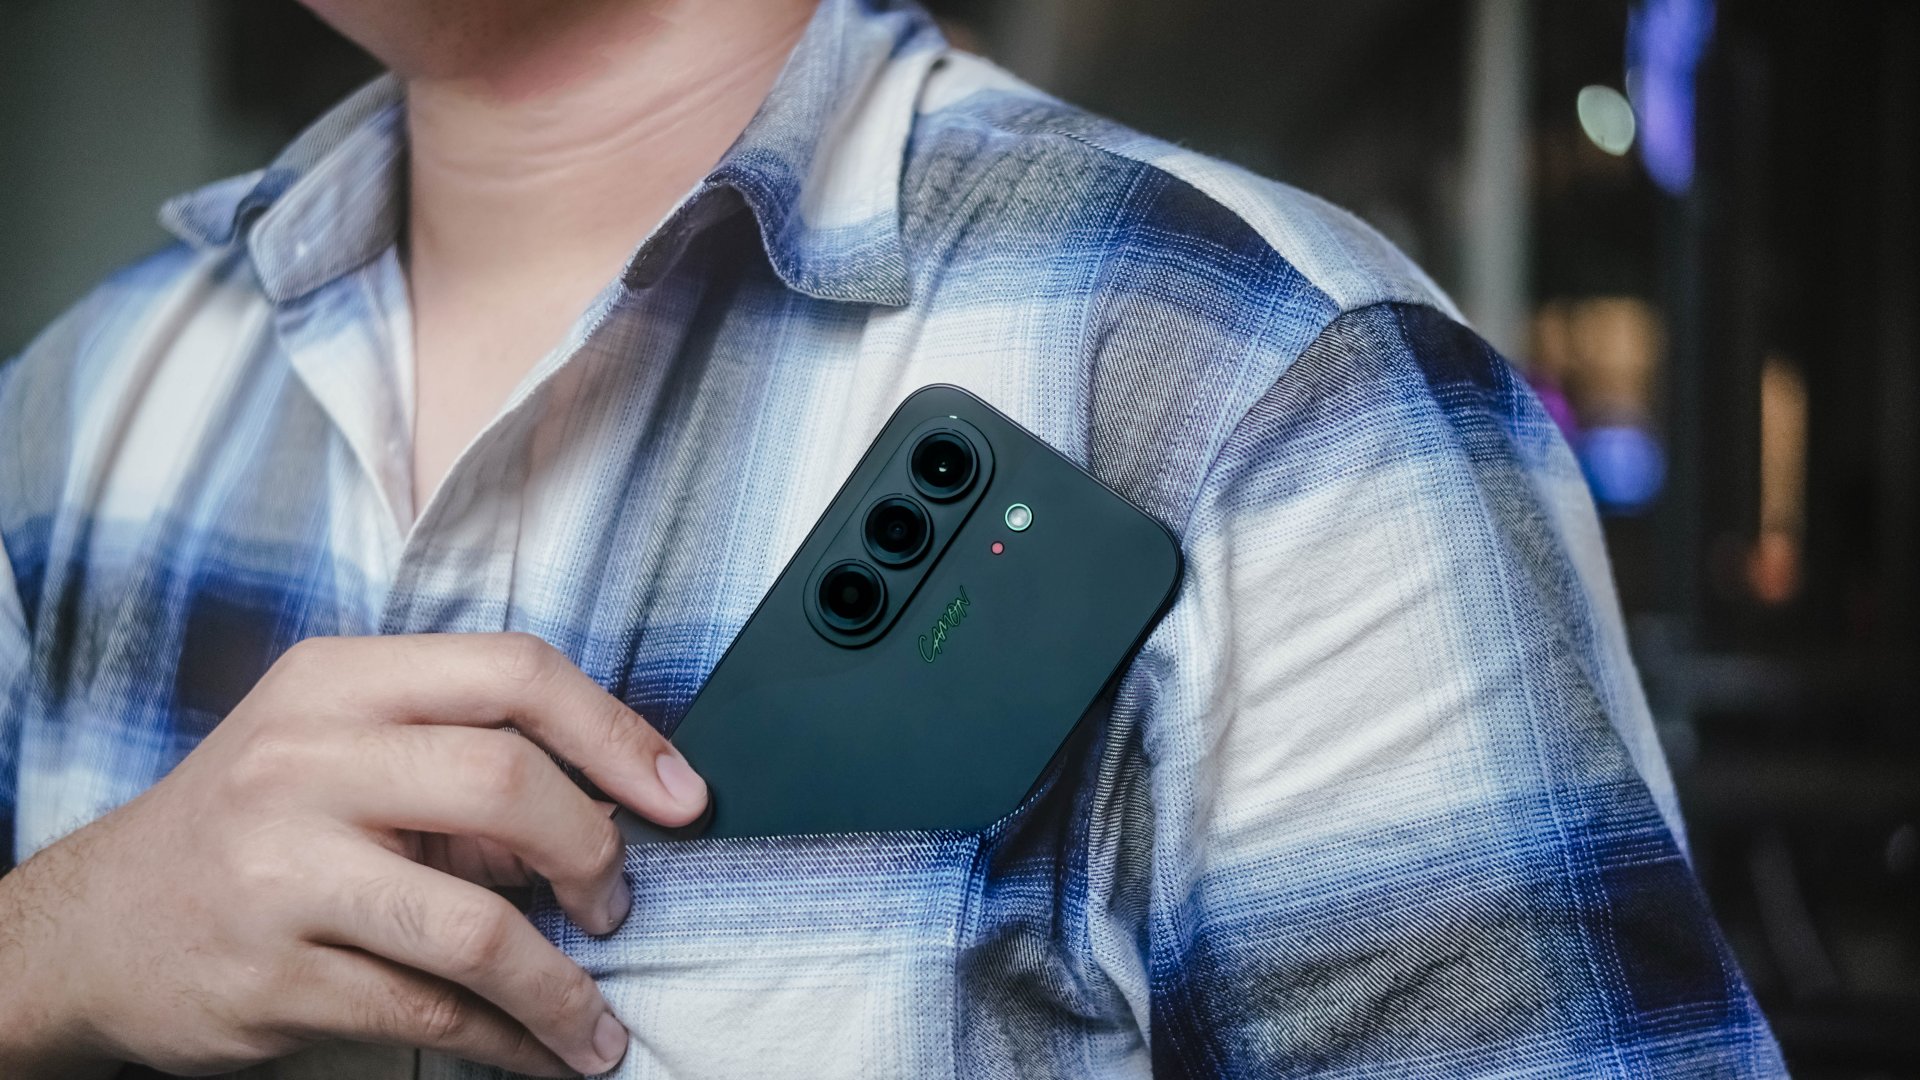
Its understated back design with CAMON’s signature “swan-neck” curve give it some sophistication — and distinctly CAMON in nature.
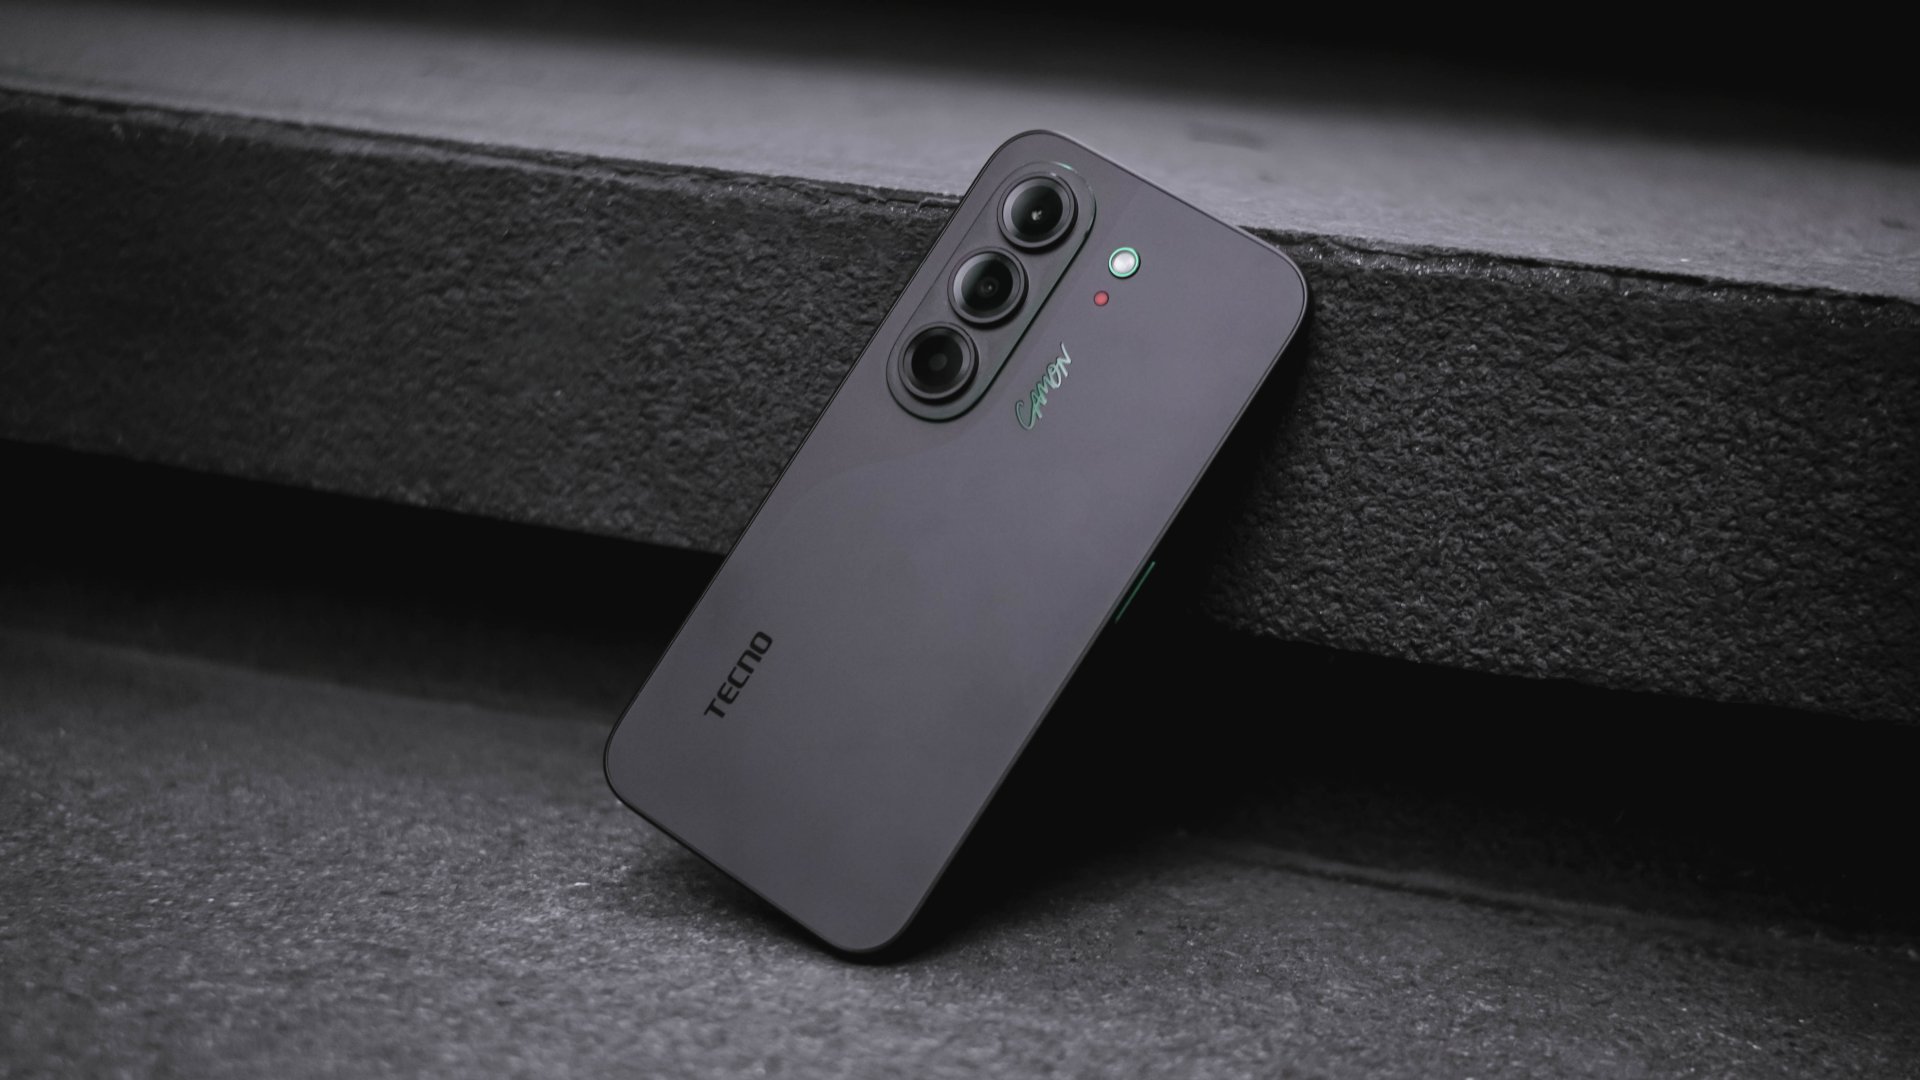
More so, its CMF (color, materials, finish) don’t immediately scream “cheap” despite the category it belongs to.
Now, if you’ve read some of my reviews, you’d know that even though I love wearing anything black, I (still) despise rocking black phones.
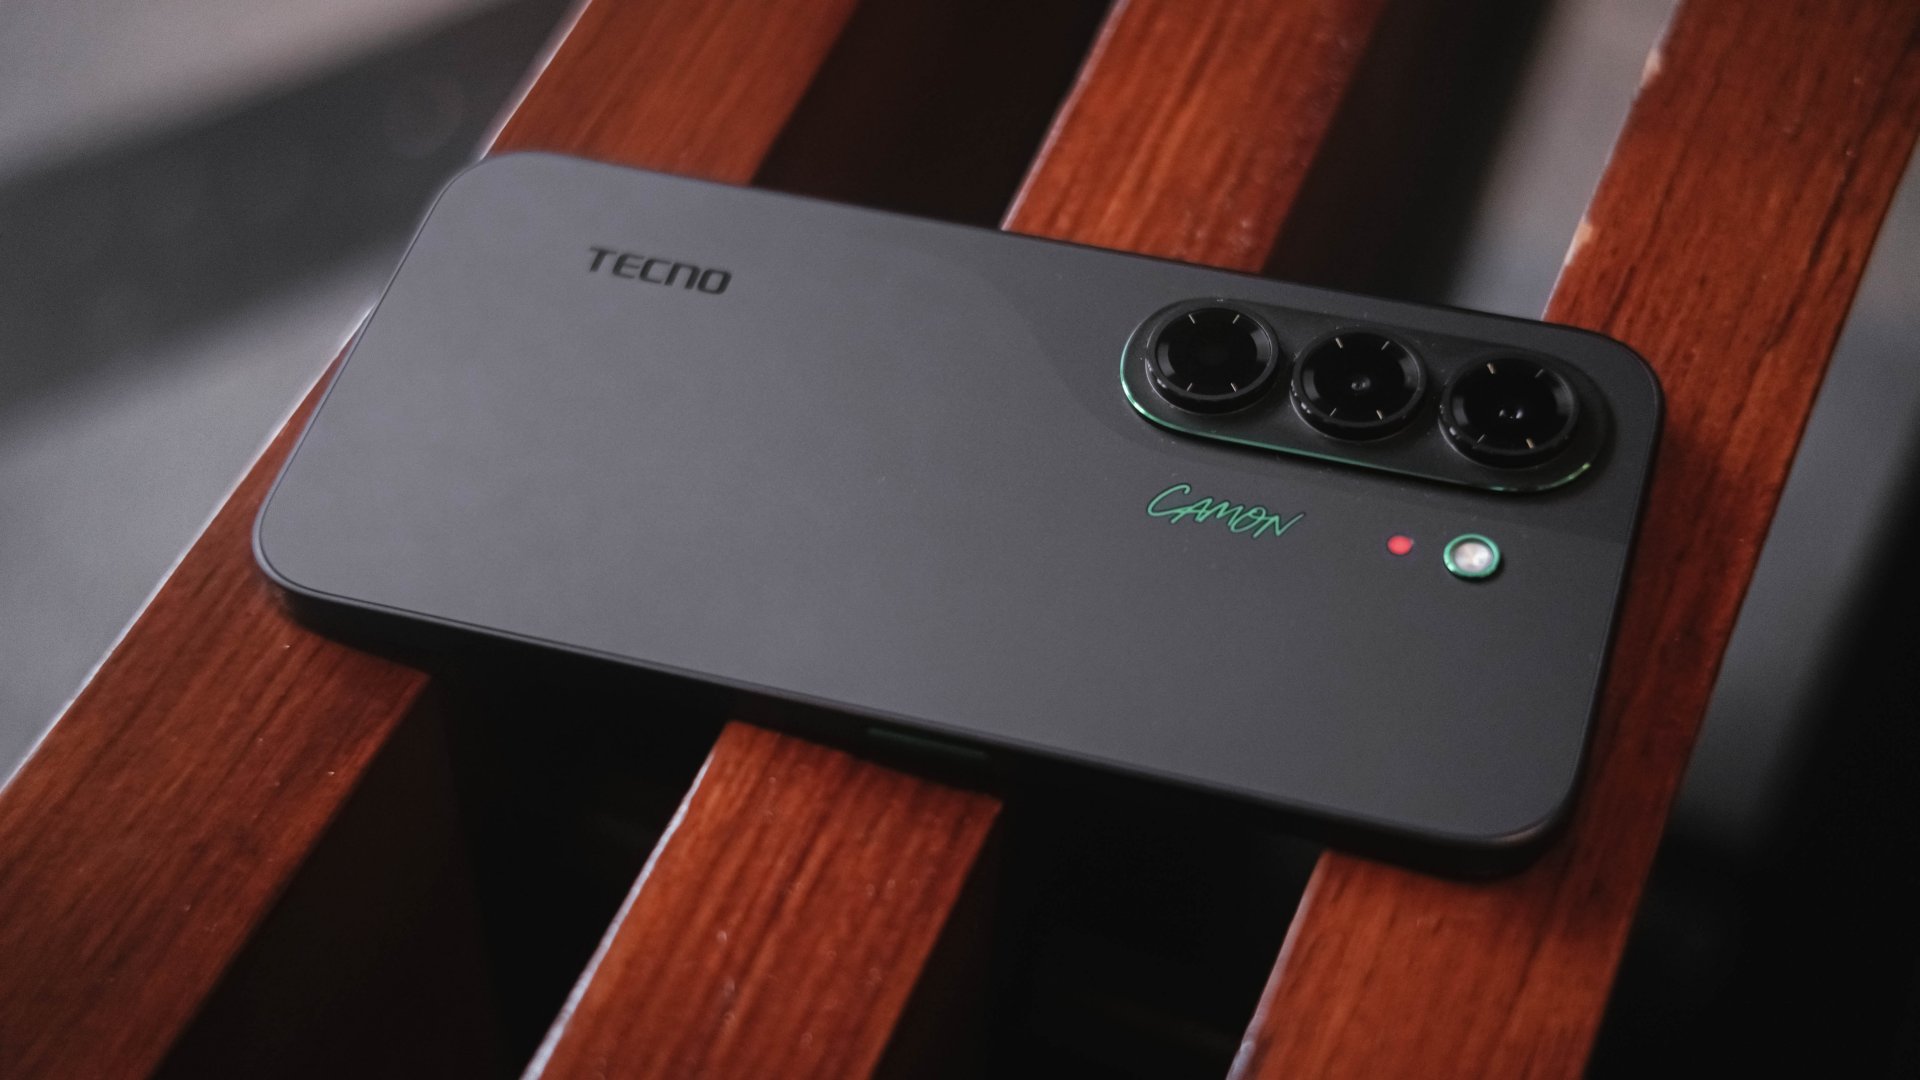
Somehow, the Matisse Black I hold is an exception. Surprisingly, it doesn’t show off much of my fingerprint smears all over its vast black back.
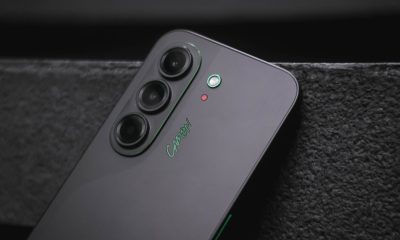
Moreover, those subdued green accents found on its oval camera rim alongside a stylish new “CAMON” wordmark truly adds an elegant touch.
If this isn’t your cup of tea, there are also the hero Burgundy Red shade alongside Gossamer White, Rebel Pink, and an even flashier Neo-Mondrian colorway.
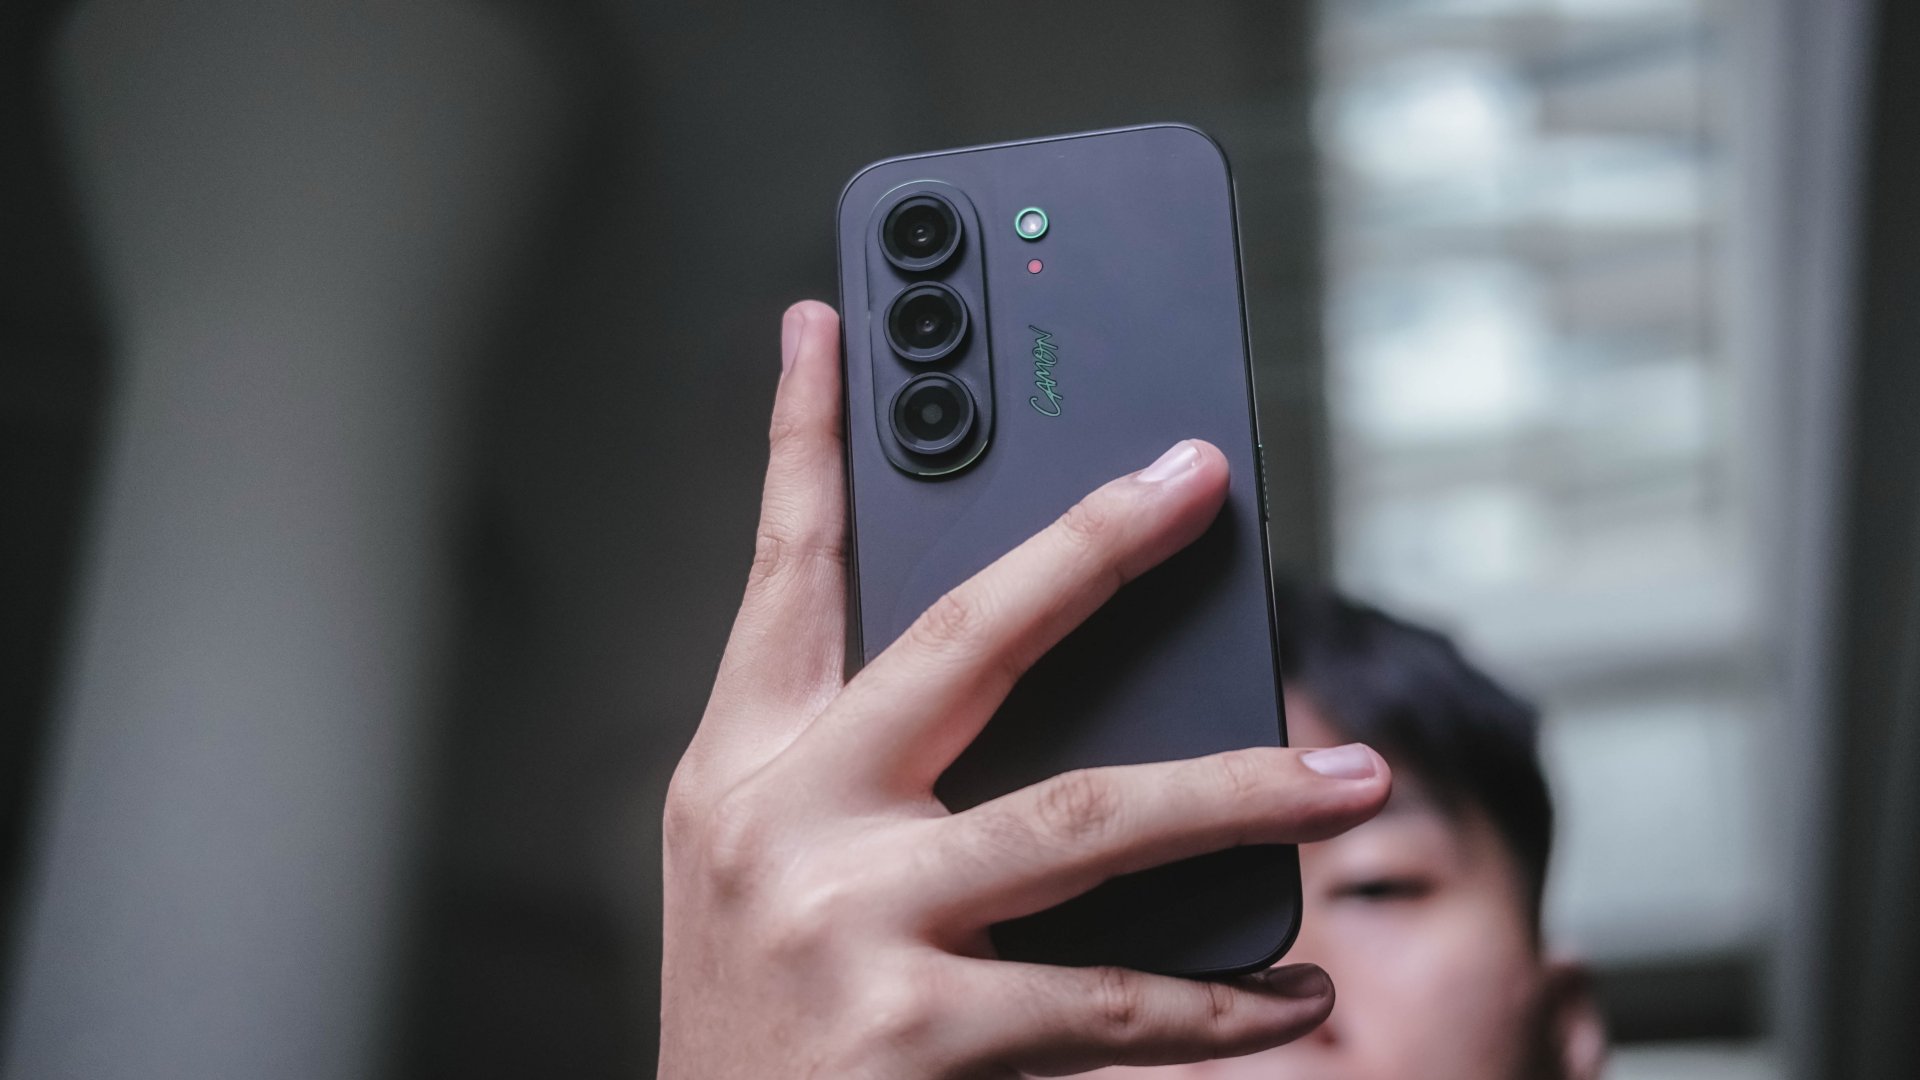
Even if it has flat edges, the phone is still easy to hold for longer periods. That slimness and a weight of only 171 grams contribute to that overall handfeel.
Being thin doesn’t mean being overly fragile either. TECNO gives the CAMON Slim 5G triple IP68, IP69, and IP69K ratings for that much-needed water and dust resistance.
So while its looks aren’t necessarily groundbreaking, its clean design, slim profile, and solid build quality all made the cut.
Bright sight with a sound delight
Easily another favorite part of the TECNO CAMON Slim 5G is none other than its audiovisual supremacy.
Up front is a large 6.78-inch 1.5K flat AMOLED display.

When I watched IU’s latest Dear my crazy soulmate live clip (dedicated to her long-time celebrity best friend Yoo In-na), I was immediately mesmerized by both her vocals and charm.
It just so happened that next in my YouTube’s autoplay list is fromis_9’s Jiwon in her WORKDOL era.

Just like the slimness of both idols I truly and dearly admire, the same can be said with TECNO’s CAMON Slim 5G.
Despite their form, they actually provide power-range vocals and irresistible visuals altogether.
Colors are vibrant, text and images look crisp, and the buttery smooth 144Hz refresh rate makes scrolling through apps and navigating HiOS feel incredibly fluid.
Pair that with its sound output and the CAMON Slim 5G becomes an enjoyable device for banging loudspeaker sessions.

Personally, it’s my first time to see the Infinity Volume Plus feature which boosts the audio output by up to 300% more.
Ryu Sujeong’s latest redemption arc release against her bubbly and innocent visuals during her prime with Lovelyz is the best sample I can think of to enjoy CAMON Slim 5G’s audio fidelity.
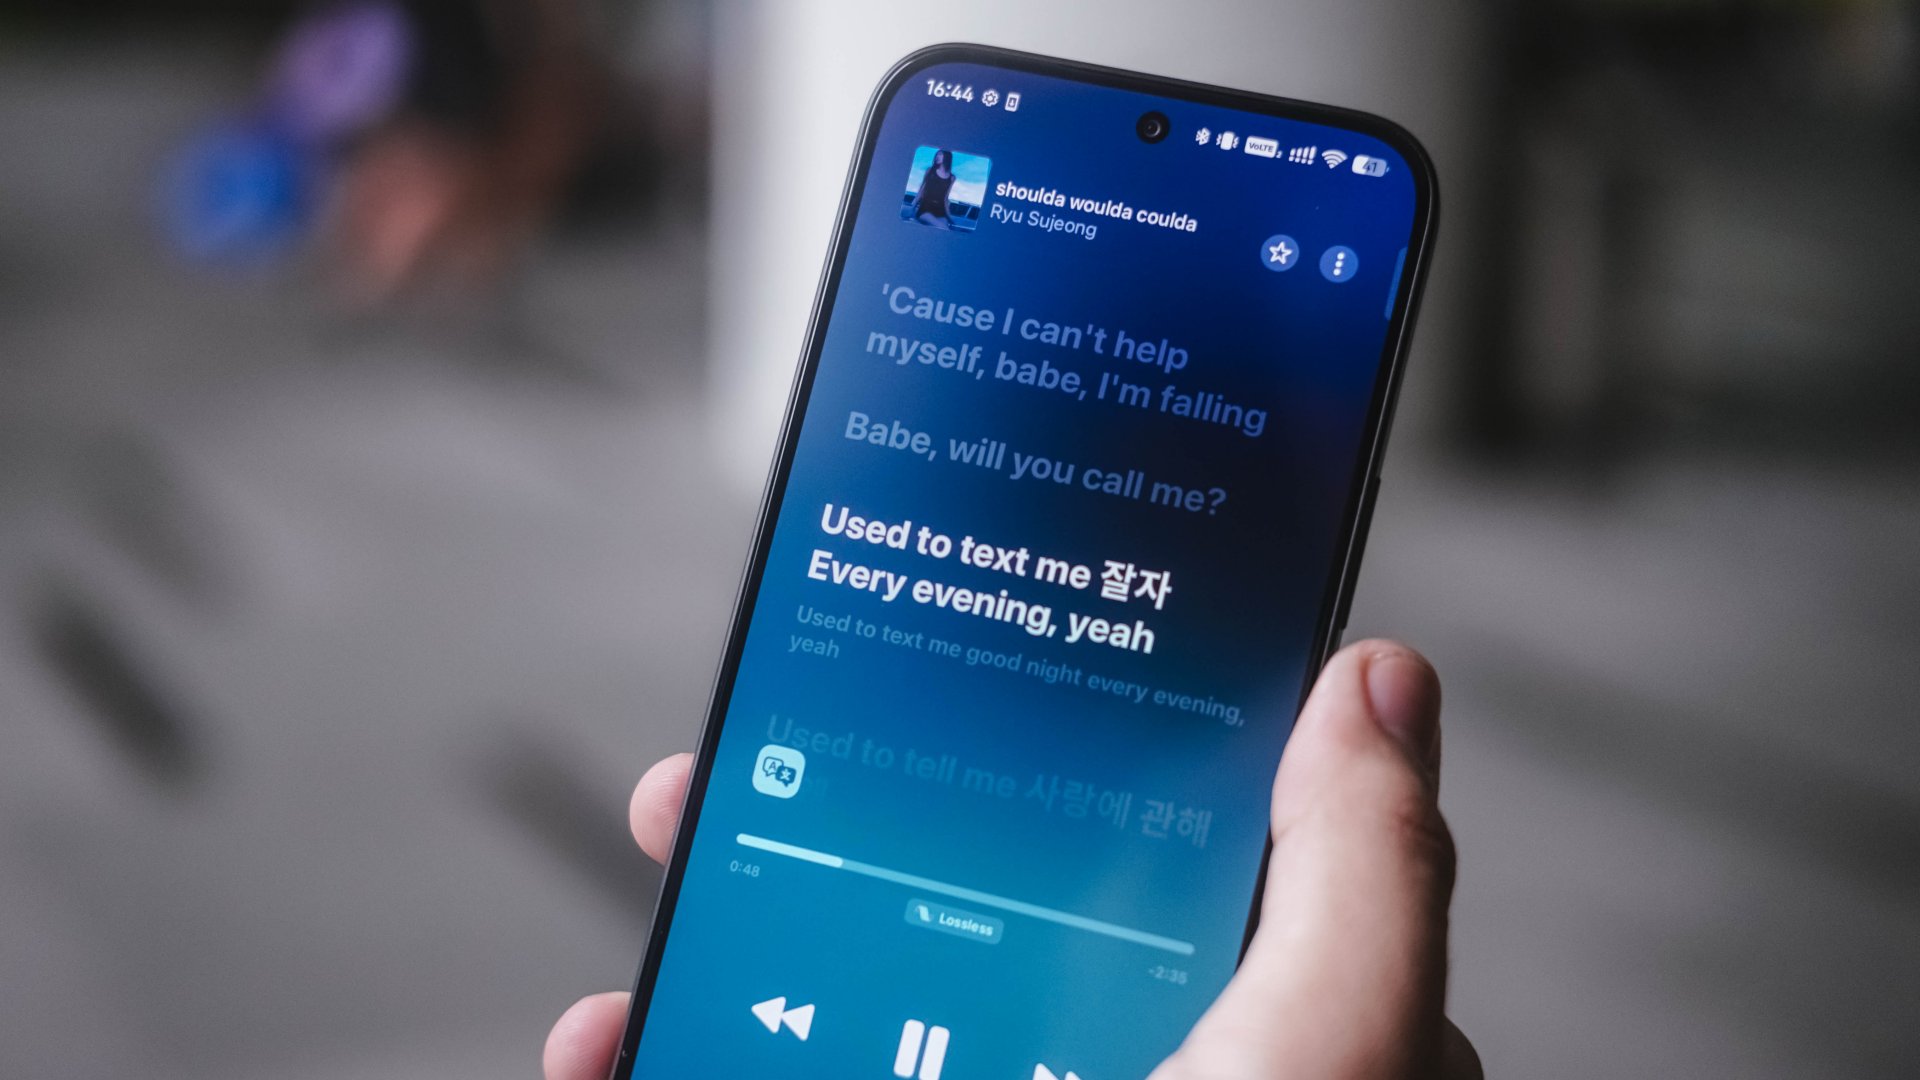
Needless to say, its Dolby Atmos stereo speakers already sound loud when out and about.
Whether I was watching long-form videos, scrolling through my Instagram Reels algorithm full of pets, idols, dank and even dark memes. Or simply just streaming my latest K-Pop music faves, TECNO’s focus on these two made a lot of sense for a slim smartphone ready to be someone’s content companion.
New chip with an efficiency dip
Powering the TECNO CAMON Slim 5G is MediaTek’s latest Dimensity 7300e chip announced as early as April 2026.
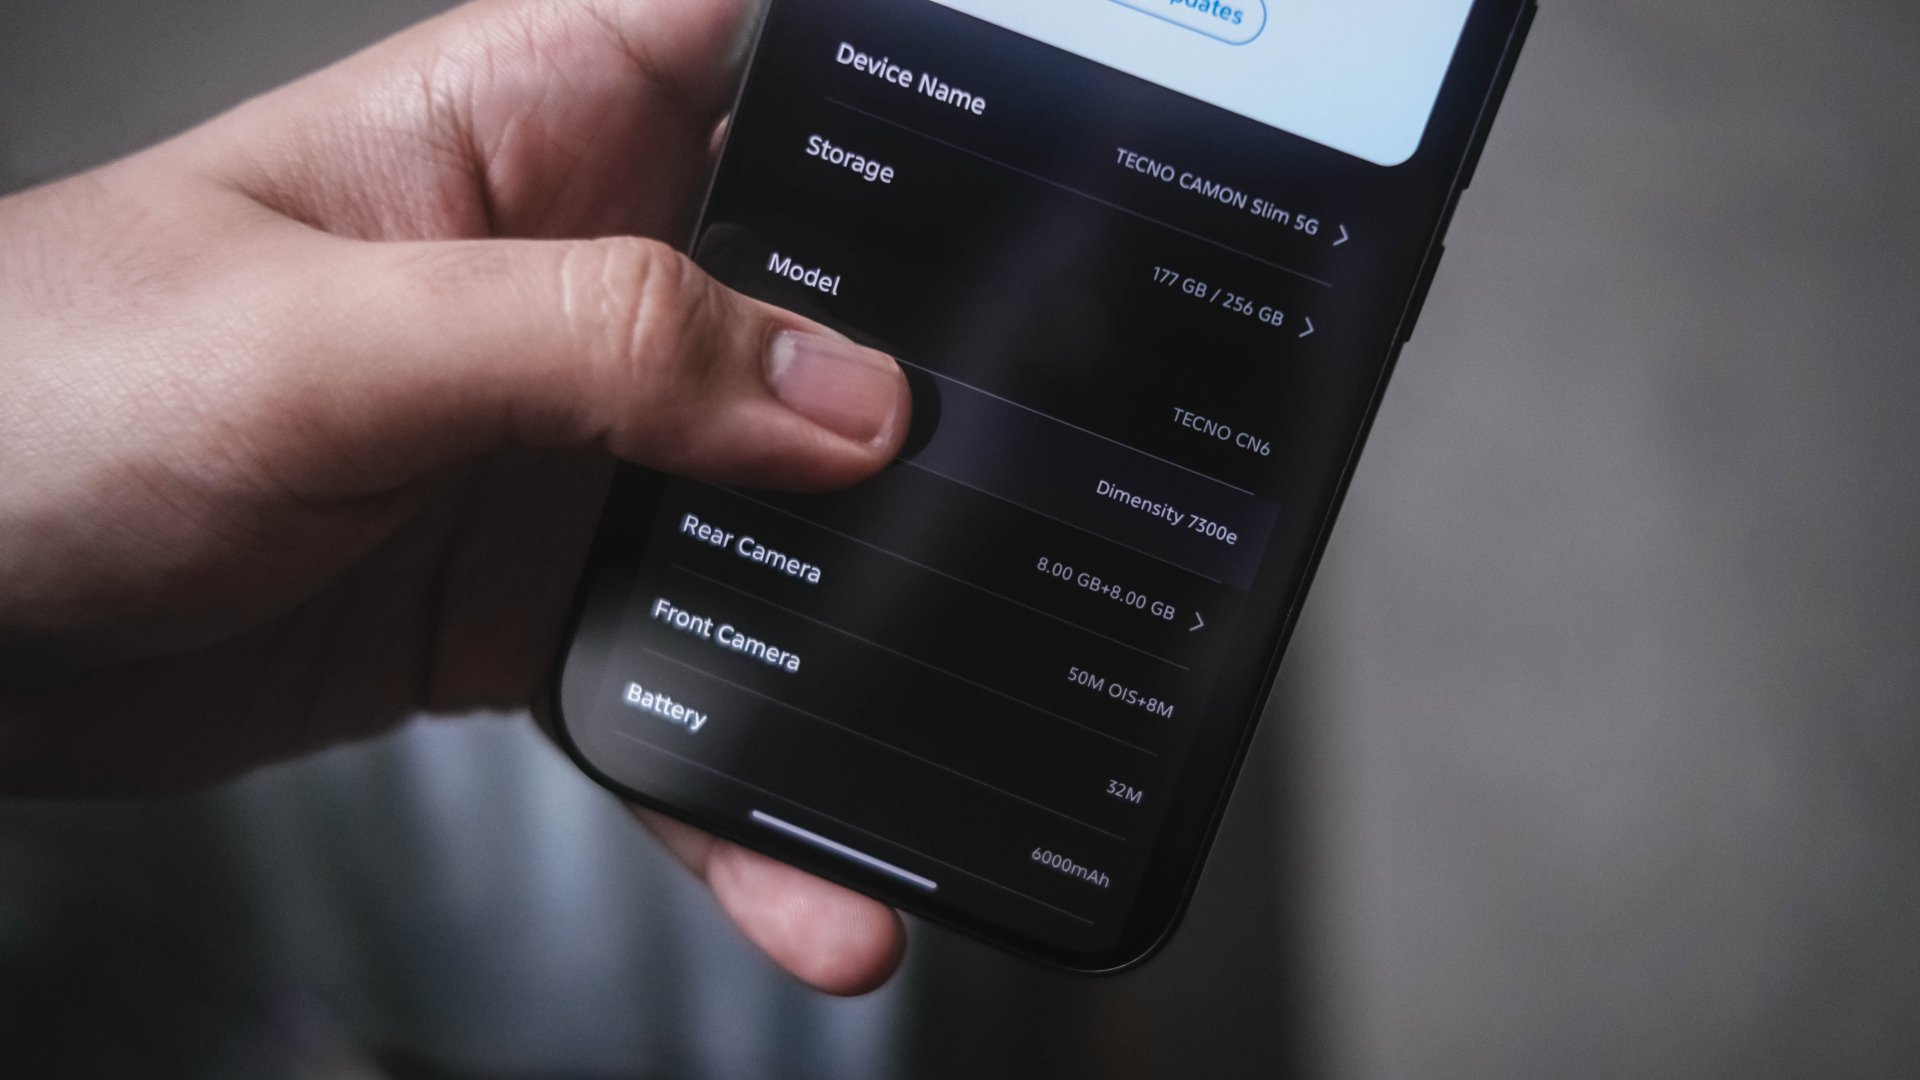
While I firmly believe that the “e” stands for “efficiency,” my experience proves otherwise.
Firing up HoYoverse’s Zenless Zone Zero gave some false hopes with its “Medium” graphic settings by default.
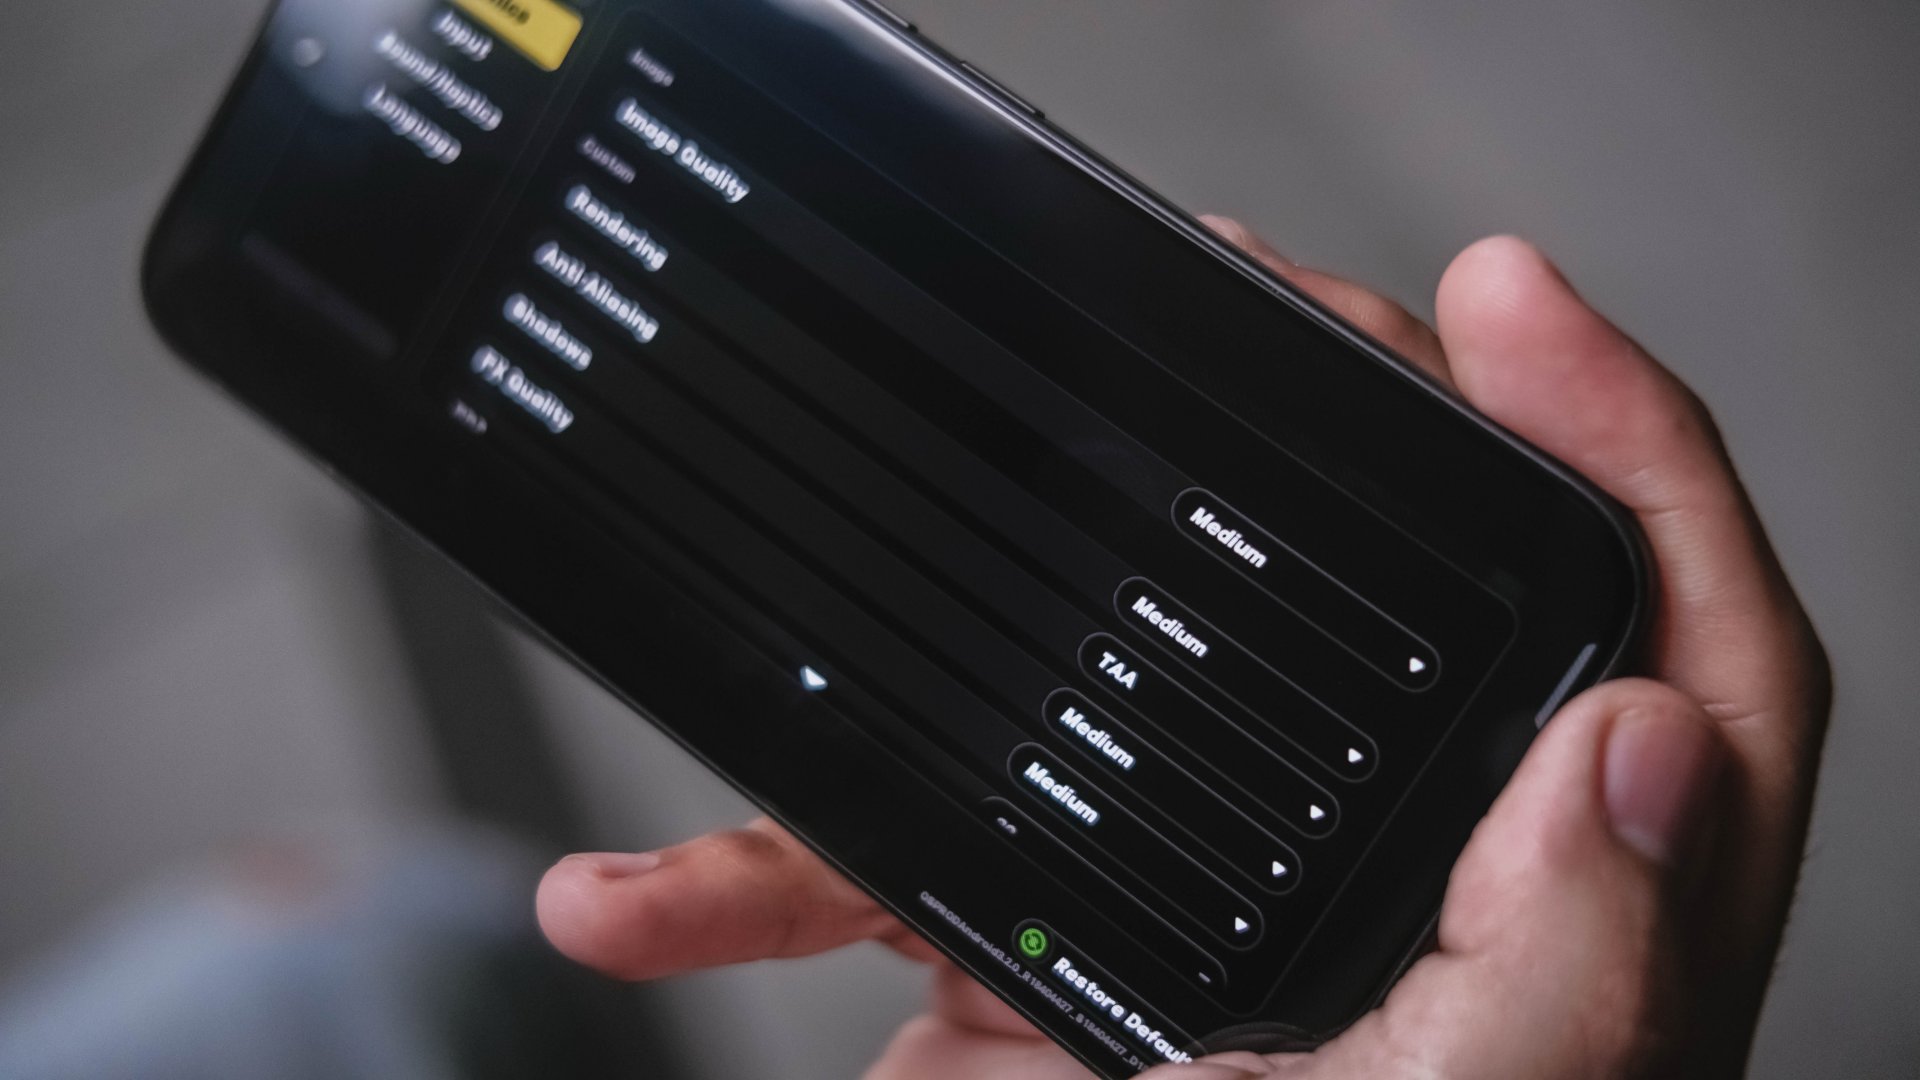
The only way to play the game without stutters is by lowering rendering and graphics to low, frame rate at 30fps. Also, by enabling Performance Mode hidden in the High Boost sidebar.
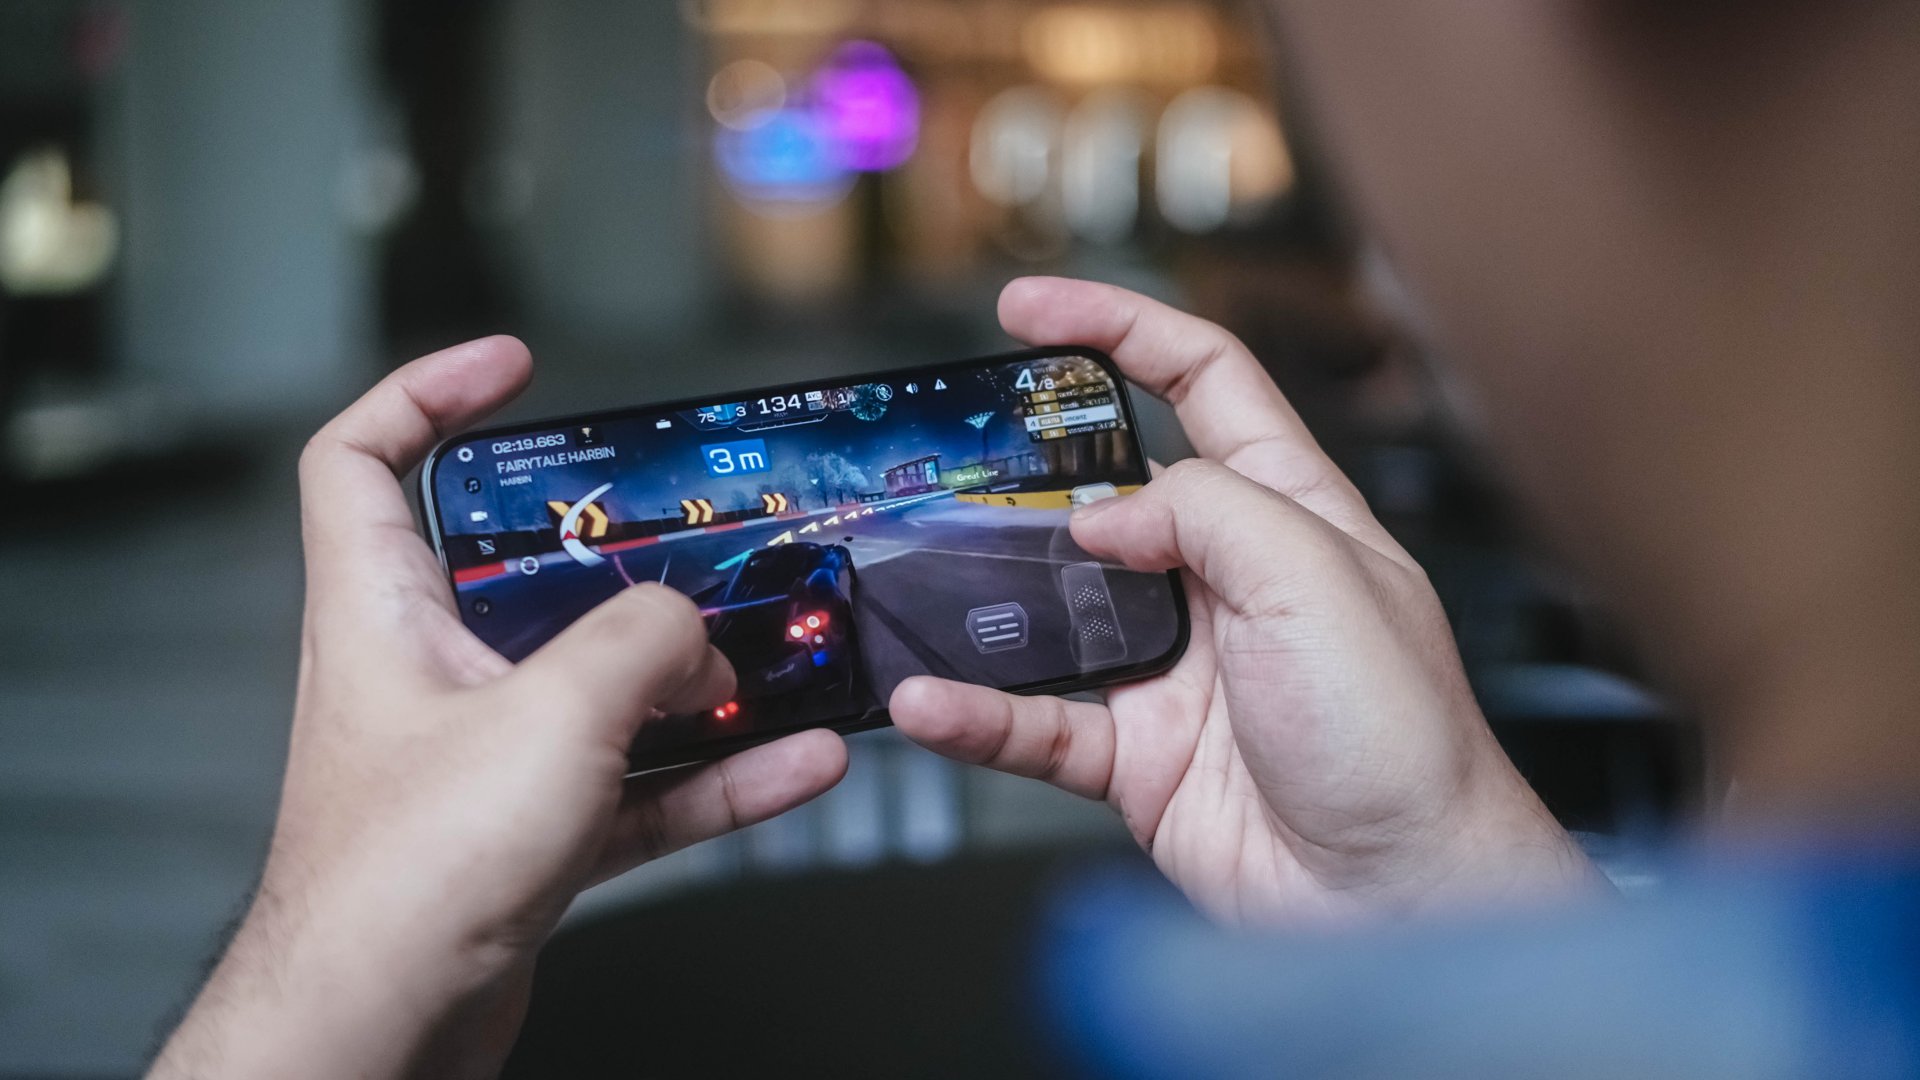
Racing Master? It’s playable with its out of the box graphics but I still recommend doing the same thing just to avoid that unwanted stutter.
Those being said, the CAMON Slim 5G don’t necessarily mean it’s awfully slow.
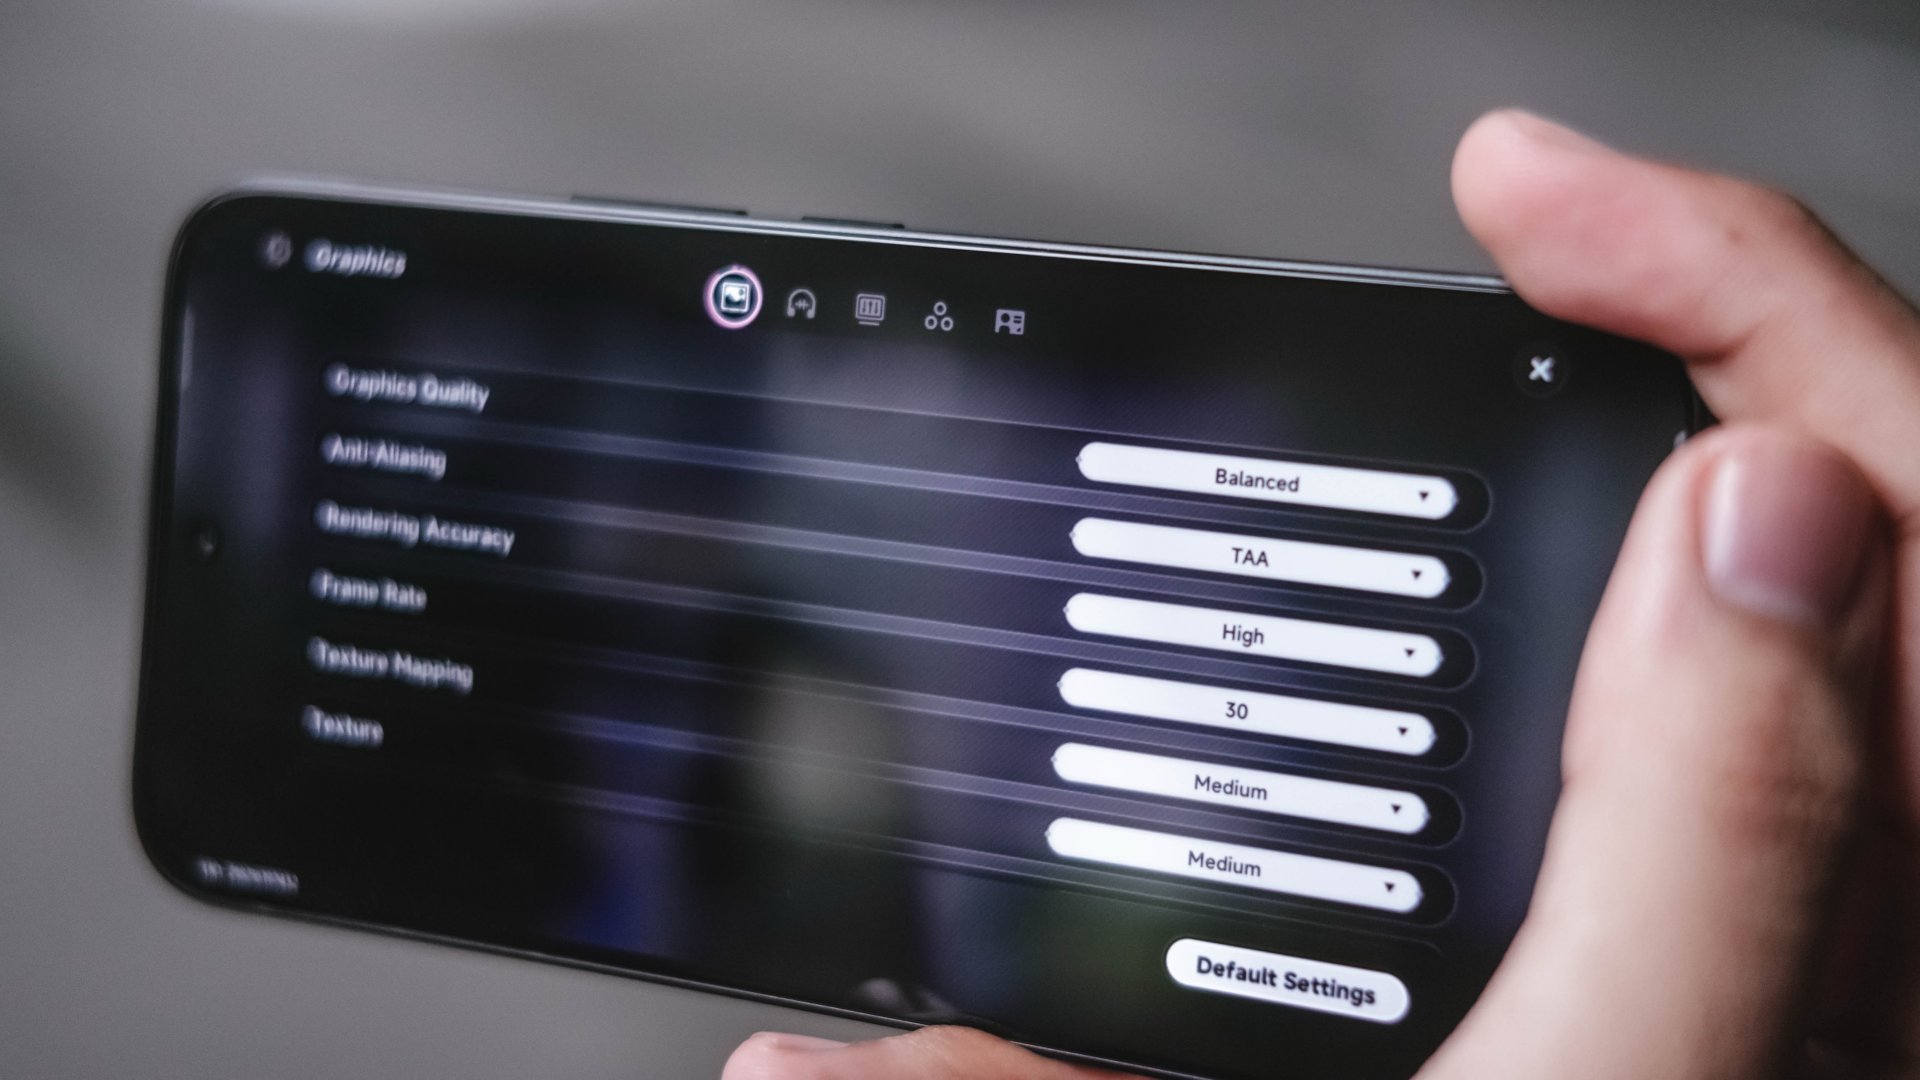
In a surprising turn of events, Neverness to Everness performs smoother and better even under Balanced graphics.
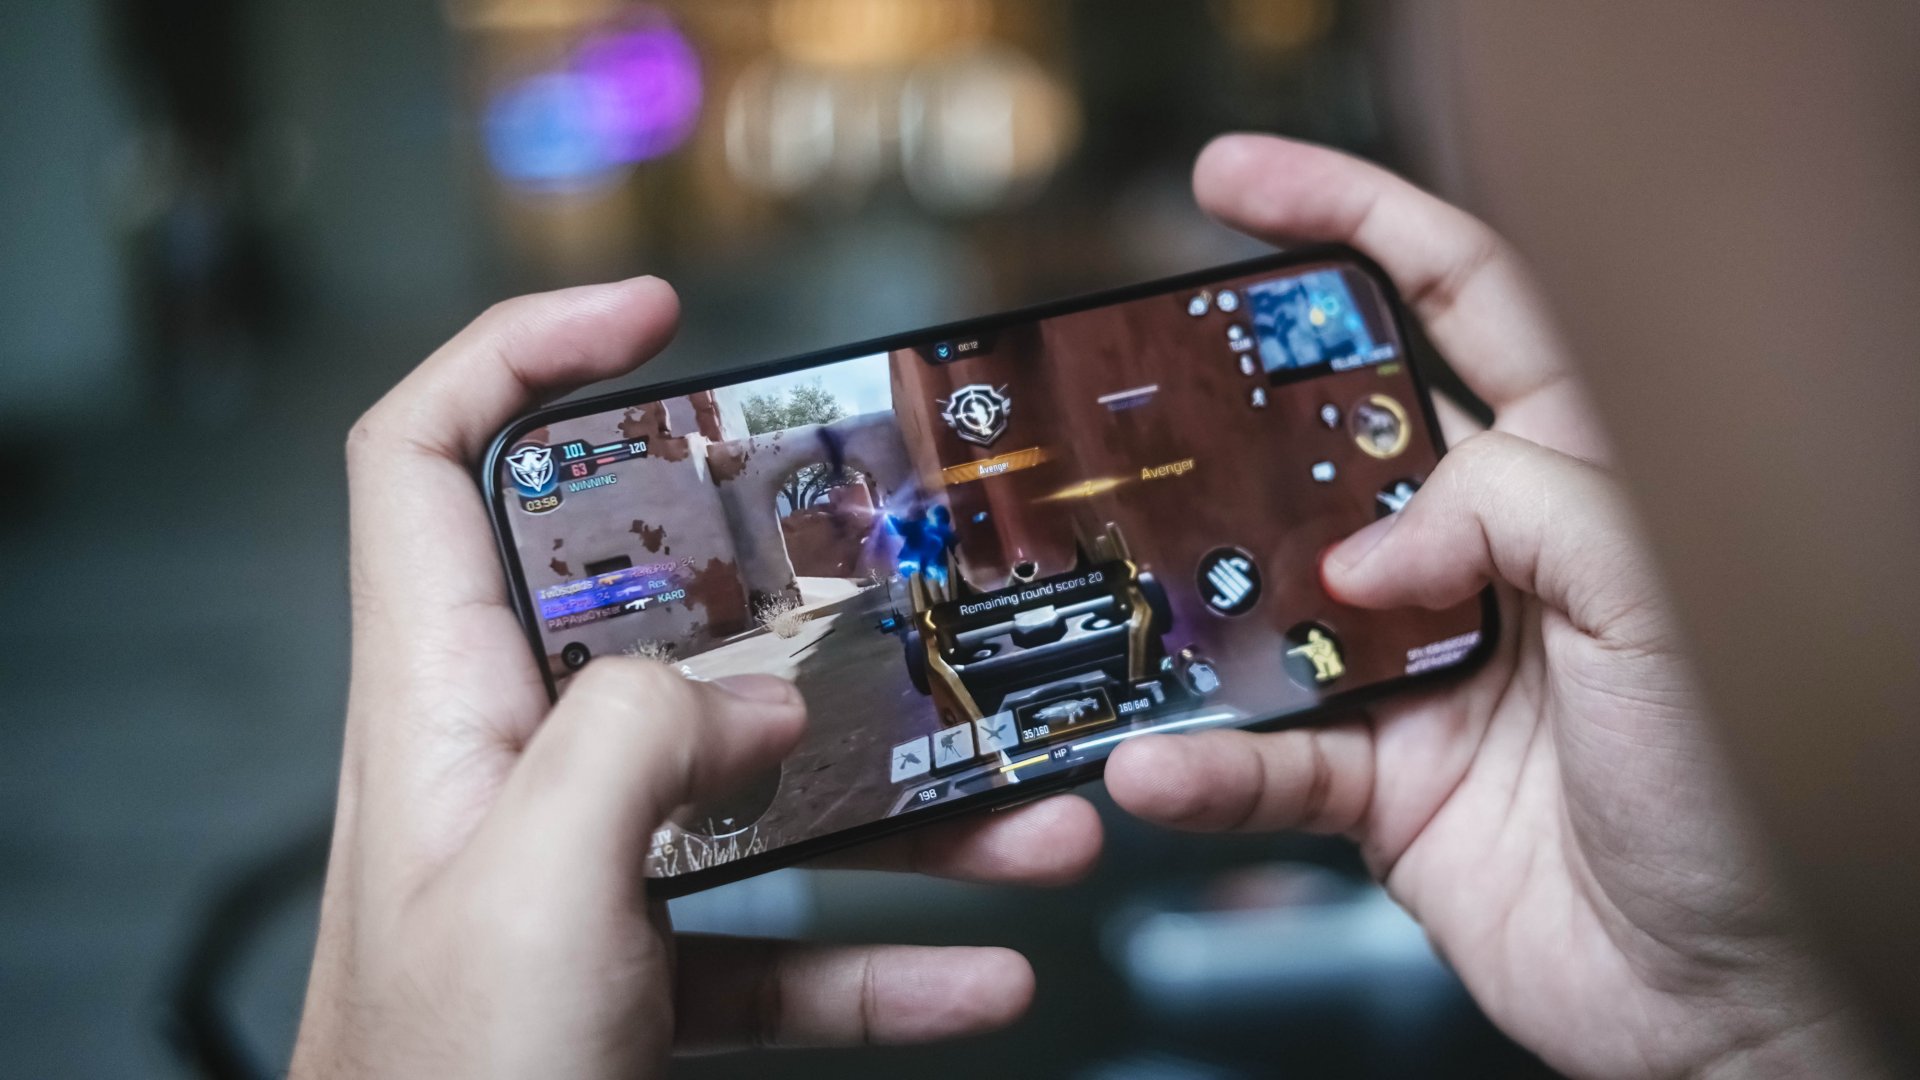
Call of Duty: Mobile and Mobile Legends: Bang Bang, like most phones in the league, run without frills.

However, that slim form factor meant getting toasty hot when used for gaming and other intensive tasks in the long run — or at least by the time you hit the 15- to 30-minute mark.
Not that this phone is totally meant for gaming. Still, the huge trade-off of its utmost slimness is simply the lack of space for a better cooling chamber.
This leads to ineffective heat dissipation resulting to performance bottleneck. A huge reason why the “e”fficiency is barely felt in this 5-month old processor.
Now when it comes to doomscrolling, streaming, split-screen multitasking and other everyday tasks, they all run without a hitch.

In the grand scheme of things, a 5G-enabled chip is still better right now when internet speeds matter a lot.
Thus, this is still a better option than the CAMON Slim 4G with a slower chip inside it.
Big cell that lasts (almost) well
We’ve seen manufacturers shave millimeters off their devices before. But doing so usually means making compromises somewhere else — most commonly in battery capacity.
While the CAMON’s chipset isn’t quite the midrange chip champ I was expecting, thankfully, TECNO compensates for some of that inefficiency with sheer battery capacity.
Inside its oh-so-thin chassis is a large 6000mAh battery. For some context, its 4G variant has a slight smaller 5600mAh tank. Last year’s POVA Slim 5G? Only at 5160mAh.
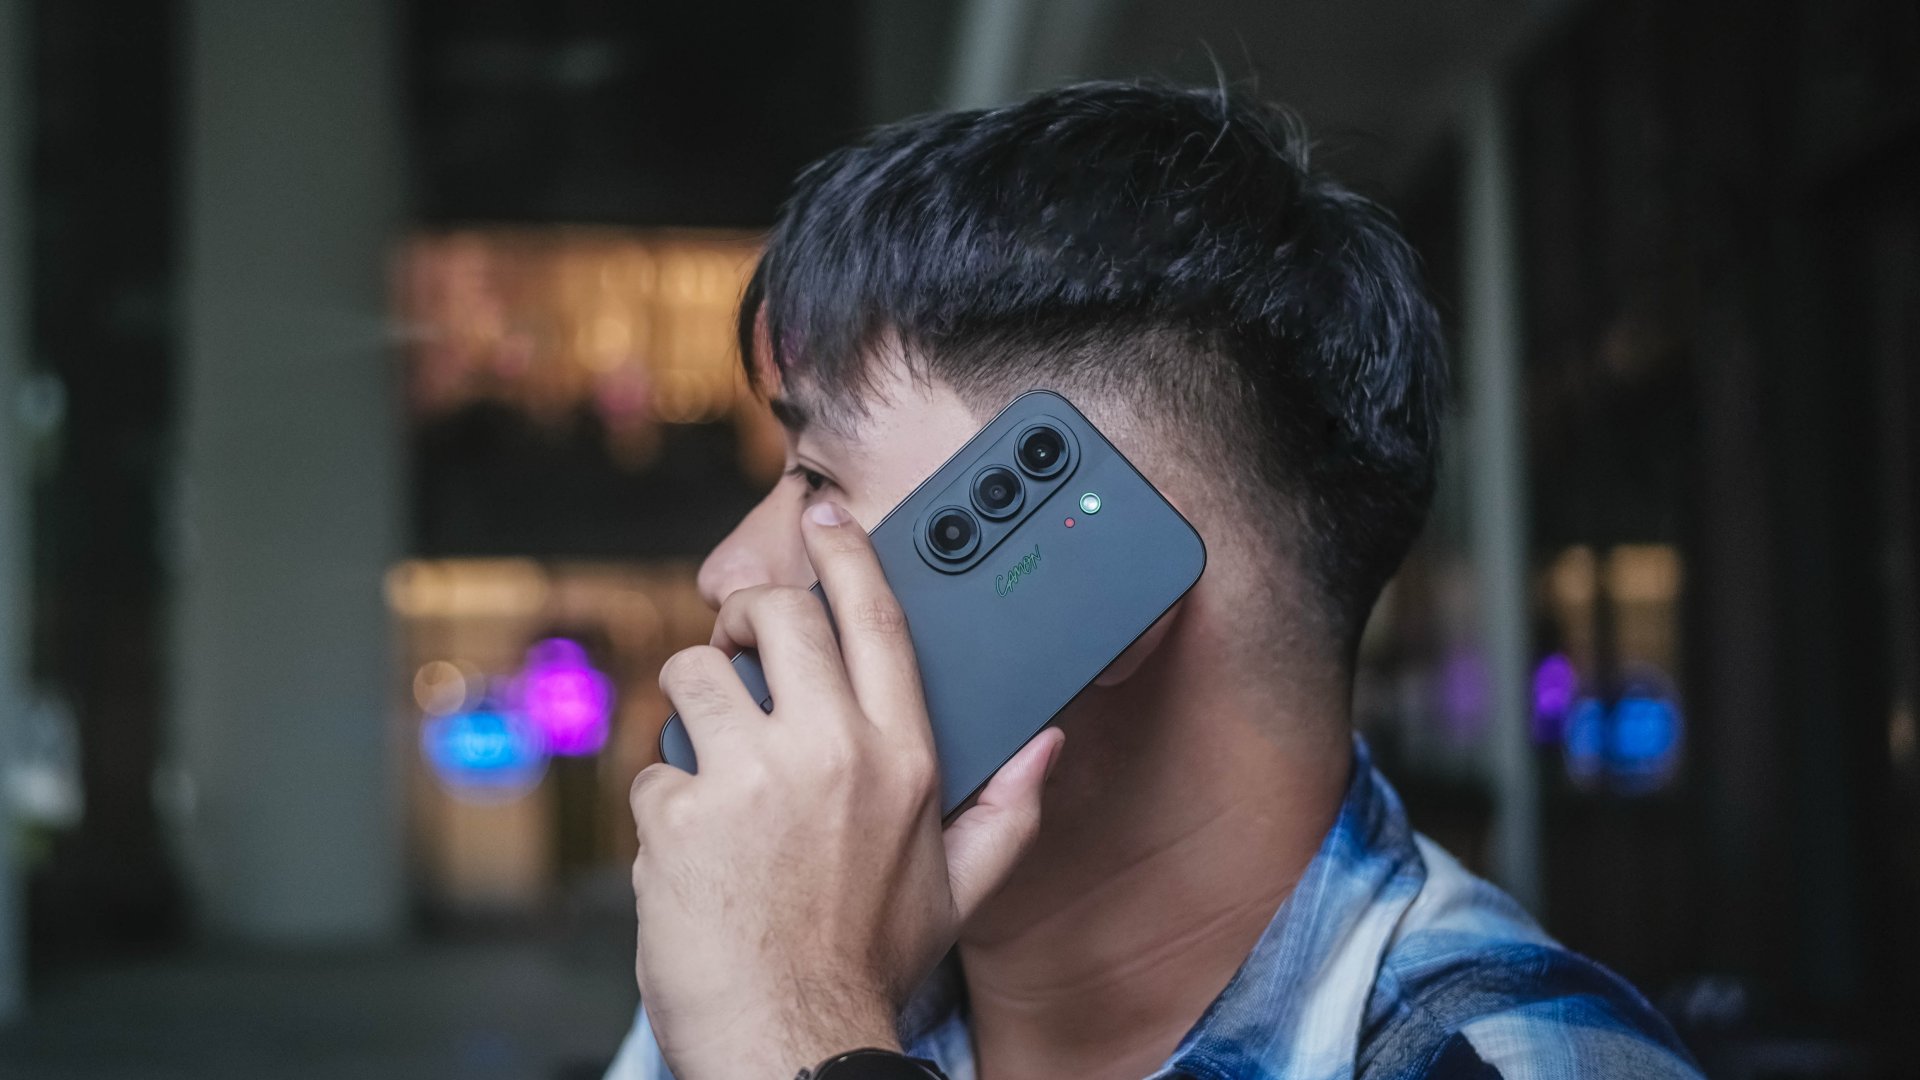
Even if the Dimensity 7300e had some performance reservations, the battery is still enough to get me throughout the day — as long as I don’t fully exhaust it.
That said, I made this phone as my one-stop hotspot for a day. From 5AM, it only lasted me around 7PM until it ultimately died down.
Standby time further proves how power-hungry it is. The CAMON Slim 5G still consumes battery even when resting on a desk for hours.
The POVA 8 Pro with a slightly better chip and 500mAh more battery was able to last more than 12 hours the next day without being touched after I placed it on my desk with only 11% remaining in it.
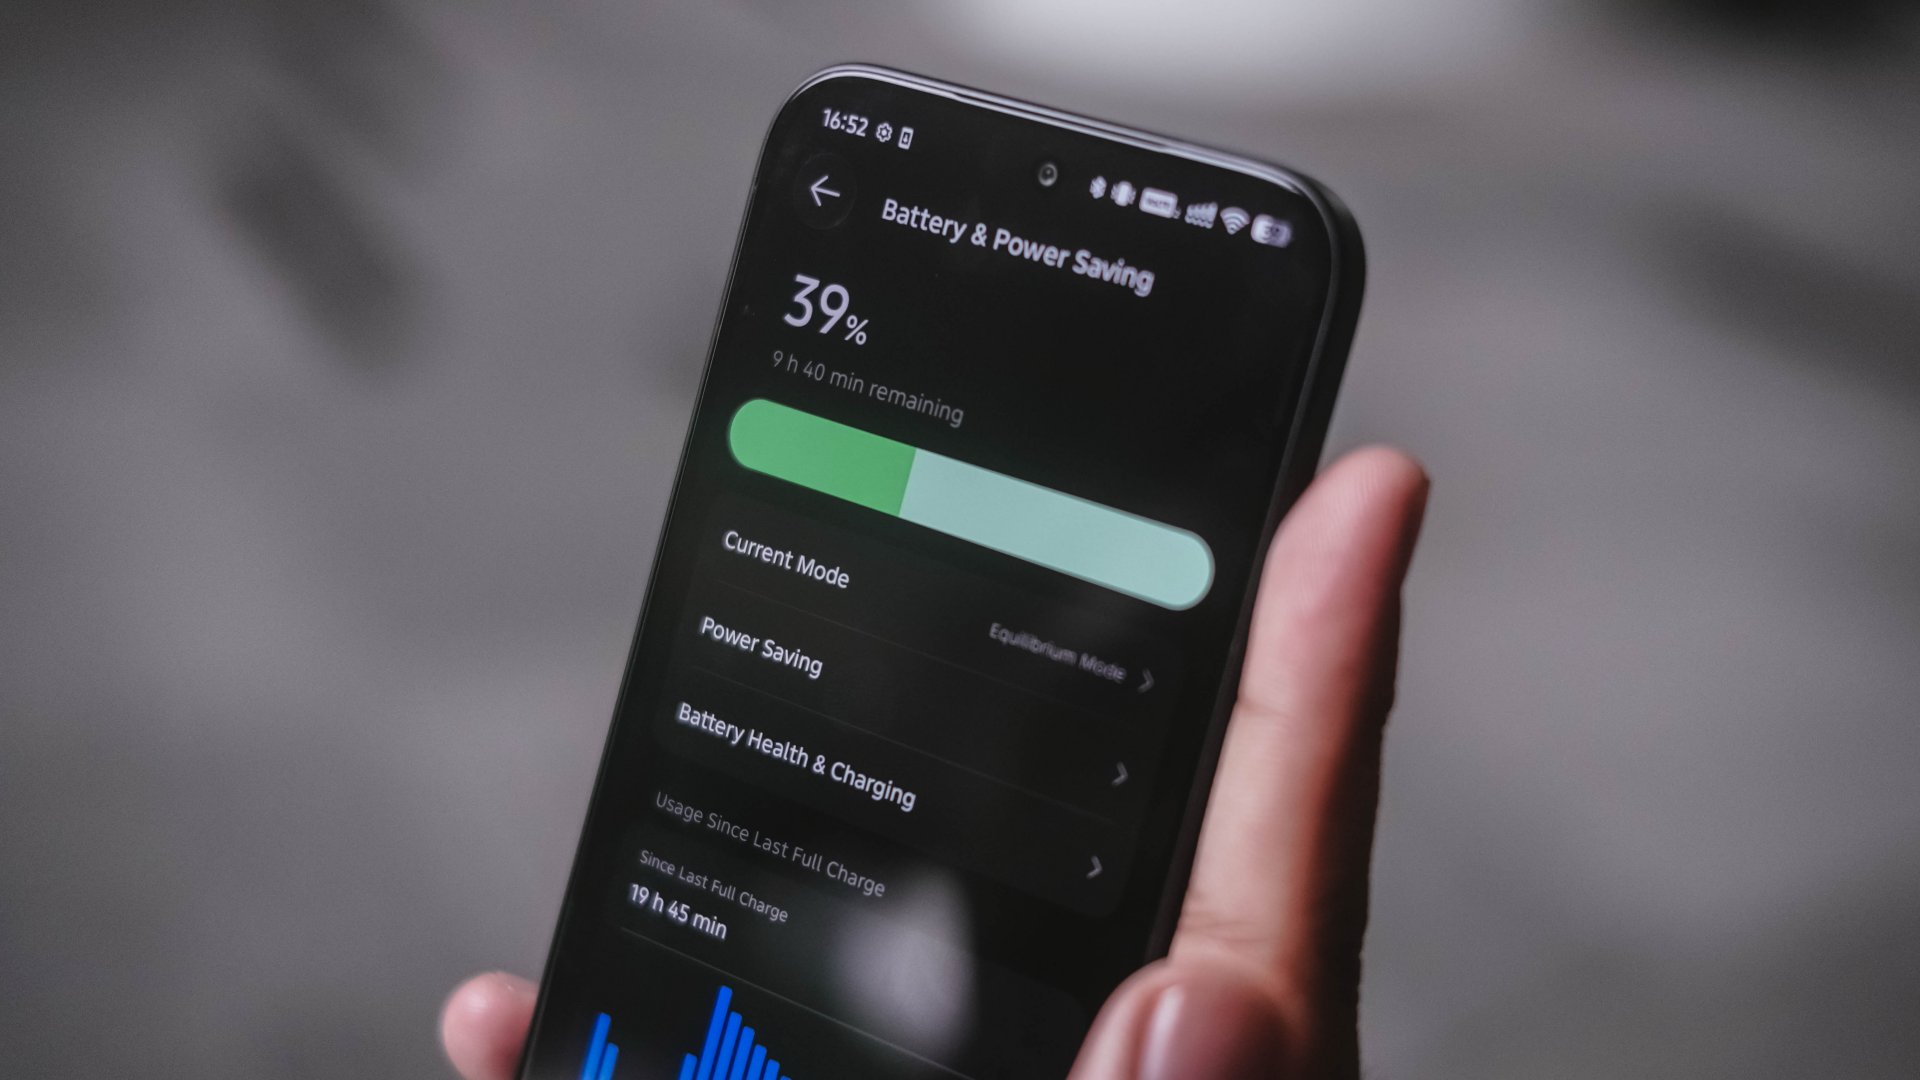
Considering the many TECNO phones I’ve used with big batteries in the recent months, I honestly expected better optimization for a slimmer device equipped with an “e” chip.
Now, when the juice completely runs out, the phone supports TECNO’s not-so-fast yet still reliable 45W wired charging.
Two attempts in the GadgetMatch Charge Test prove that it can be filled at least below 1.5 hours.
Attempt #1 |
Attempt #2 |
|
START TIME (from 0%) |
3:25AM |
10:37PM |
3 minutes |
2% |
4% |
5 minutes |
8% |
7% |
10 minutes |
11% |
12% |
15 minutes |
22% |
17% |
30 minutes |
40% |
38% |
45 minutes |
59% |
56% |
1 hour |
79% |
77% |
1 hour 15 minutes |
94% |
93% |
END TIME (100%) |
4:47AM
|
12:00AM
|

For better measure, I have to insert this part as well.
POVA 8 Pro
|
CAMON Slim 5G
|
|
START TIME (from 0%) |
5:00AM |
3:25AM |
3 minutes |
5% |
2% |
5 minutes |
8% |
8% |
10 minutes |
19% |
11% |
15 minutes |
27% |
22% |
30 minutes |
53% |
40% |
45 minutes |
78% |
59% |
1 hour |
97% |
79% |
1 hour 15 minutes |
– |
94% |
END TIME (100%) |
6:04AM
|
4:47AM
|
The POVA 8 Pro Tonino Lamborghini I handled clearly has the same charging speed and bigger battery. Yet, it was still able to finish first. A smartphone’s chipset choice clearly has an effect.
Are the cameras CAMON-like?
The CAMON line has always put a fair amount of emphasis on photography. Hardware-wise, their Slim model isn’t any different.
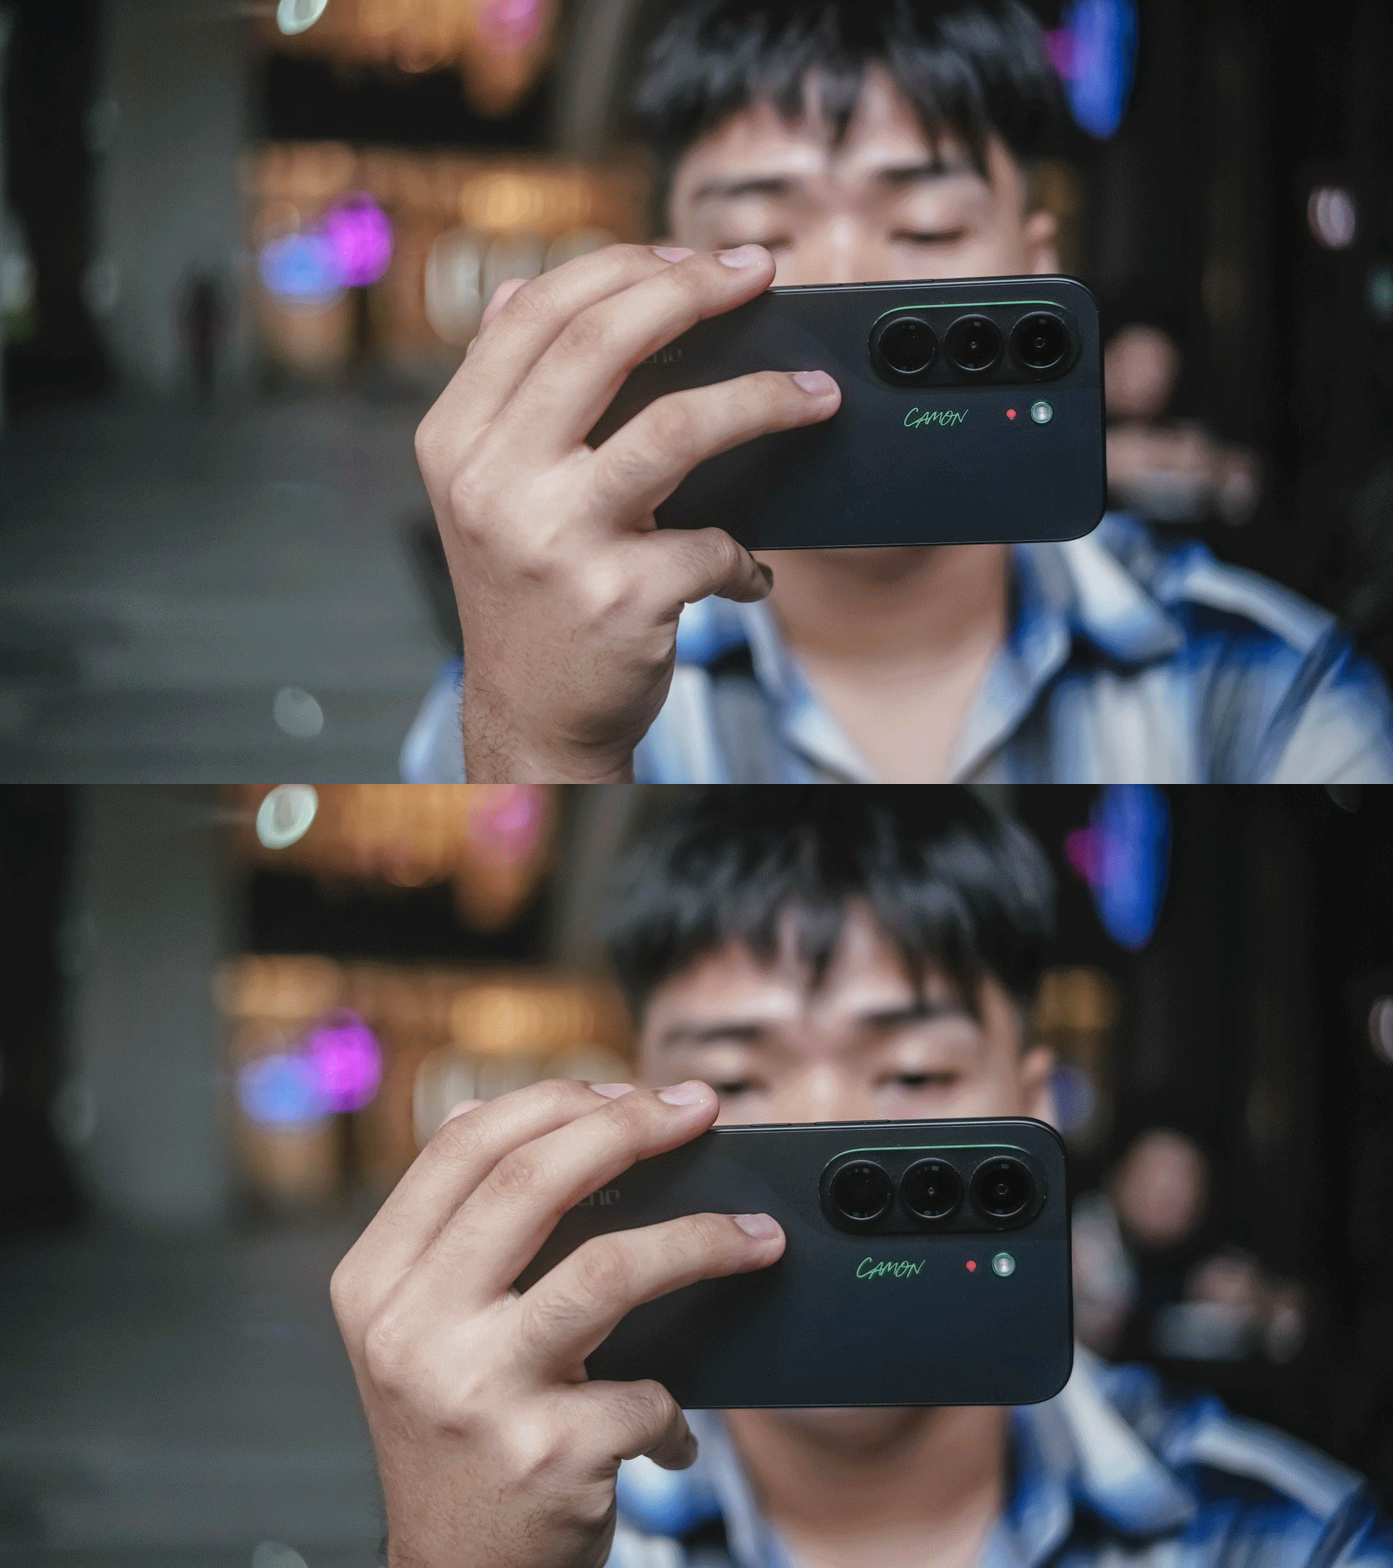
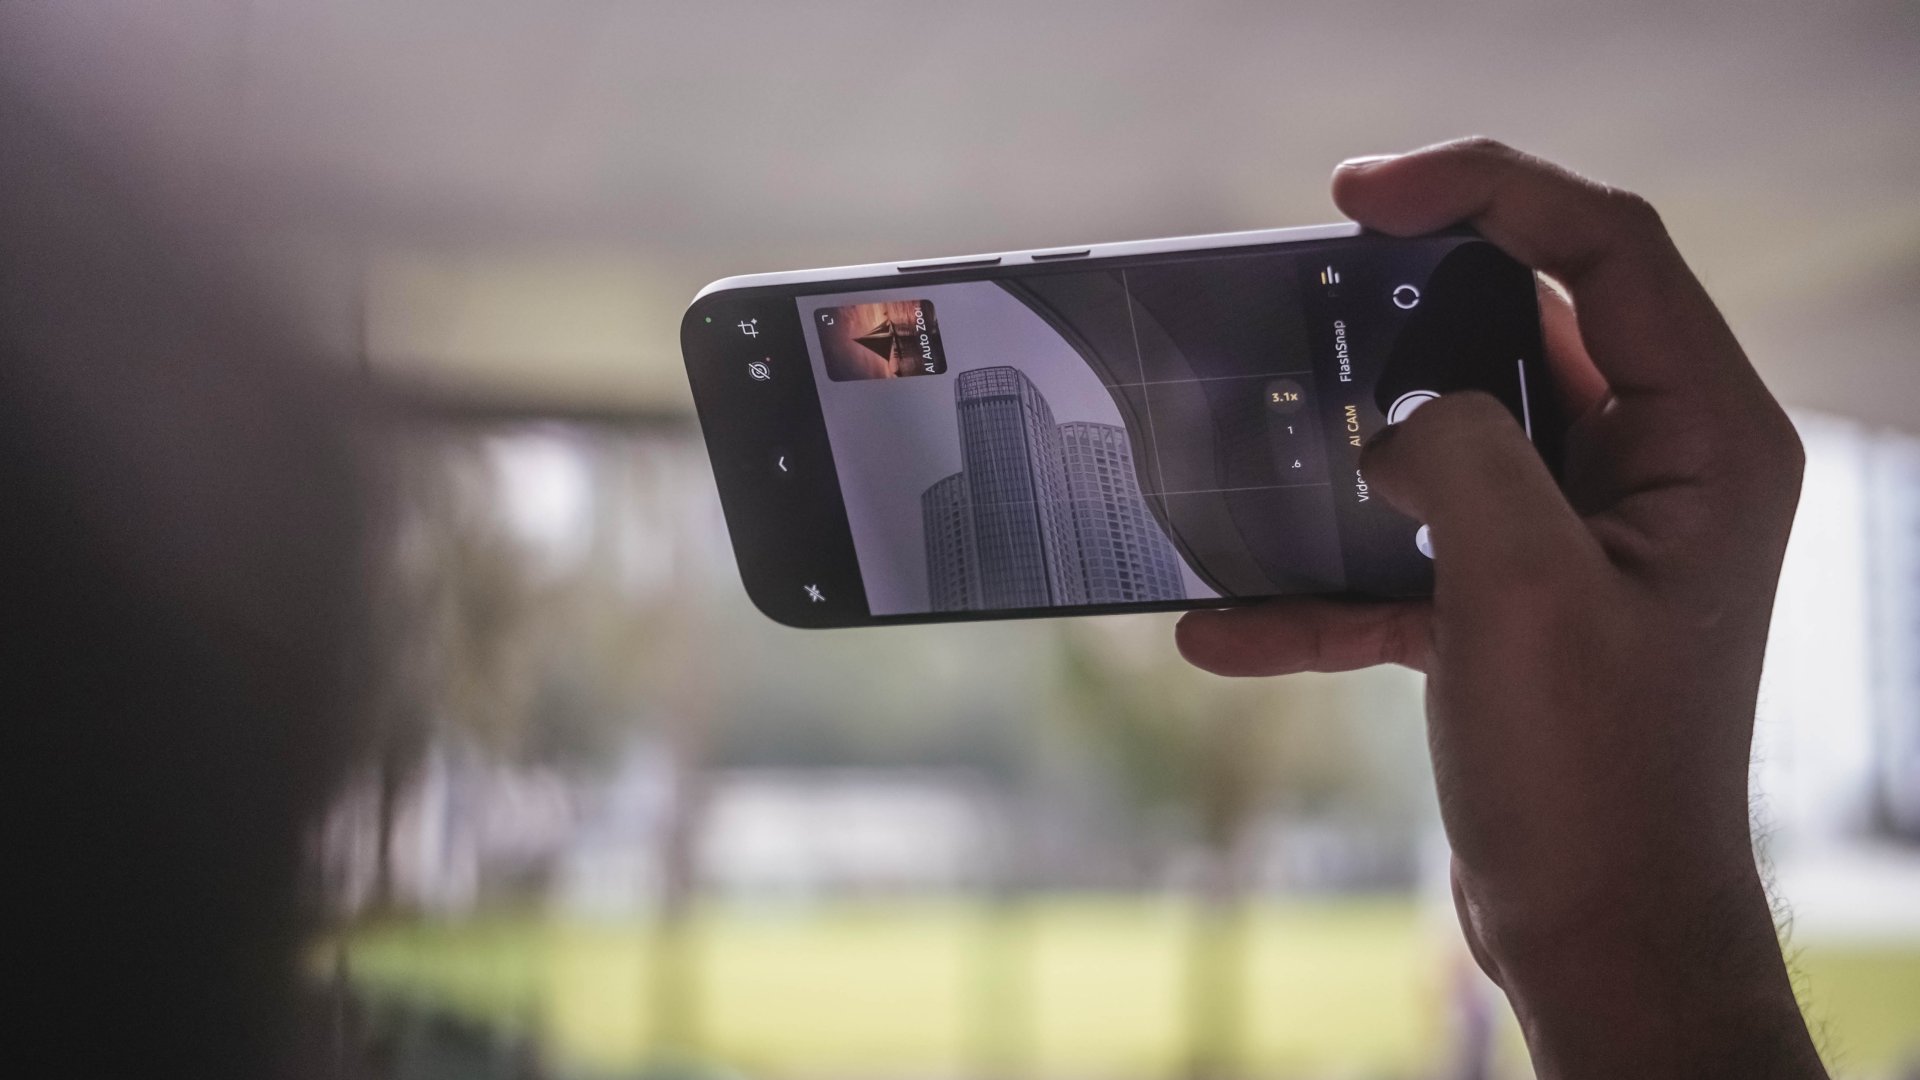
Don’t be fooled by that triple camera lens setup though as it only features two rear shooters: a 50MP Sony LYTIA-700C main sensor accompanied by the widely conventional 8MP UWA camera.
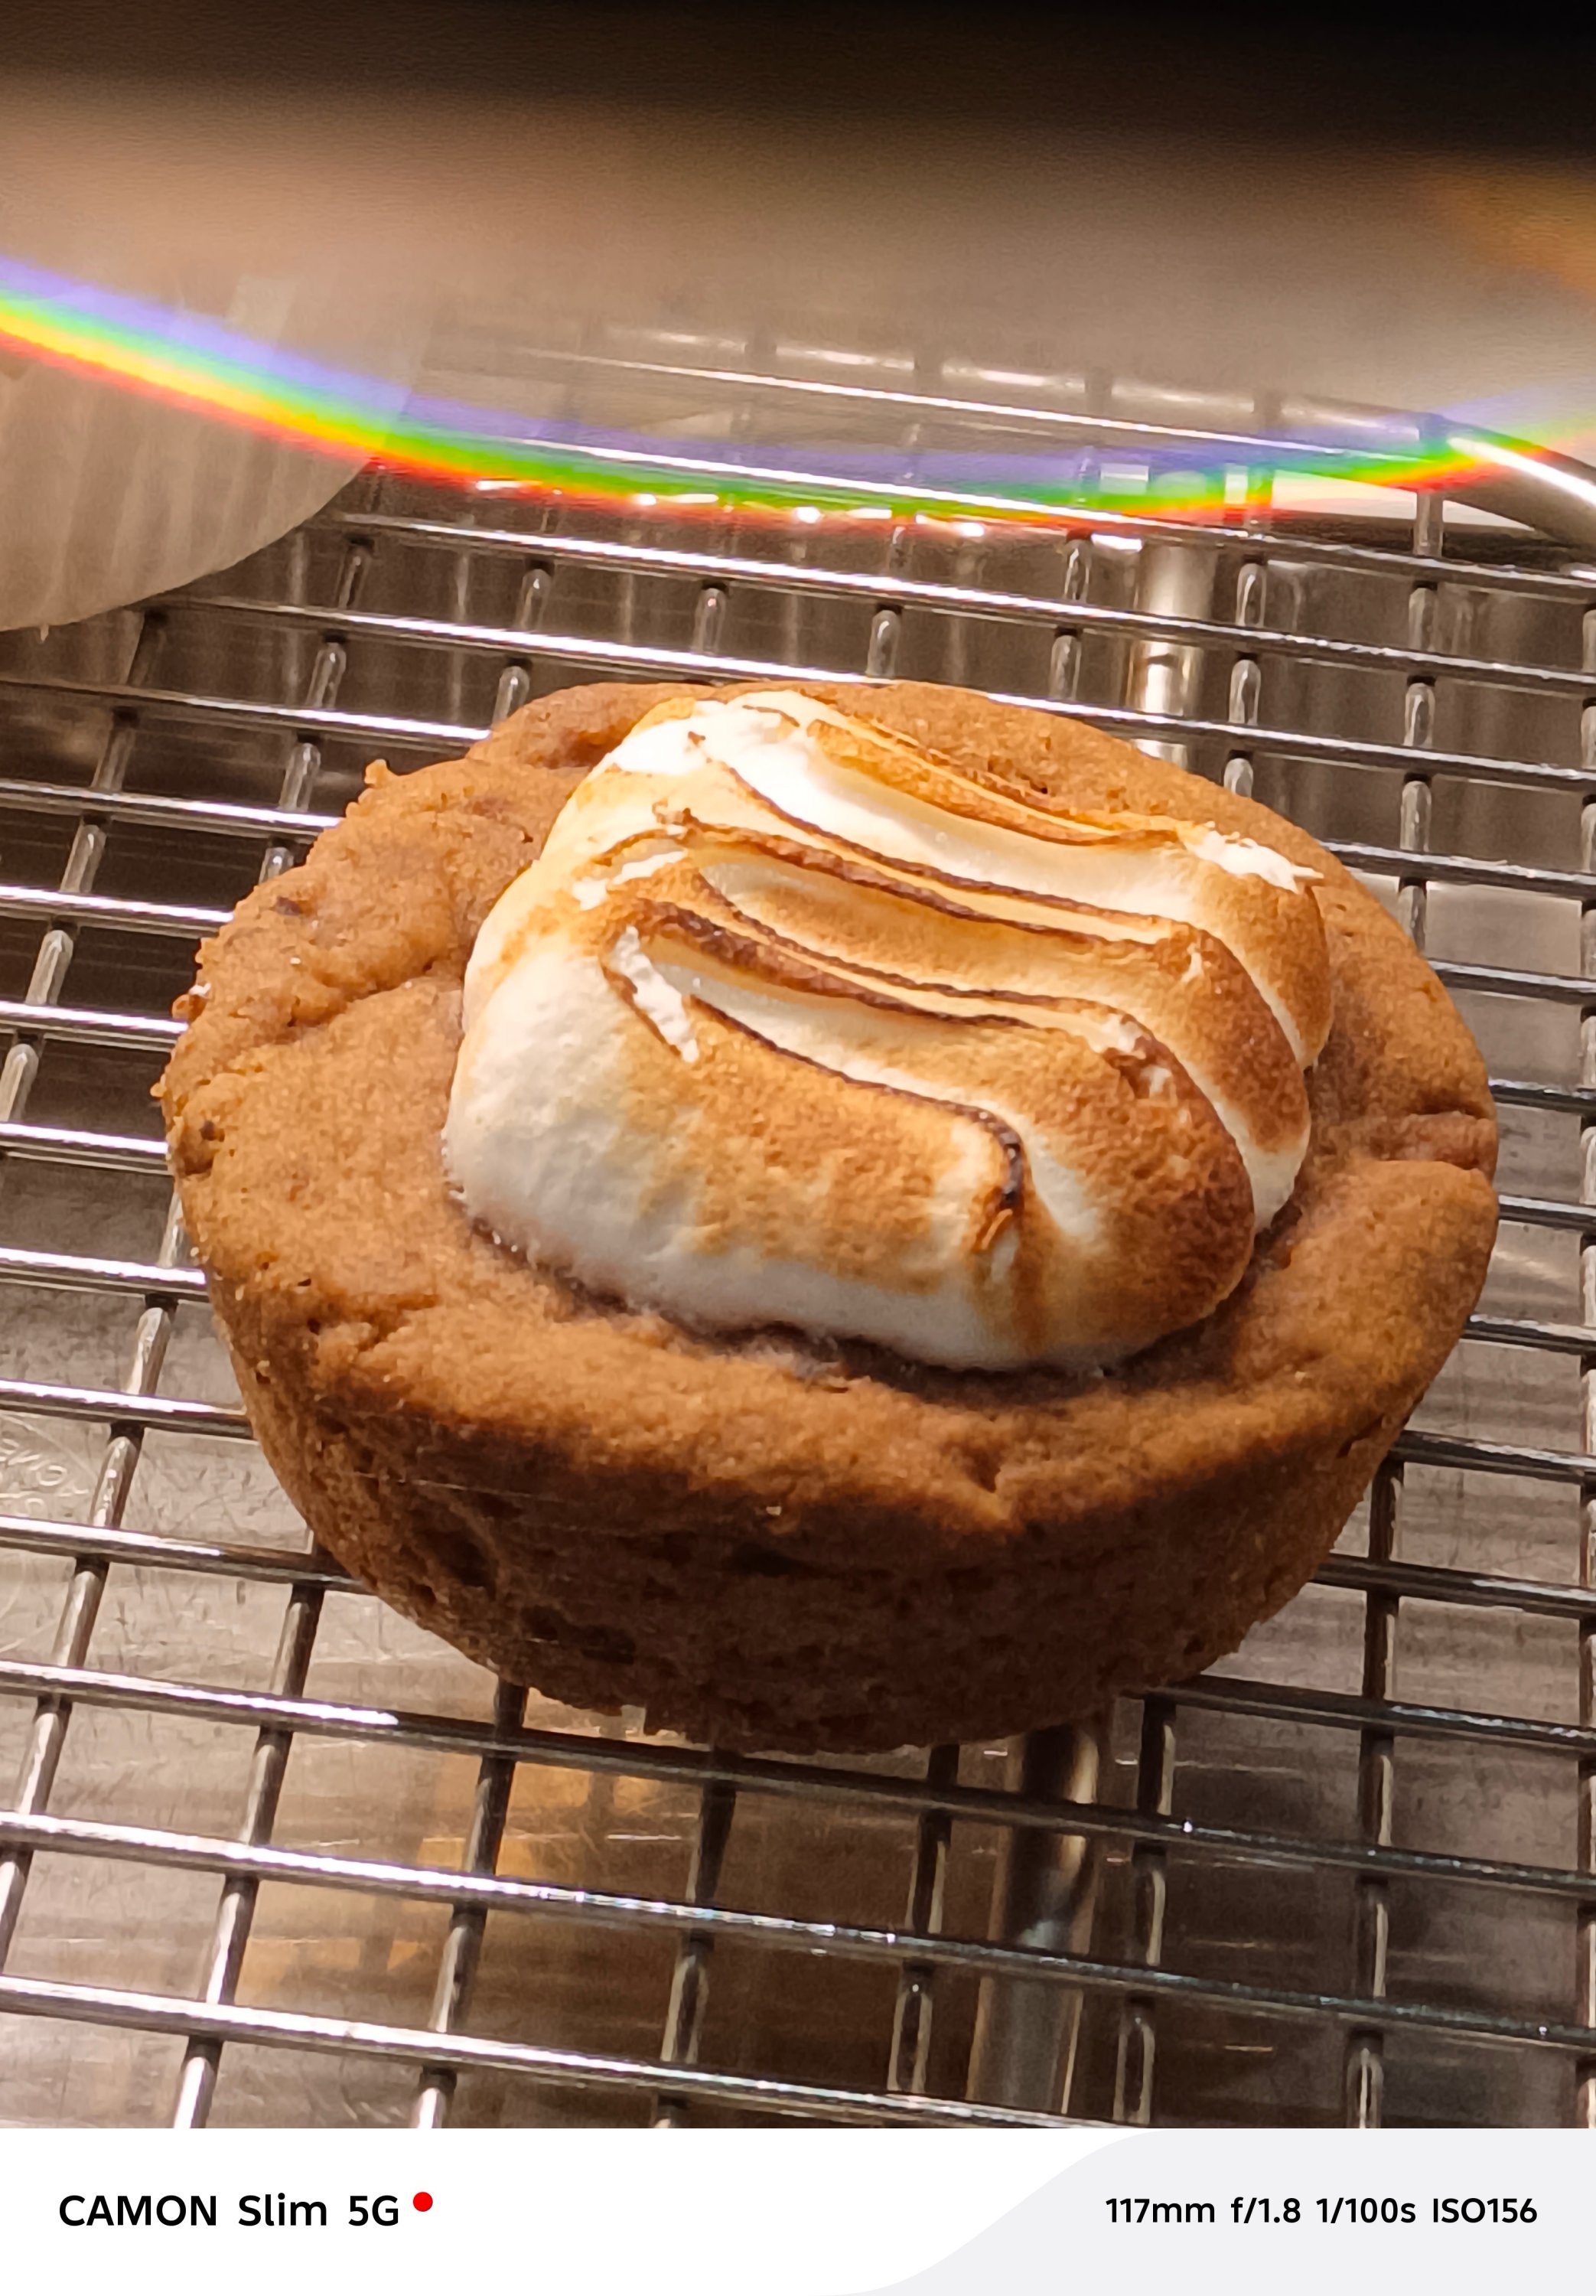
I’ll keep this part simple. The cameras are just right. Photos from the main camera are enough for everyday shooting.




Honestly, most photos seem like they were captured by a SPARK, not a CAMON. While there were hits, there were quite misses as well.
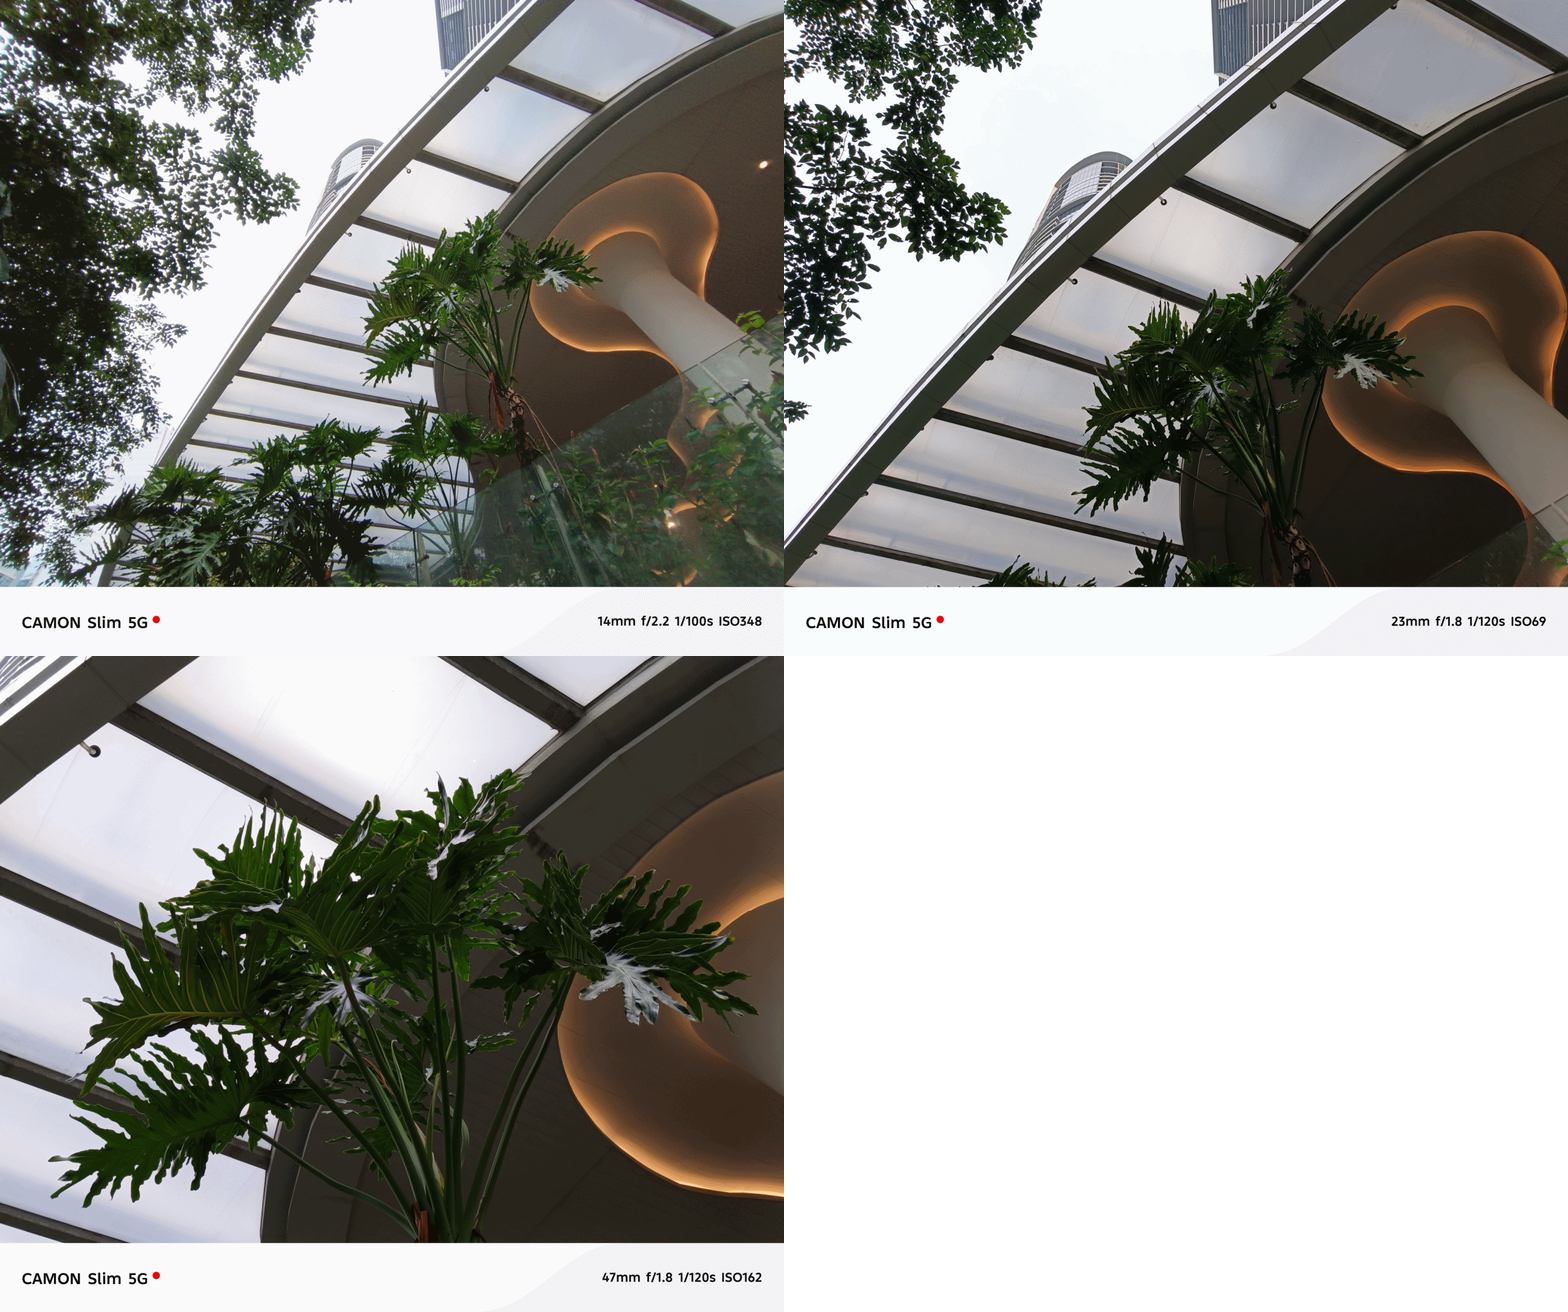
In certain occasions, color reproduction somehow looked less punchy and flat. AWB (Auto White Balance) sometimes get confused too — especially indoors.
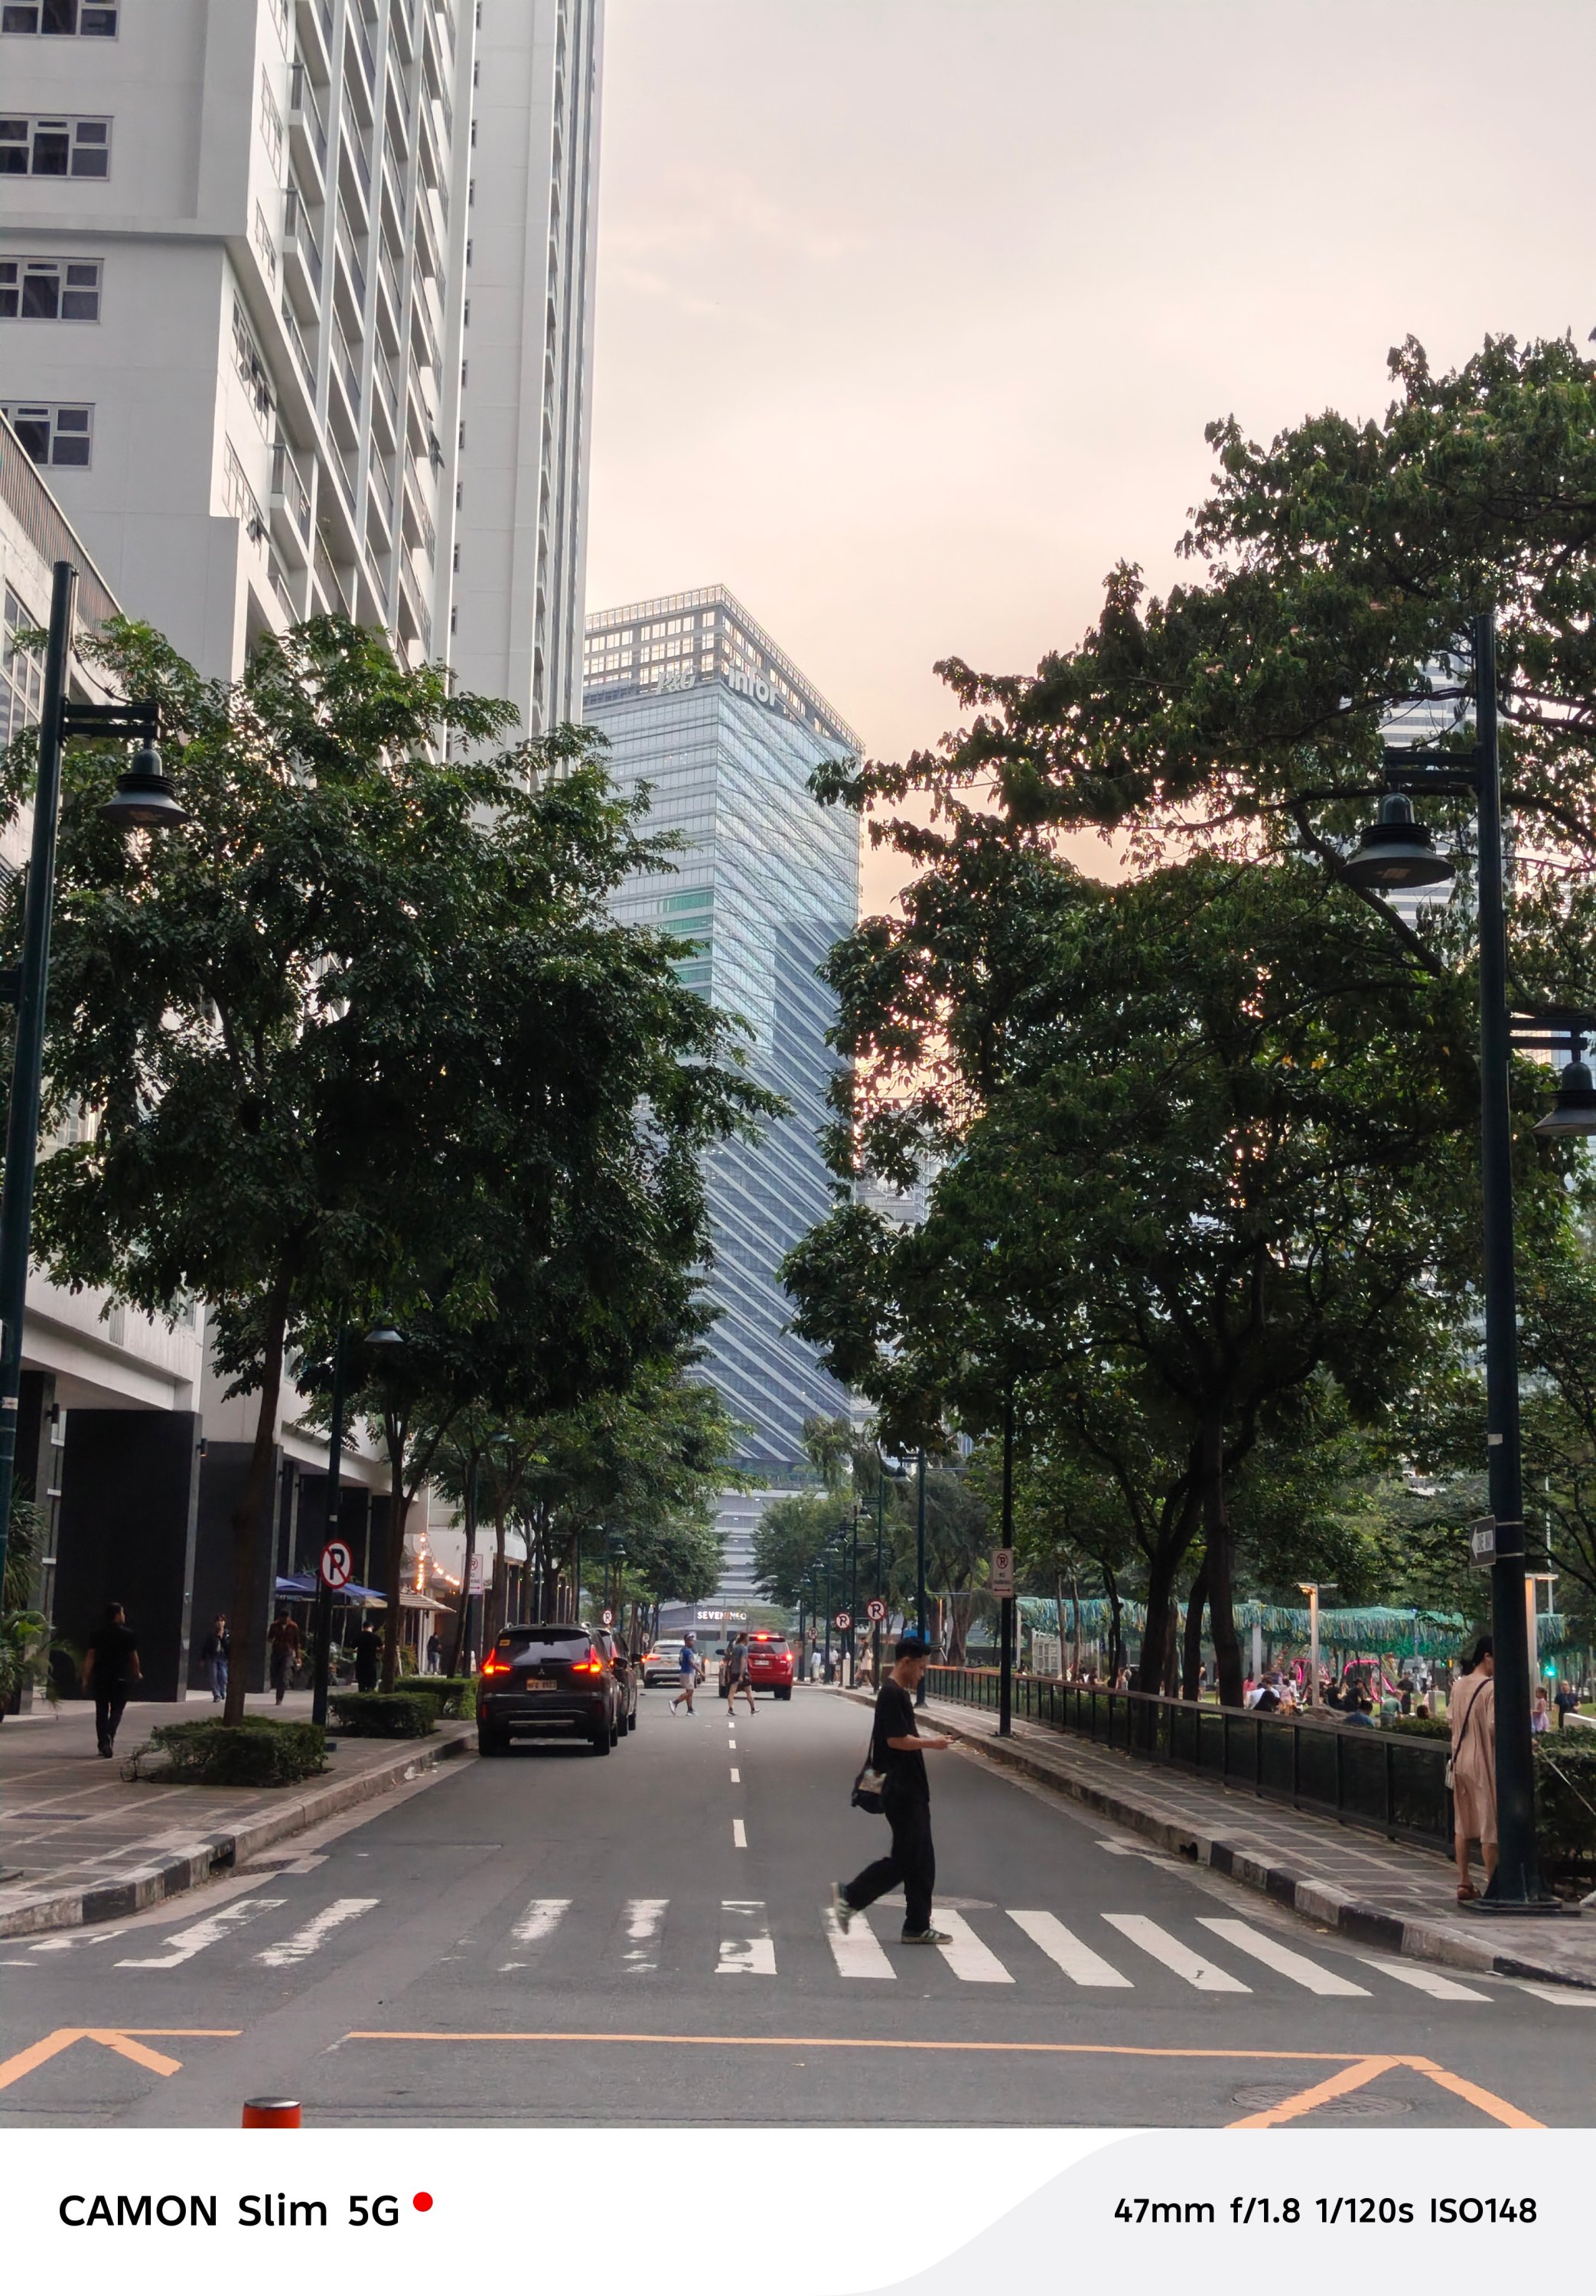
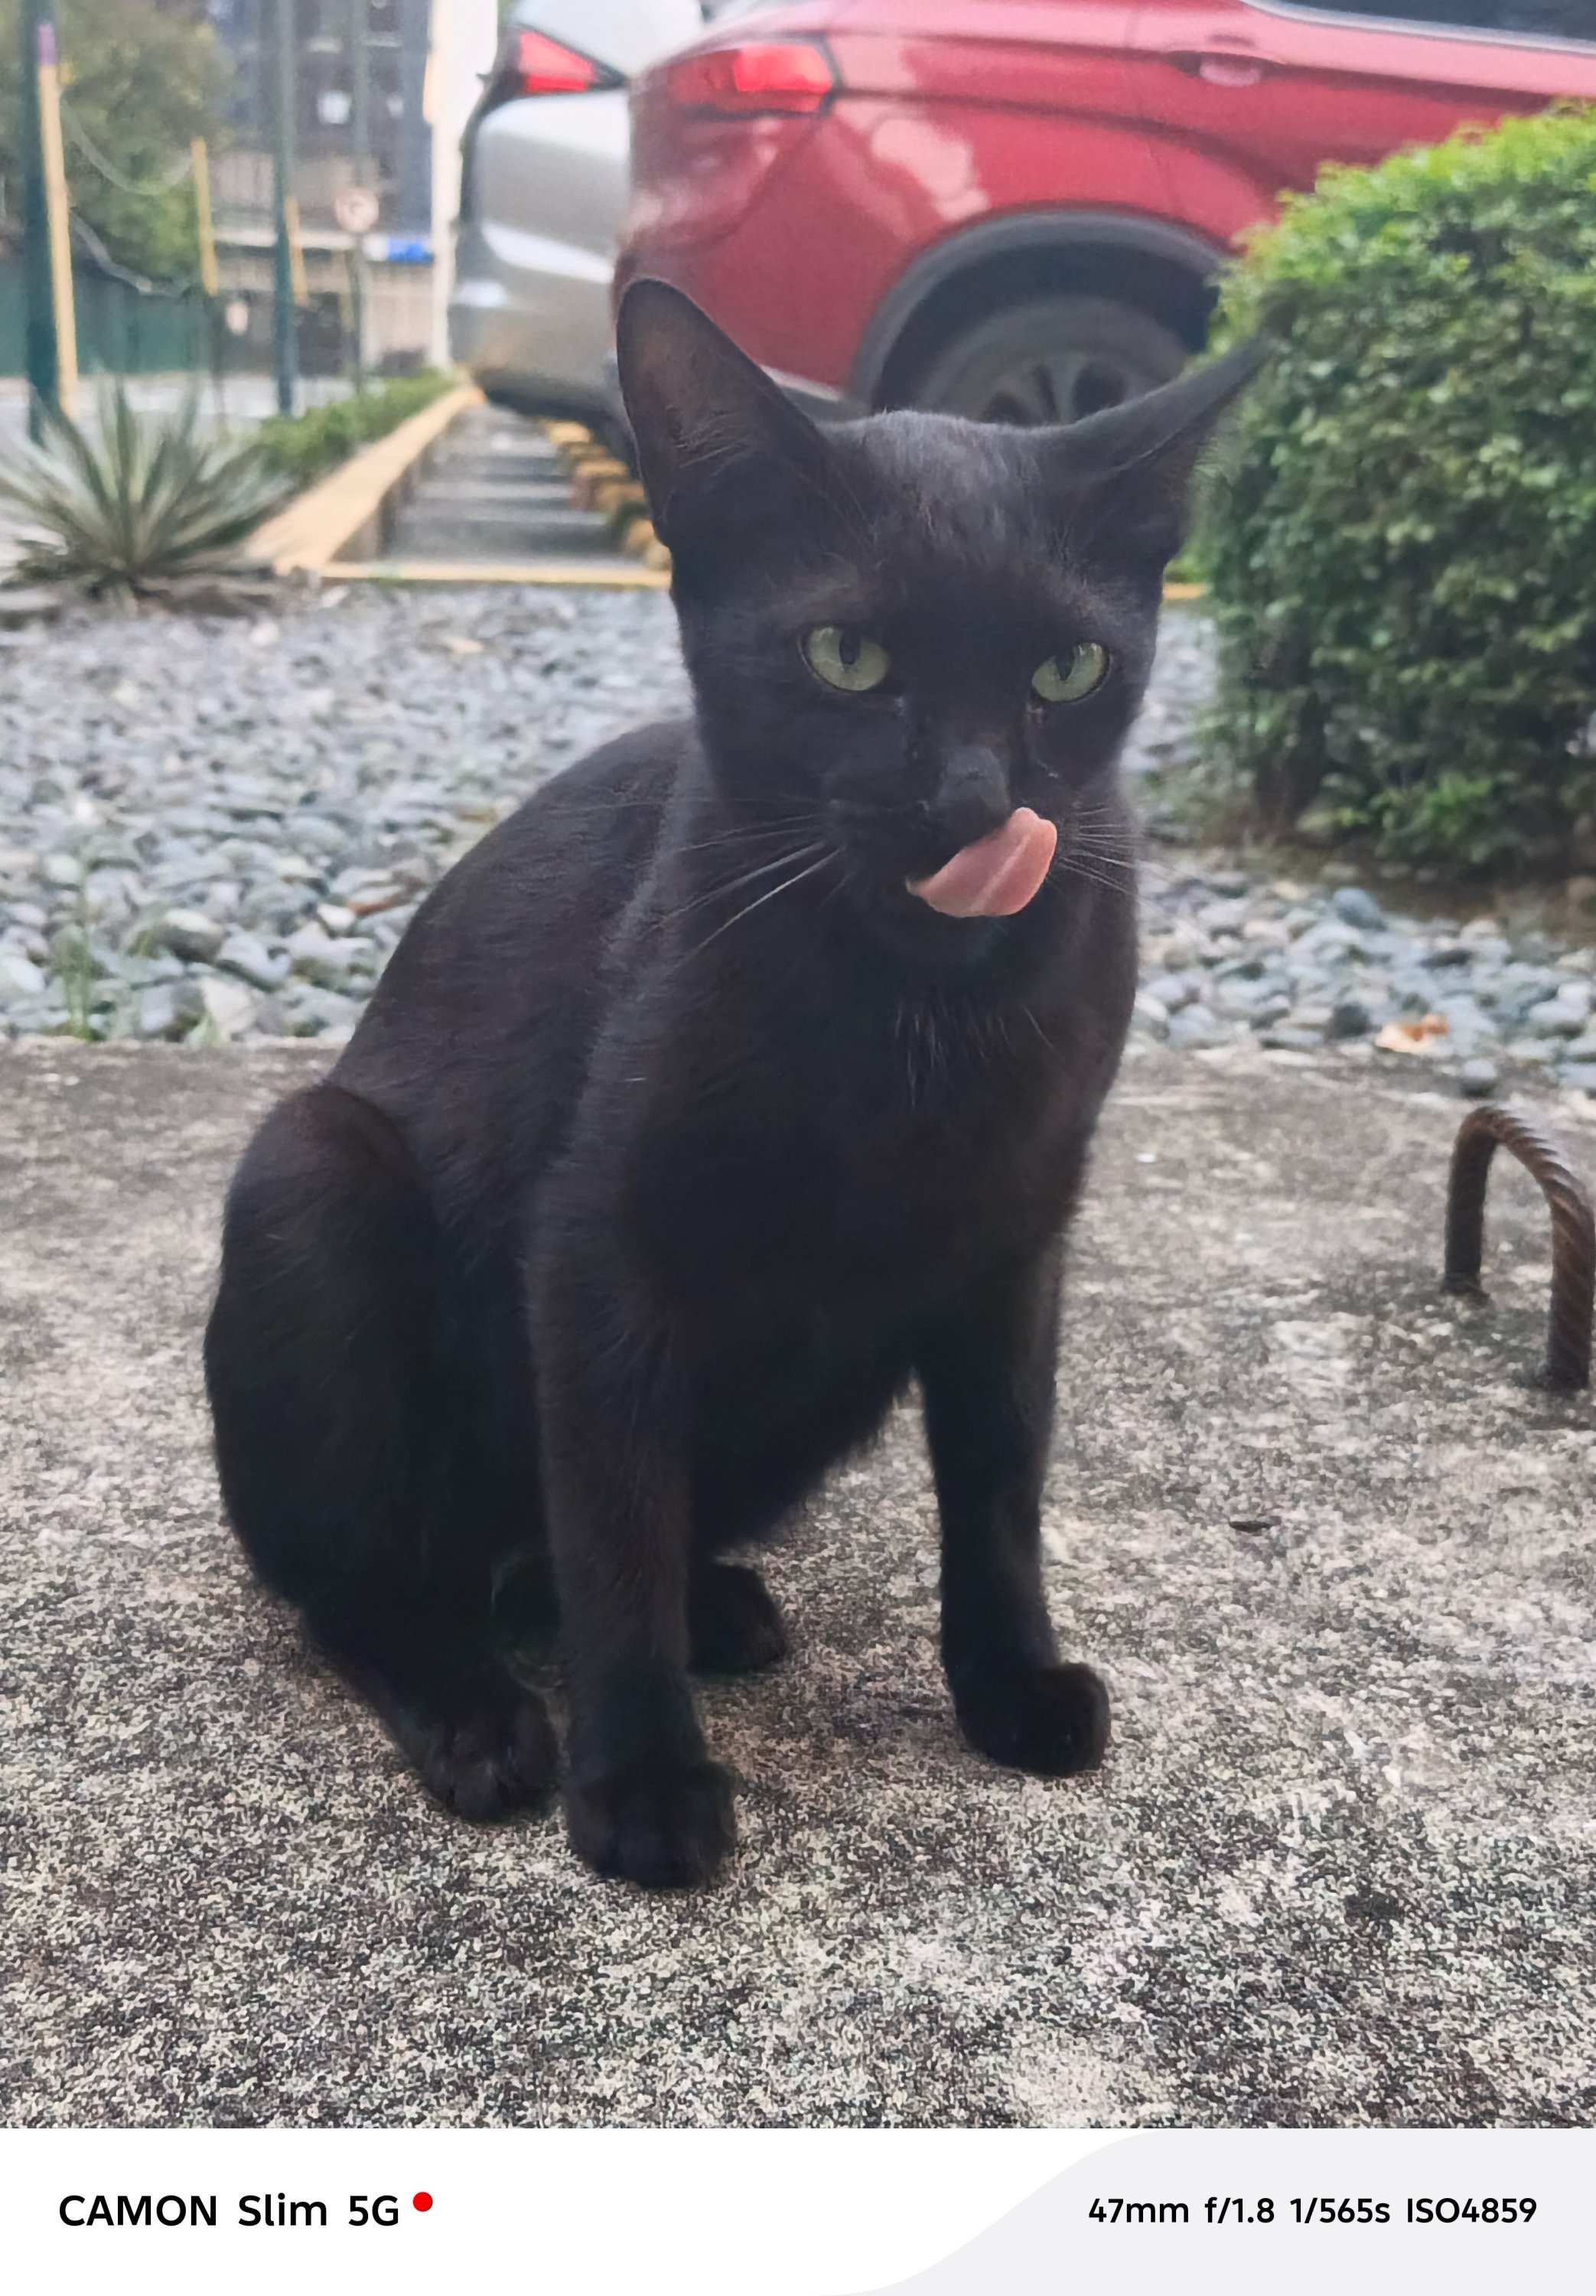
You also have to be very still when taking photos of moving subjects. Otherwise, they will all just be blurry.
Again, putting the POVA 8 Pro I recently reviewed into perspective, that one snapped faster and produced overall better photos. That’s despite the fact that the CAMON Slim 5G features FlashSnap and that one doesn’t.
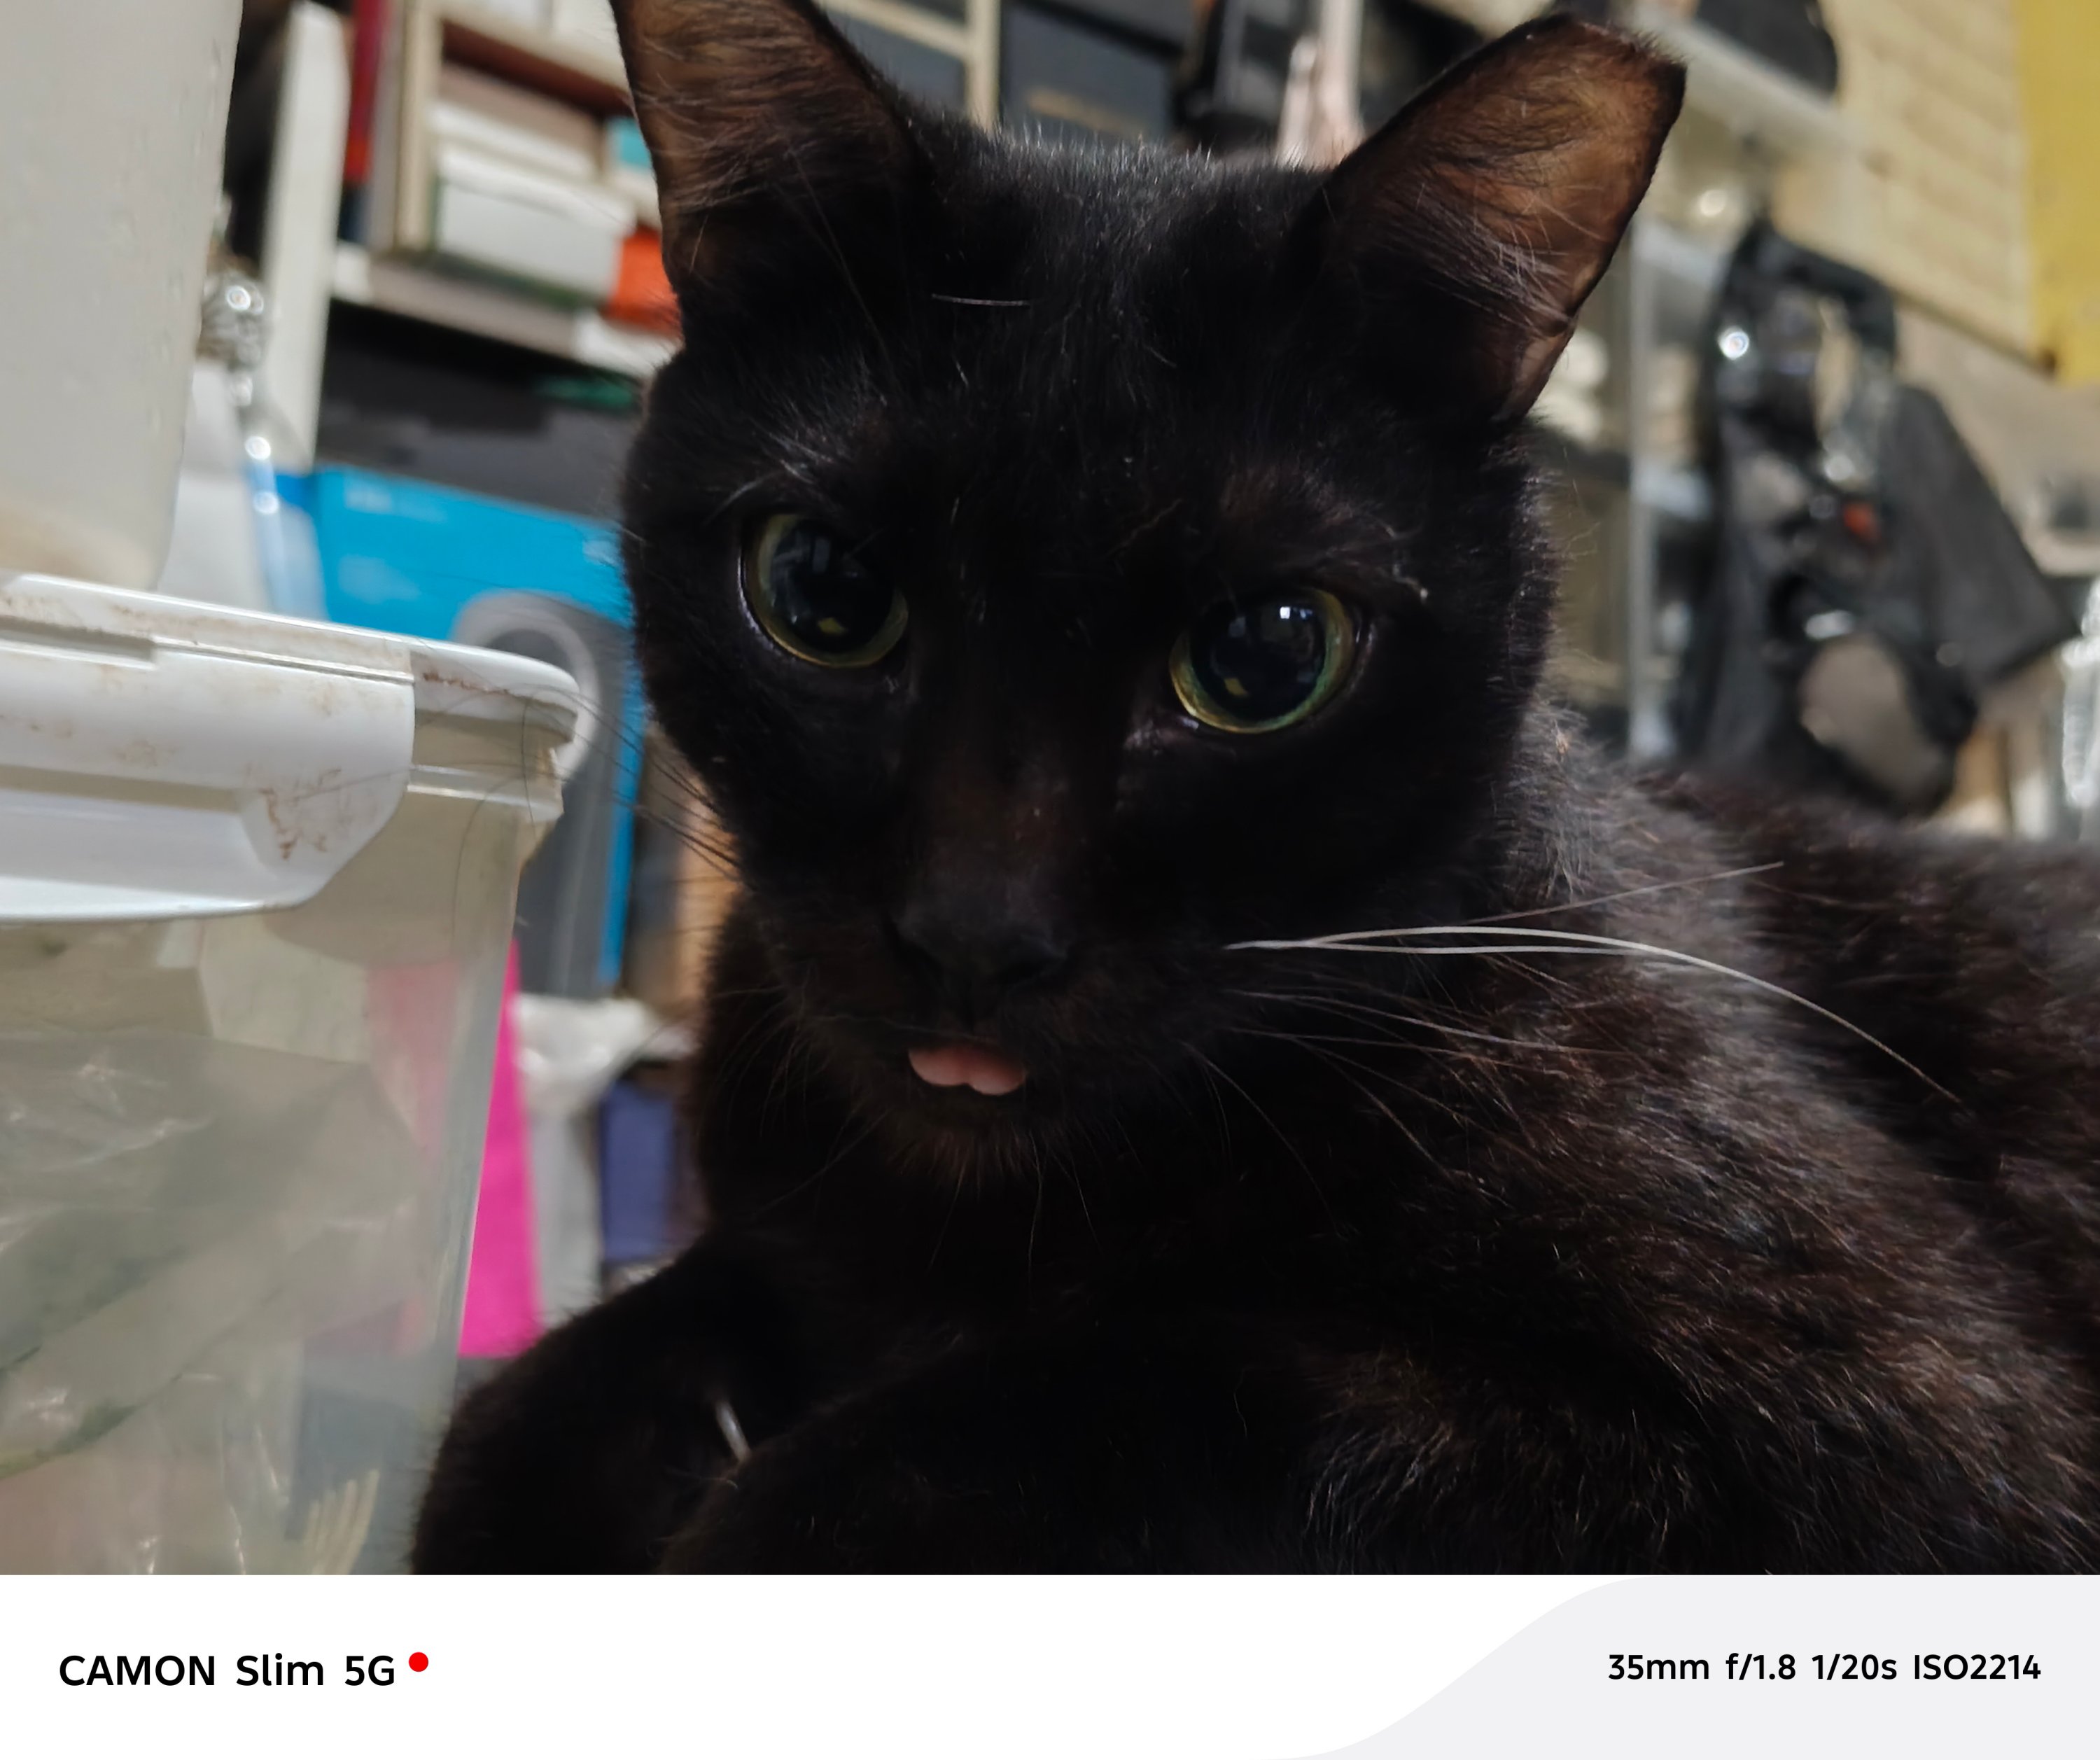
Also, ICYMI, both of them rock the same LYT-700C sensor as their main shooter. Both of them also lacked long-range telephoto modules which meant heavy reliance in sensor cropping.
For 2x shots, its main sensor simply gets the job done.
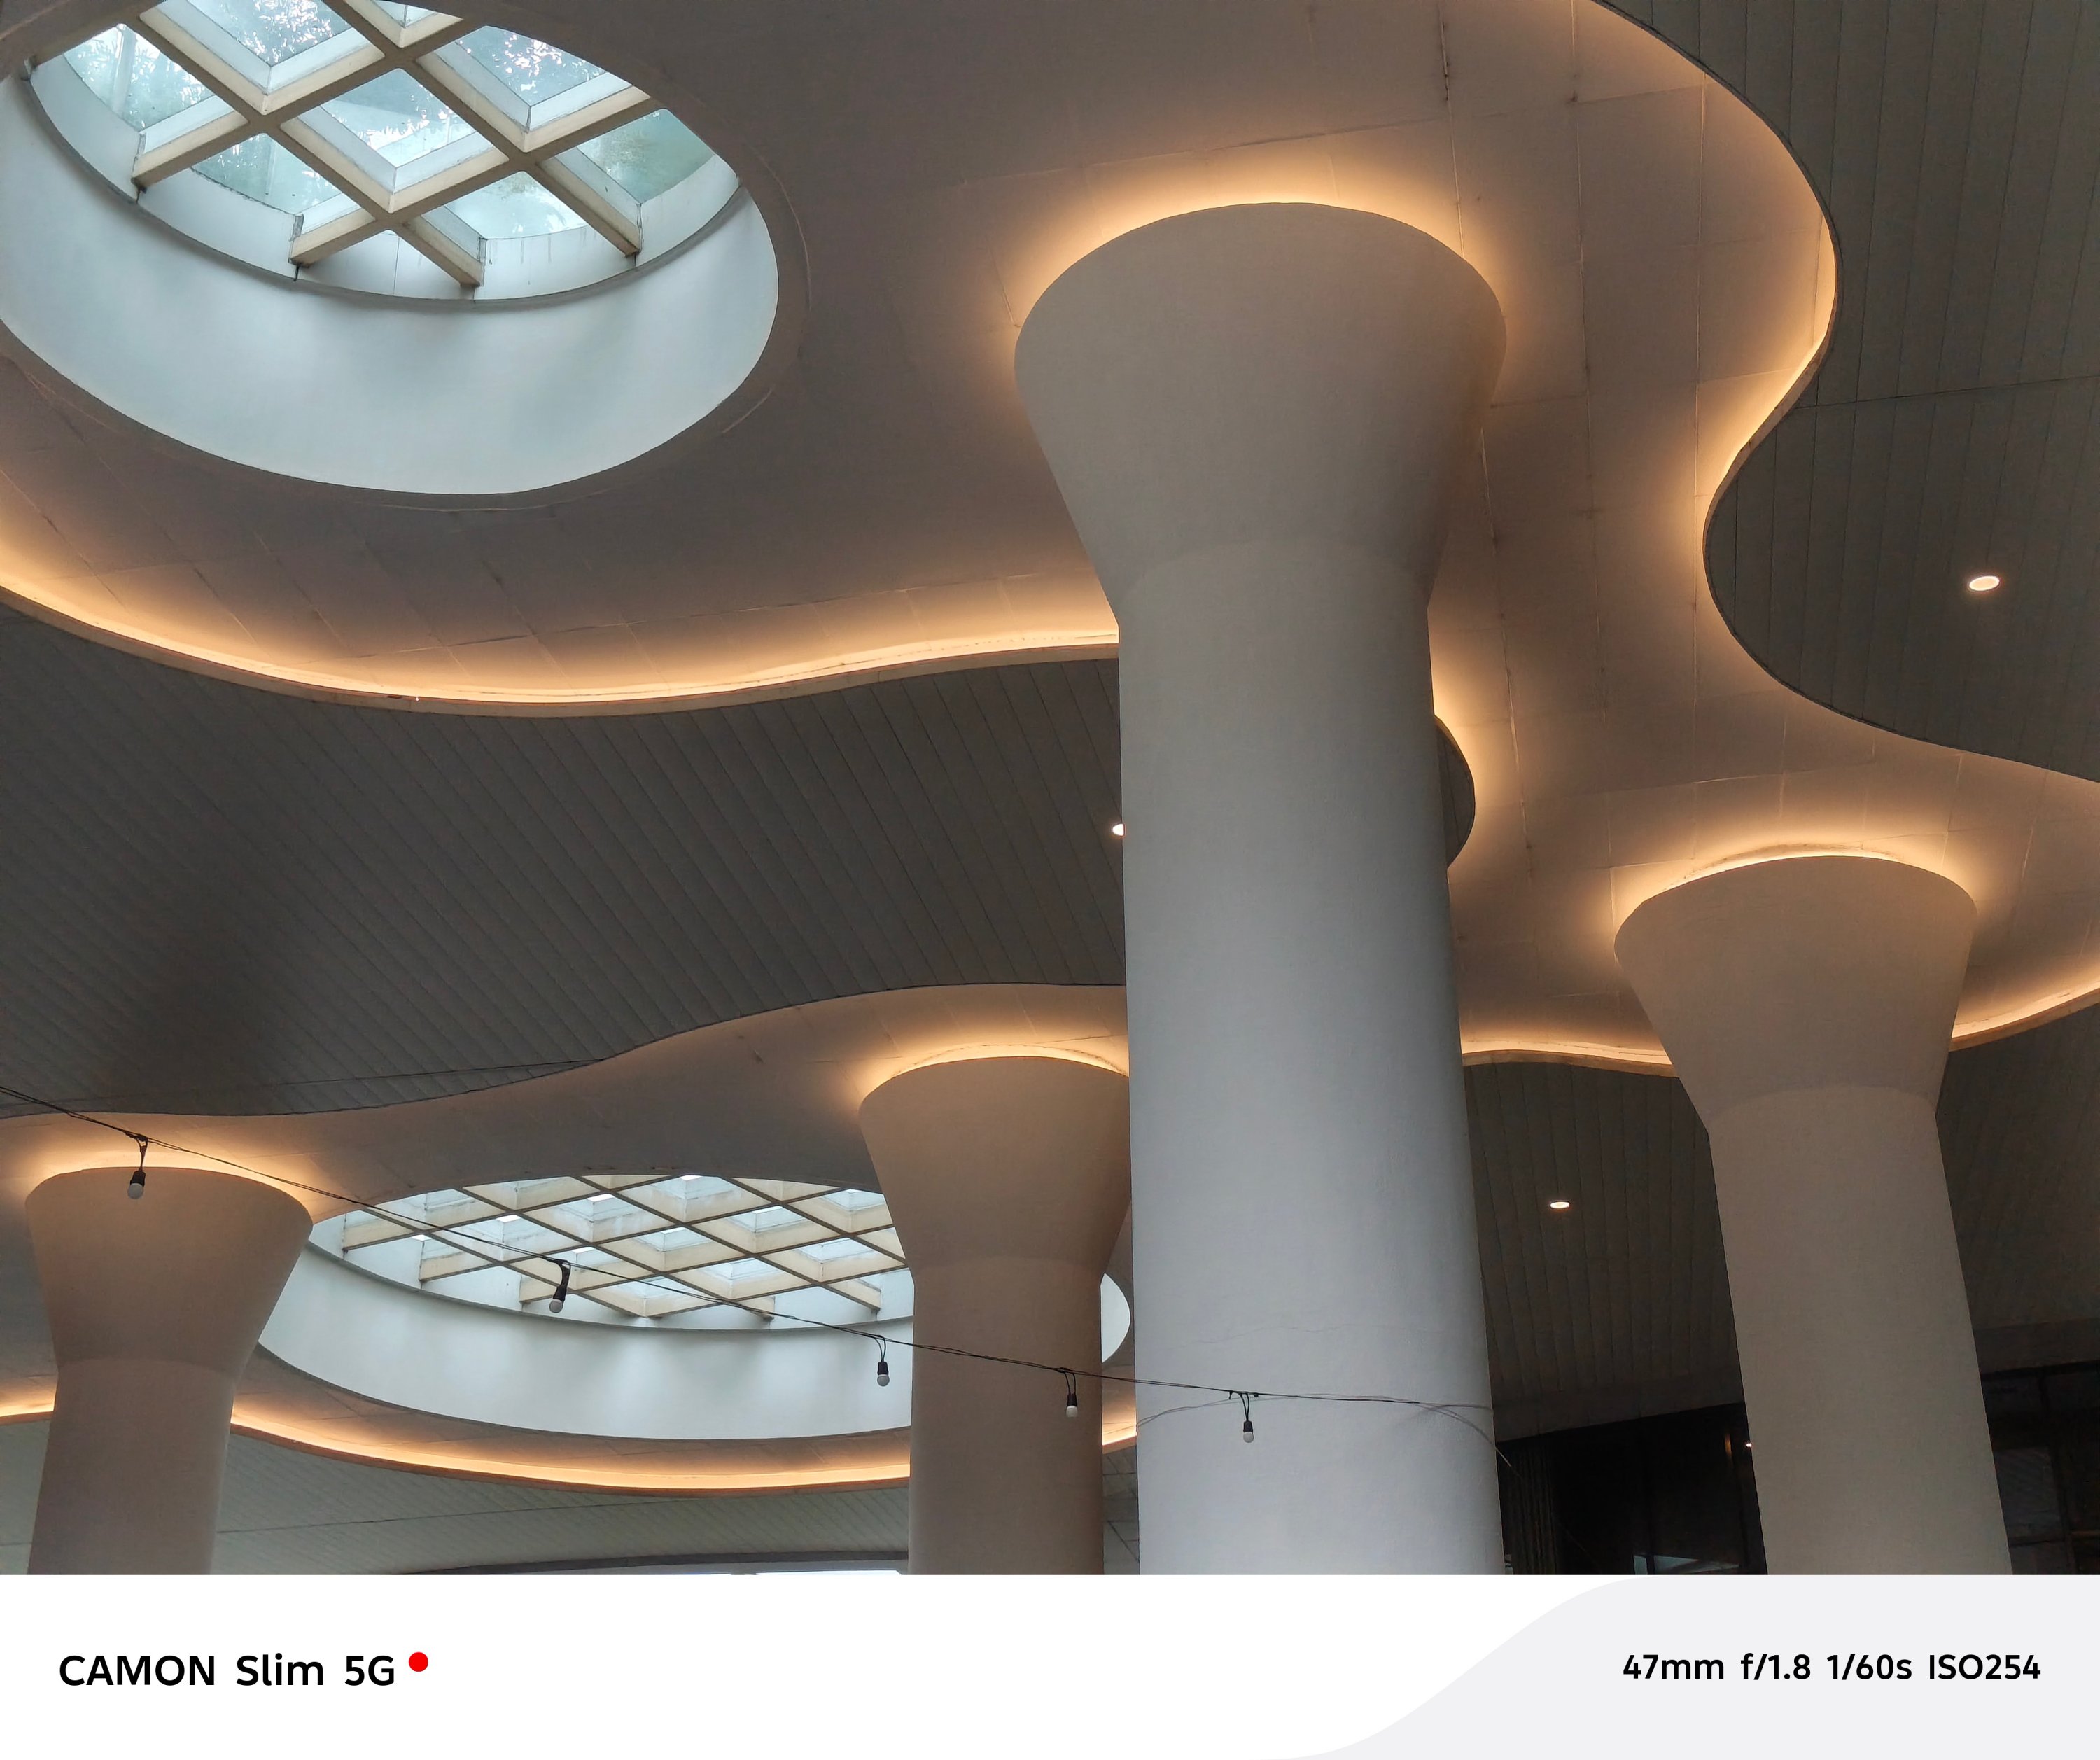



However, the CAMON Slim 5G instantly loses when going beyond the digital 2x zoom.
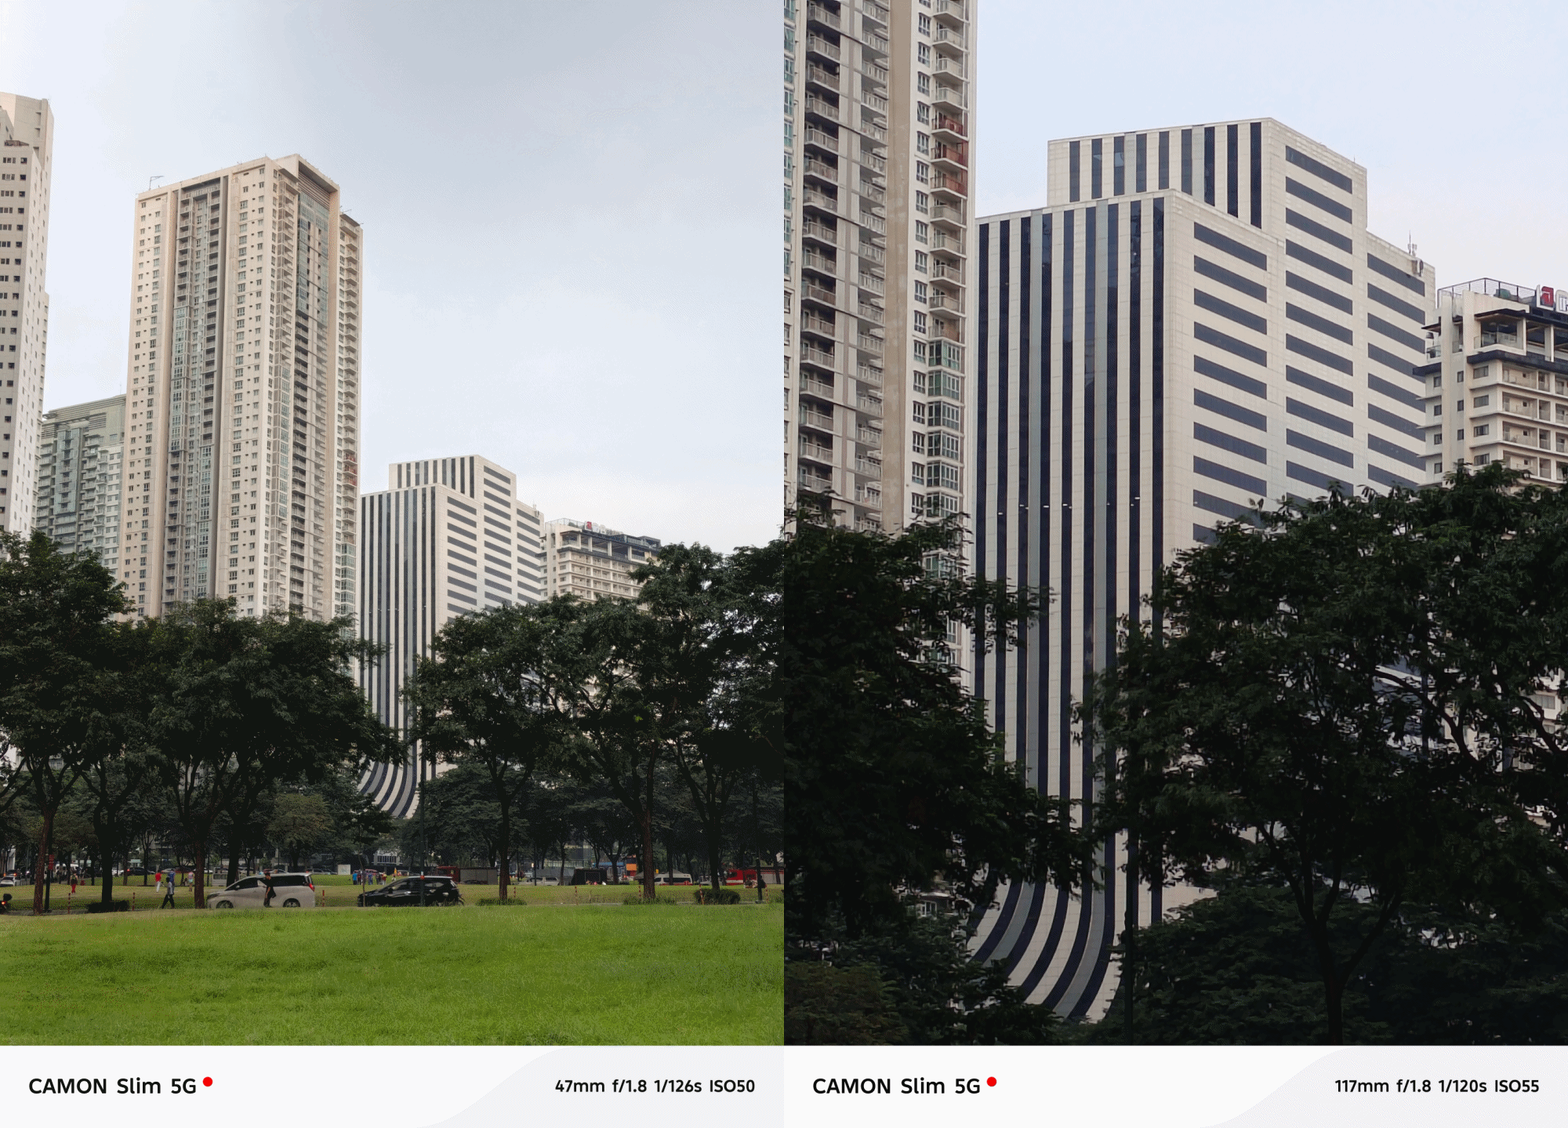
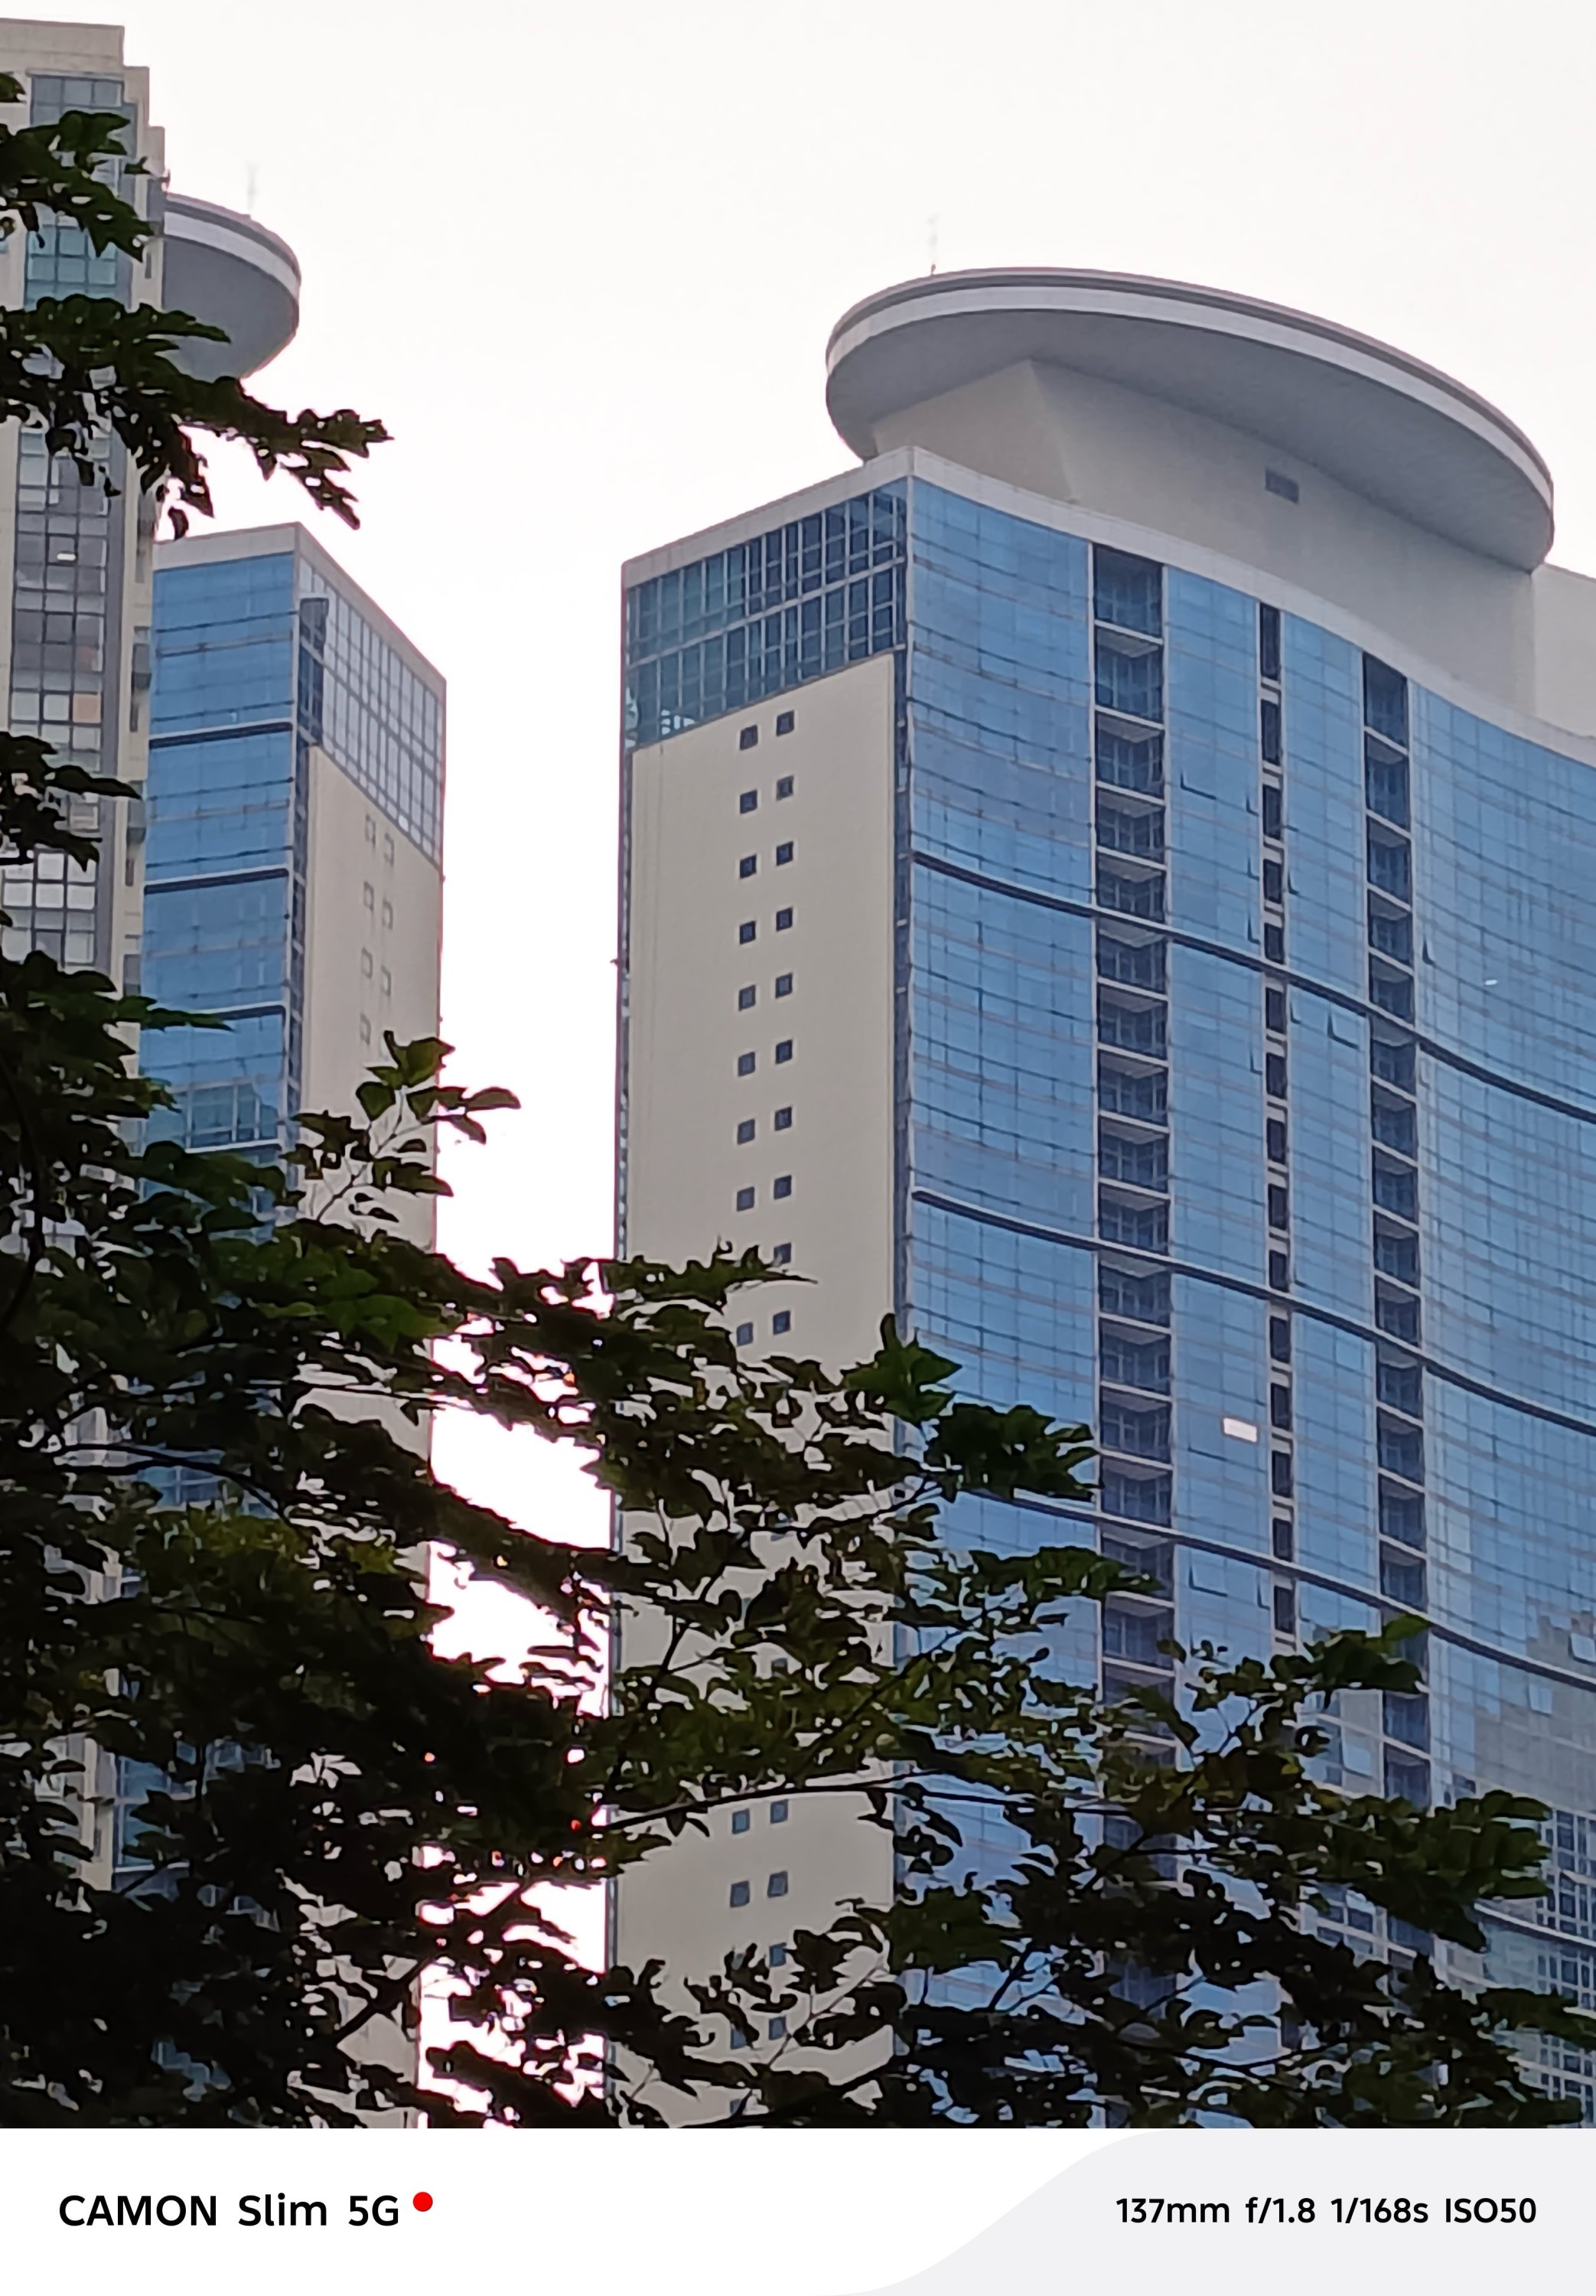
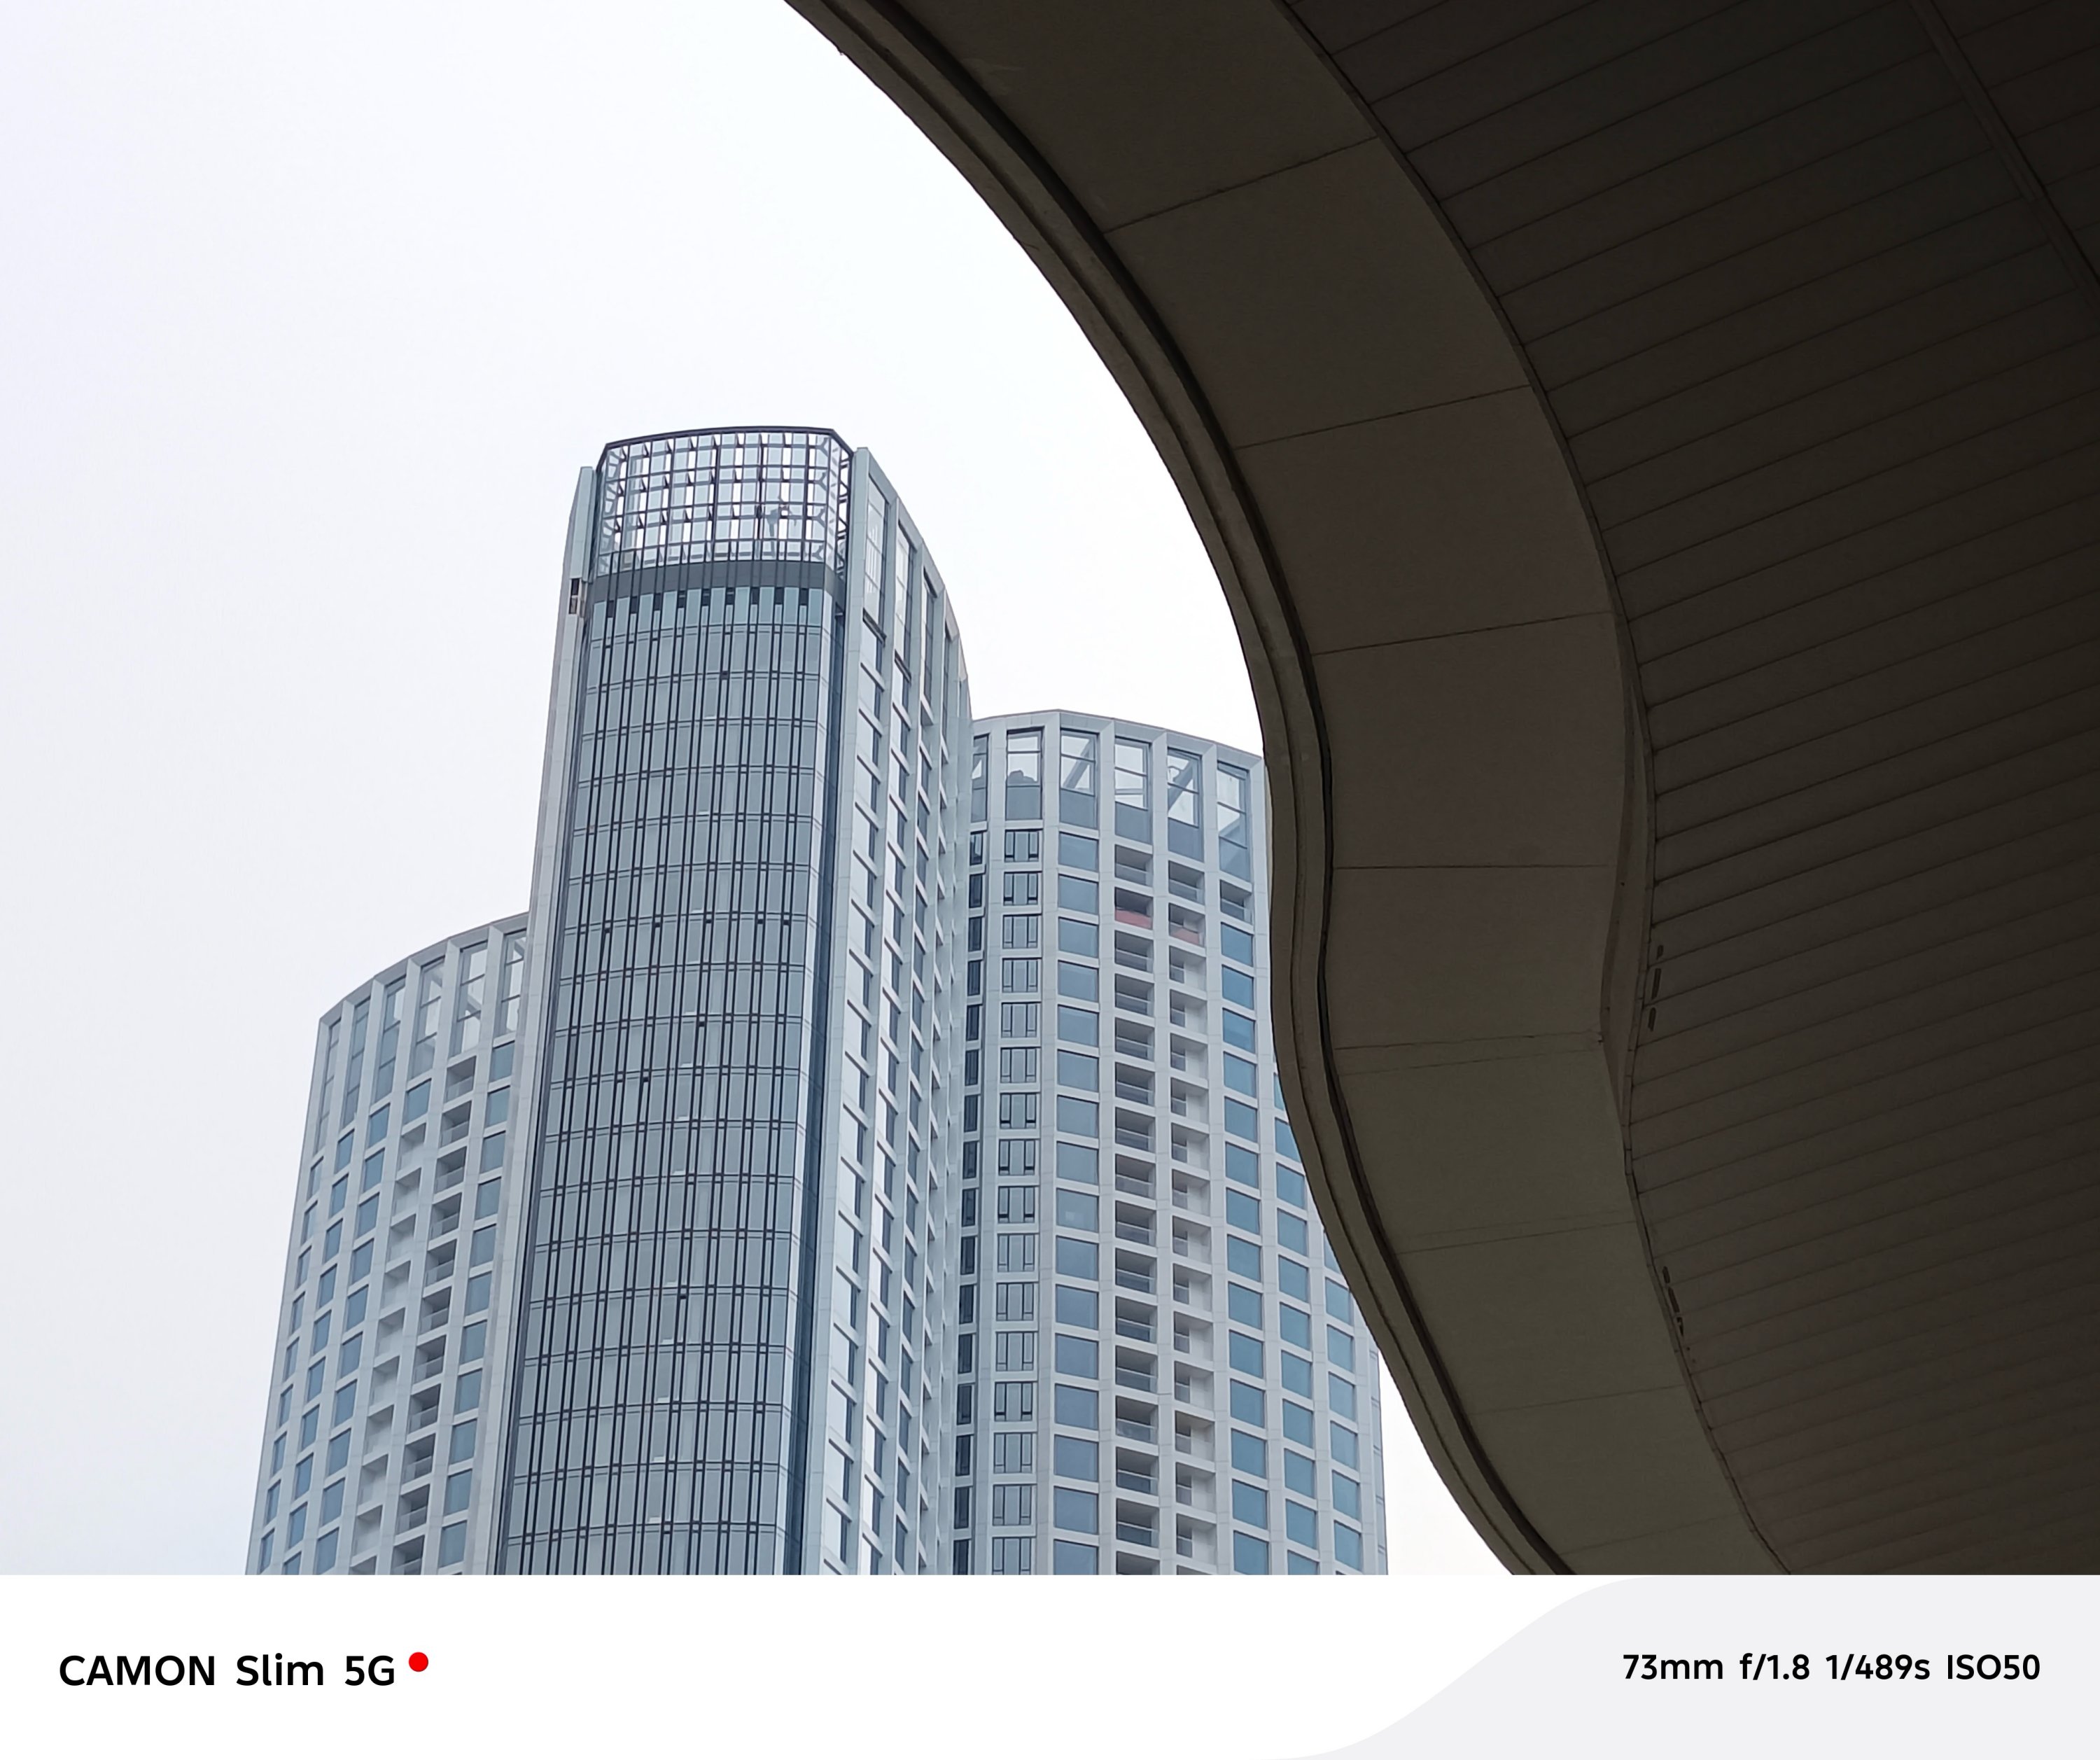
For the type of phone the CAMON Slim 5G is, its cameras get the job done. Just don’t expect a CAMON 50 series-like output.

Cute badge to match
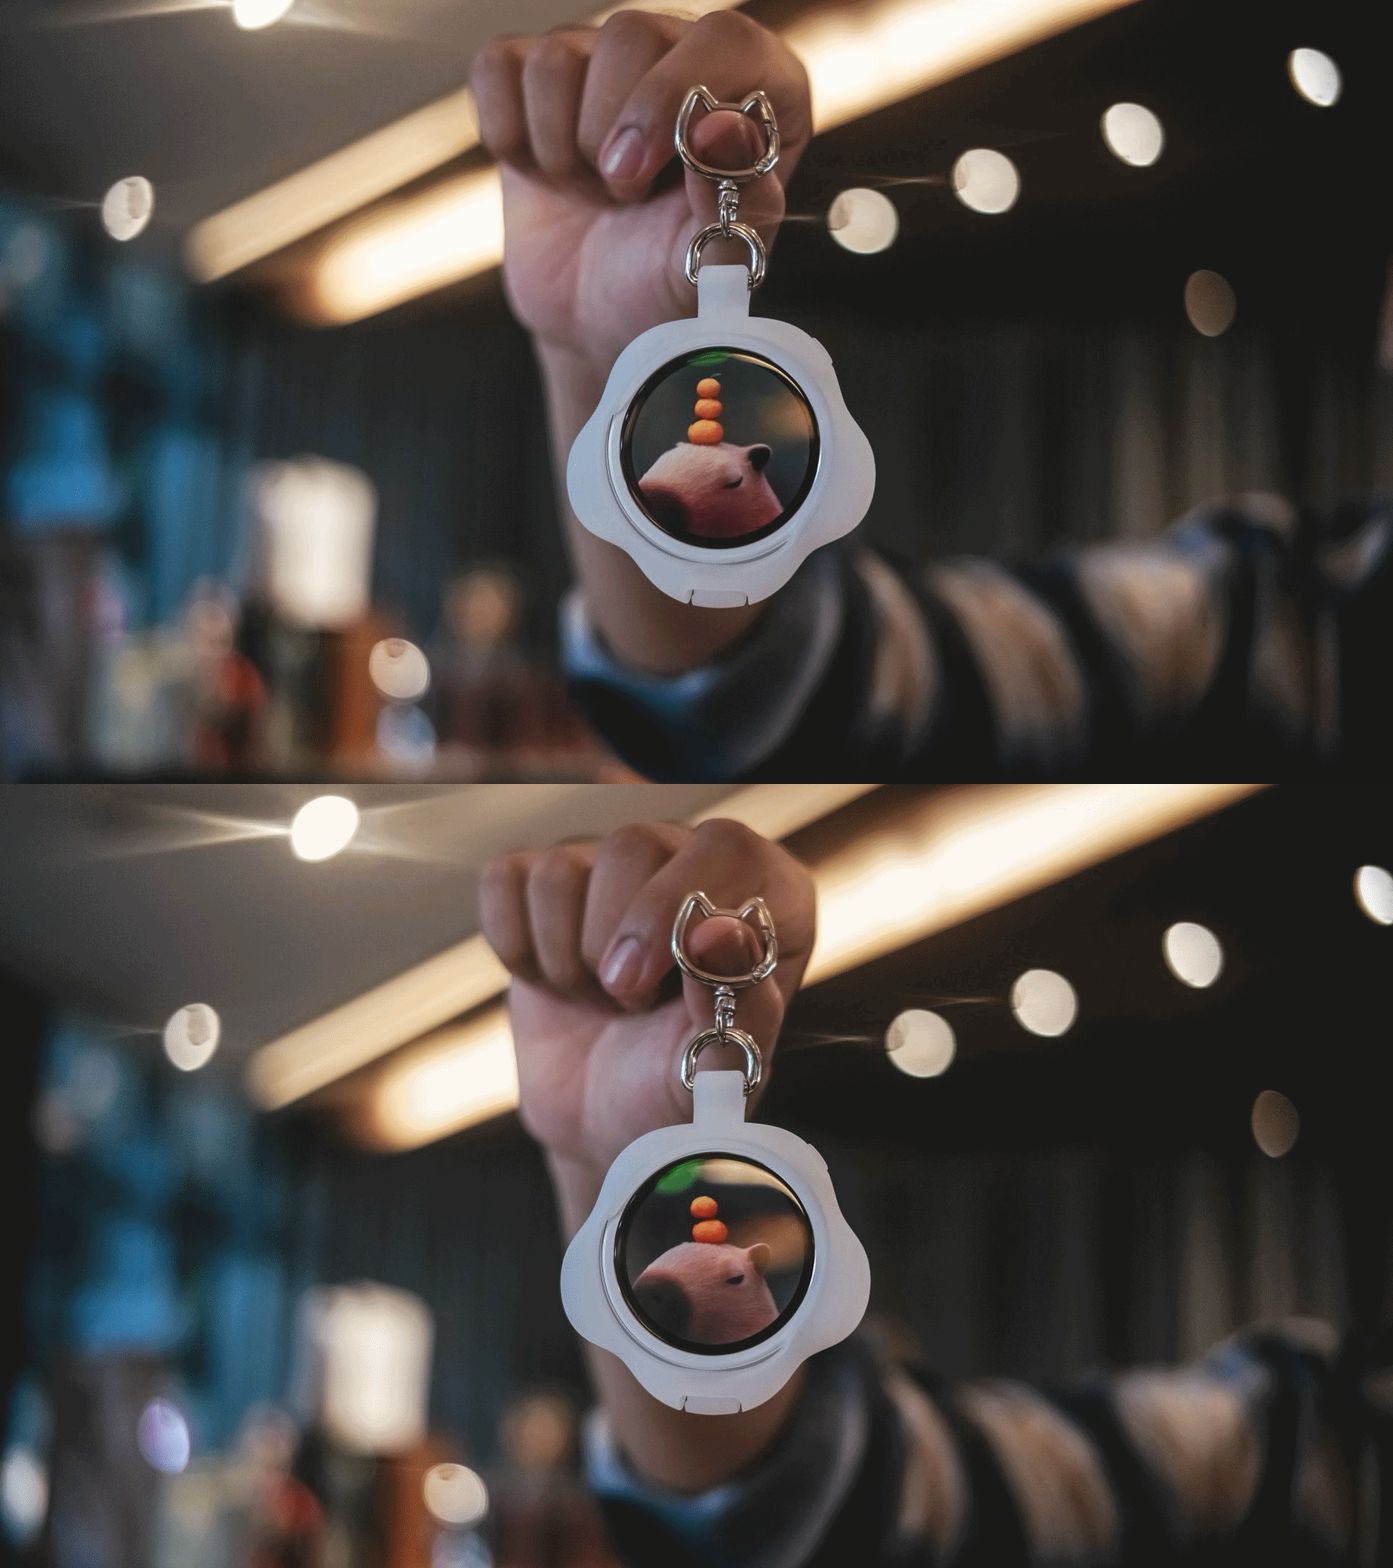
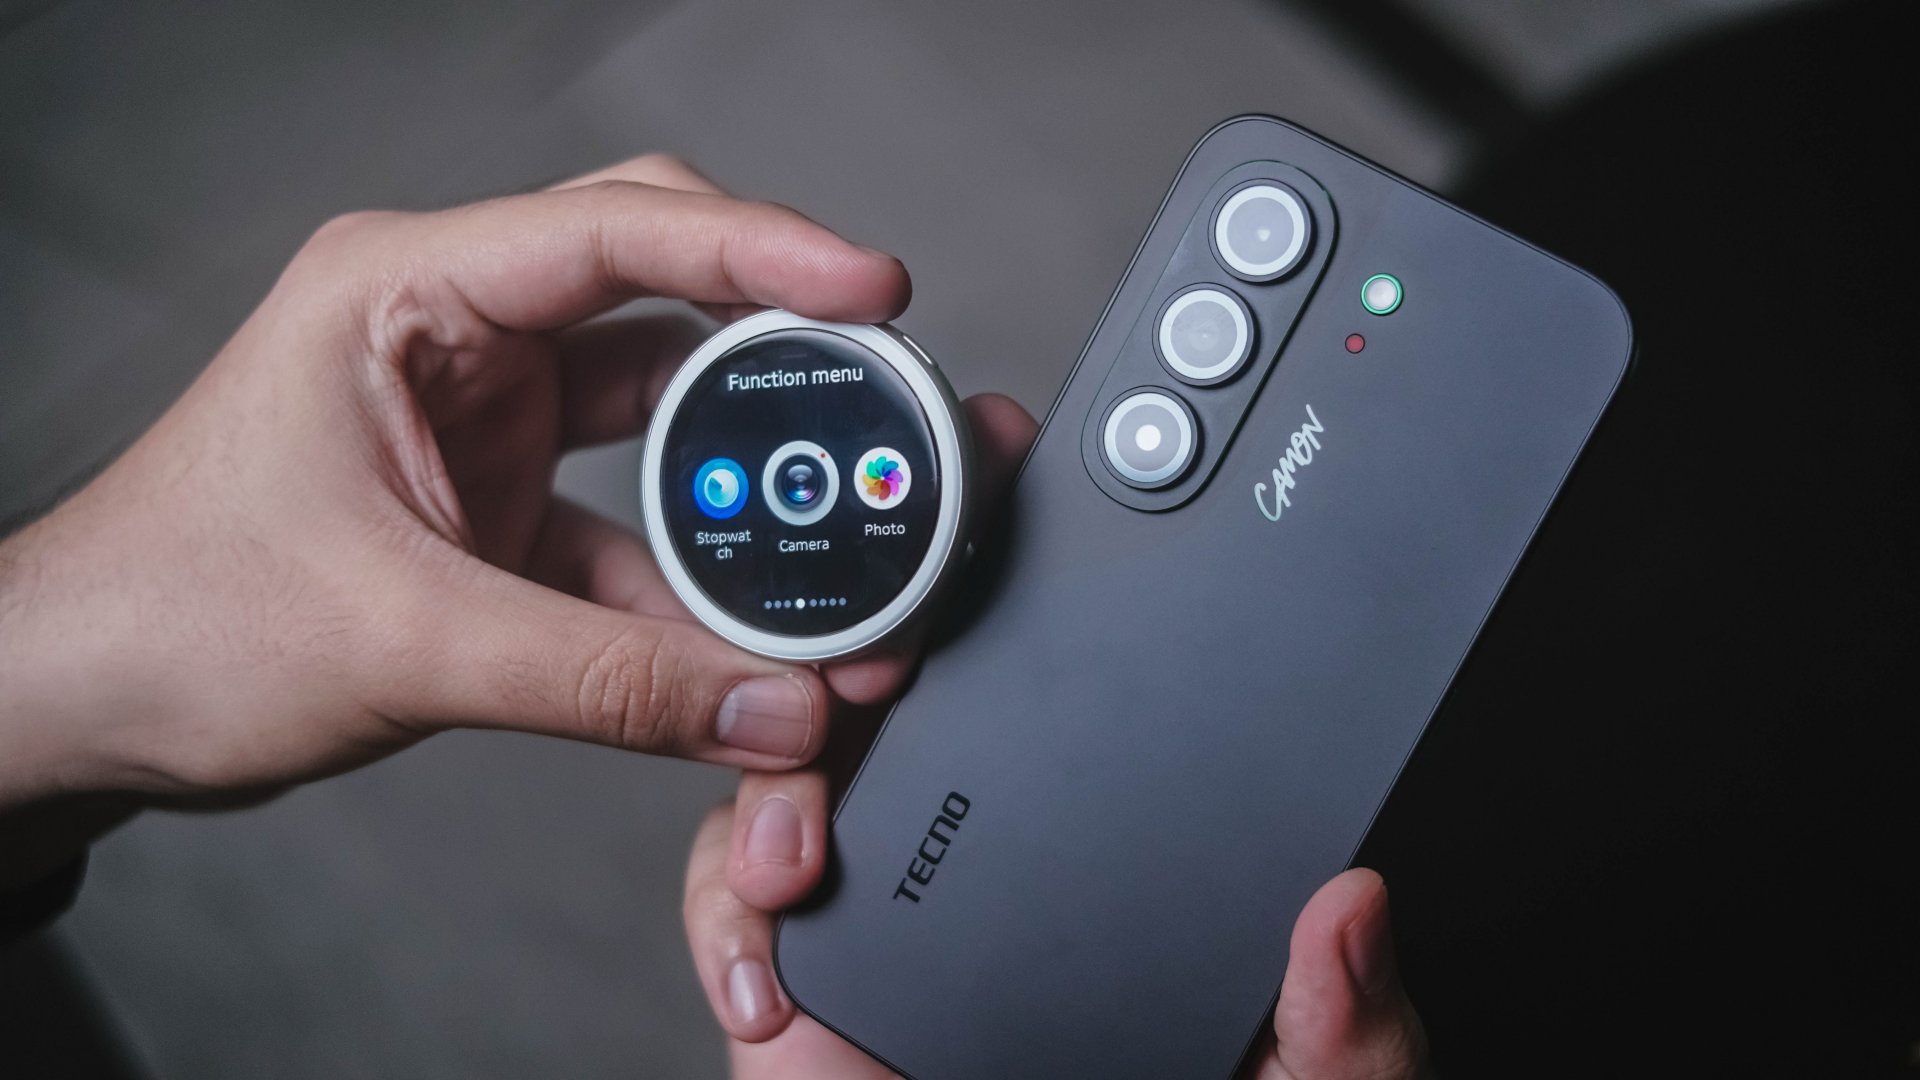
Alongside the new phone comes with TECNO’s MagBadge, an all-new accessory that attaches to the CAMON Slim 5G through its bundled magnetic clear case.
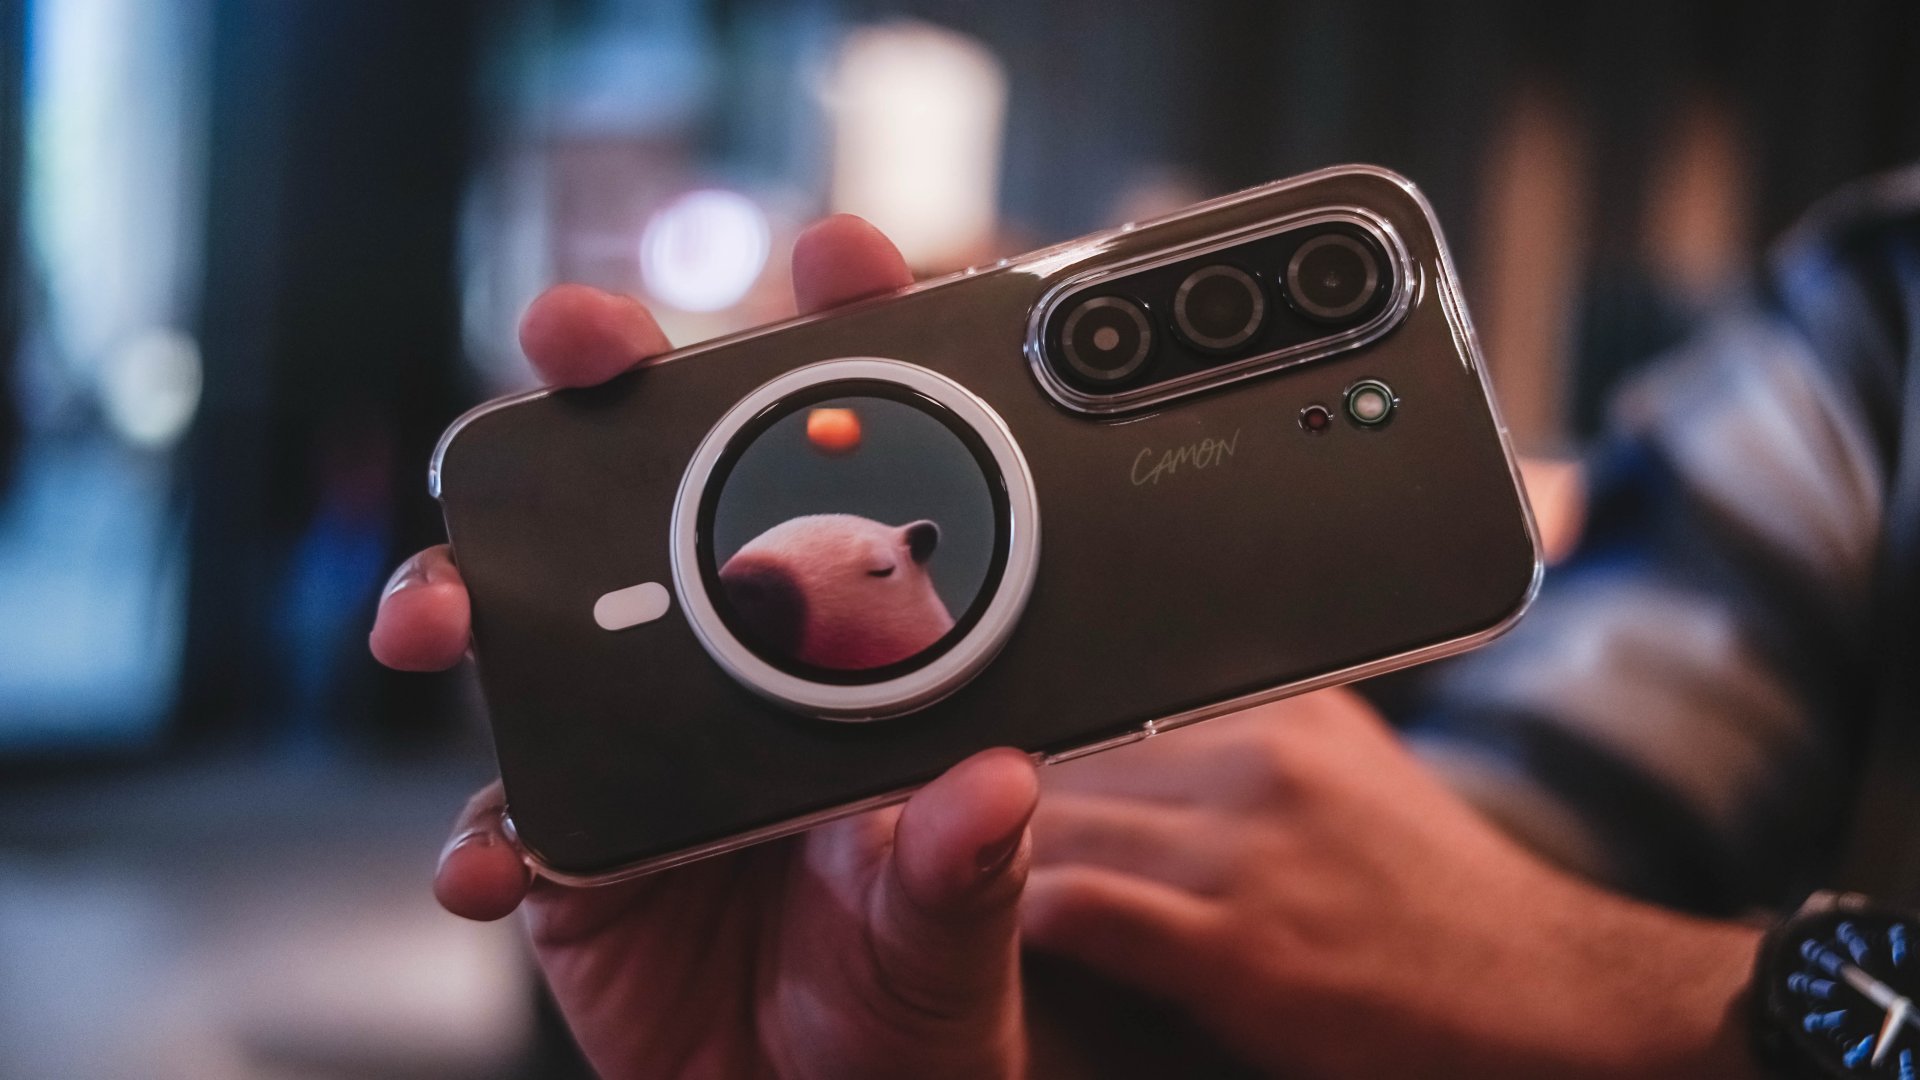
It’s basically a tiny circular display that doubles as a rear-camera monitor. While its front houses a 32MP selfie shooter, this add-on makes Gen Z selfies a lot less hassle to frame and take.
It can also act as a remote shutter, making it useful when shooting yourself from farther away or recording videos alone.
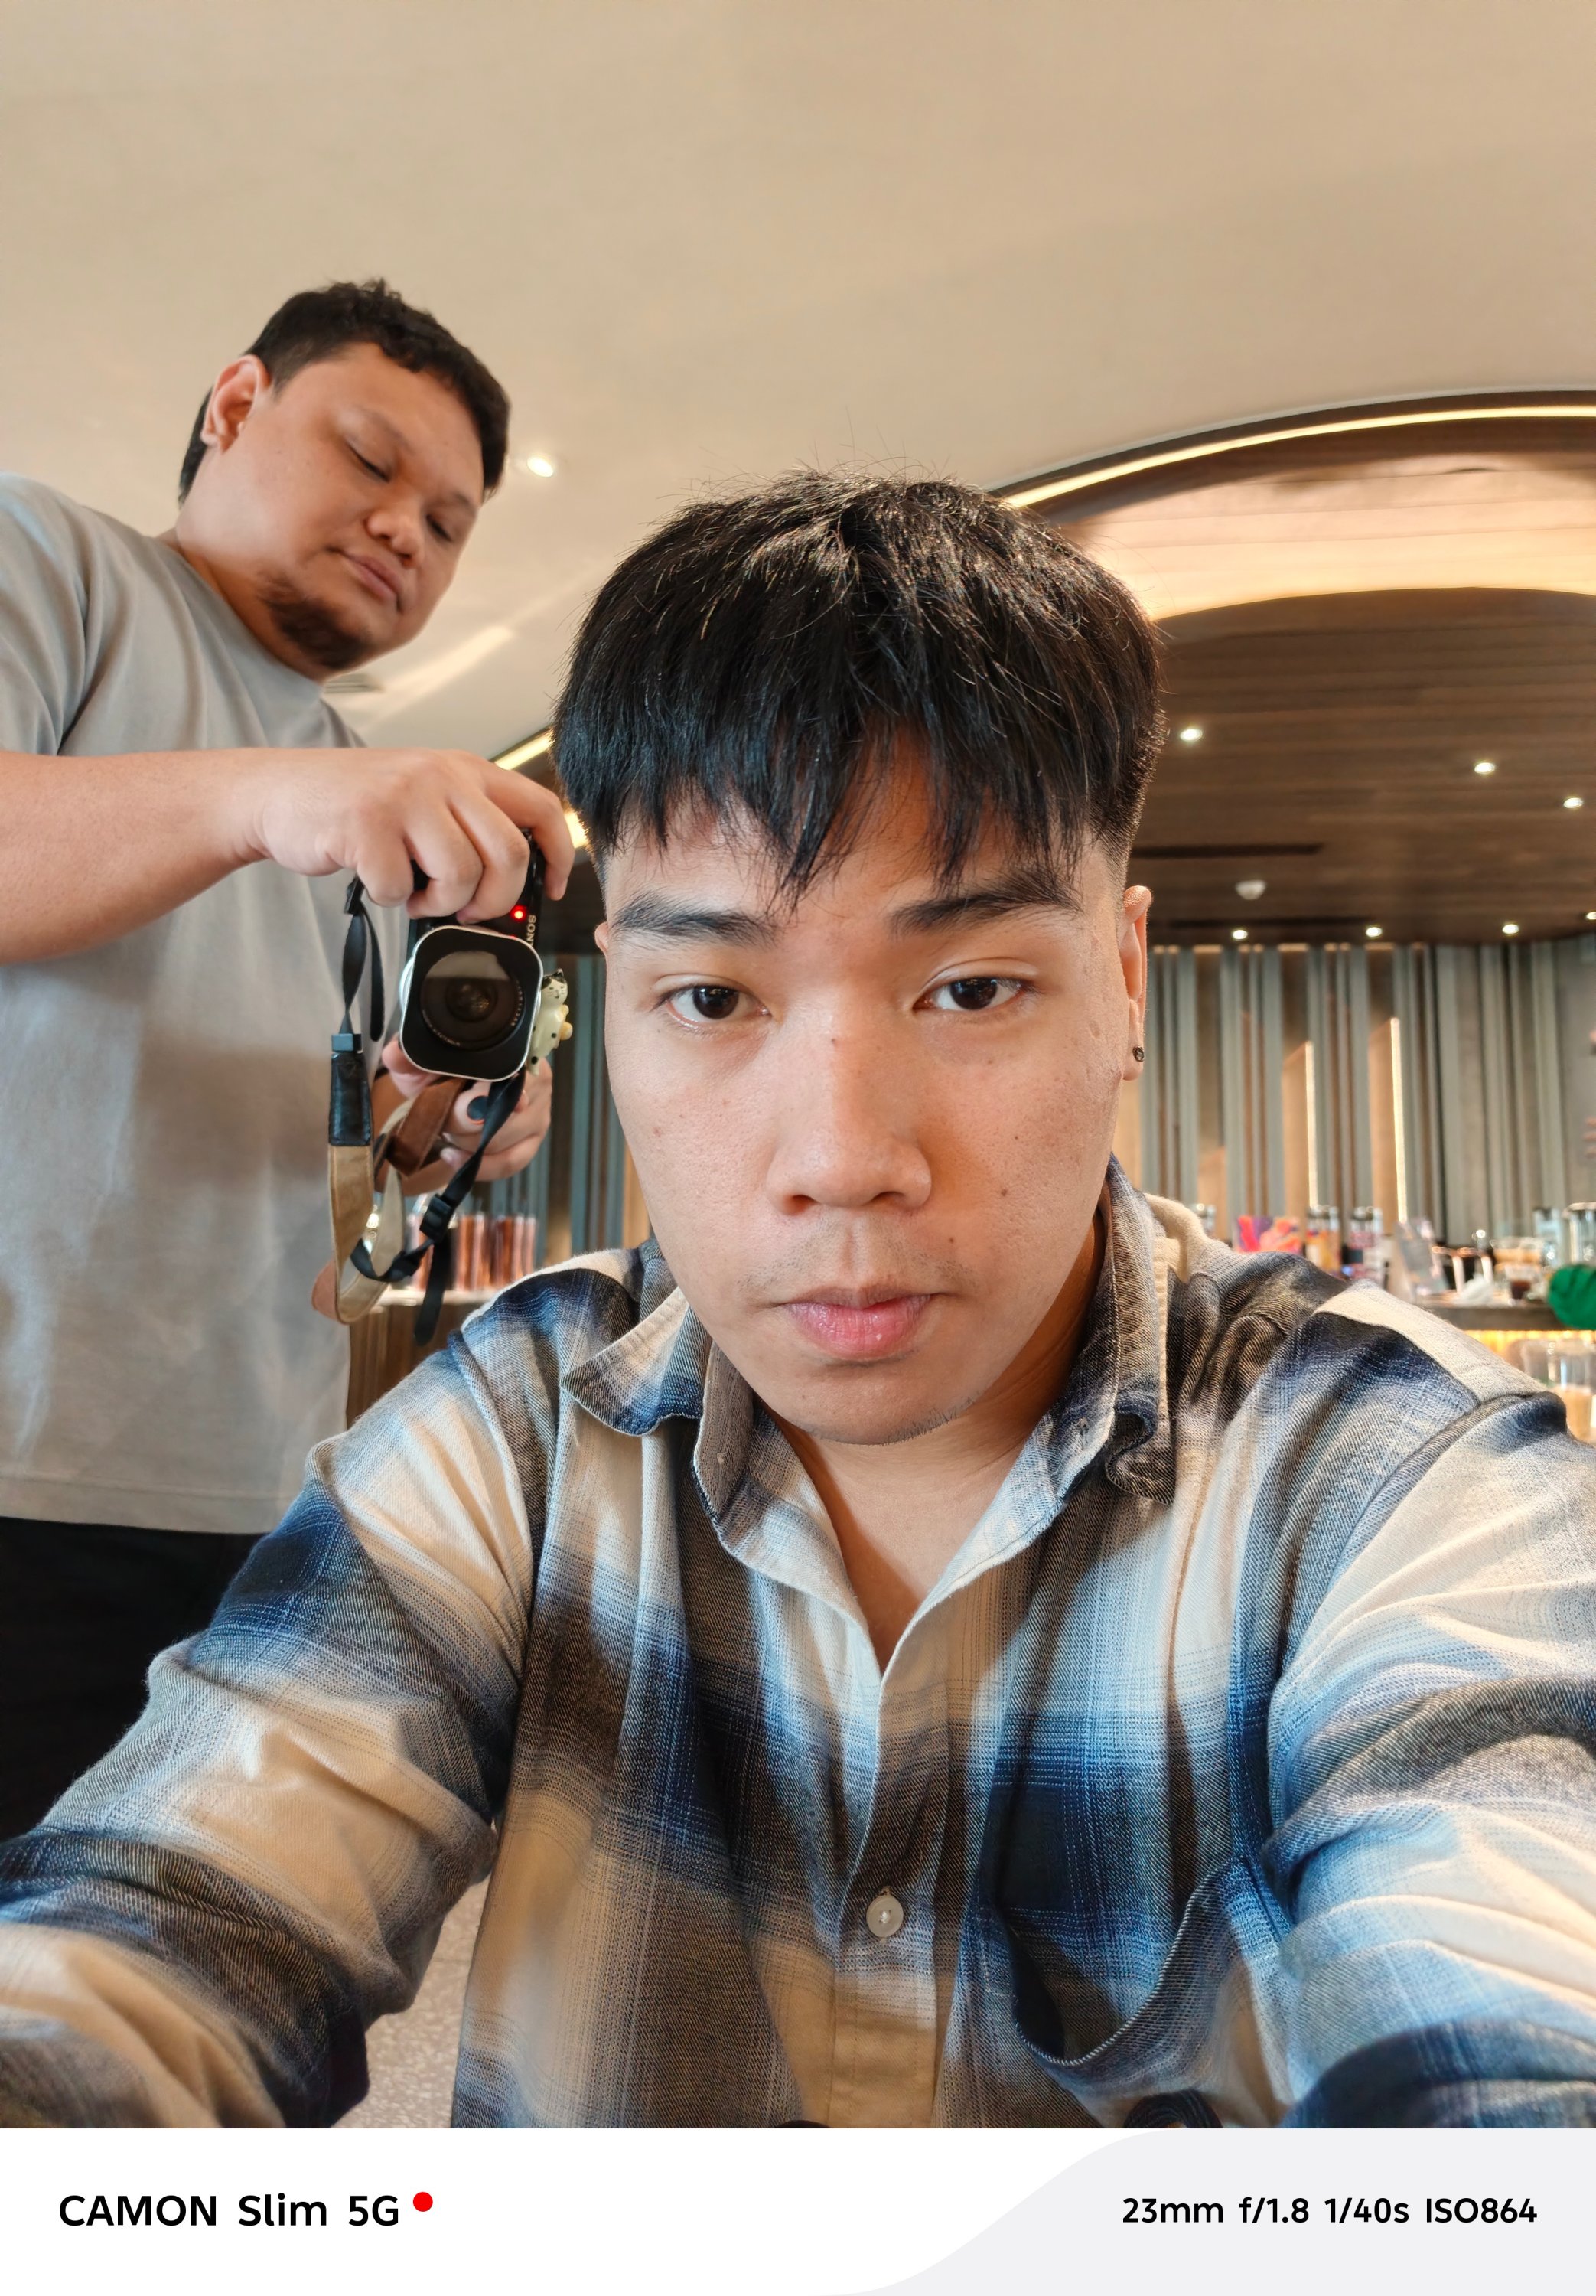
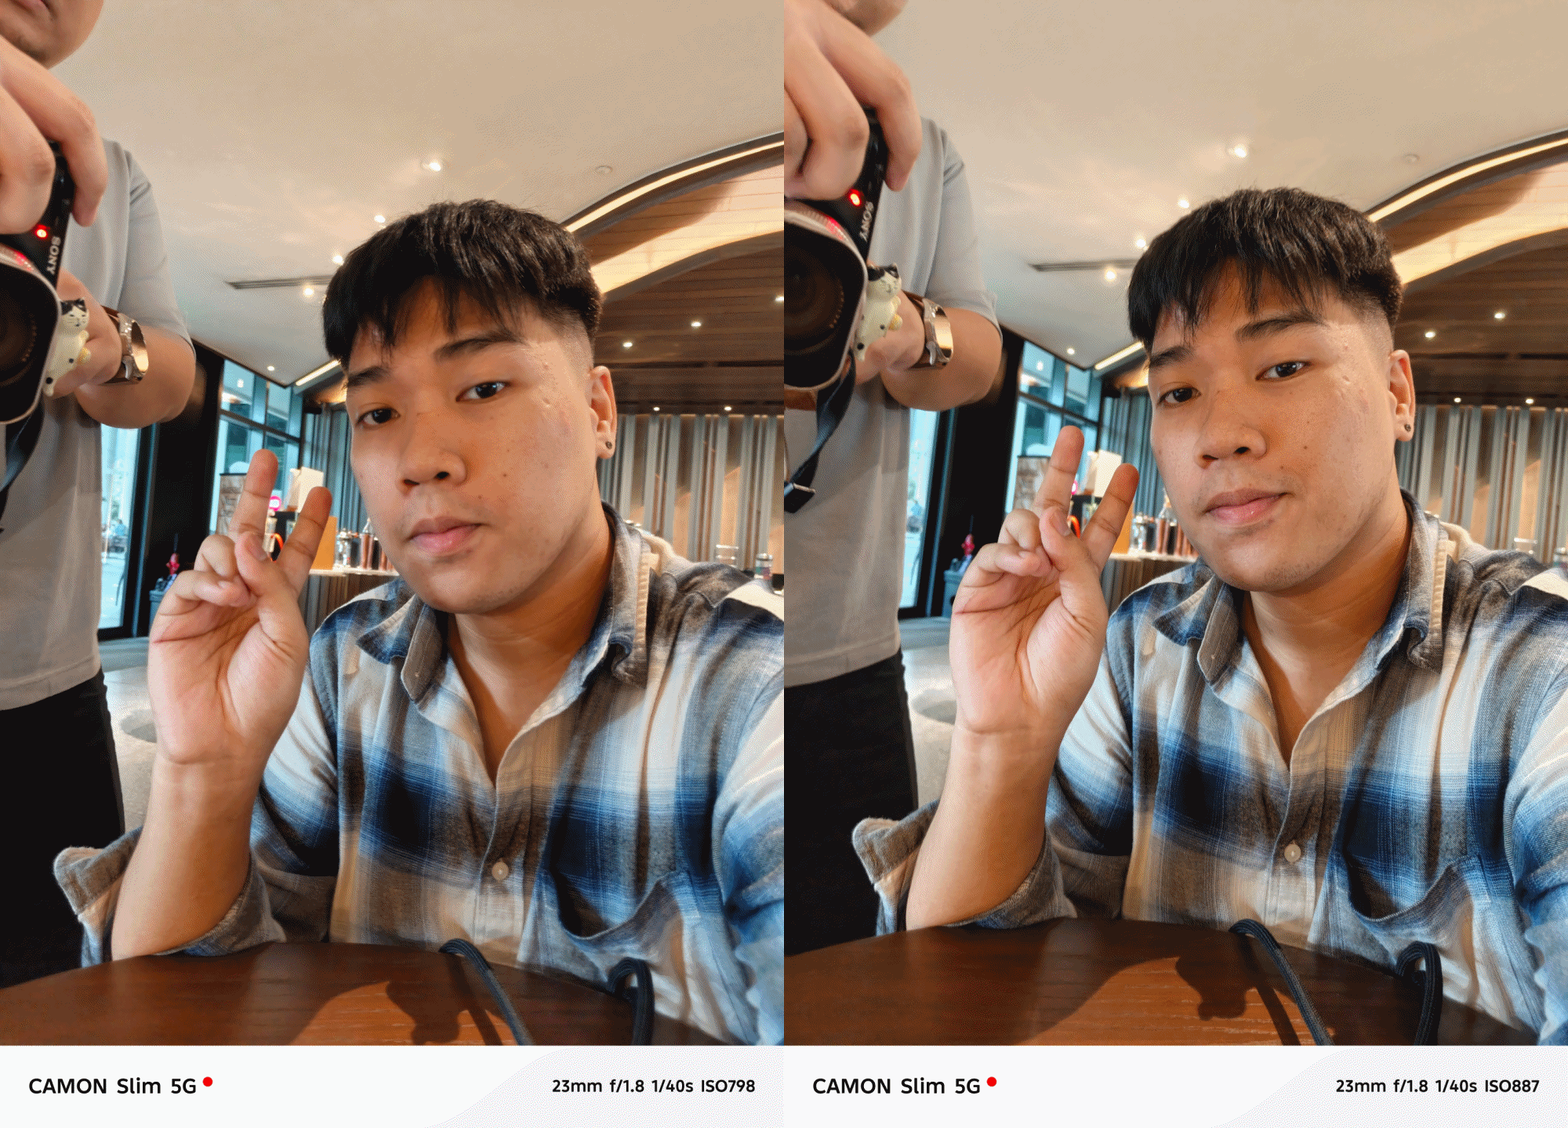
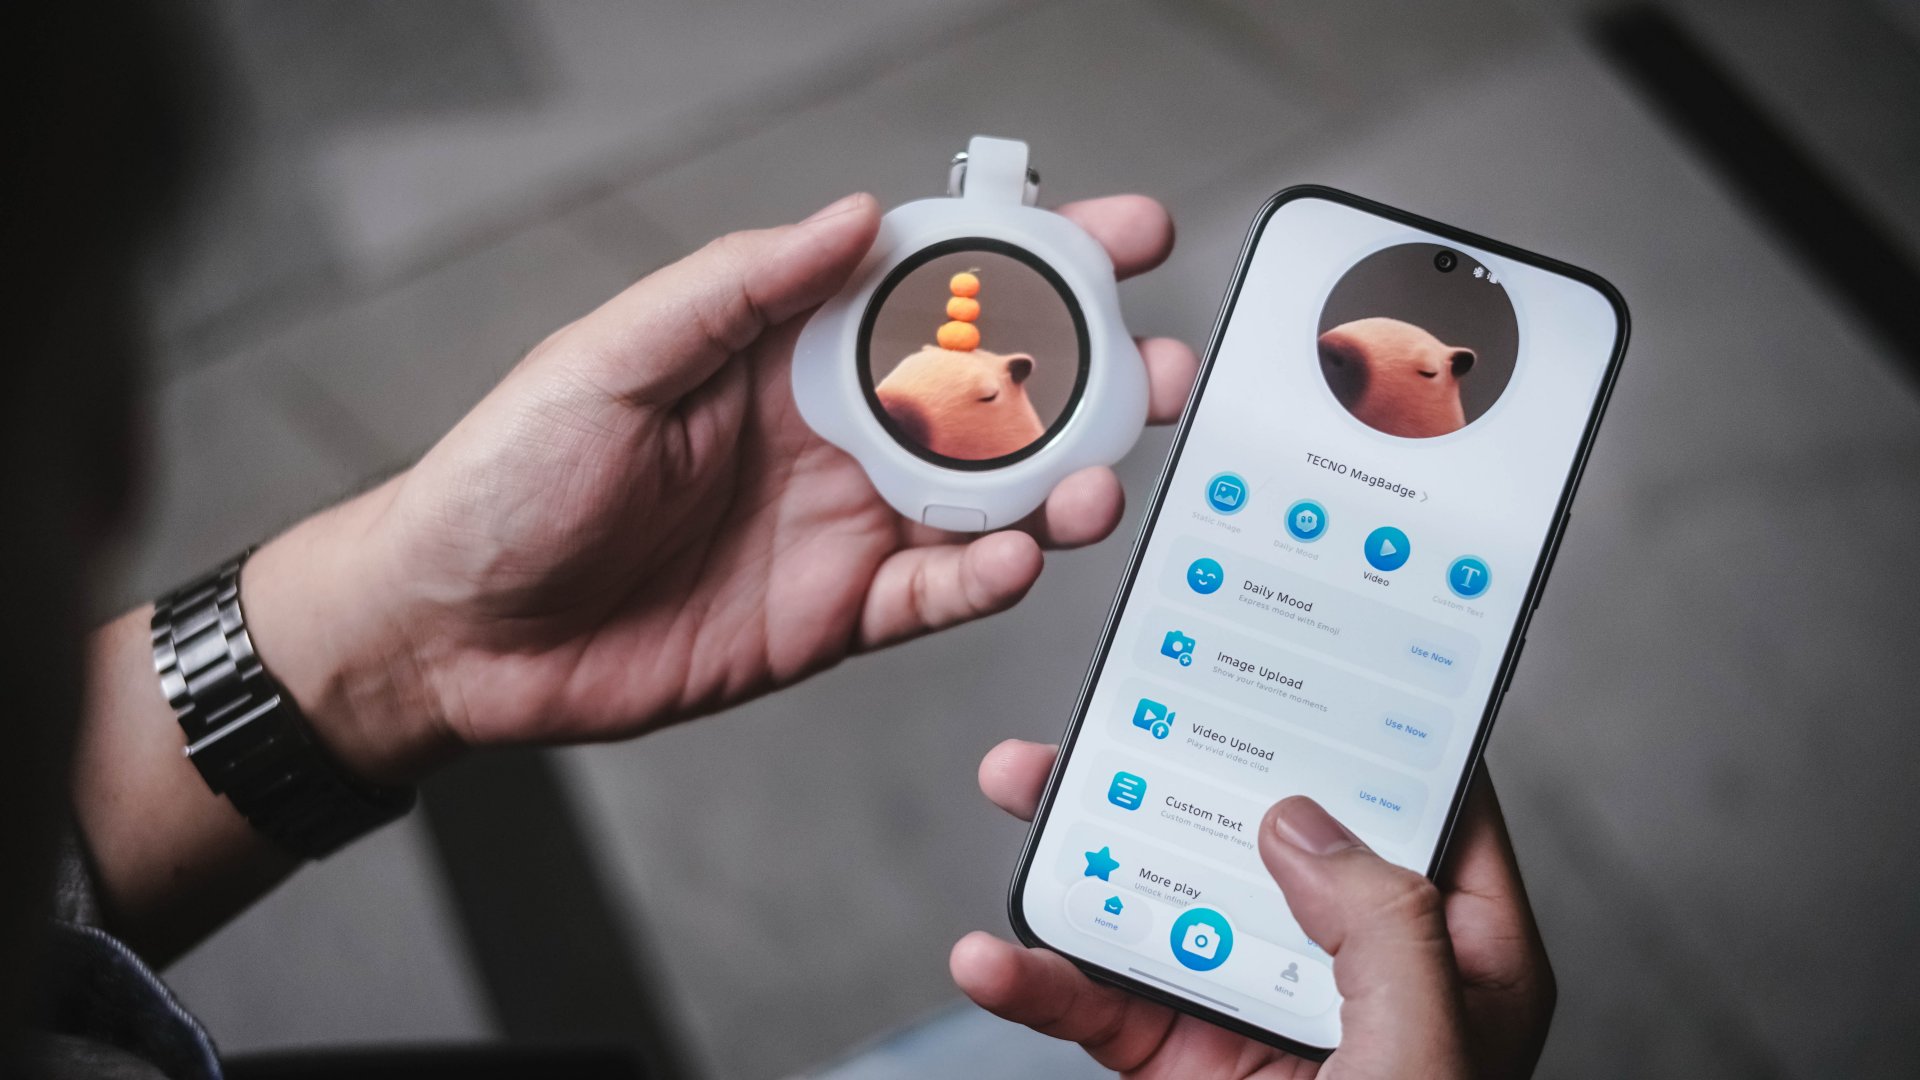
You can even put your own image or add custom texts on the MagBadge and use it as your unique phone accessory.
Unfortunately, the software still needs some polishing.
For instance, even though focal length switches appear in the interface, it was stuck at the regular 1x mode during my testing.
That’s frustrating because the hardware itself is clever.

If you plan on purchasing this accessory alone, it currently only works for the CAMON Slim 5G.
It’s not compatible with other smartphones — both Android and iPhones. The MagBadge app is only available in TECNO’s proprietary Palm Store (or App Center).
With that in mind, I tried installing it in my CAMON 50 Ultra to take advantage of the better camera system.
While I was able to download the MagBadge app, connect it, and even run a firmware update, it wasn’t able to do its job. Whether opening the camera app via MagBadge or manually opening the camera app in the phone, none of them worked.
Hopefully, TECNO makes the MagBadge compatible to most if not all of their smartphones.
Beyond the novelty, I see a potential that this can become a hit — as long as they fix their software quirks.
Is the TECNO CAMON Slim 5G your GadgetMatch?
If it wasn’t emphasized enough, its slim body meant lack better cooling. That resulted to a less than ideal heat management plus a loss in overall chip and battery efficiency.
If those concern you, you might want to look elsewhere.
However, those shortcomings don’t completely ruin the experience. It’s still a Swipe Right for a handful of reasons.
The combination of an impressive slim build alongside a clean design, superb display and speakers, plus a large battery and cute MagBadge accessory all make up for some of its performance-heavy drawbacks.
The TECNO CAMON Slim 5G is easy enough to appreciate for what it is.

While most don’t get the hype around slim smartphones, I still see this as an engineering breakthrough. Something brands and people behind all of these were able to achieve through years of research and hard work, all packed in an ultra-thin, consumer-ready product.
The TECNO CAMON Slim 5G is clearly thin. While not perfect, there’s still plenty to like within.





Garmin Approach S72 brings swing metrics, green reading to your wrist

Garmin Enduro 4 promises up to 320 hours of battery life

Spotlight: Marshall Heston 60

Apple sets home-themed event on October 13

ASUS Zenbook 14 lineup expands with new colors and processors

vivo X500 Series launches with major imaging upgrades

OPPO Find X10 Pro Max is the first phone with a triple 200MP camera system

BYD says that way better EV batteries are coming next year

TECNO CAMON Slim 5G: Price, availability in the Philippines

HONOR Magic9 Pro Max launches in China with ARRI-powered imaging


-
 Automotive2 weeks ago
BYD says that way better EV batteries are coming next year
-
 Philippines1 week ago
TECNO CAMON Slim 5G: Price, availability in the Philippines
-
 News2 weeks ago
HONOR Magic9 Pro Max launches in China with ARRI-powered imaging
-
 Reviews1 week ago
TECNO CAMON Slim 5G review: Slim on size, big on surprise
-

 Smartphones2 weeks ago
TECNO CAMON Slim 5G teases an ultra-slim design ahead of launch
-

 News1 week ago
Apple wants to release new iPhones more regularly
-

 Computers2 weeks ago
ROG brings out the ultra-stylish G1000 gaming desktop
-
 News1 week ago
vivo X Fold6 makes global debut with 200MP camera and 6900mAh battery