

If you’re looking for a step-by-step tutorial on how to repair your iPhone by yourself, this isn’t iFixit nor JerryRigEverything. But if you came here out of curiosity (and for some tips), I’m here to share my first ever iPhone repair experience.
I’ve been dealing with tech mishaps over the years. From faulty PCs and laptops, all the way to a completely dead iPhone 3Gs and Samsung Galaxy Note5, it’s not something new to me. In fact, it was frustrating to deal with it as I’ve experienced having no computer when I was in high school — and even being phoneless for three months back in college.
If you’re too clumsy or you can’t see small parts clearly, your next best option is to:
- Bring it to a repair shop
- Find a friend (like me) who knows how to replace phone parts
- Find a substitute phone instead
Disclaimer: Try at your own risk. Don’t do it if your device is still under warranty.
Check your phone’s defects
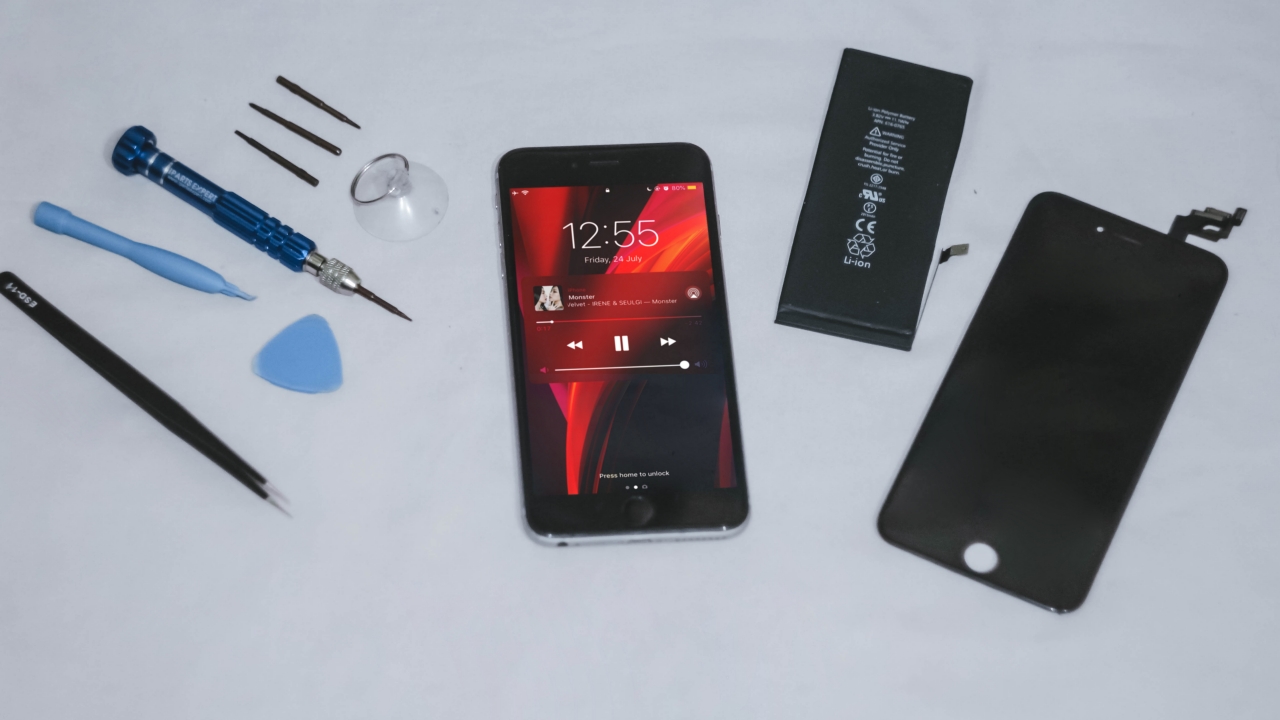
You can’t fix something if you don’t know what’s wrong with it. If you already know your phone’s situation, it’s easier to determine what parts you need to buy for the Do-it-yourself iPhone repair you’re planning to do.
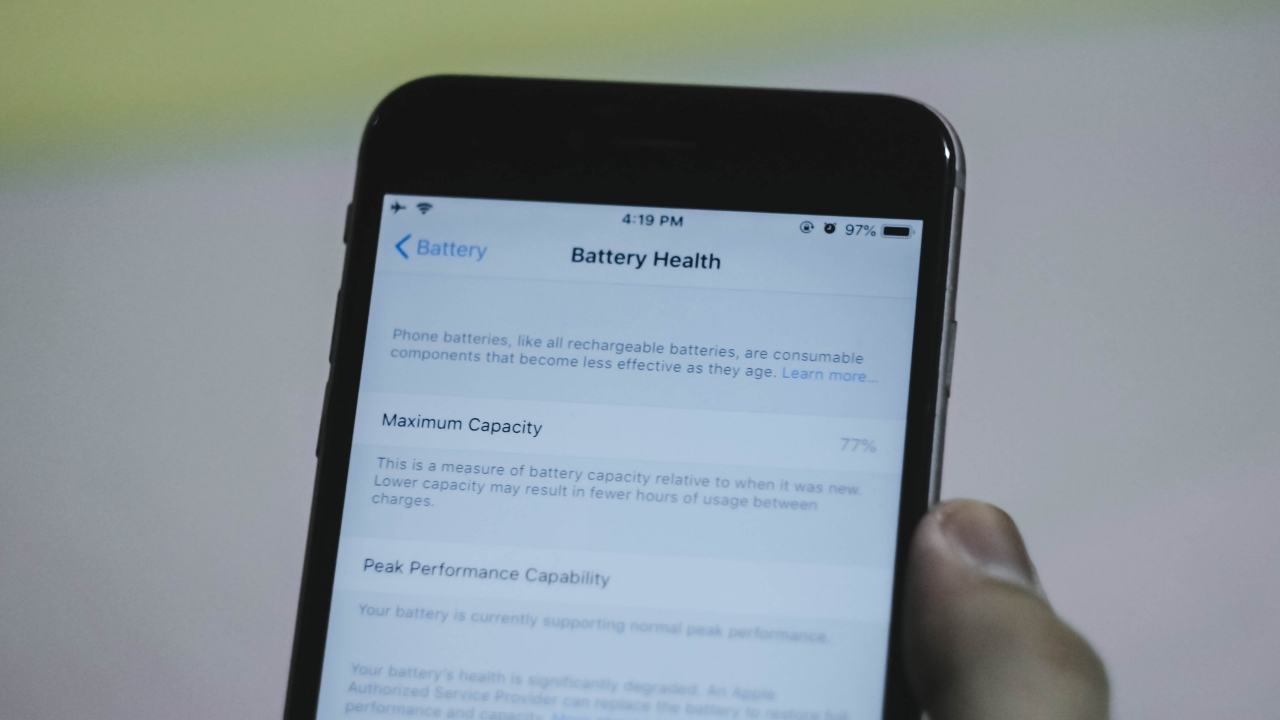
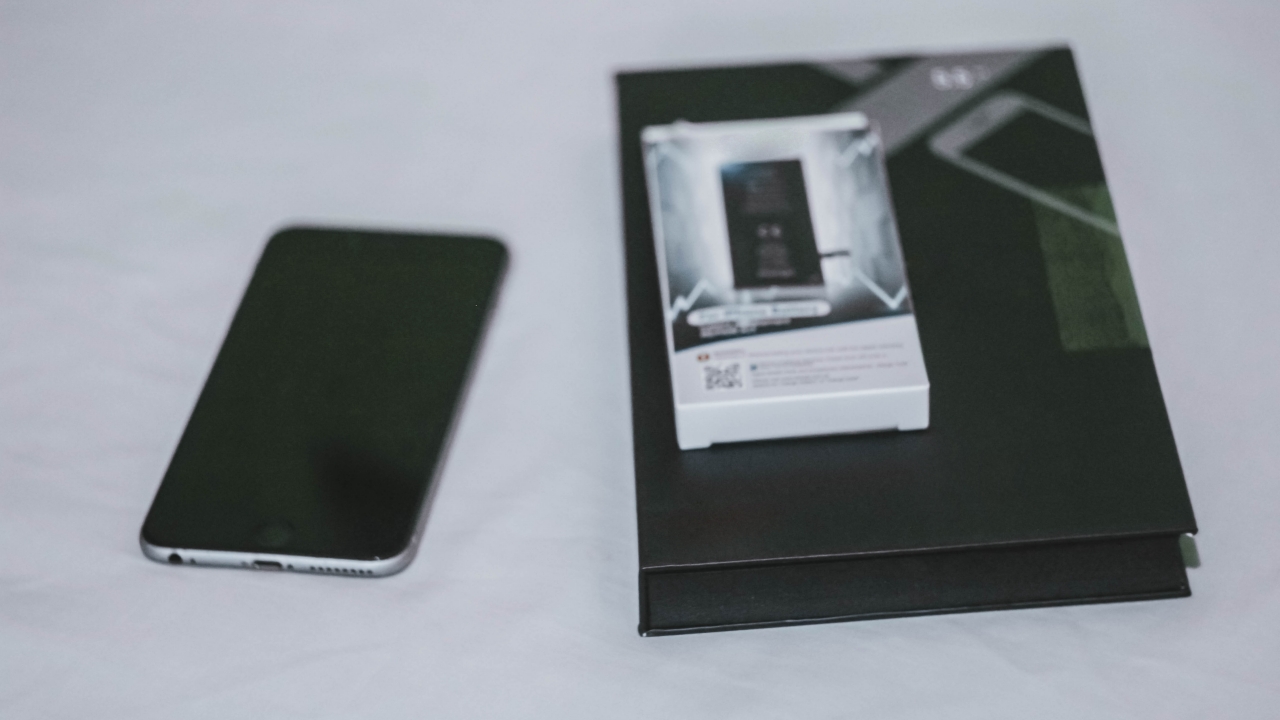
In my case, I already knew that my iPhone’s battery is not in its ideal shape. Apple iOS’ Battery Health feature is actually helpful as it states whether your battery is still functional or needs to be replaced. Other than that, my phone’s display also suffered from “ghost touches” that I needed to replace it too right away.
DIY repair is the cheapest option
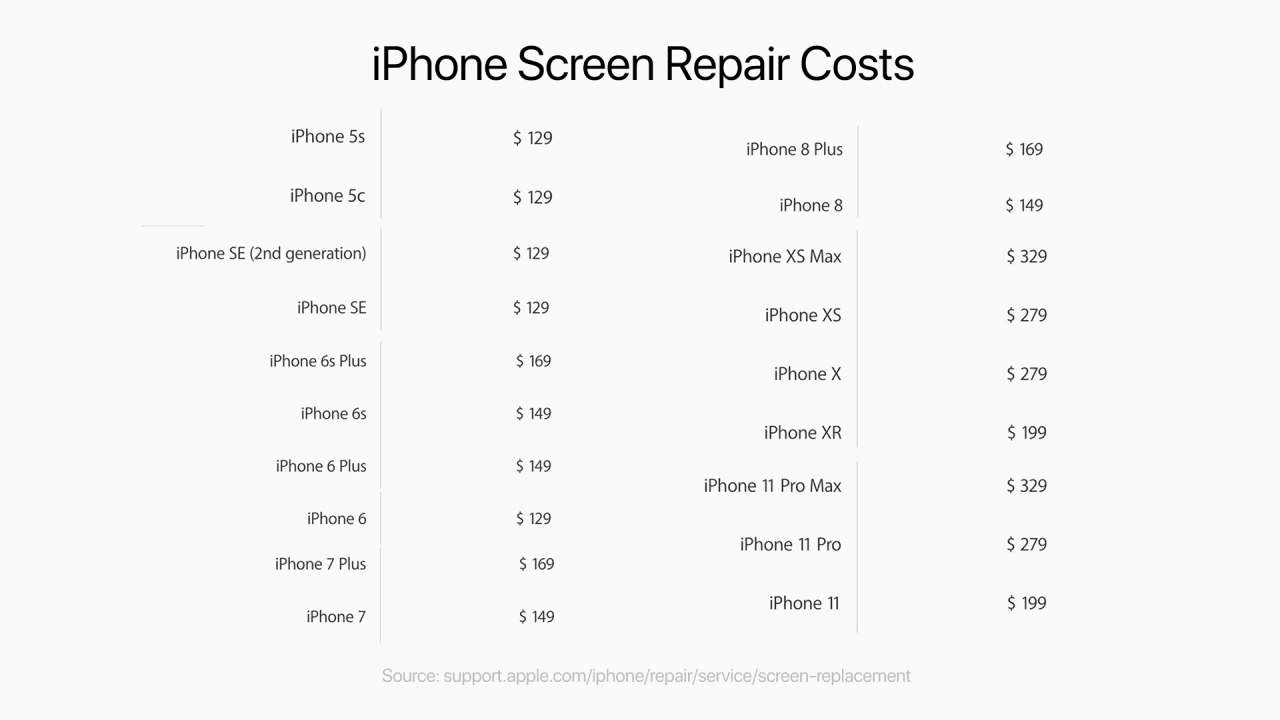
Phone repairs really aren’t cheap. If you take your iPhone to an Authorized Service Center, you’re not just paying for those parts that need to be replaced, you’re also paying a hefty amount of diagnostics fee and even the repairman’s labor.
As I checked on Apple’s website, an out-of-warranty screen repair for the iPhone 6 Plus will cost me a whopping US$ 149 (which is around PhP 7,360 when converted). Other than that, Apple’s US$ 29 battery replacement is long overdue. Now, it’s back to its original replacement cost of US$ 79 (around PhP 3,900).
I know what you’re thinking. Third-party repair shops have cheaper services. Still, you’re gonna pay for labor and diagnostics fees. It will also consume much of your time — and just the thought of going out amid the pandemic isn’t safe at all.
Be knowledgeable enough
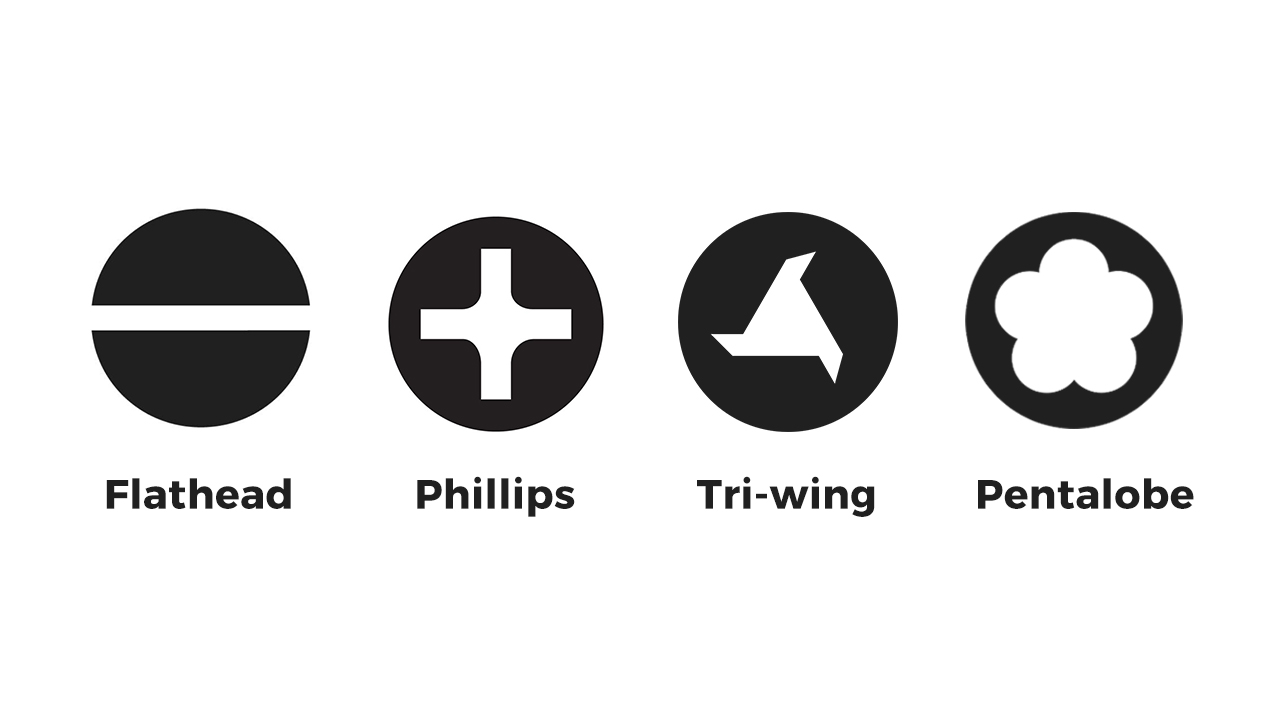
Image by GadgetMatch
DIY repair isn’t for everyone. As for myself, I’m confident enough to proceed as I’ve had numerous experiences repairing most laptops and CPUs. I was able to upgrade the RAM (memory) capacity as well as replacing old HDDs (hard disk drives) to a faster SSD (solid state drive).
Other than that, one should know how tools work. One mistake and you might damage the whole thing. Usual problems start when you don’t know what proper screw head to use — either between the common Phillips and flathead screw heads to a more complex Tri-wing and Pentalobe screws.
Not being vigilant and careful results to stripped screws, making future repairs harder. Other problems arise when you damage flex cables, IC chips, and other phone parts that are all vital in making the phone function — just like organs in the human body.
Finalize your decision
If you’re still holding onto your phone because you’re used to your phone’s ecosystem or you still need a lot of files with you and you don’t want to switch to a slower budget phone, this might be your final call.
But if you don’t actually care switching to a new phone without thinking of the hassle of moving files and several information, it’s not a bad decision. Just pick something that’s practical for you.
Choose the right parts and buy the exact tools needed
Now, it’s time to search for replacement parts. With the ongoing pandemic, it’s advisable to buy from reliable shopping apps. In the Philippines, you can find options on Shopee or Lazada. But if you still want to explore more, AliExpress offers parts for consumers and not just for wholesalers. The only downside is the pricey shipping fee compared to local operators.
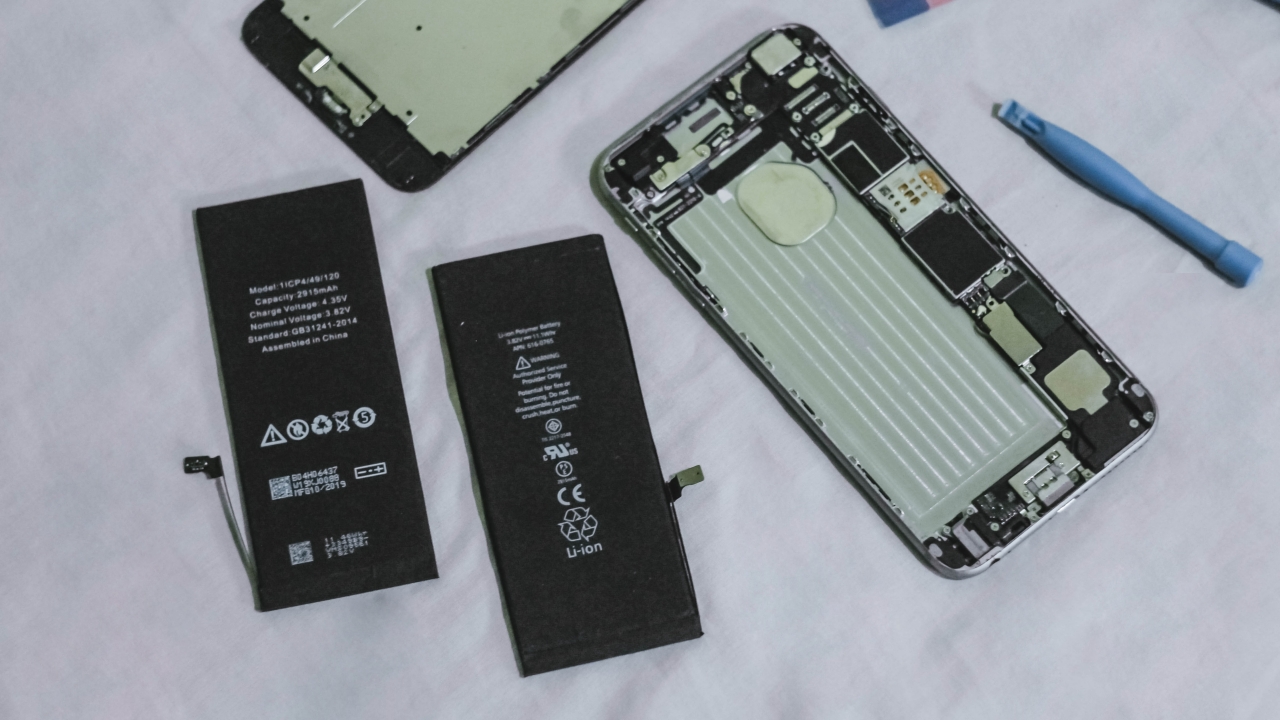
As this is an old iPhone, buying third-party parts wasn’t a big deal as long as they’re functional. I was able to buy a replacement battery for just PhP 460 (US$ 9).
For the display replacement, I was able to purchase one for PhP 1086 (US$ 22). It even came with the right set of tools, from pliers, plastic spudger, suction cup, sim ejector tool, and a screwdriver with 4 detachable magnetic screw options that are commonly used for iPhone repairs.
Note: Most iPhones are assembled in China that’s why parts being sold online are sourced from them. If it looks sketchy to you, try checking customers’ feedback. It has always been my habit whenever I shop online. Luckily, I wasn’t scammed and received the items I ordered without damage.
Let’s get the work done
After receiving the replacement parts, I immediately went on with the repair. It’s common knowledge but just in case you forgot, you need to turn off your phone before repairing to avoid technical failures.
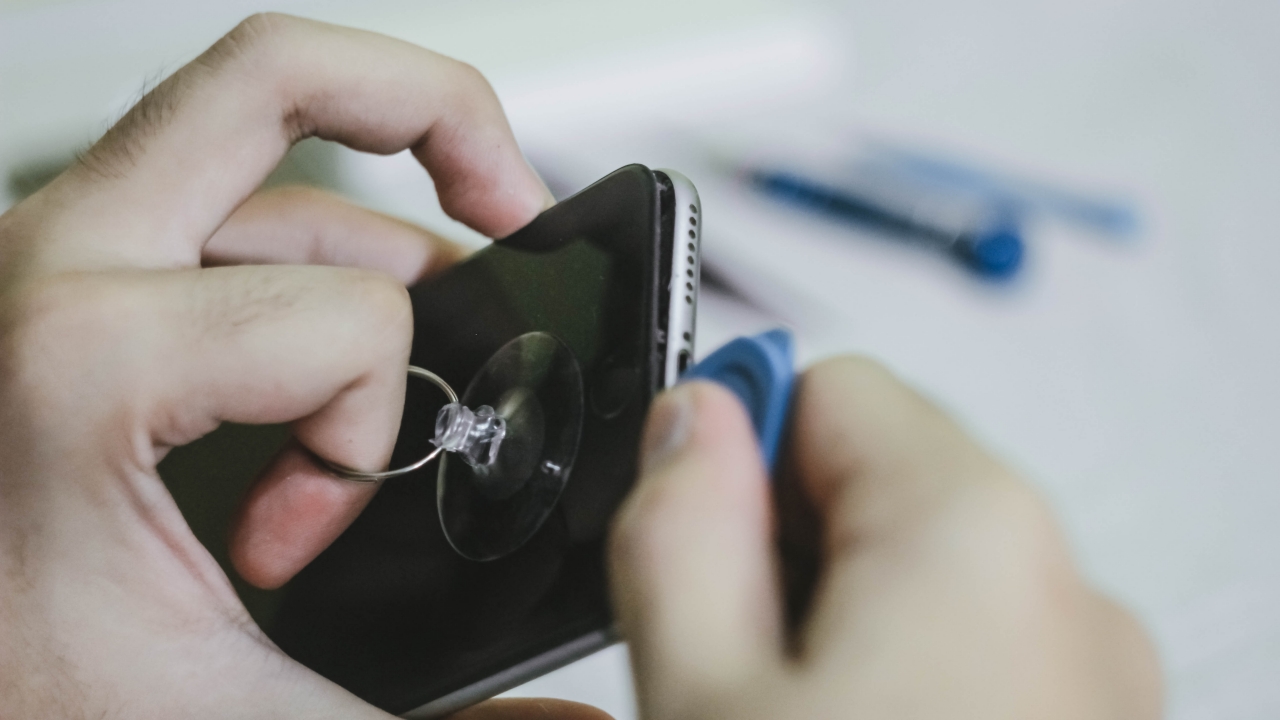
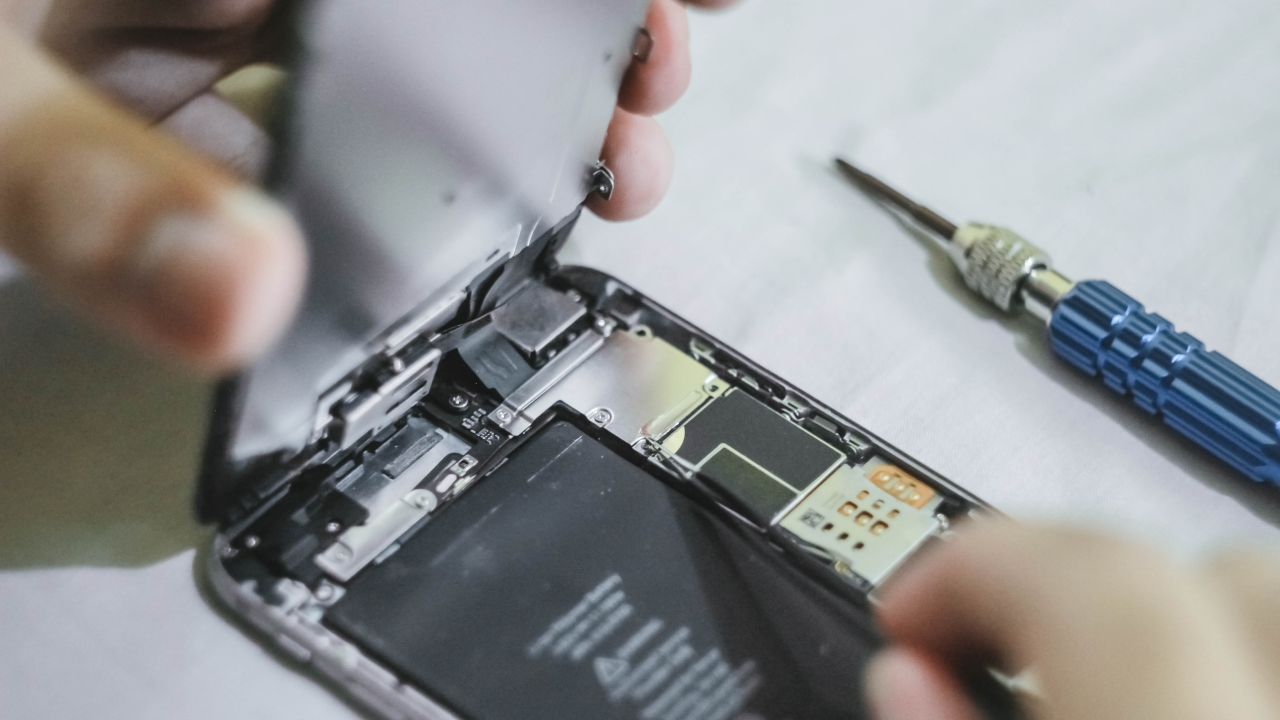
I started by plugging my hot blower into the socket and directly pointed it at my phone so it’s easier for me to separate the display from the aluminum unibody. Then, I started attaching the pentalobe attachment to the screwdriver and removed those two screws found between the Lightning (charging) port.
And with the help of the included suction cup, plastic spudger, and a little bit of my hand’s force, I was able to pry the phone’s display gently.
Not all iPhones are created equal
As my iPhone doesn’t have an IP rating, it doesn’t come with a waterproof gasket on its edges. For the iPhone 7 series and newer, prying the display will be more challenging because of the added adhesive for waterproofing.
Weird Flex but OK
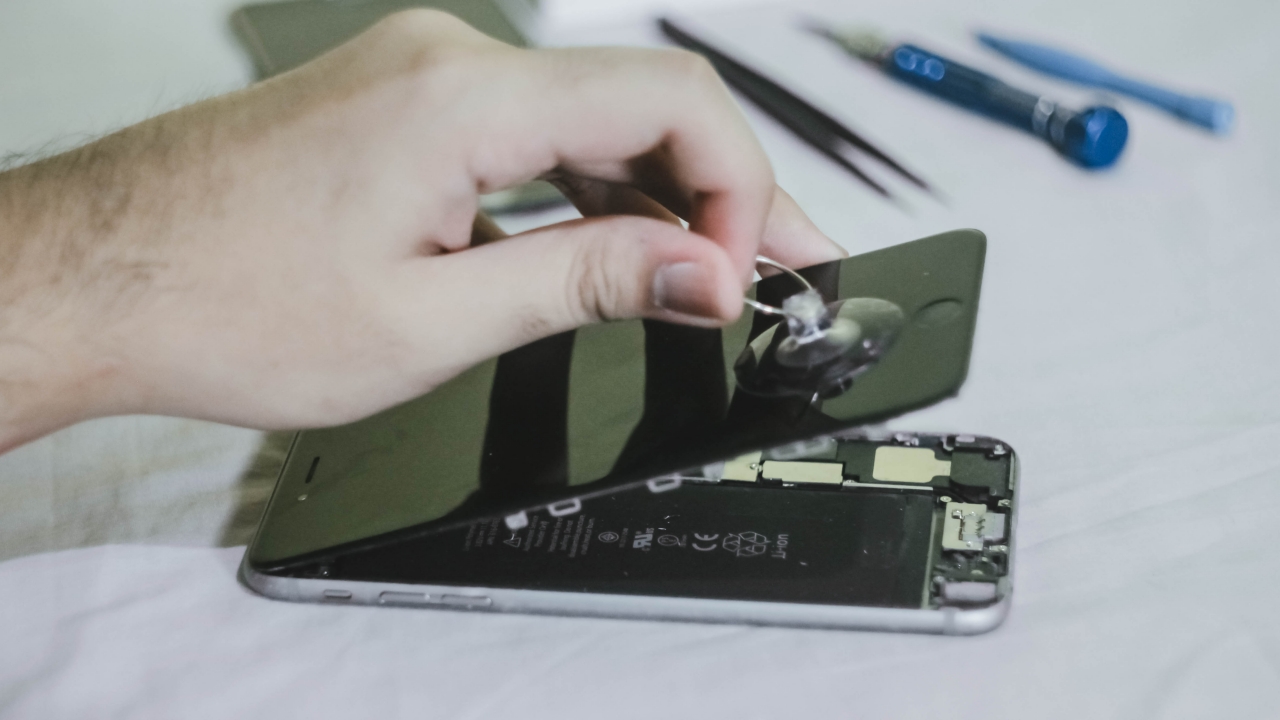
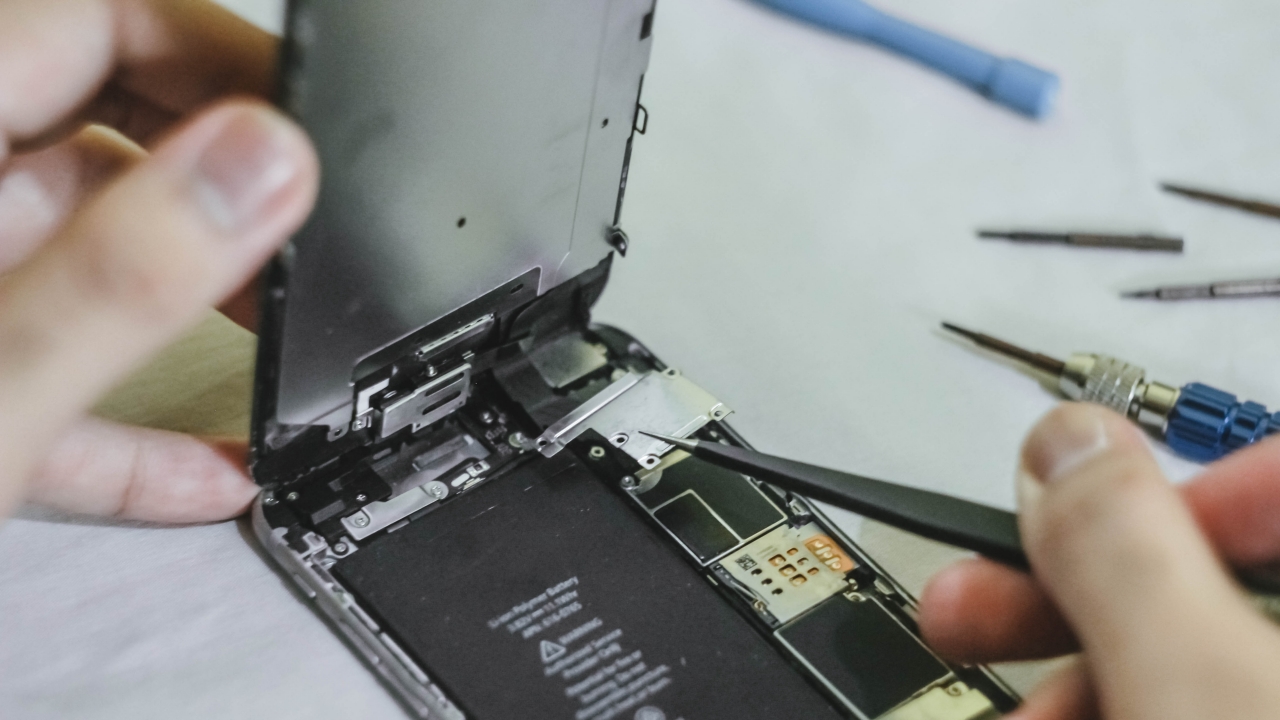
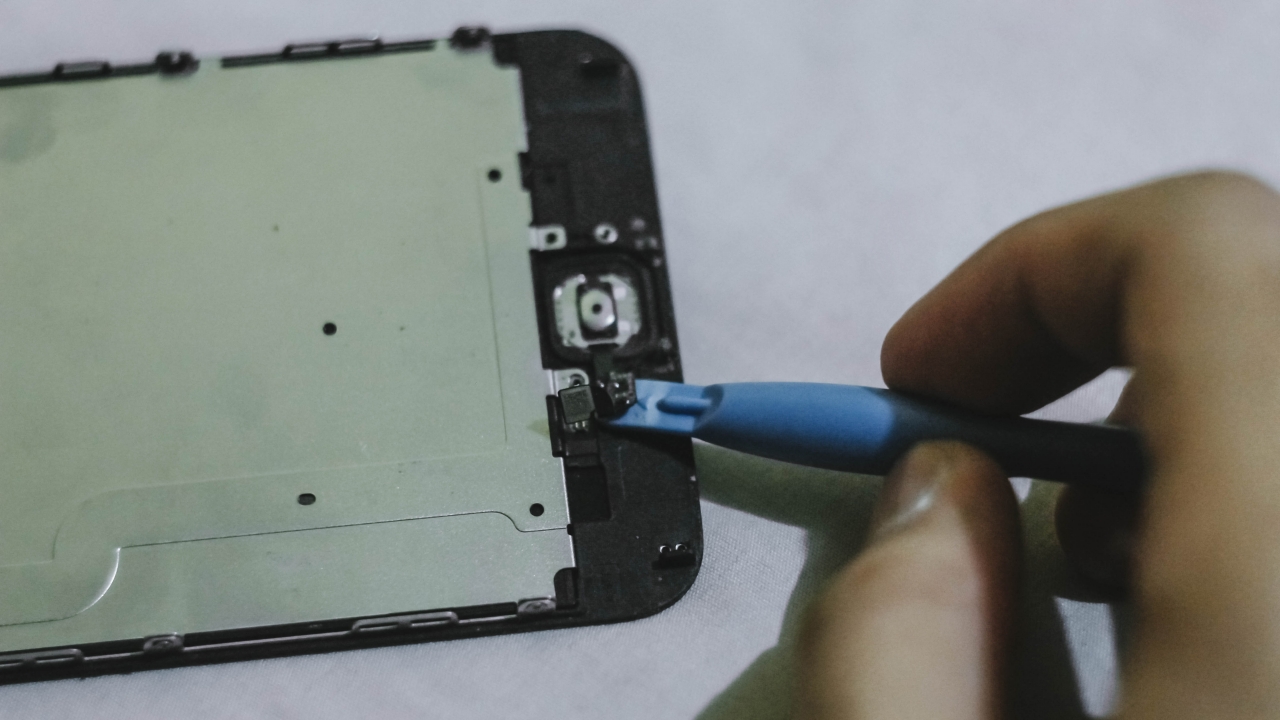
At last! I was able to lift my phone’s display. But don’t get too excited. You should still be careful with those flex cables that are still connected to the phone’s logic board. If you forcefully pull it hard, the worst thing that could happen is you ripping the flex cables — which you don’t want to do with your original display especially if you did not buy a replacement.
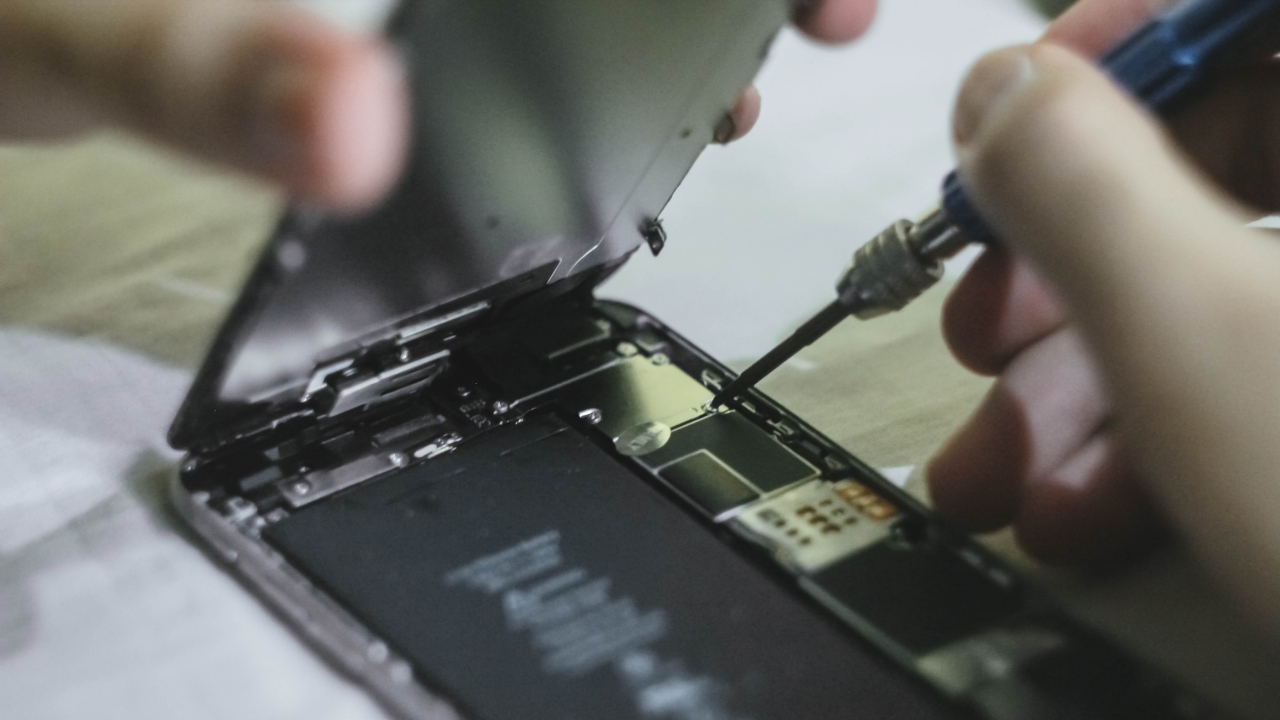
Usually, you only need to use a Phillips screwdriver to unscrew certain parts in the phone. But if you’re gonna disassemble the whole phone, you also need to use flathead and tri-wing screwdrivers to remove everything.
As for this part, I only needed the Phillips head to remove the metal plate that protects the display’s flex cables. Removing it will help me unsnap those cables.
Label your screws accordingly
As mentioned earlier, you might encounter screws that are completely different from one another. This isn’t totally required but it’s a helpful way to distinguish which screw parts go to which hole since not all screws have the same length and type.
You can do this by placing a piece of tape with numbers/labels on top of your working space and place them in an order you will remember. Things are always better when they’re labeled. 😉
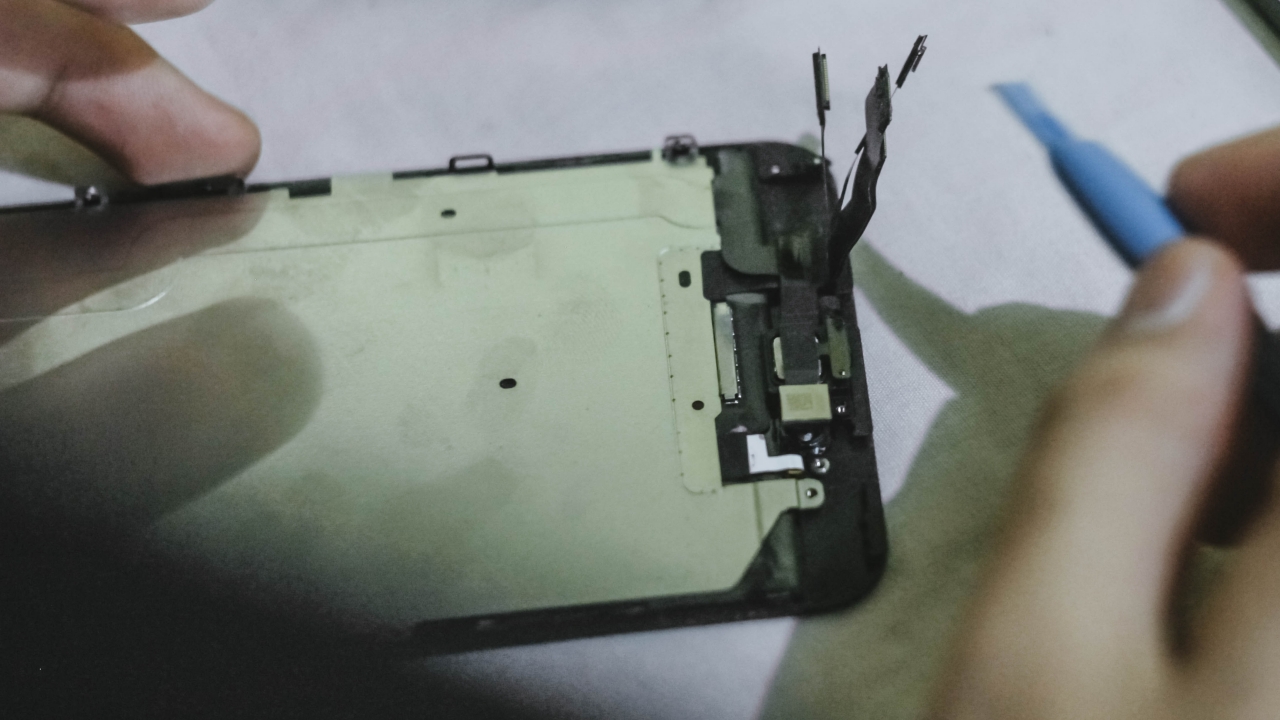
Don’t use metal pliers when unsnapping cables
Be cautious or you might snap
You can use pliers to remove metal parts that aren’t electrically-charged. Still, you should be cautious as you can’t use metal pliers when unsnapping cables inside or it might damage the IC chips found on the logic board and will badly affect the phone. Doing so might not only damage your phone, but it can also make you snap hard.
Best way is to use a plastic spudger to prevent metal contacts from sparking. As JerryRigEverything always says in his videos, unsnapping them is as easy as removing LEGO bricks stacked on top of one another.
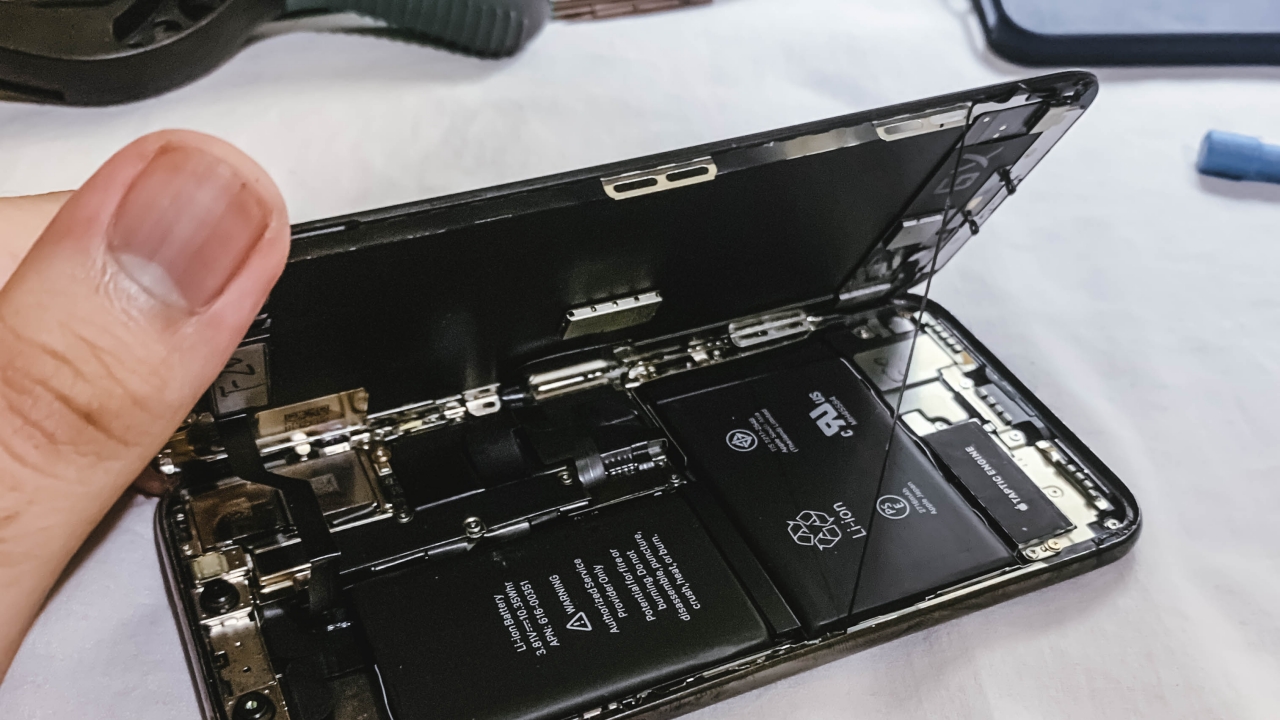
Battery removal is tedious but satisfying
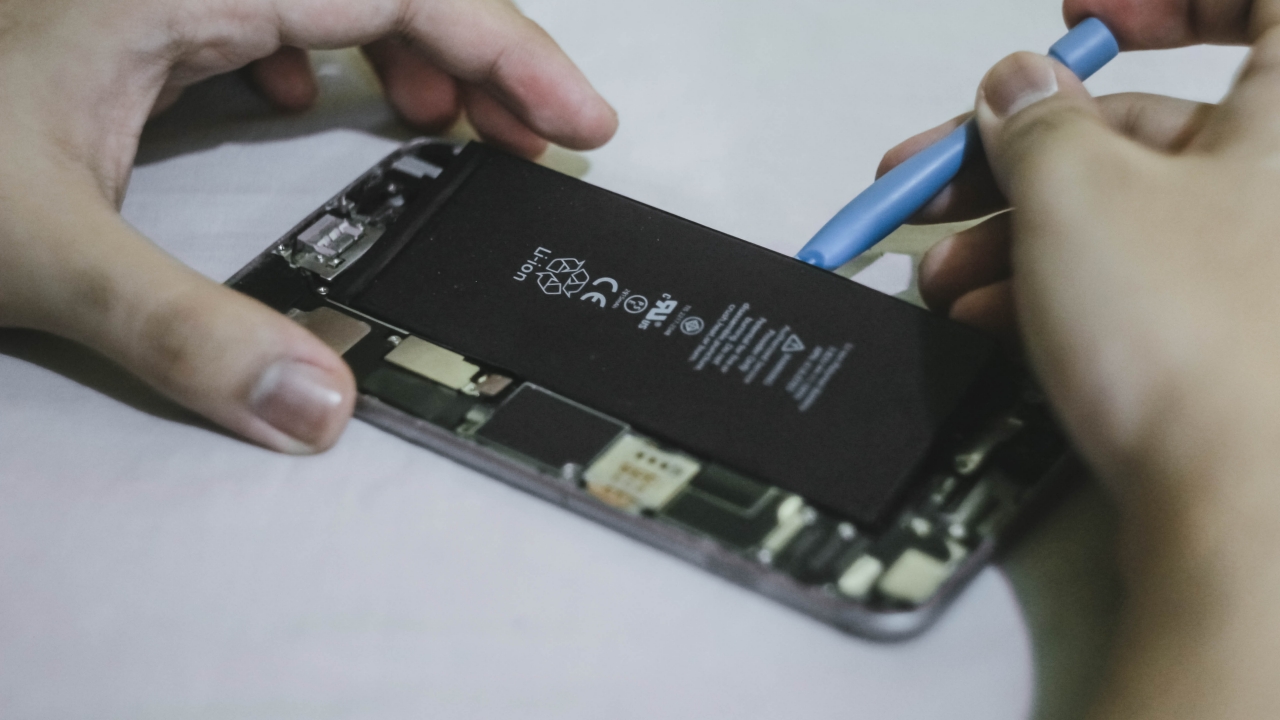
Usually, your iPhone’s battery has plenty of adhesive beneath it in order for it to stick even when you’re on the move. But before prying it up, you should remove the metal plate housing first on the lower right side. After doing so, unsnap the cables just like how you did with the display’s flex cables.
If you can’t find those black pull tabs that will easily help you remove the battery adhesive, you should grab your spudger and slowly lift the battery until you see the white adhesive and pull it as hard as you can. Once all the adhesive is pulled out, it’s safe to say you succeeded with the battery removal.
Start replacing those parts
Unlike replacing your ex, replacing your phone’s parts is just a backward process. After getting the replacement parts ready, you should store the old parts in a safe place since they are still products that are electrically-charged and include chemicals that might pose a risk of fire hazard when not handled and stored in a closed container.
Remember to dispose technological devices and parts properly. Keep it out of reach children and pets as well.
Putting back what’s left

Unlike putting your trust back in another person, putting all the cables, plates, and screws back in place is easier especially when you know how and where to place them — that’s why labeling them is more important than you thought.
Some iPhone parts are designed for a single device only
Display, backplate, battery, cameras, microphones, speakers, and vibration motor can all be replaced. But for parts that require biometrics, there’s a 1:1 equivalent for every iPhone. If you’re proceeding with the display replacement of your old iPhone, you need to remember that it doesn’t come with a TouchID replacement. That iPhone part is made for a single device only. You need to transfer that part from your original display to the replacement.
If you break your TouchID (or even FaceID in newer iPhones), you can’t have replacement parts for them. Breaking these precious parts will result into complete biometrics malfunction.
Fun fact: The best way to know whether an iPhone was repaired is by checking the True Tone Display setting. If it doesn’t show that setting, your iPhone’s display is most likely replaced. Even original iPhone display replacements are not exceptions to Apple’s repair mishap.
It wasn’t a perfect repair
When you’re not careful, you can immediately break something — whether it’s someone’s heart or just the flex cables in your display.
I overdid the unsnapping of the LCD backplate’s flex cable that connects the TouchID. Luckily, the fingerprint sensor is still in its original shape that I only needed to order a new LCD backplate for PhP 261 (US$ 5). It came two weeks after because it was directly sourced from China.
But it was still a successful repair

After waiting for weeks to get my LCD backplate replacement, I successfully repaired my old iPhone 6 Plus — all with working buttons, a better touch input, and of course, the TouchID works as well. With the faulty battery, it usually lasted for around two to three hours but now, it lasts for at least a day of moderate to heavy use. Standby time lasts a whole week.
The original cost of repair was around US$ 228 (or more than PhP 10,000) — where you can find and buy a brand new budget smartphone instead. Thinking about the money I saved actually motivated me to push this through. Combining the parts I paid for (including their shipping fees), that’s a total of just PhP 1807 (US$ 36) just in case you forgot to do the math.
BONUS: I also repaired my friend’s iPhone X
After sharing my story on how I successfully repaired my old iPhone 6 Plus to my friends, I was dared to repair an iPhone X. I took it as another iPhone repair challenge.
At first, I thought the logic board was dead. Not until I tried charging it wirelessly. Eventually, it powered on — which made me think that only the charging port was defective as it was submerged in water.
The repair process is completely different — from the placement of display flex cables, all the way to the complete removal of the battery, logic board, Taptic Engine, and the cameras as the charging port hides beneath those parts. The best thing is that, the Lightning port replacement plus waterproofing and battery adhesive only cost around PhP 916 (around US$ 19). It will cost more if it was brought to a service center considering they will run several diagnostic tests that add up to its total repair cost.

Making the long story short, it was another successful iPhone repair! With little background and experience to phone repairs, I was astounded that I can replace phone parts even without needing to go out and head to a service center.


News
iPhone 17 Pro Max is somehow the most traded-in phone today
All of the recent Pro Max models are sitting at the top, too.
For a lot of people, reselling or trading-in is the natural end of their time with an iPhone. After all, an iPhone is too expensive to leave lying stagnant in a drawer. Now, this usually happens years after a phone fully lives out its usefulness. However, the new iPhone 17 Pro Max has somehow claimed the top spot as the most traded-in phone today.
According to reports organized by SellCell, a surprising number of people are reselling their iPhone 17 Pro Max. Today, 11.5 percent of trade-ins are of the current generation’s most premium model. The next models, the iPhone 14 Pro Max to the iPhone 16 Pro Max, all sit between 7.2 percent and 7.3 percent apiece. This is a staggering growth, as the iPhone 17 Pro Max was sitting at only 5.1 percent of trade-ins in late November.
There’s no confirmed reason as to why people are trading their premium models so early into the model’s lifecycle. However, if it’s any indication, the iPhone 17 Pro Max has the lowest depreciation for a premium iPhone model, when compared to its predecessors in the same time frame.
Given that the resale value of a new iPhone 17 Pro Max is still pretty high today, it’s possible that users aren’t completely satisfied with the model and opted to trade in their new phones for something more manageable. After all, the new phone is as premium as they come. It’s also as large as they come.
That said, it’s certainly an odd tidbit that the most premium iPhone is the one that people are dumping the most.
SEE ALSO: Xiaomi 17 Pro Max takes a jab at Apple’s iPhone 17 Pro Max
News
vivo V70 launched globally, introduces 4K 60fps, OriginOS 6, more
Comes with powerful ZEISS Super Telephoto Camera
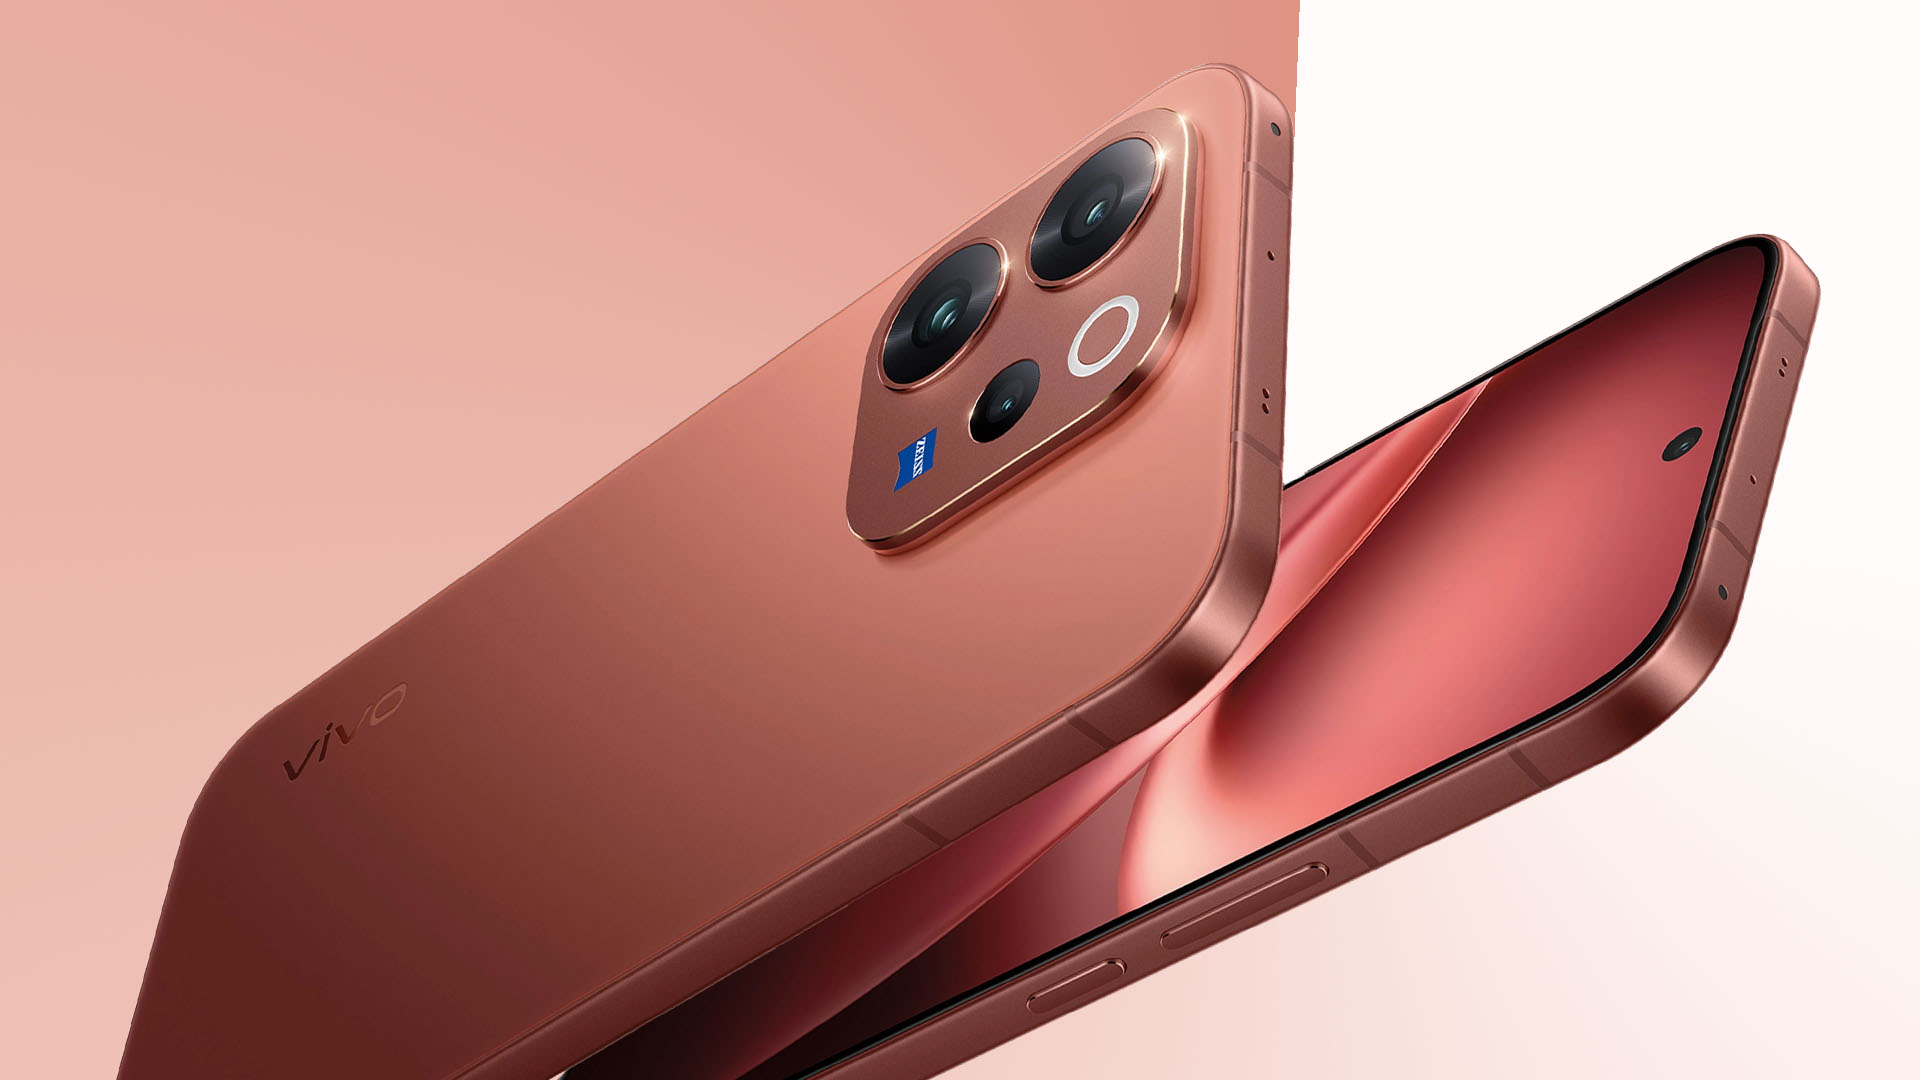
The vivo V70 has officially been launched globally, and will soon roll out gradually across Southeast Asia, the Middle East, Europe, and other markets.
The company’s latest V series mid-ranger features helpful tools for travel, concerts, and other occasions, with its familiar 50MP ZEISS Super Telephoto Camera, AI Stage Mode, 4K 60fps video, and AI-powered editing tools.
A refined design also features aerospace-grade aluminum alloy frame, rounded corners, and a flat 6.59-inch 1.5K OLED display in front. The back, meanwhile, has AG glass for scratch resistance.
Available colors are Golden Hour, Alpine Gray, Sandalwood Brown, Canary Yellow, and Authentic Black.
In addition, the vivo V70 debuts the new OriginOS 6 out of the box for enhanced performance and security.
Pro-grade telephoto camera
The vivo V70’s 50MP ZEISS Super Telephoto Camera has a pro-grade, 1/1.95-inch sensor and OIS for sharper shots in low-light and challenging conditions.
Its advanced periscope design also allows for higher zoom levels without adding bulk.
This shooter is coupled with a 1/1.56-inch 50MP ZEISS main camera. There is also an 8MP ZEISS ultra-wide angle camera and a 50MP ZEISS Group Selfie Camera.
The new device comes with a new AI Stage Mode, tuned for stage photography.
Shots are enhanced by AI Image Portrait Enhancement Algorithm and AI Style Portrait Technology.
This way, users can achieve 10x zoom for crisp stage photos.
As with previous iterations of the V series, the latest handset is also equipped with ZEISS Multifocal Portrait, along with options like 85mm ZEISS Sonnar Style Bokeh or 100mm Close-Up Portrait in ZEISS Planar Style.
And for the first time in the V series, the phone introduces 4K 60fps video for cinematic and smooth captures.

AI Audio Noise Eraser, meanwhile, offers an additional layer of creative control fo post-editing.
Other AI-powered editing tools include AI Magic Weather, AI Magic Landscape, AI Retouch, AI Erase, AI Magic Move, AI Image Expander, and AI Color Adjustment.
The cameras are arranged in a flagship metallic camera module for a smooth, clean, and understated look.
Smarter, more intuitive
Powered by OriginOS 6, the V70 brings a smarter performance through deep AI integration.
Along with a fully rebuilt infrastructure and Origin Smooth Engine, the system looks, feels, and stays smooth while allowing multi-scenario connectivity.
The OS also introduces Origin Island, a dynamic capsule at the top of the screen.
The phone also supports cross-device transfer, including with supported iPhone models.
Inside is a 6,500mAh BlueVolt battery with 90W FlashCharge. Other features include Dual-Bridge Signal Concurrency for optimized network even in congested environments.
Smartphones
Google launches the Pixel 10a
It will be available starting March 5, a day after Apple’s event.
This week, Apple announced a major event happening on March 4. There is a substantial chance that the iPhone 17e will make its debut during the event. Based on how other companies are handling the announcement, something big is coming. For example, Nothing essentially hitched a ride on Apple’s hype yesterday. Today, Google responded by launching its counterpart to the iPhone 17e: the Pixel 10a.
As is tradition with the series, the Pixel 10a breathes new (and budget-conscious) life into the current generation of Pixel. Improving on the previous generations, the new phone has a completely flat back. Plus, Google says that it has the most recycled material of any entry in the A-series so far, including a 100% recycled aluminum frame and an 81% recycled plastic cover.
![]()
Under the hood, the Pixel 10a will feature the same Tensor G4 chip as the Pixel 9a. There’s no surprise there, as Google is likely reserving its major performance upgrades to the next flagship.
However, the new series will have improvements elsewhere. For one, the Pixel 10a will have a 48-megapixel rear camera, paired with a 13-megapixel ultrawide camera.
There’s a new Auto Best Take feature, which takes multiple shots in one press and automatically selects the best one of the bunch. Camera Coach acts as a personal tutor that guides users on the best composition and lighting.
Additionally, Google is adding Satellite SOS for the first time on an A-series phone. Users can now call emergency services outside of their usual coverage area.
It will come in four colorway options: Lavender, Berry, Fog, and Obsidian.
The Pixel 10a will be available starting March 5, a day after Apple’s event. Pre-orders are available now. The new phone will cost US$ 499.
SEE ALSO: Google Pixel 10 Series: First Look


iPhone 17 Pro Max is somehow the most traded-in phone today

vivo V70 launched globally, introduces 4K 60fps, OriginOS 6, more

Osmo Pocket 4 makes a surprising appearance in public
Google launches the Pixel 10a

ACMobility Launches ChargeFleet: Seamless solution for businesses

HONOR X9d 5G review: Tougher, more long-lasting and optimized

Now playing: Final Fantasy VII Remake INTERGRADE on Switch 2

Breaking up with Adobe Photoshop after 20 years

Razer fully unwraps these limited BLACKPINK Edition gaming gear

Forza Horizon 6 launches on May 19


-

 News1 week ago
TECNO will showcase the CAMON 50 and POVA 8 series at MWC 2026
-

 Laptops2 weeks ago
TECNO MEGABOOK K16s 13th review: No-frills beneath those grills
-
 Features1 week ago
HUAWEI MatePad 11.5 S 2026: The better-than-ever 4-in-1 productivity tablet
-

 Gaming1 week ago
Now Playing: Yakuza Kiwami 3 & Dark Ties
-

 Gaming2 weeks ago
Valve is delaying the launch of the Steam Machine
-

 Gaming2 weeks ago
Horizon Hunters Gathering is an upcoming co-op roguelite spinoff
-

 Reviews6 days ago
The art of being in and behind the frame
-

 Gaming2 weeks ago
No new NVIDIA GPUs this year, report says