

Cameras
Learning street photography with the Canon EOS RP
A picture is indeed worth a thousand words

Street photography has been around for decades — way back in the early years of World War, famine, hunger, and financial crisis. It even sparked several debates whether it’s legal or ethical to do so. Although these questions remain unanswered, a lot of people have been more invested in street photography lately.
It may have started that way but it didn’t stay for long. Today, it’s not just limited to photojournalists, it even hits casual and creative photographers alike. But the real essence of this photography genre is still intact: it is thrilling, challenging, and takes a lot of patience because it should be candid and in perfect timing, not staged.
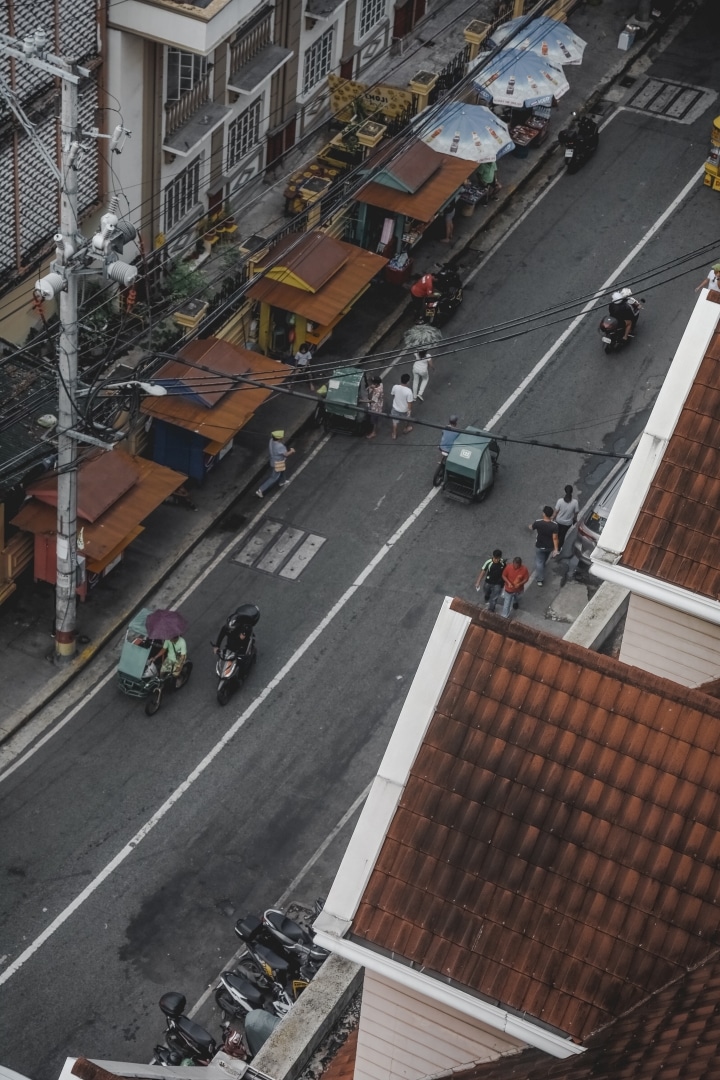

Canon Philippines gave us an opportunity to learn more about shooting in streets with the guide of popular photojournalist, Jilson Tiu. We roamed around the streets of Intramuros and got a glimpse of life inside the walls.
It hasn’t been long since Canon released the EOS RP in the Philippines. Just a refresher, it is the early successor of the EOS R, which is Canon’s first full-frame mirrorless camera. It is also their second mirrorless camera with a smaller body and introduced other cut-down features to make it (a little bit) cheaper.
Canon has come a long way in making and manufacturing cameras. My first camera is a 60D, which was a prosumer king during its time. My initial hands-on with their newest mirrorless camera felt familiar. They have managed to keep the design language in a smaller form factor.
Enough with the technicals. As someone who has been into photography since high school, I can tell that street photography is specifically not my forte. But this doesn’t mean I won’t challenge myself. I learned so many things during this photo walk — so I’m giving you eight tips when shooting around the streets, together with my EOS RP experience.
1. Learn the basics

They are called “basics” for a reason. You should not go to war without learning how to shoot a gun — the same principle applies in photography. Learning how shutter speed, ISO sensitivity, and aperture work before you shoot is essential because you will not (and should not) rely on Auto Mode, especially that you are going to use DSLR or mirrorless cameras when shooting, which is a lot more versatile than using point-and-shoot cameras.
Other photography jargons such as Depth of Field (DOF), focal length, white balance, exposure bracketing, should follow along the way. Composing shots is also part of the basics, including placing subjects within the frame, exercising Rule of Thirds and/or Golden Ratio, and more. With the existence and vastness of the internet, searching for tutorials shouldn’t be a problem for most.
More over, technicals should come along the way. Even the lens you pick affects the quality of shots you take. Prime, kit, telephoto lenses, you name them. Photography isn’t as easy as it seems, but trust me, knowing the basics will be one of your biggest achievements and advances as an aspiring photographer (or photojournalist).
2. Look for human elements

Imagine walking around the streets without any human element, do you think street photography would still make sense? Human element creates several stories in the shots you capture. Street photography isn’t literally talking about capturing the streets, it’s more about capturing the culture between people and the streets you pass by.
One misconception about street photography is when photographers take their posing models as subjects, and street as a background element — put simply, that’s not street photography.
3. Know one’s story
To whoever is reading this, I would admit that I’m socially awkward. A big chunk of me being an introvert holds me back from talking to people. If you are really focused on doing street photography, this tip is very important in establishing connections and making relationships as you shoot more individuals in the long run.
Once you find at least one (or several) human element/s you want to capture, it shouldn’t stop there. Talk to them. Ask them about life, how is their day going, other questions to follow. These questions may sound simple but it helps in creating a sense of belongingness, even if you are both strangers to each other. It would also feel authentic when you talk to them more, even when you are both focused on the different things you’re doing.

Taking the shot above as an example. Although he is busy with his job as a barber, he still entertained our group because we took the initiative to speak with him. Talking to people contributes to the candidness of the photograph. It did not disrupt the things we all did — he even enjoyed the small talk with our group. Let your single photograph say a thousand words to those who will see it.
4. Respect all things around you

Part of having moral ascendancy is respecting each and everything around you — not limited to life forms such as people, animals, and plants, even non-living things alike.
In this particular shot, an old man got mad at our group for suddenly capturing this dog. After trying to ask for permission, he then decided to let us shoot. There are times when people are not amused seeing cameras pointed at them nor at the things they own. If it happens to you, respect their privacy and decision. You should not argue and you definitely need to walk away before you get yourself in trouble.
5. Stop making poverty an aesthetic

I have seen a lot of street photographers who are making poverty as an aesthetic. In connection to tips two and three, showing one’s respect is not imitating the way they live or how they interact with other people.
Exhibit A: You want to do a staged photoshoot with models pretending they are beggars.
Exhibit B: You were awed when you saw two siblings sleeping along the footbridge. You decided to take photos of them and shared it on Social Media without their consent.
Social Media exposure would raise awareness about their situation, but do you think it would make them happy if they knew they were photographed without consent? If no talk or story-telling happened in between, it is not street photography anymore. The essence of knowing their life nor story never even happened. It is unethical to make one’s living condition a part of your Instagram or Bēhance portfolio — so is exaggerating one’s situation as a staged shoot.
6. Post-processing is normal, #NoFilter shots are not bragging rights

Cameras and lenses are not created equally. Although my experience with the Canon EOS RP is outstanding and its RF 28-70mm f/2L USM lens does the job well, there were times that the shot I took was not aligned to what I wanted the outcome to be.
Post-processing isn’t cheating. There’s nothing wrong with fixing your photography mistake (or worse, a hardware mistake). In fact, it already takes place the moment you press the shutter button on your camera — that is why people should not make #NoFilter shots a big deal. If you are one among the clumsiest users who forgot to set RAW shooting, you have no choice but to stick with your .jpg files.
Let’s say you forgot to adjust the Custom WB (White Balance) while shooting, post-processing apps can help you fix it. You can even do other processing techniques if you want to convey more feelings in your shots. It is a part of experimentation, and the values in each photo you edit are not something that’s always definite.

In this particular photo, I adjusted the curves that helped it achieve a faded look instead of deep shadows, making it feel softer with minimized shadows and contrast. I minimized the highlights because of the harsh sunlight hitting the tile bricks. I also moved the slider to the warmer side for it to look lively. Color science says that photos on the cool side feels melancholic and lifeless.
I suppose not everyone is computer-literate. There are mobile apps you can try when it comes to post-processing your shots — such as VSCO, Snapseed, and Lightroom Mobile, a toned-down version of the PC-based Adobe Lightroom. Take note that mobile apps may have limited functions, especially because they are free.
Reminder: Before all of you use (and abuse) the power of post-processing, you should have already understood the first tip. Not to sound like a broken record but it is about understanding the basics. Nowadays, a lot of people rely on post-processing without knowing the essentials — maybe it’s time to learn them properly.
7. Capture the scenery, too

Imagine you are trying to shoot on top of a building. You peeked at your camera’s viewfinder, adjusted the focal length, and tried fitting human elements within the camera’s frame. Suddenly, you realized that the scenery makes them stand out more — that’s what this tip is for.
Street photography should not be limited to street per se. As long as the background element does not overpower the human element or subject, you are good to go. The lush greenery along this golf course make the golfers stand out more. The differences in their movement make it feel dynamic, candid, and emphasizes their actions of playing golf.
8. Explore unusual elements to shoot
Last but definitely not the least is all about looking for odd elements that will make you and your composition different from others. Staged photographs can be imitated, but not the candid ones. That’s why learning the basics matter, so you can compose shots in a split second — every shot you take makes a lot of difference.

Use juxtaposition when possible in order to convey two contrasting elements in one frame. In the shot above, I was aiming to describe the situation of the Philippines (or other similar nations) today — the biker represents that Filipino citizens are freely moving around, while the window grilles represent that we are restricted to freely express ourselves due to government policies and sanctions (Threat to Press Freedom, anyone?).
I captured more than ten photographs in the same location just to get my desired composition. If you think this goes against the essence of shooting candid photos, it’s not. I do not personally know him nor directed him to pass by. Misconceptions like this can cause trouble among the photography community, and you should avoid that.

Another candid shot I took talks a lot about growing up and getting old. Having the same walking direction between the old man and the children tells us that time is constant. There is nothing that can stop us from accepting more responsibilities and having different kinds of interest as we grow up.
Photography throughout my years
I was born knowing what traditional film cameras look like and how they function. I was even there when VGA, 3-megapixel and 5-megapixel cameras in phones made headlines. Photography has come a long way, and they still keep improving. It’s not even limited to professional cameras anymore that newer smartphones with excellent mobile photography prowess can now be considered as contenders.
As I was saying, street photography is not my forte. But from my experience using the Canon EOS RP coupled with a new RF lens system (vs the old EF lens mount), capturing photos still felt like I was using my old 60D because of the familiar feel and function. After using different cameras throughout my creative journey, Canon still lives up to their name for creating a big name in the camera industry.




Cameras
Sony introduces its 1st Fisheye Zoom G Lens
Broad range for landscapes, architecture, sports, and video production

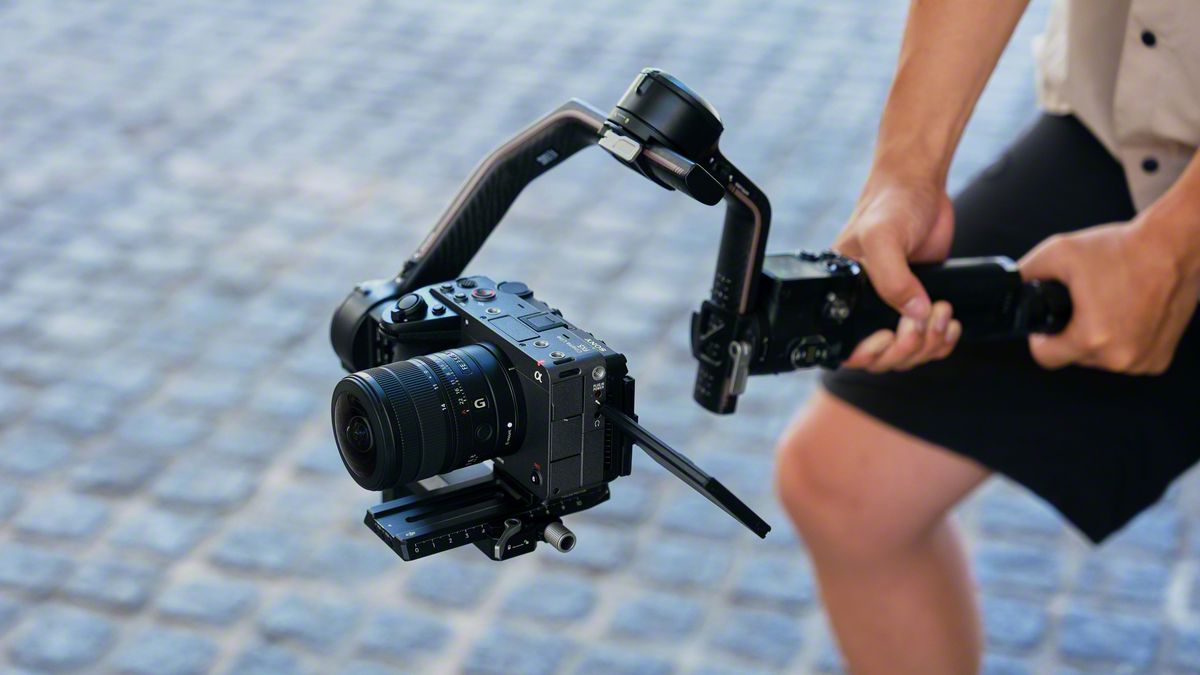
Sony has just launched its first fisheye zoom G Lens for full-frame Alpha E-mount cameras: the Sony FE 8-14mm F3.5 Fisheye G. It will be available from late September for an SRP of US$ 1,599.99 / SG$ 2,049.
The 8 mm to 14 mm zoom focal range covers a broad set of fisheye perspectives in one compact lens.
At 8 mm, the lens shoots circular fisheye with a 180-degree angle of view projected as a circular image on a full-frame sensor.
Meanwhile, at 14 mm, it shoots diagonal fisheye across the full frame with a 180-degree diagonal angle of view.
Users can match the angle of view and composition to the subject and creative intent, across various scenarios like landscapes, architecture, sports, and more.
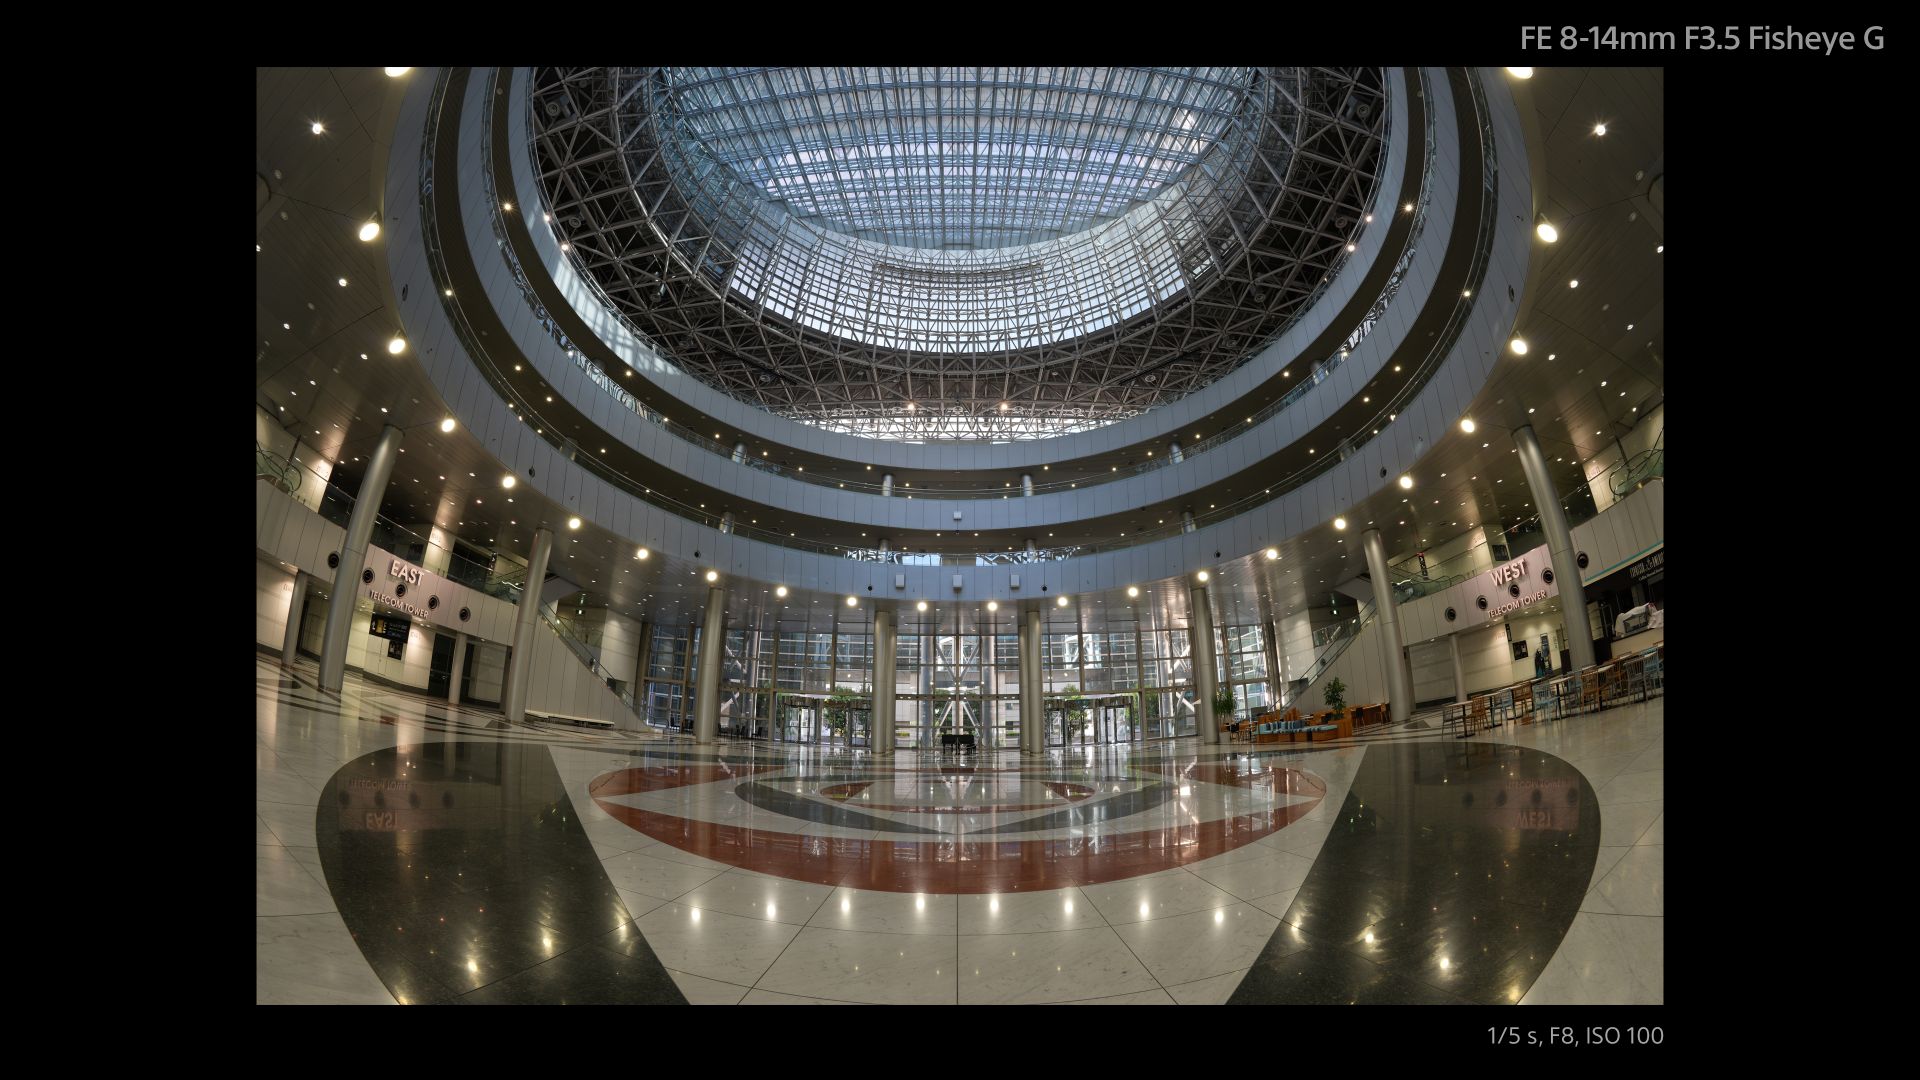
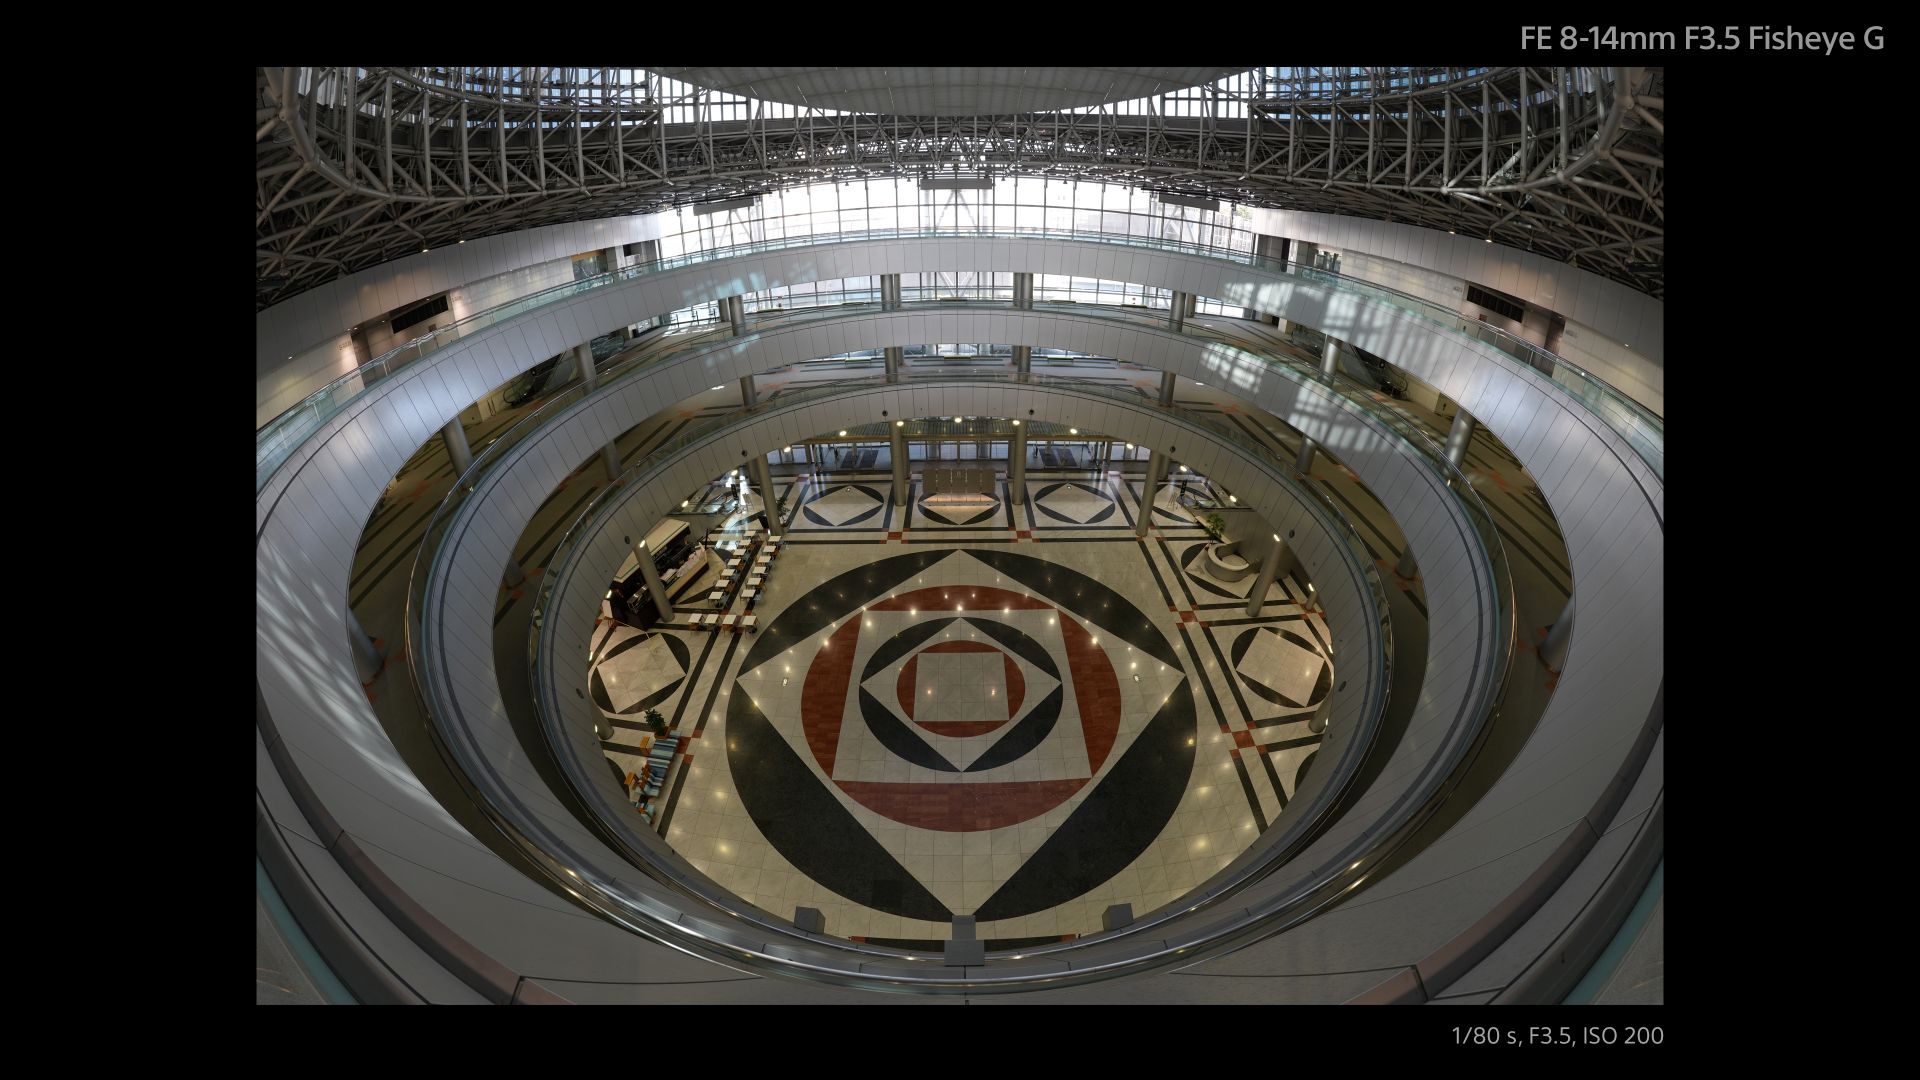
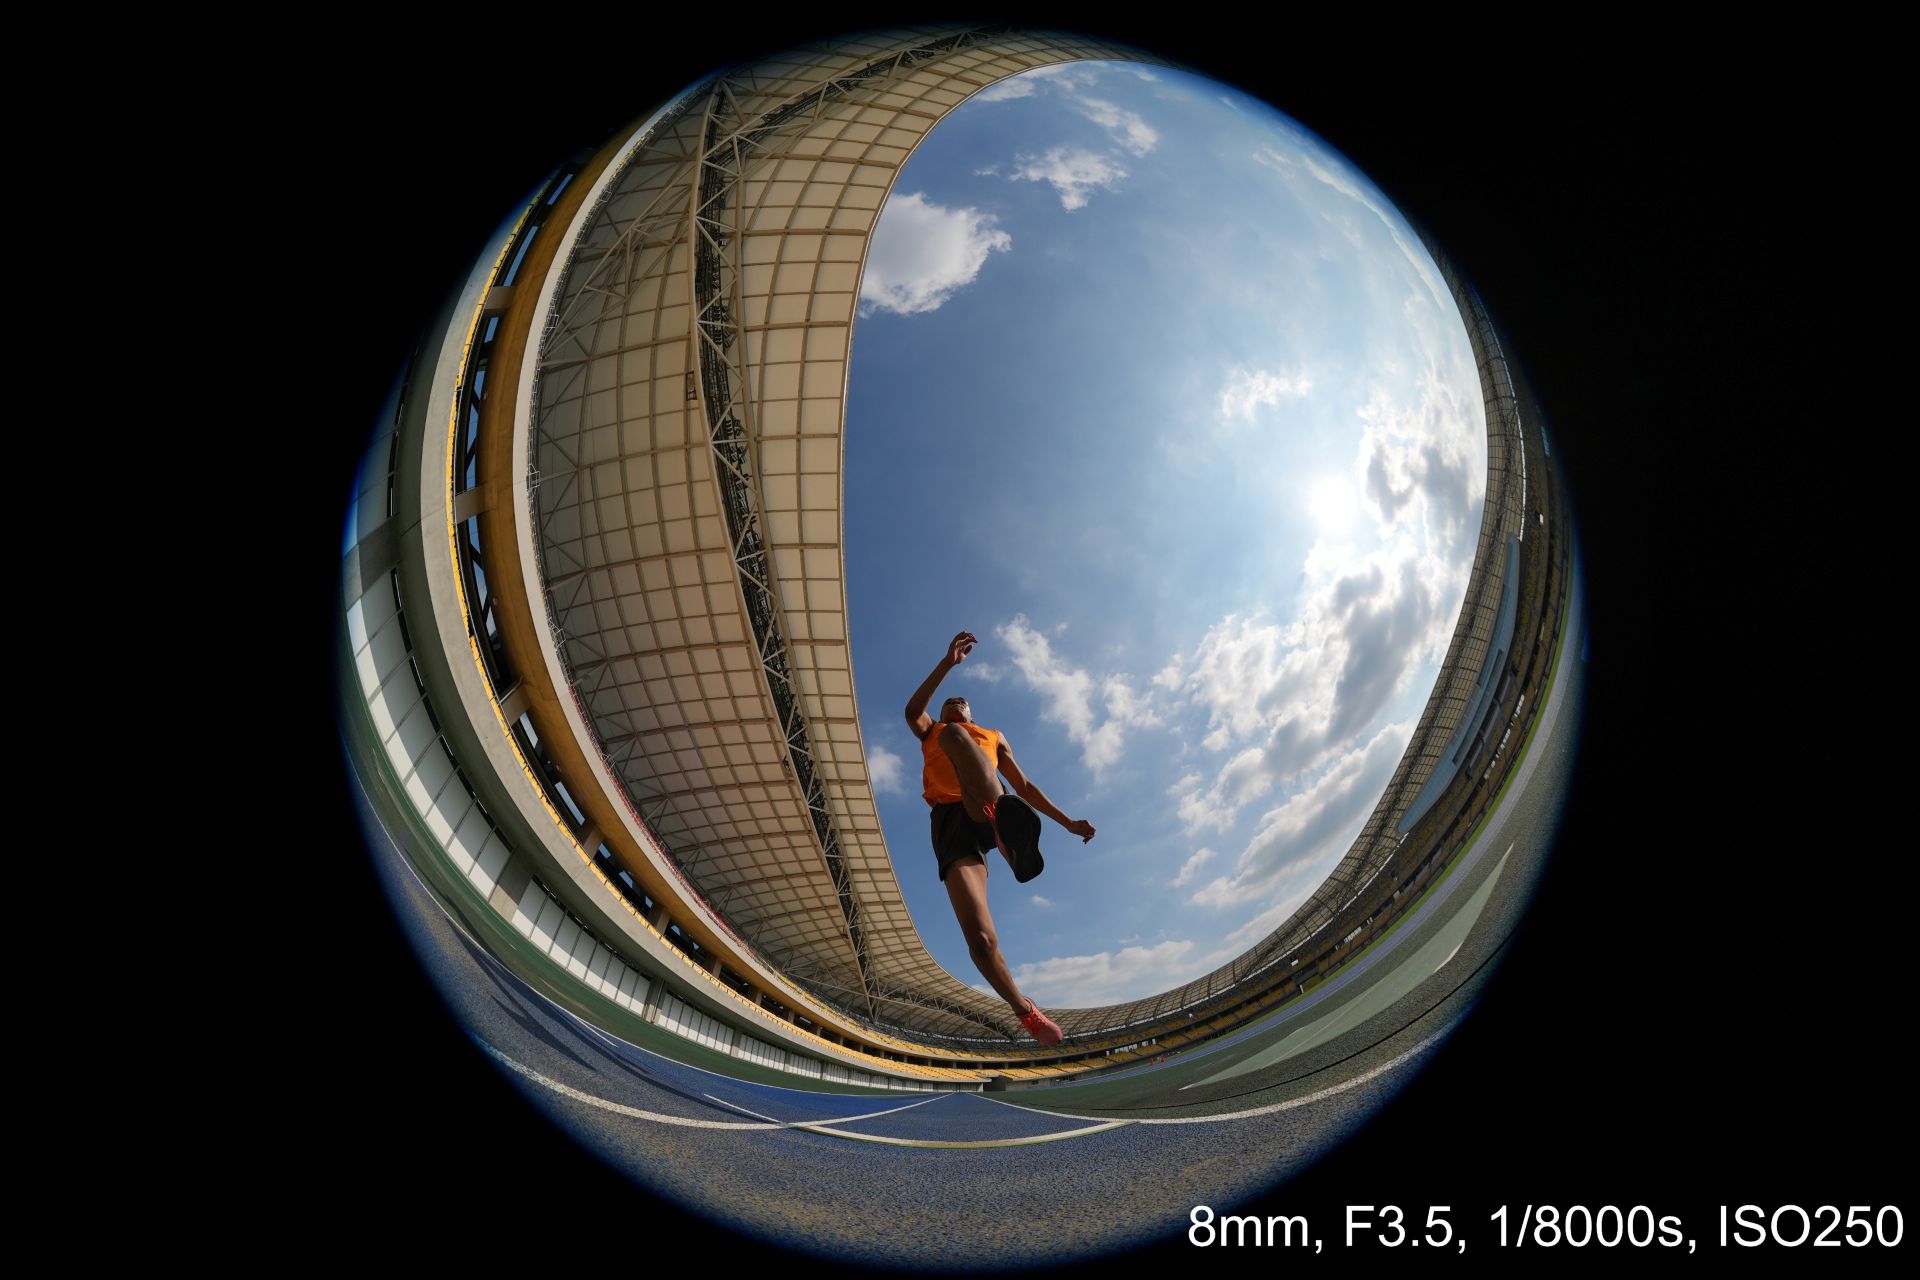
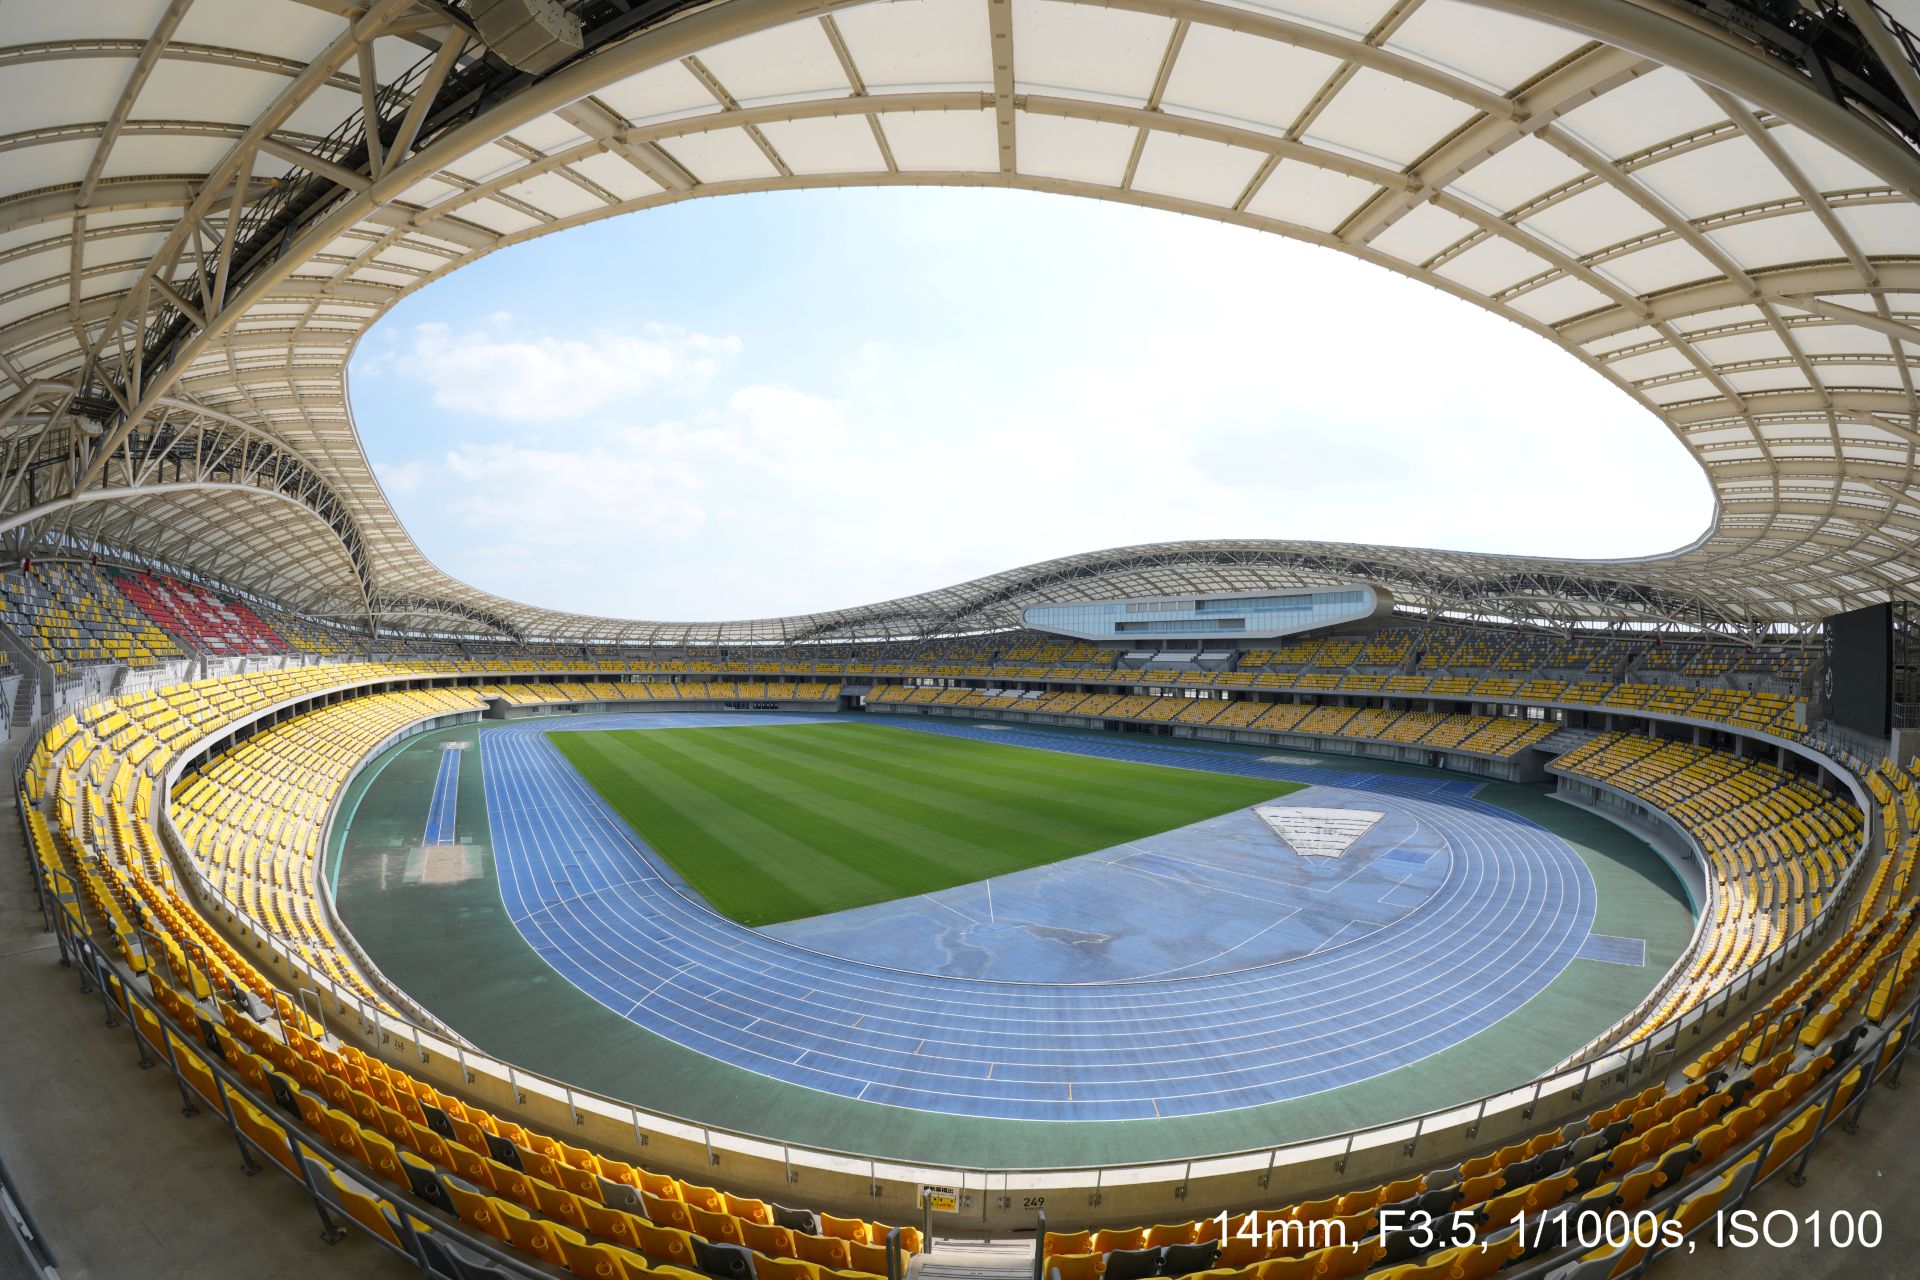


An optical design with ED (extra-low dispersion) glass and aspherical elements suppresses chromatic and other aberrations across the image area.
This enables high resolution throughout the zoom range with fast and precise autofocus and Linear Response MF. All these while suppressing focus breathing and operating quietly for movie production.
Controls include a focus mode switch, zoom lock switch, and an aperture ring with switchable click stops.
A minimum focusing distance of 0.15 meters and maximum magnification of 0.22x at the telephoto end also allow close-up fisheye perspectives both for stills and movies.
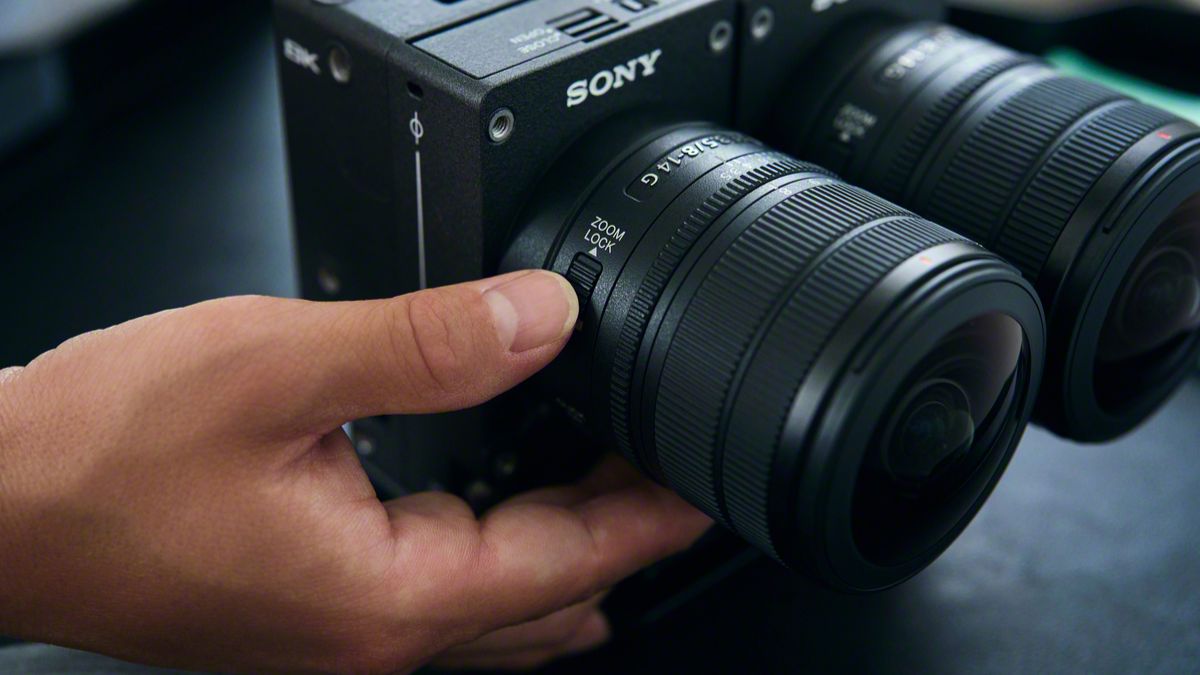
The Sony FE 8-14mm F3.5 Fisheye G measures about 63.1 mm in maximum diameter and 82.8 mm in length.
It weights about 314 grams, giving it mobility for handheld, gimbal, and rig-based shooting. It is also dust and moisture-resistant with a fluorine coating on the front.
In addition, users can opt for a dual-lens configuration with the VENCE Extension System Mini.
Cameras
DJI Osmo 360 II review: Going all-in on the ecosystem
I’m finally leaving my Insta360 X5 behind!

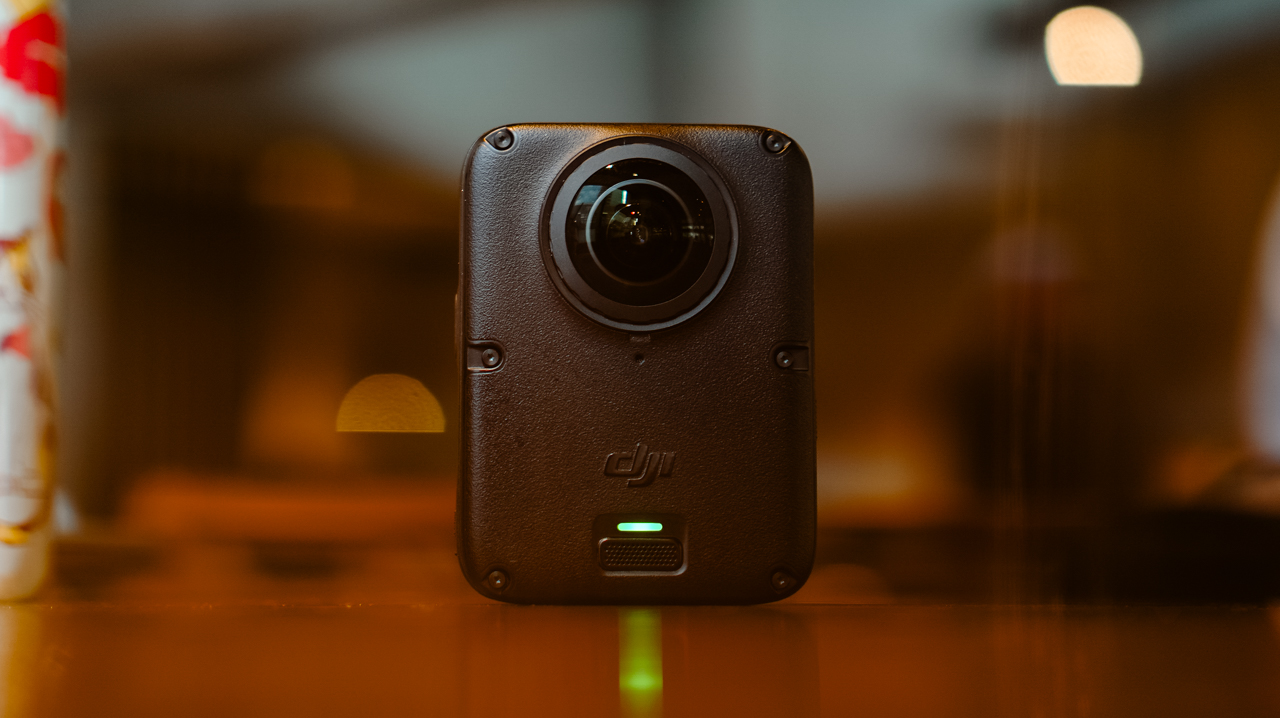
I’ve been shooting with the Insta360 X5 for a year. Trail runs, races, city trips, training sessions, all of it in 360.
I’ve held onto footage from that camera that I still watch back for no reason other than to remember what a particular morning felt like. I liked it enough that I wasn’t in a rush to switch anything.
After a month-long vacation carrying only the DJI Osmo Pocket 4P, I started thinking about consolidating it into a full DJI ecosystem instead, since I’d already tested and geared up with a Pocket, a Nano, an Action 6, and most recently, the Lito X1. The X5 was the one outlier left.
I never got to try the original Osmo 360, not until I saw my friend, Kyle Vergara, using one when we were in Boracay. Watching him shoot with it planted the idea before I even knew I wanted it.
So I waited for the DJI Osmo 360 II to see if it was worth the switch, half hoping it wouldn’t be, since switching meant admitting I was ready to let go of a camera that had been good to me.
Insta360 released the X6 around the same time, and as a creator, it was tempting. But between the workflow I already had and the cost of the gear, the math didn’t work out.
Anything leaning hard into AI these days comes with a jacked-up price tag, and the X6 wasn’t an exception. The Osmo 360 II has its own AI features, but the price is still bearable.
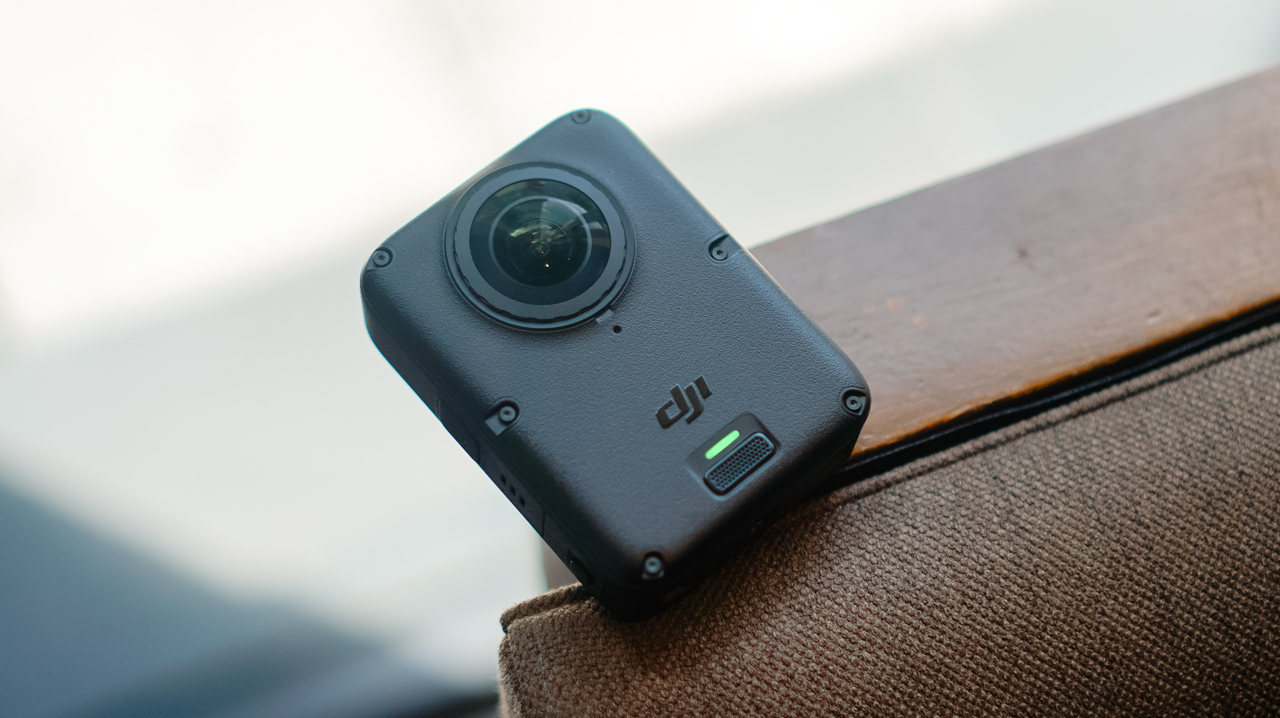
Price
The Standard Combo starts at PhP 32,490, with the Osmo Extreme Battery Plus, a Camera Protective Pouch, a cleaning cloth, an Osmo 360 Silicone Lens Cap, and a USB-C to USB-C PowerDelivery cable included.
@gadgetmatchThe new DJI Osmo 360 II is here with 1-inch 360° imaging, native 8K/60fps, and AI SuperNight 2.0! ✨♬ original sound – GadgetMatch
The Adventure Combo, which is what I got, runs PhP 39,490 and adds two extra Osmo Extreme Battery Plus (2150mAh), an Osmo Multifunctional Battery Case 3, an Adjustable Dual-Direction Quick-Release Adapter mount, and a 1.2m Invisible Selfie Stick.
For rider friends, there’s also a Limitless Riding Combo at PhP 34,490, which pairs the Standard Combo with an Osmo Heavy-Duty Clamp Mount kit.
Build
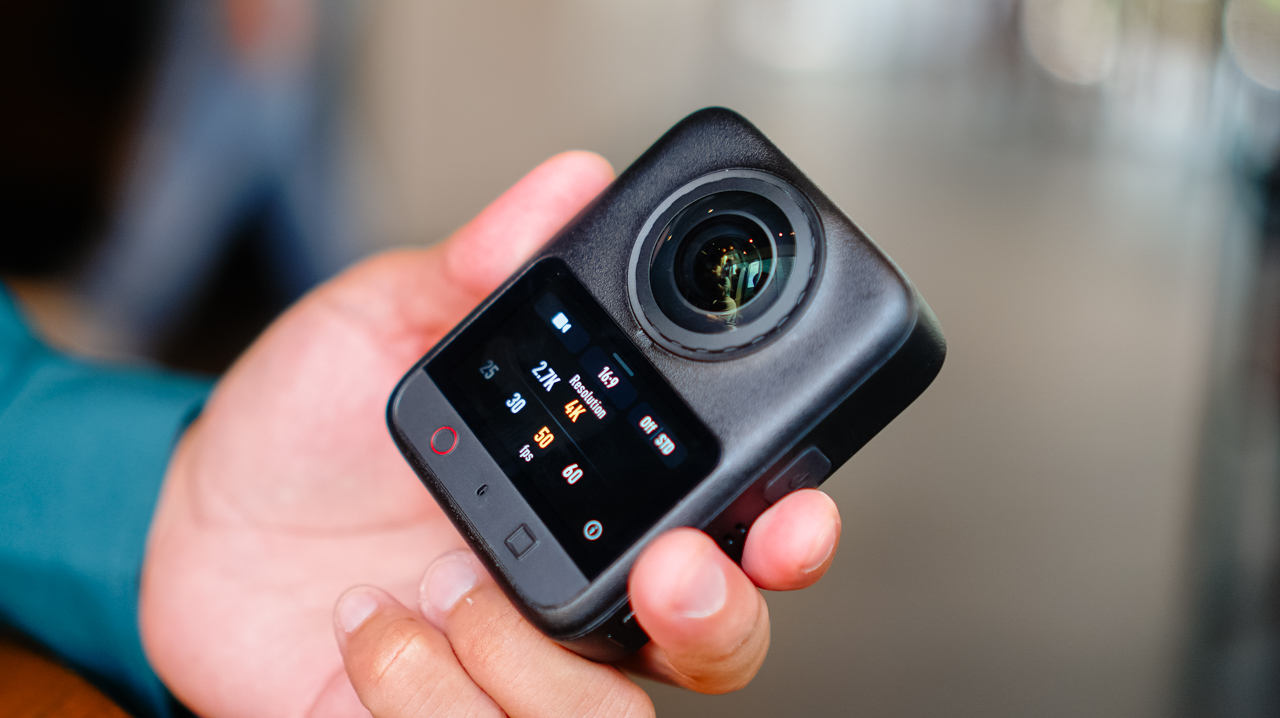
Coming from the X5’s lengthy monolith shape, the Osmo 360 II looks like a square monolith that fits in the palm of my hand.
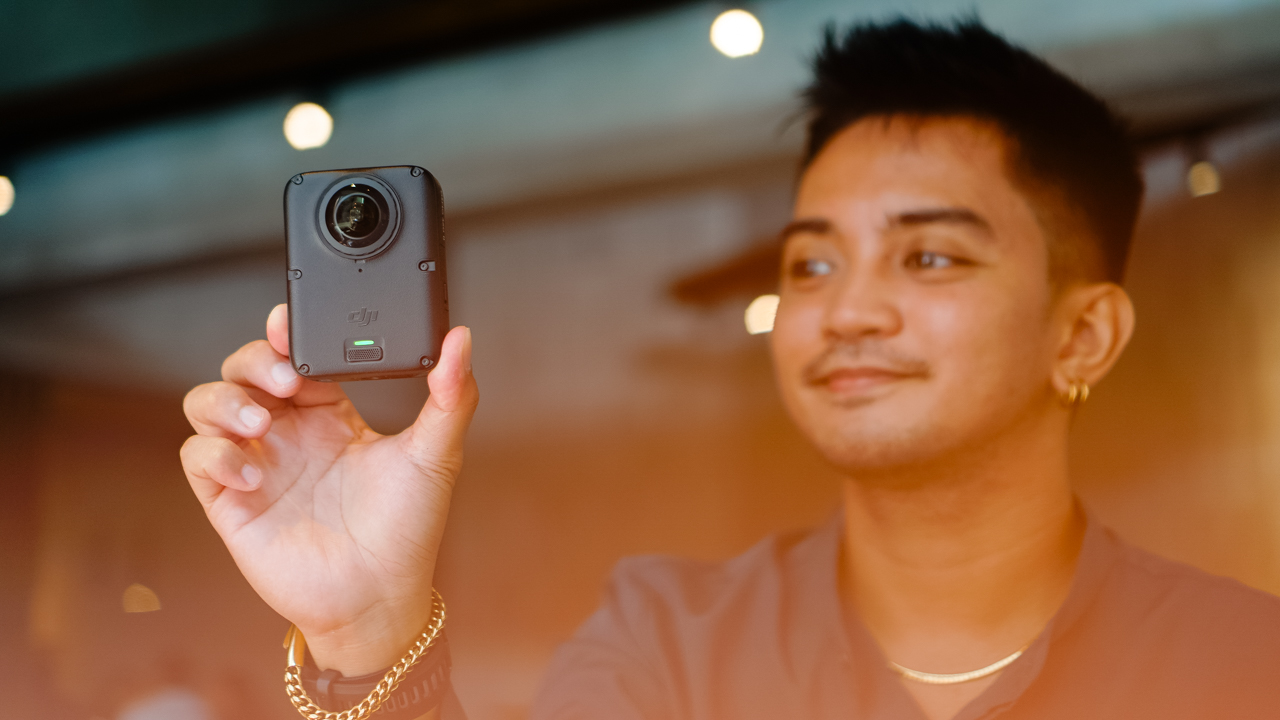
The smaller footprint makes it easier to switch between portrait and horizontal orientation when shooting single-lens.
It’s heavier than the X5, though, and I noticed that weight almost immediately the first time I clipped it onto a mount, like the camera wanted me to know it meant business.
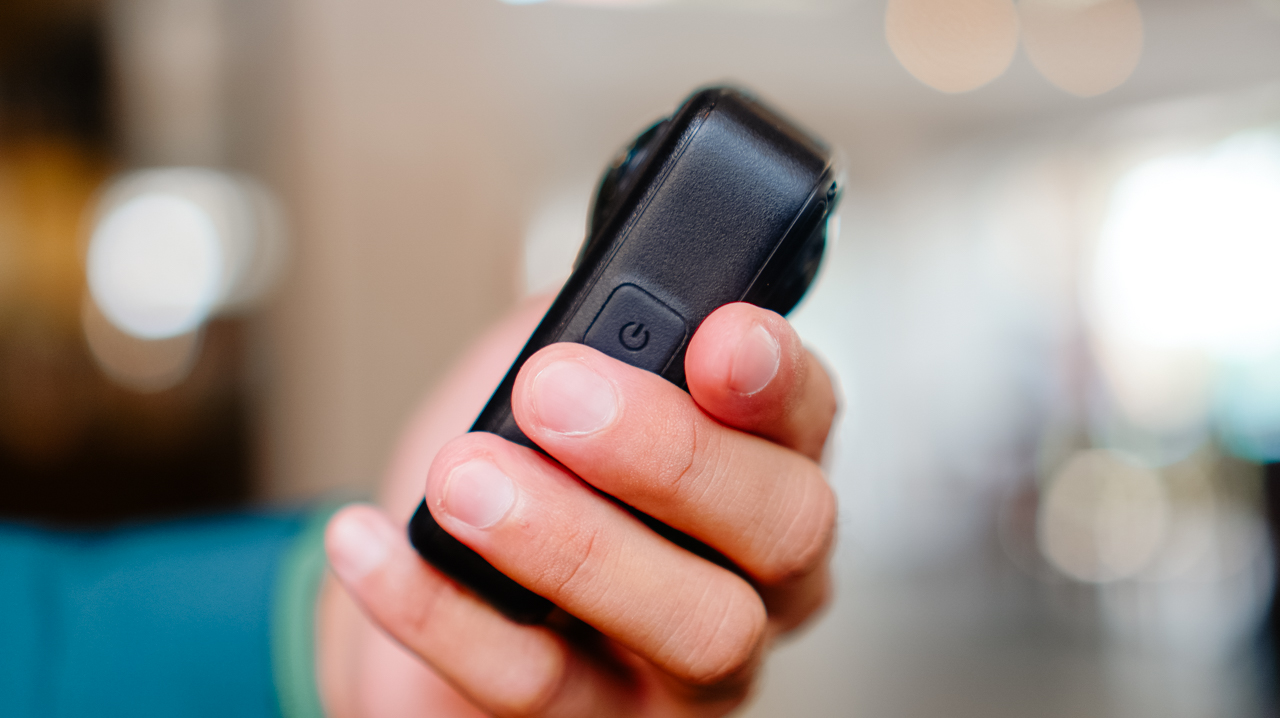
The design feels sturdier than its predecessor, and it now has a replaceable lens for when you scratch it, instead of a trip to a service center.
Performance
The Osmo 360 II arrived during a rough month for shooting in the Philippines. We were hit by one storm after another, with barely any sun in between, and there were days I genuinely wondered if I’d get to test this camera the way I wanted to before a deadline caught up with me.
I’d planned to test it on my usual trails, but landslides closed them off, so the next best option was a car-free Sunday in Ayala Triangle while the sun cooperated.
View this post on Instagram
It wasn’t the adventure footage I had in mind, but making a plain Sunday in the city look like it mattered turned out to be its own kind of satisfying.
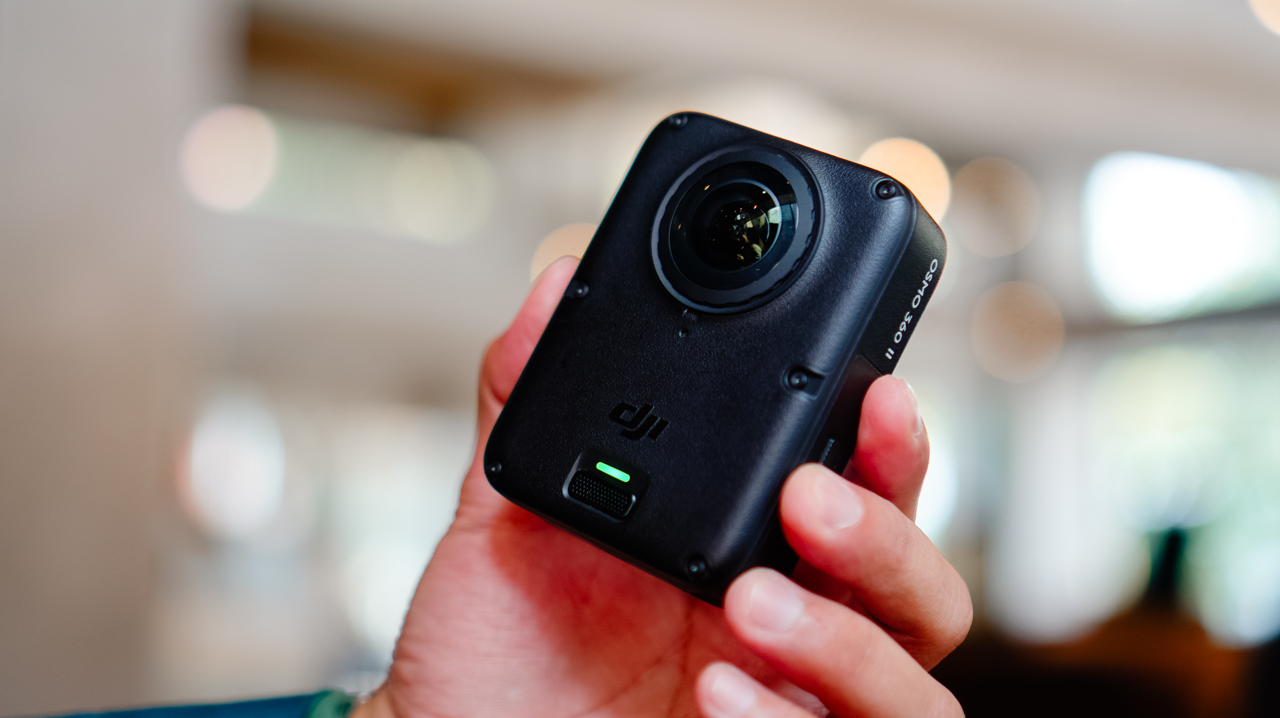
360 video now shoots at 8K60, up from 8K50 on the previous model, with the bitrate raised from 170Mbps to 220Mbps.
Single-lens shooting tops out at 4K60, though 4K50 is the recommended setting. Daytime footage looks excellent, especially for anything meant for social with a slightly different perspective than the usual flat shot.
Scrolling back through those Ayala Triangle clips later that night, I caught myself smiling at angles I wouldn’t have thought to frame on a regular camera.
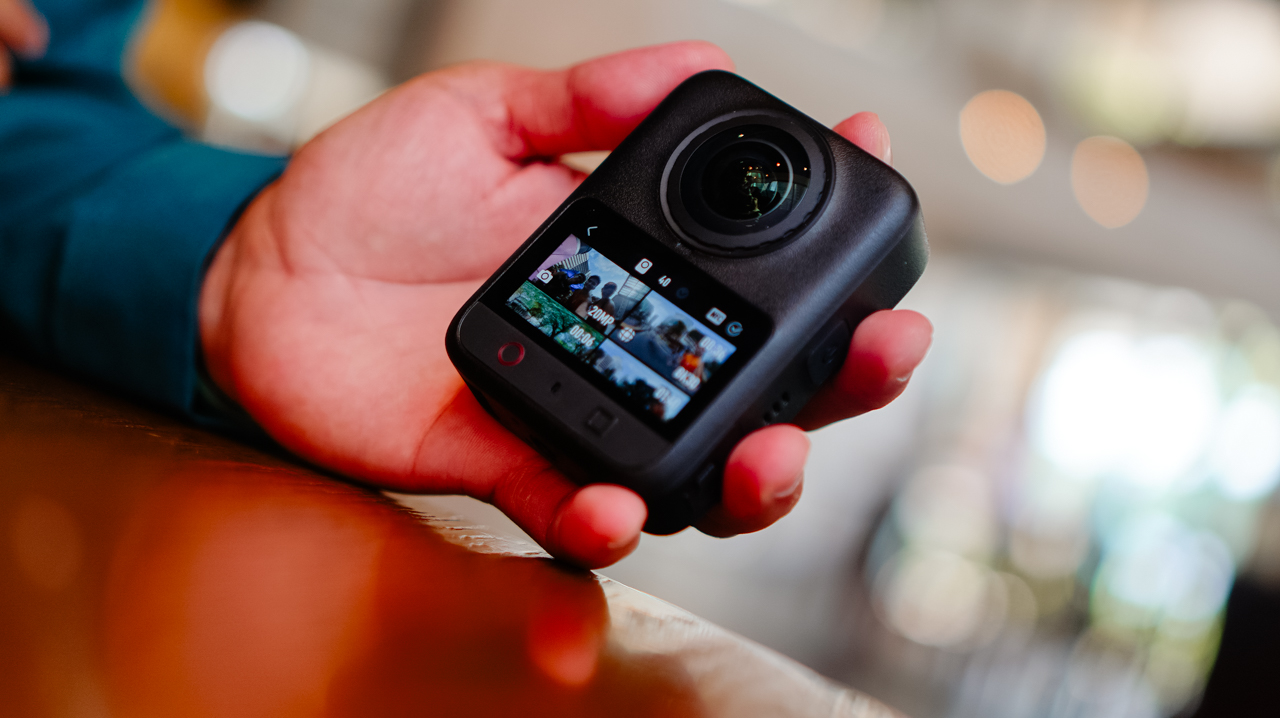
Night footage is where I’ve historically had issues with this category of camera, and I still don’t love straight Video mode after dark. But the new model claims 14.5 stops of dynamic range with its low-light processing, and shooting in Boost Video and SuperNight modes noticeably improves low-light results.
Photos hold up well too. Single-lens stills shoot ultra-wide at up to 30MP, and panoramic 360 photos go up to 120MP HDR.
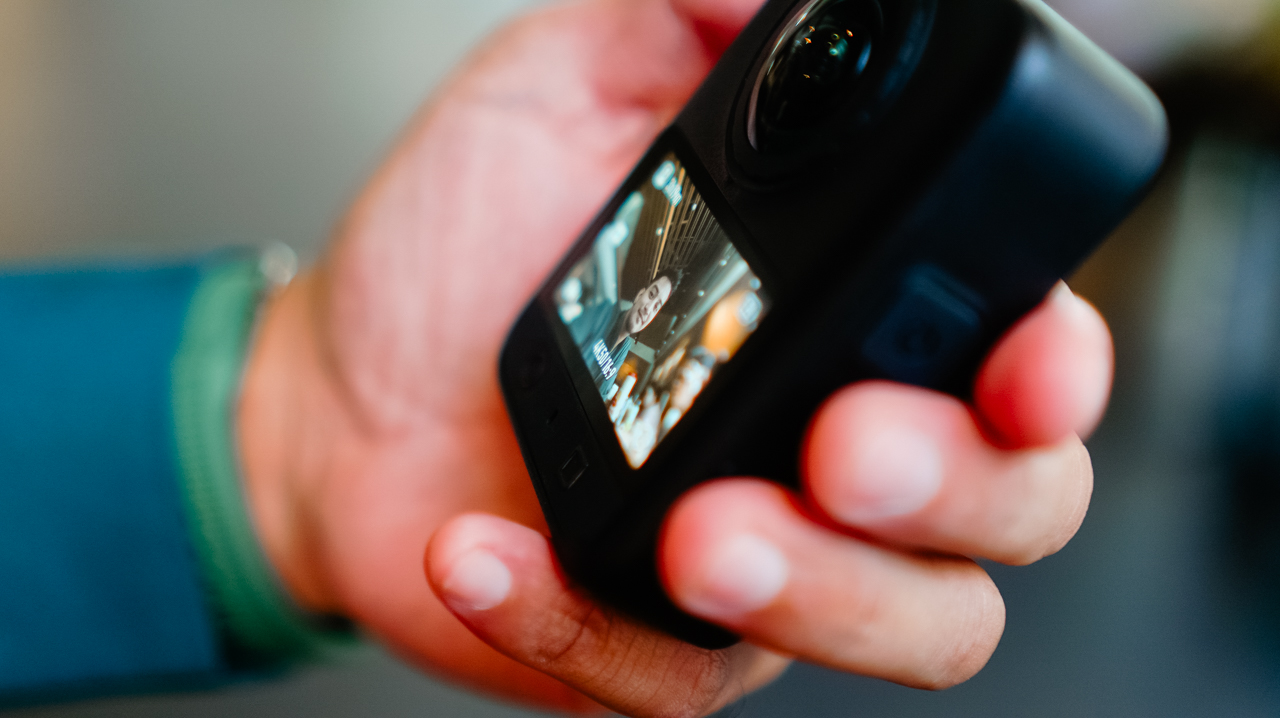
RAW photo support is new this generation, and it’s this type of addition that made me want to slow down and actually shoot stills again instead of treating this as a video-only device.
Storage
AI features pushing further onto these devices has driven up demand, and prices, for RAM and storage across the board.
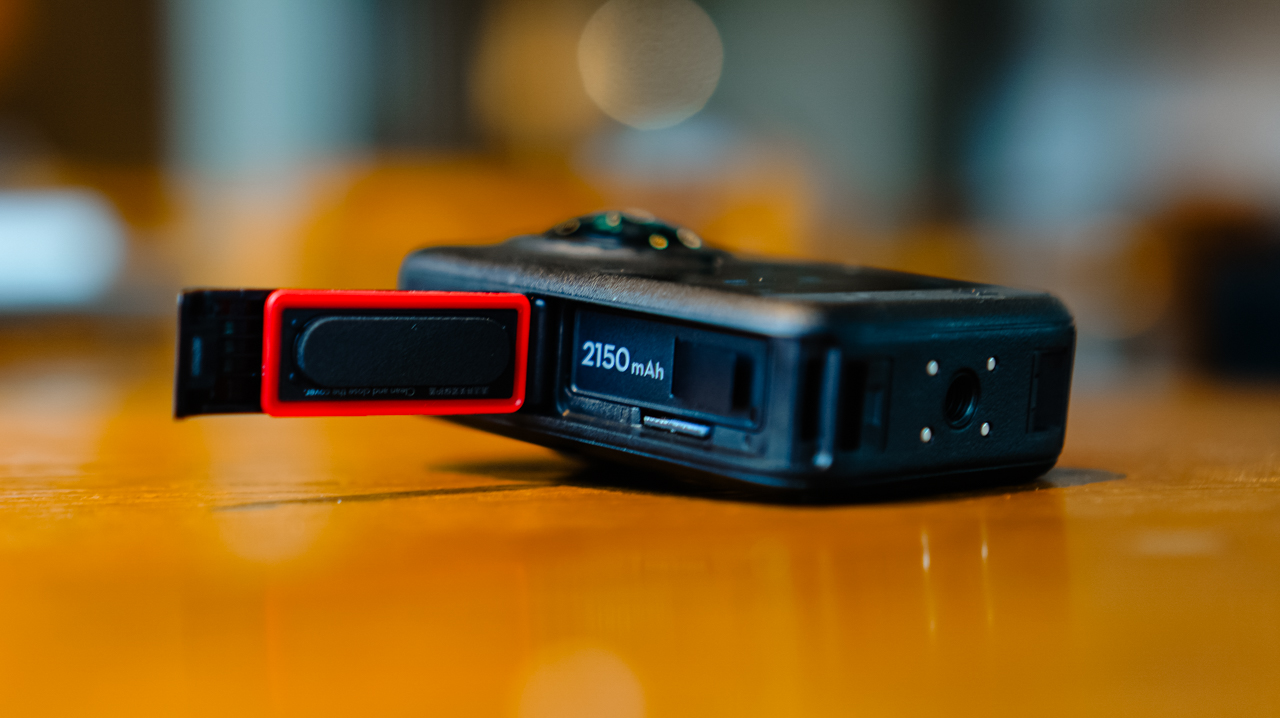
MicroSD cards, SSDs, even cloud storage all cost more than they used to, and I’ve felt that pinch every time I’ve had to buy a new card just to keep shooting through a busy week.
What I appreciate about DJI’s new lineup this year is the built-in storage, over 100GB on the Osmo 360 II. Paired with a microSD card, I’m not scrambling to back up mid-shoot just to free up space, which matters given how fast 4K and 8K footage eats through storage.
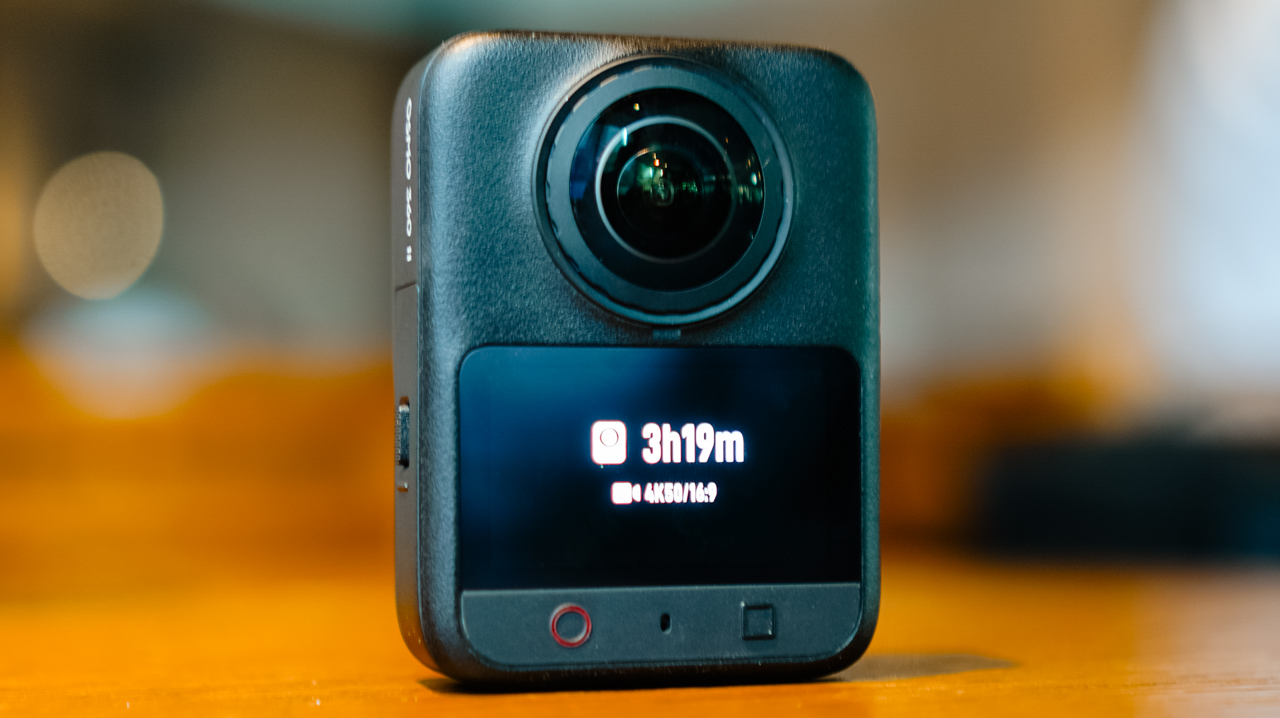
Not watching a storage warning pop up in the middle of something I can’t reshoot is a relief I didn’t know I needed.
Ecosystem
Before this, the X5 was the one device in my kit that didn’t run on DJI. Now that the Osmo 360 II is in the mix, footage lands in the DJI Mimo app the same way it does from everything else I own.
I’m not juggling two apps or two export flows anymore. Previously, files from the X5 would sit untouched longer than I wanted, simply because everything else I owned already funneled into Mimo and this one didn’t.
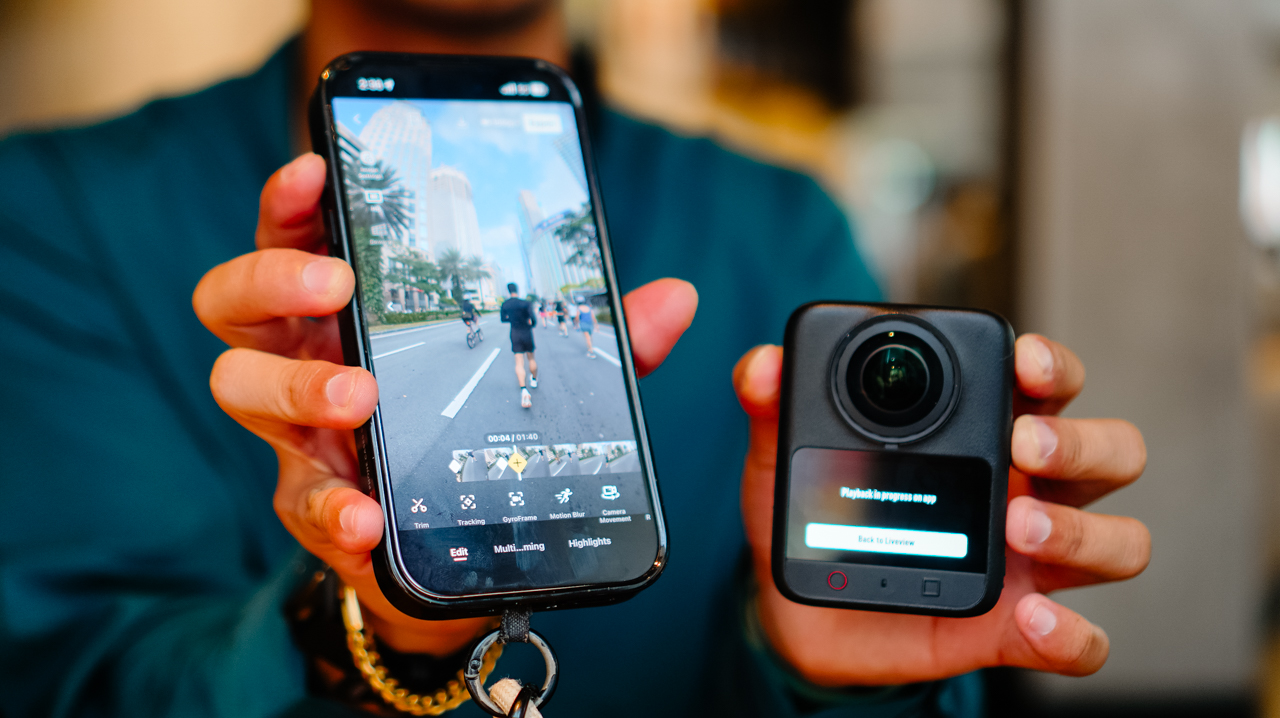
I can’t count how many times I opened my phone meaning to edit something, only to close it again because the file was sitting in the wrong app.
Editing 360 footage in the app is straightforward, with tools built for actually shaping the story rather than handing it off to AI.
Trimming, tracking, GyroFrame for dynamic movement, motion blur adjustments, multi-clip cuts and exports in one pass. If you do want AI in the loop, there’s Highlight Auto Selection to help surface usable scenes for reels.
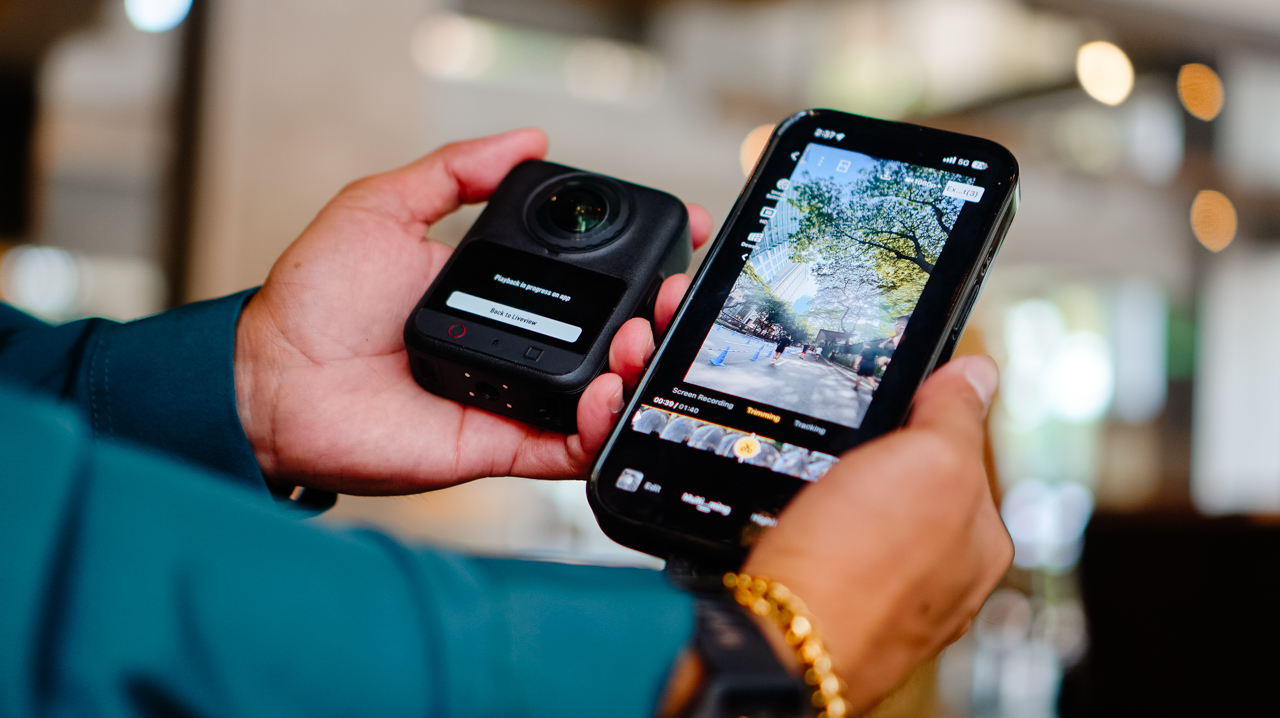
Insta360’s ecosystem likely has comparable editing depth. What’s different for me is having it all live in one app instead of splitting my workflow across two, and how much lighter that’s made the whole process feel by the end of a shoot day.
Is the DJI Osmo 360 II your GadgetMatch?
If you’re already using DJI across your gear and your workflow, the Osmo 360 II is an easy yes.
It fixes a real complaint from the first generation, folds into one ecosystem instead of two, and comes in at a price that’s hard to argue with.
Letting go of the X5 turned out to be less of a loss than I expected. It’s more like finally closing a tab I’d left open for a year.
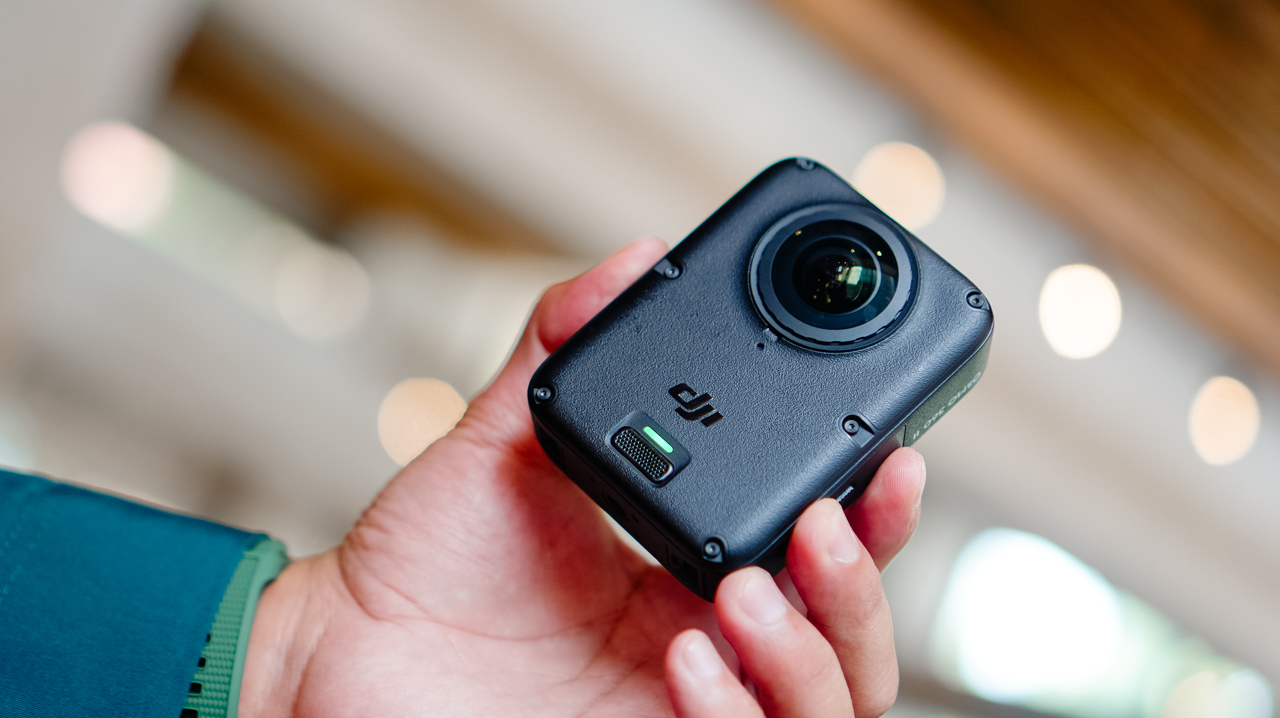
Swipe Right if you want hardware upgrades that solve a genuine complaint from the first generation, one ecosystem instead of two, and a real price advantage.
The DJI Osmo 360 II is built for someone focused on storytelling and getting the most out of the gear they already own, rather than someone chasing the newest AI-editing tools.
Swipe Left if you want AI-driven editing front and center, or you’re already settled into Insta360’s ecosystem.

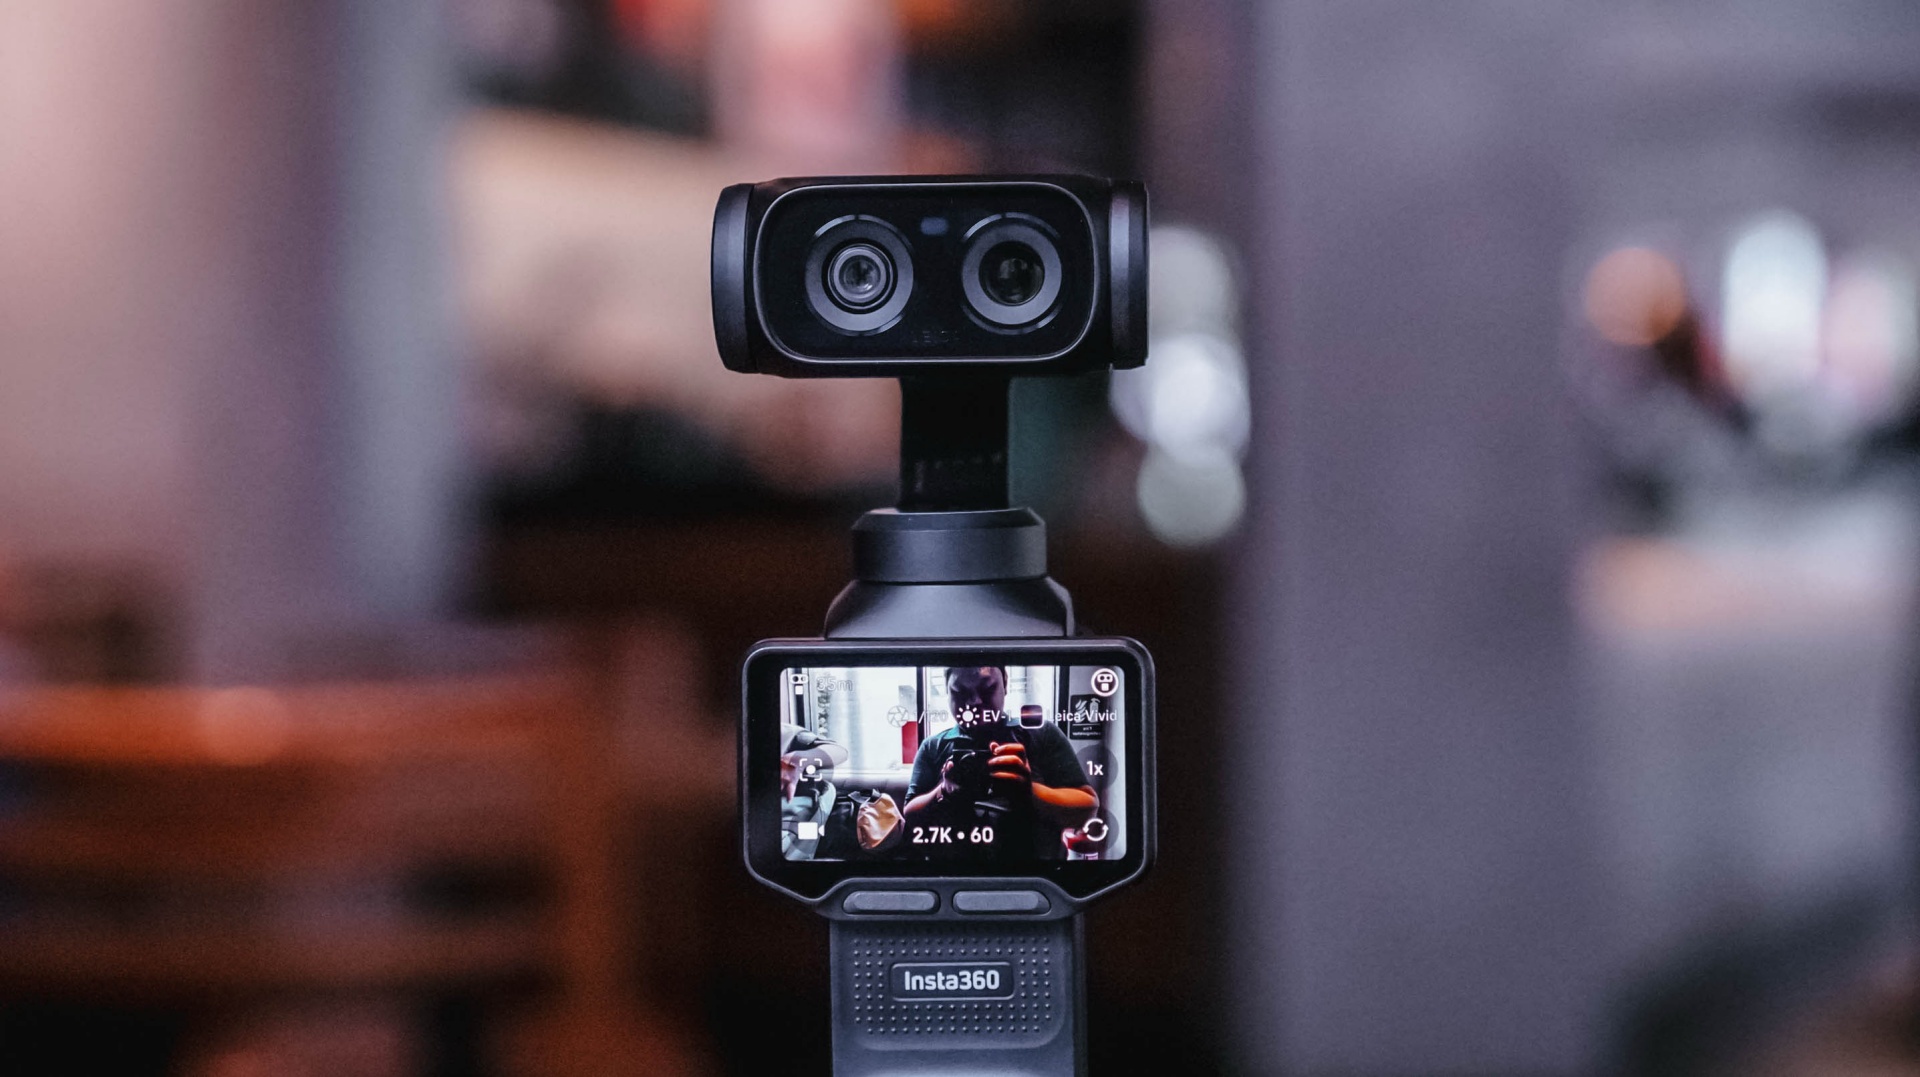
I’ve been using the Sony a6500 with a 35mm f/1.8 lens for the past six or seven years. There’s a certain level of comfort and familiarity that comes with using the same camera for that long. My workflow with it is automatic at this point.
That’s why it took some time for me to get comfortable with the Insta360 Luna Ultra.
I wasn’t familiar with using a gimbal camera. When I first started using the Luna Ultra, it felt awkward. I was also trying to figure out too many things at once.
But after several weeks of using it for different kinds of coverage, I’ve reached a point where I’m comfortable leaving my old reliable behind, especially when my priority is making Reels.
And it was my most recent overseas work trip to Shenzhen, China, where I finally realized that.
Finding my footing
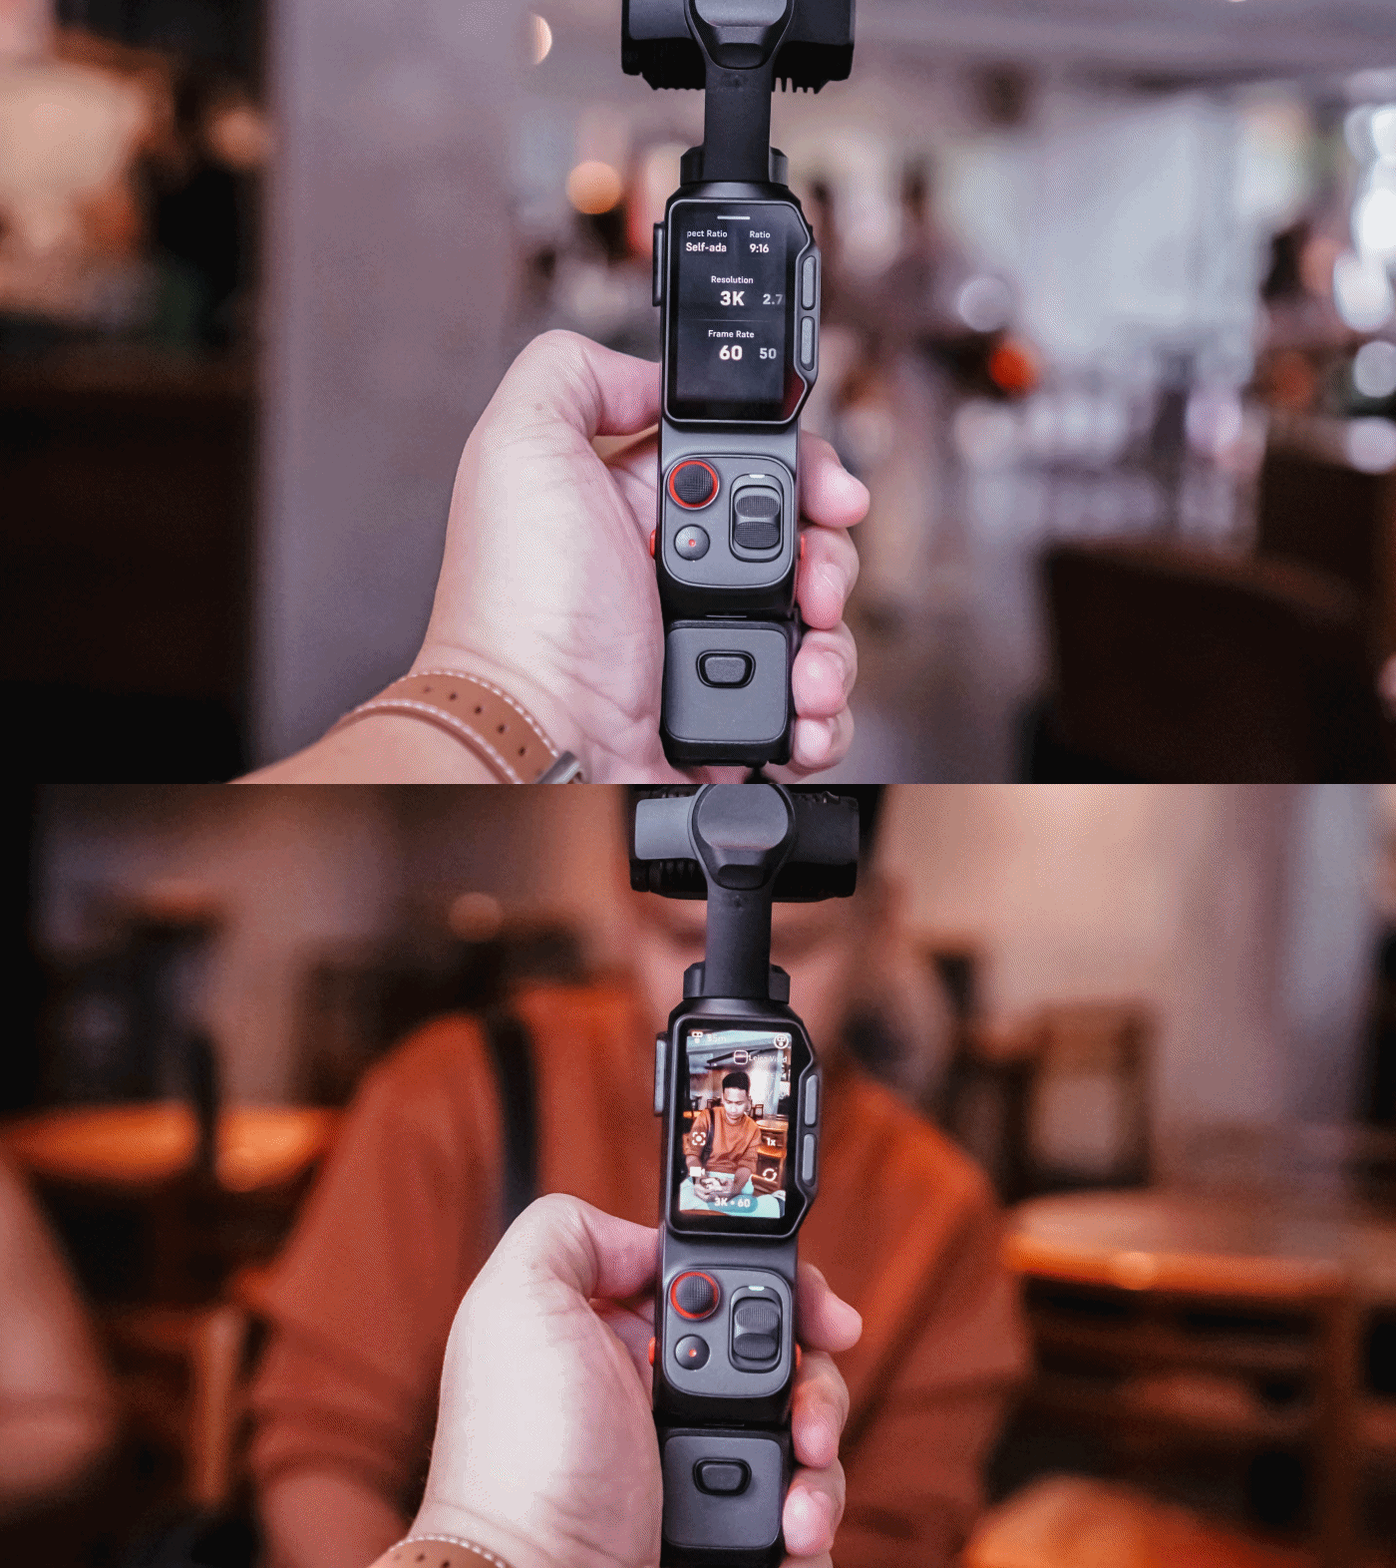
I brought the Insta360 Luna Ultra to three events almost immediately: Samsung Vision AI, the TCL A400 Art Launch, and an ROG event.
That first week was really experimental. I was trying out multiple features of the device for this review. I tried shooting horizontally because it seemed like that’s what the Luna Ultra was made for.
But my work over the past few years has focused heavily on vertical short-form video, so that contributed to the awkward feeling.
I also defaulted to PureVideo after a while because I tend to shoot in really not-well-lit locations. The colors look good as is, anyway.
I experimented with I-LOG, too. That taught me that it should probably be reserved for actual experimental outputs, rather than anything tied to a deadline. Our workflow is built for speed with quality, and I-LOG adds another step that isn’t always necessary for the kind of news-oriented Reels we make.
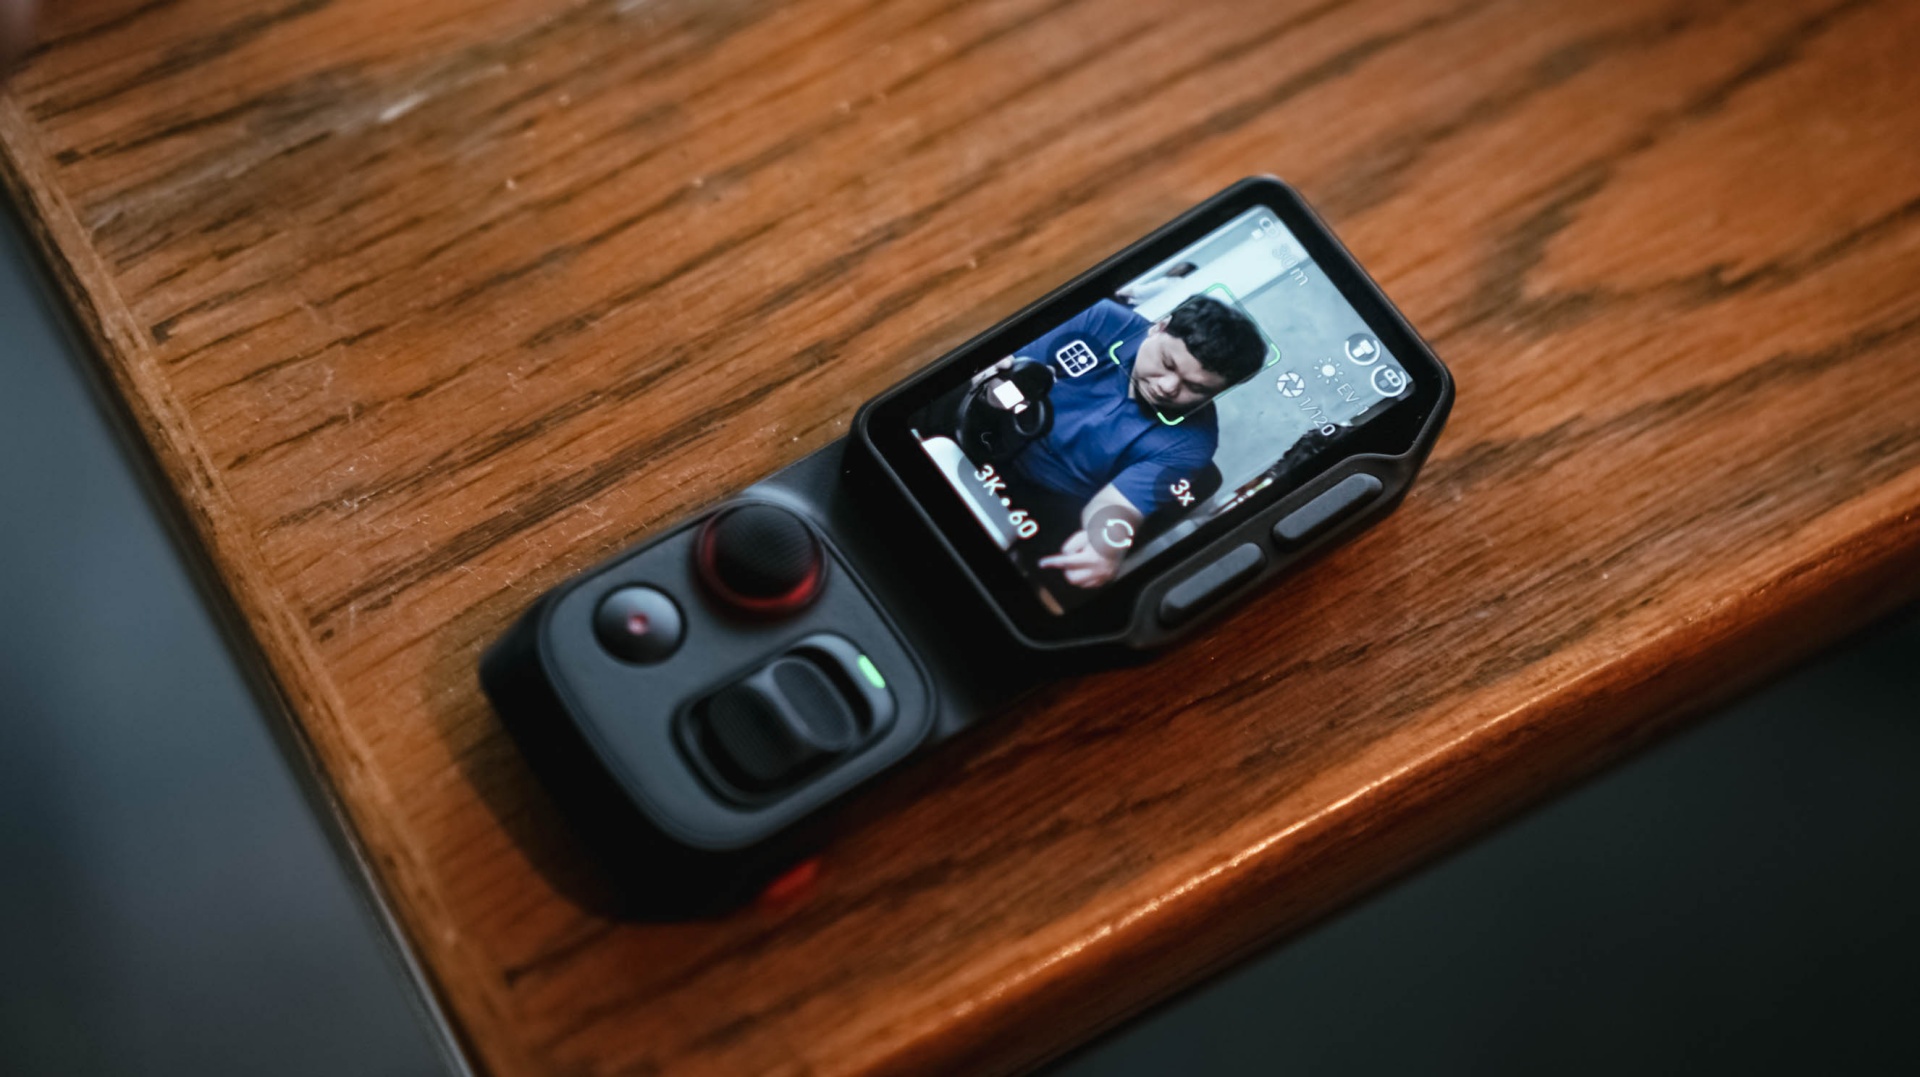
The detachable controller, meanwhile, was a godsend when I’m shooting by myself and want the Luna Ultra to be at a distance. I still had the preview and controls nearby, and that was extremely helpful.
The biggest thing I learned during that first week was that I was trying to speed-run through all of the features instead of figuring out which ones actually made sense for the Reels I needed to make.
It was only when I decided what I actually needed for each coverage that the Luna Ultra really clicked with me.
@gadgetmatchThe best way to test a creator camera? Use it while creating. We brought the Insta360 Luna Ultra to multiple media events to see how it handles real-world coverage. From low-light venues to fast-paced launches. Here’s what we learned so far. Full review coming soon. #Insta360 #LunaUltra♬ original sound – GadgetMatch
Getting more comfortable
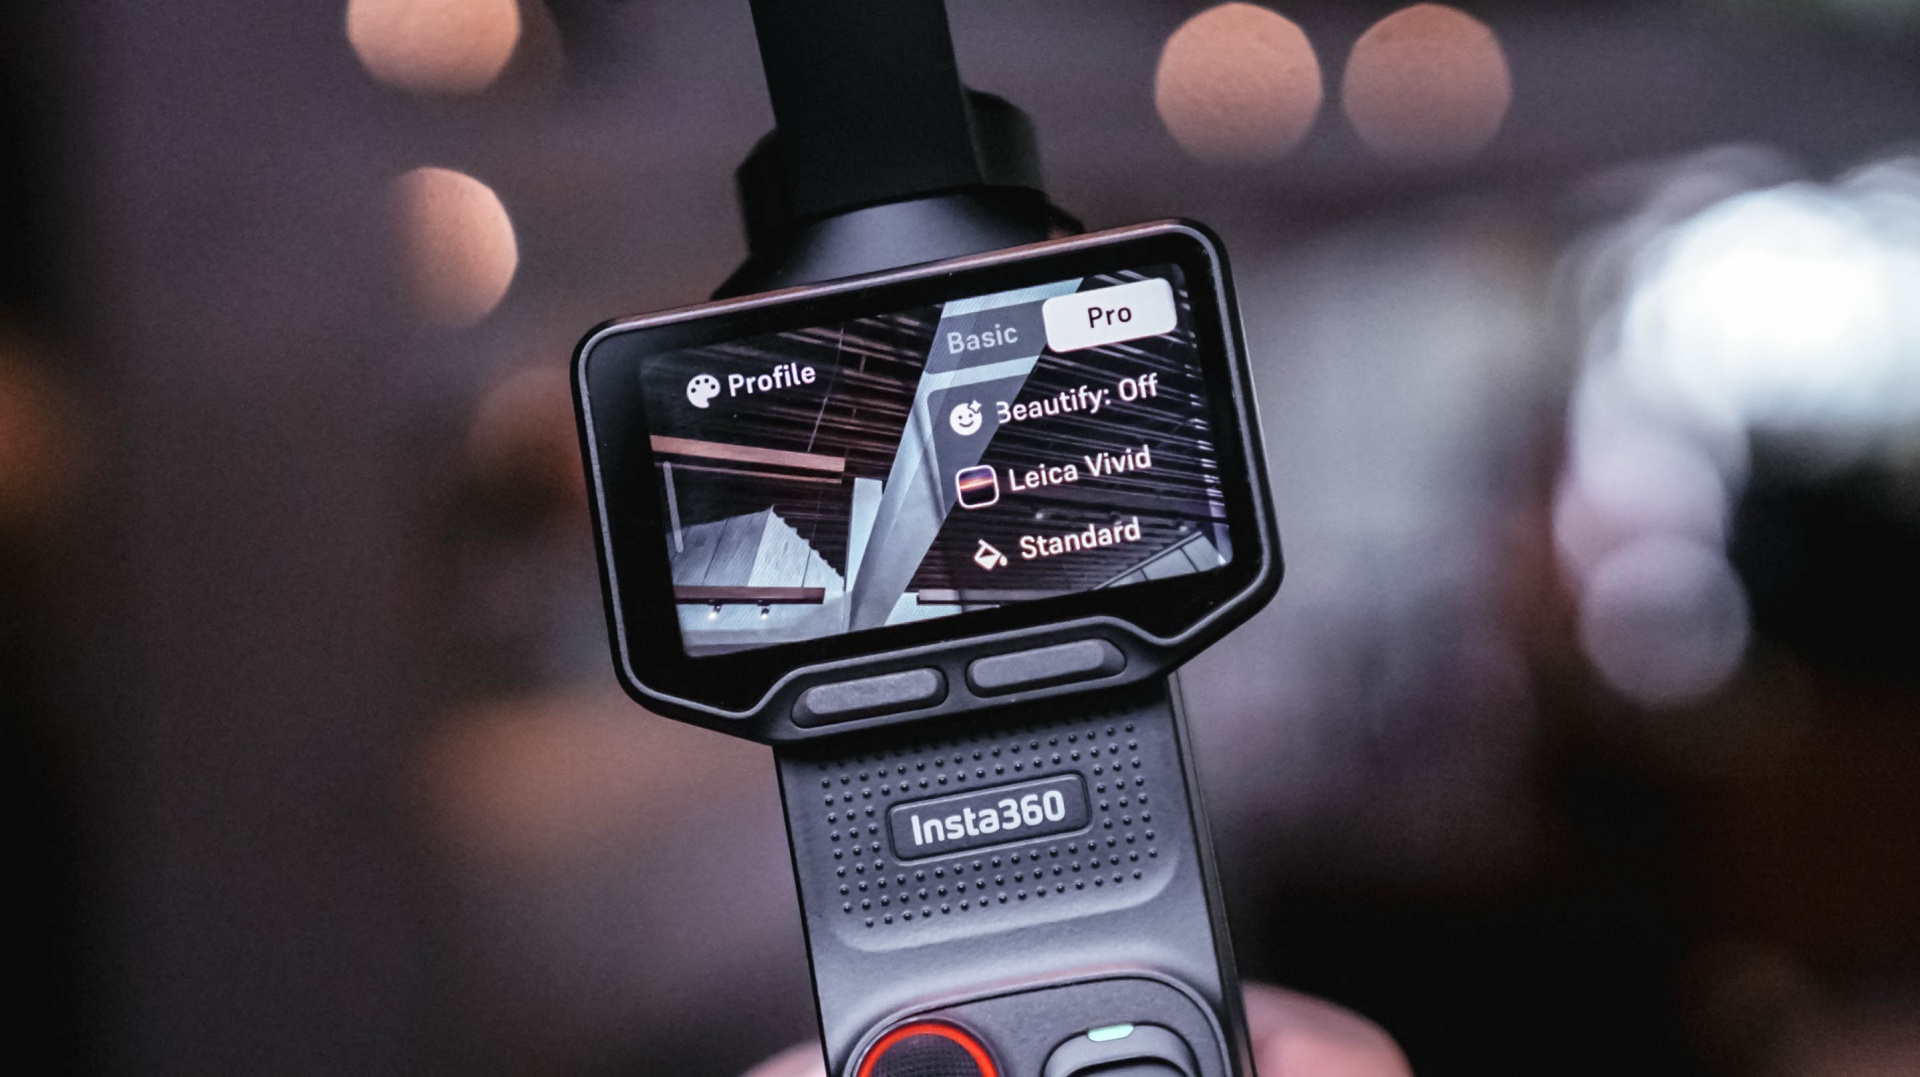
Most of the learning curve came down to overall usage and figuring out how I could maximize the camera.
There’s still plenty that I don’t know about the Luna Ultra. There are camera tricks and shots that can certainly elevate some of my footage. But I’ve decided to lock in on how it’s useful to me during fast-paced coverage and slowly unlock its capabilities as I spend more time with it.
Getting reps with a device is the best way to become familiar and comfortable with it.
For now, I can say I’ve found my preferred base settings that cover most of my needs. The next goal is to slowly level up, learn its capabilities more, and figure out how I can apply them to the Reels I make.
That process continued outside of traditional tech events.
Putting it to work
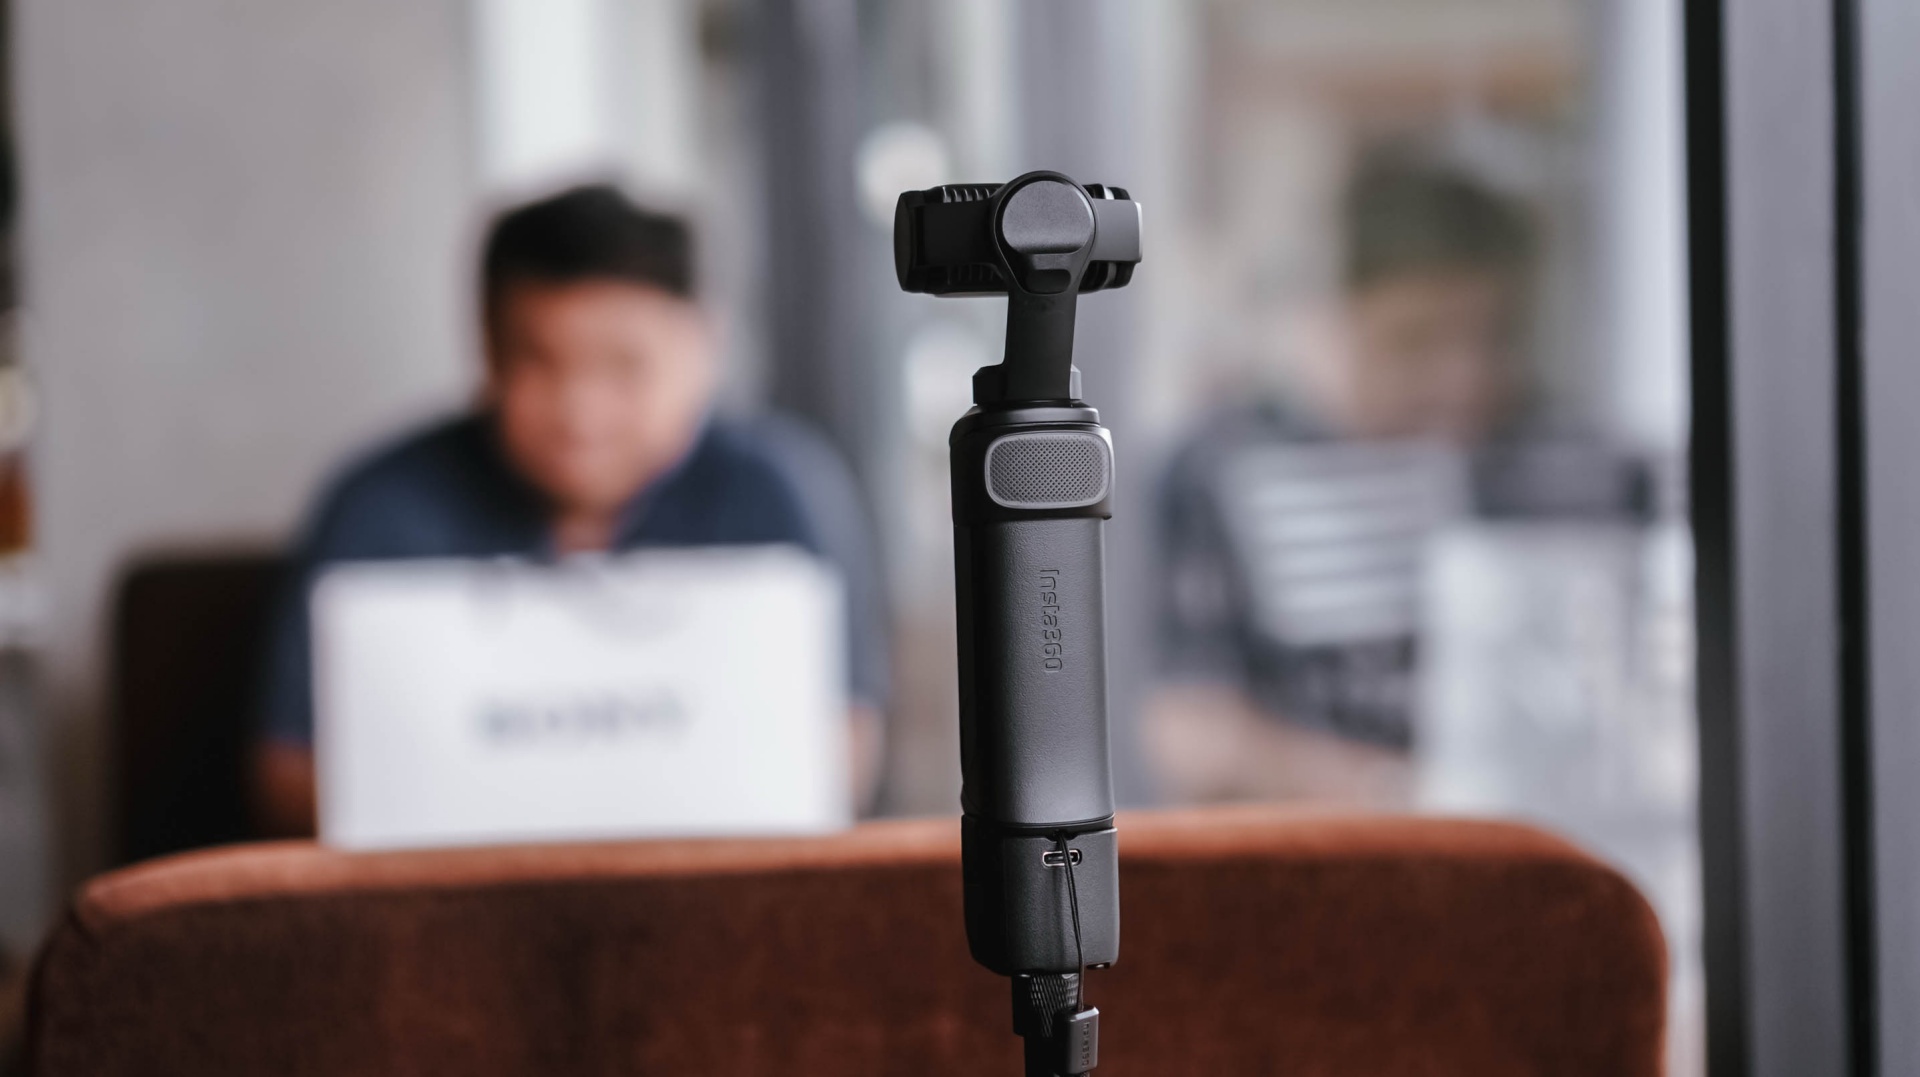
I brought the Insta360 Luna Ultra to a pottery session arranged by Shokz. It was a completely different kind of environment from the launches and media events I usually cover.
For the most part, I just set it up, pointed it at me, and let it roll.
My hands were busy, so I found myself wishing it had a way to automate certain capture features. Hands-free controls would be useful, for example. I’d also love an option to automatically record 30-second clips at a time for a set amount of time.
That would be useful when you’re shooting solo and doing an activity.
It was also around this time that I started figuring out some of the conditions necessary to get the bokeh effect I wanted.
@gadgetmatch Came for the pottery. Stayed for the vibes. 🏺 Featuring the Shokz OpenDots 2, because apparently good audio is required while discovering you have zero pottery skills. #PowerMacCenter @Power Mac Center @SHOKZ ♬ original sound – GadgetMatch
While unboxing the Shokz OpenDots 2 right before the pottery session, I got a sense of the distance needed when using 1x zoom to get that bokeh effect. Not long after, I also figured out the conditions necessary to get that effect with 3x zoom.
That was crucial for the mostly product-focused stuff that I shoot.
The more I used the Luna Ultra, the more I started understanding not just what it could do, but what I could realistically ask it to do during my work.
Then came the real test.
Shenzhen was the turning point
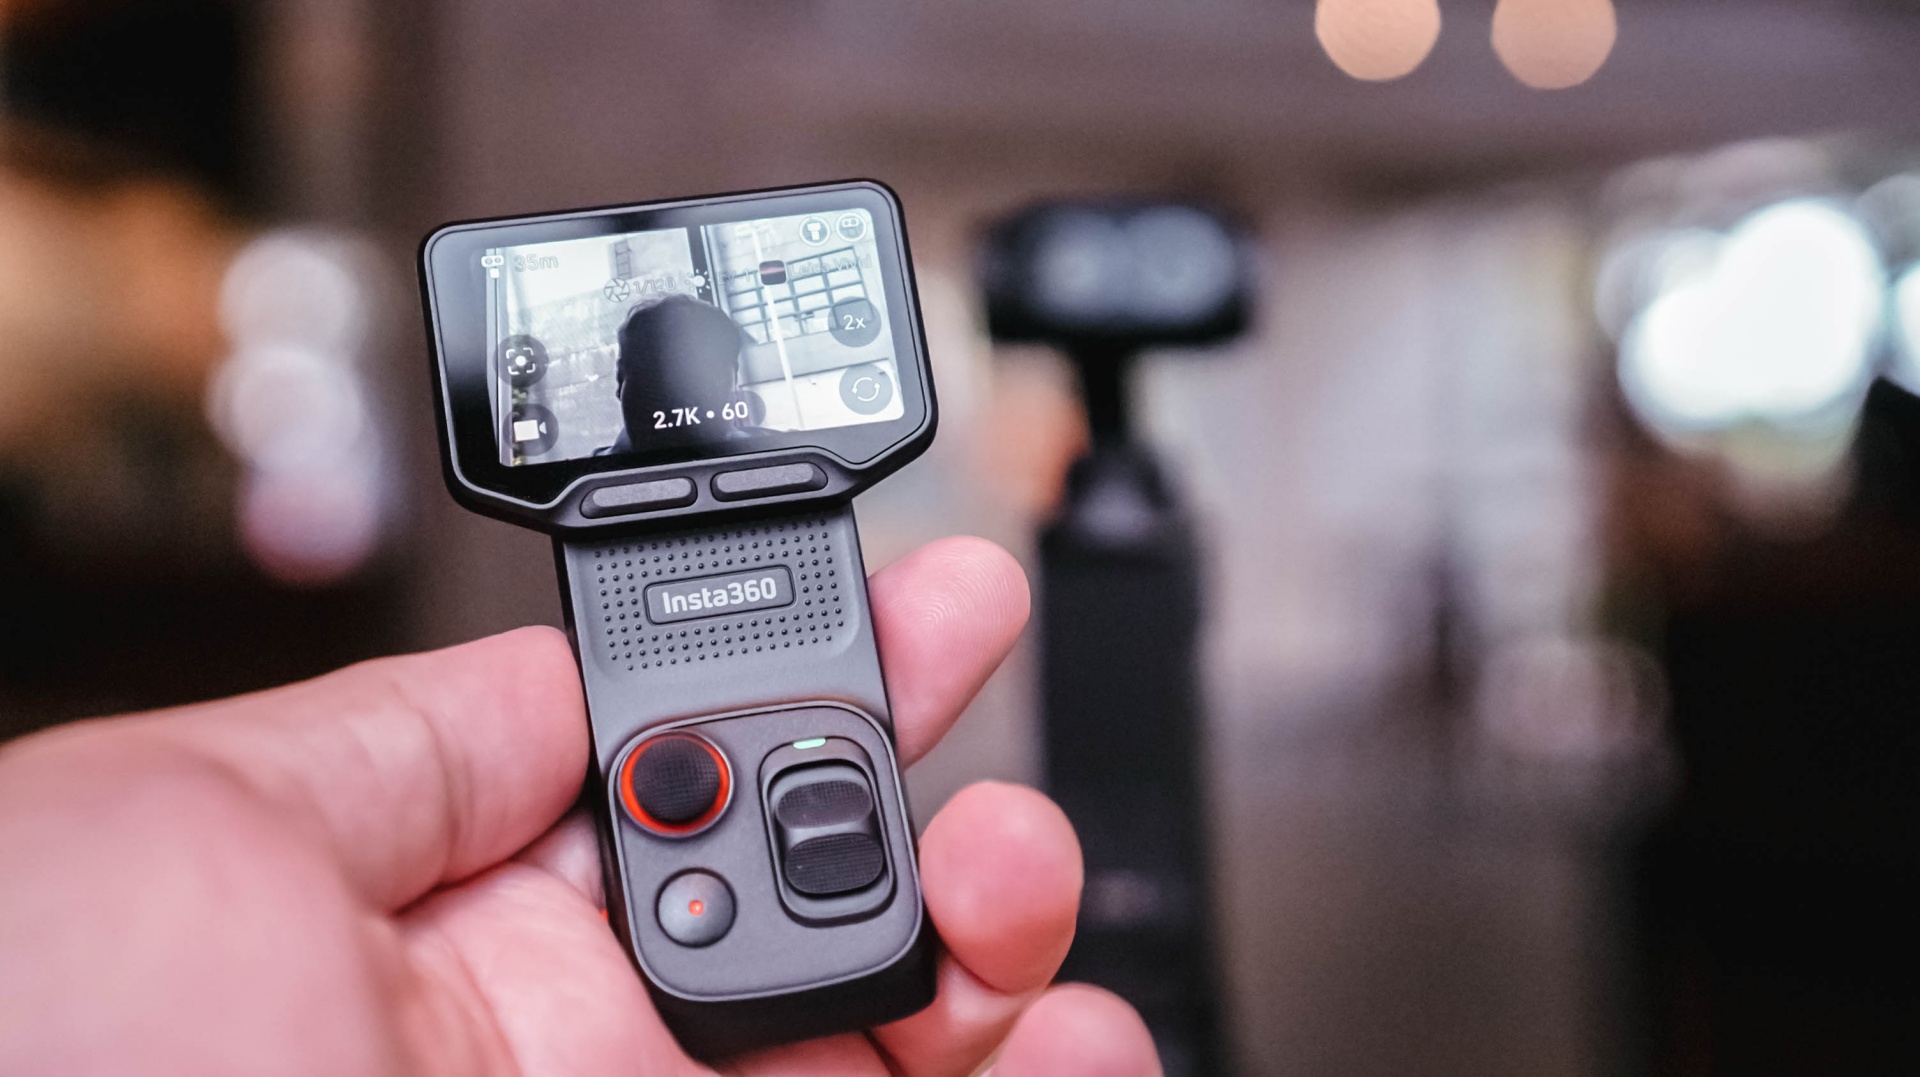
When I went to Shenzhen, China, to cover the launch of the HONOR Robot Phone, I didn’t have my old reliables as a crutch.
It was a make-it-or-break-it situation.
I needed to get as many product shots as possible. I had to show the design of the phone, its mechanical gimbal camera, and what it was like to shoot with it.
And the Luna Ultra was very capable.
The real issue was my unfamiliarity with it.
Once I figured out the settings I needed and narrowed down the shots I had to take, everything flowed rather smoothly.
@gadgetmatch HONOR Robot Phone 🤖📱 ✅ 4DoF mechanical gimbal ✅ 200MP Agile Gimbal Main Camera ✅ 200MP periscope telephoto camera ✅10-bit ARRI LogC3 recording ✅ 50MP ultra-wide camera ✅ Snapdragon 8 Elite Gen 5 Mobile Platform ✅ 7,060mAh silicon-carbon battery #HONORRobotPhone @honorglobal ♬ original sound – GadgetMatch
Some of it still felt unnatural because I’m used to using my camera for both photo and video. This time, I focused on shooting video with the Luna Ultra and used a flagship smartphone for the photos.
That whole setup still needs refinement, but I feel like I found a workflow I can lean on.
Most importantly, I got all the shots I needed.
Any challenges I faced were mostly due to the shooting environment and my own general familiarity with the Luna Ultra. As for the tool itself, it was fantastic.
The moment that really solidified this for me was when I started reviewing the footage and saw that many of the shots came out better than I expected.
That’s when I realized I could actually use this as my coverage camera.
View this post on Instagram
A different kind of coverage camera
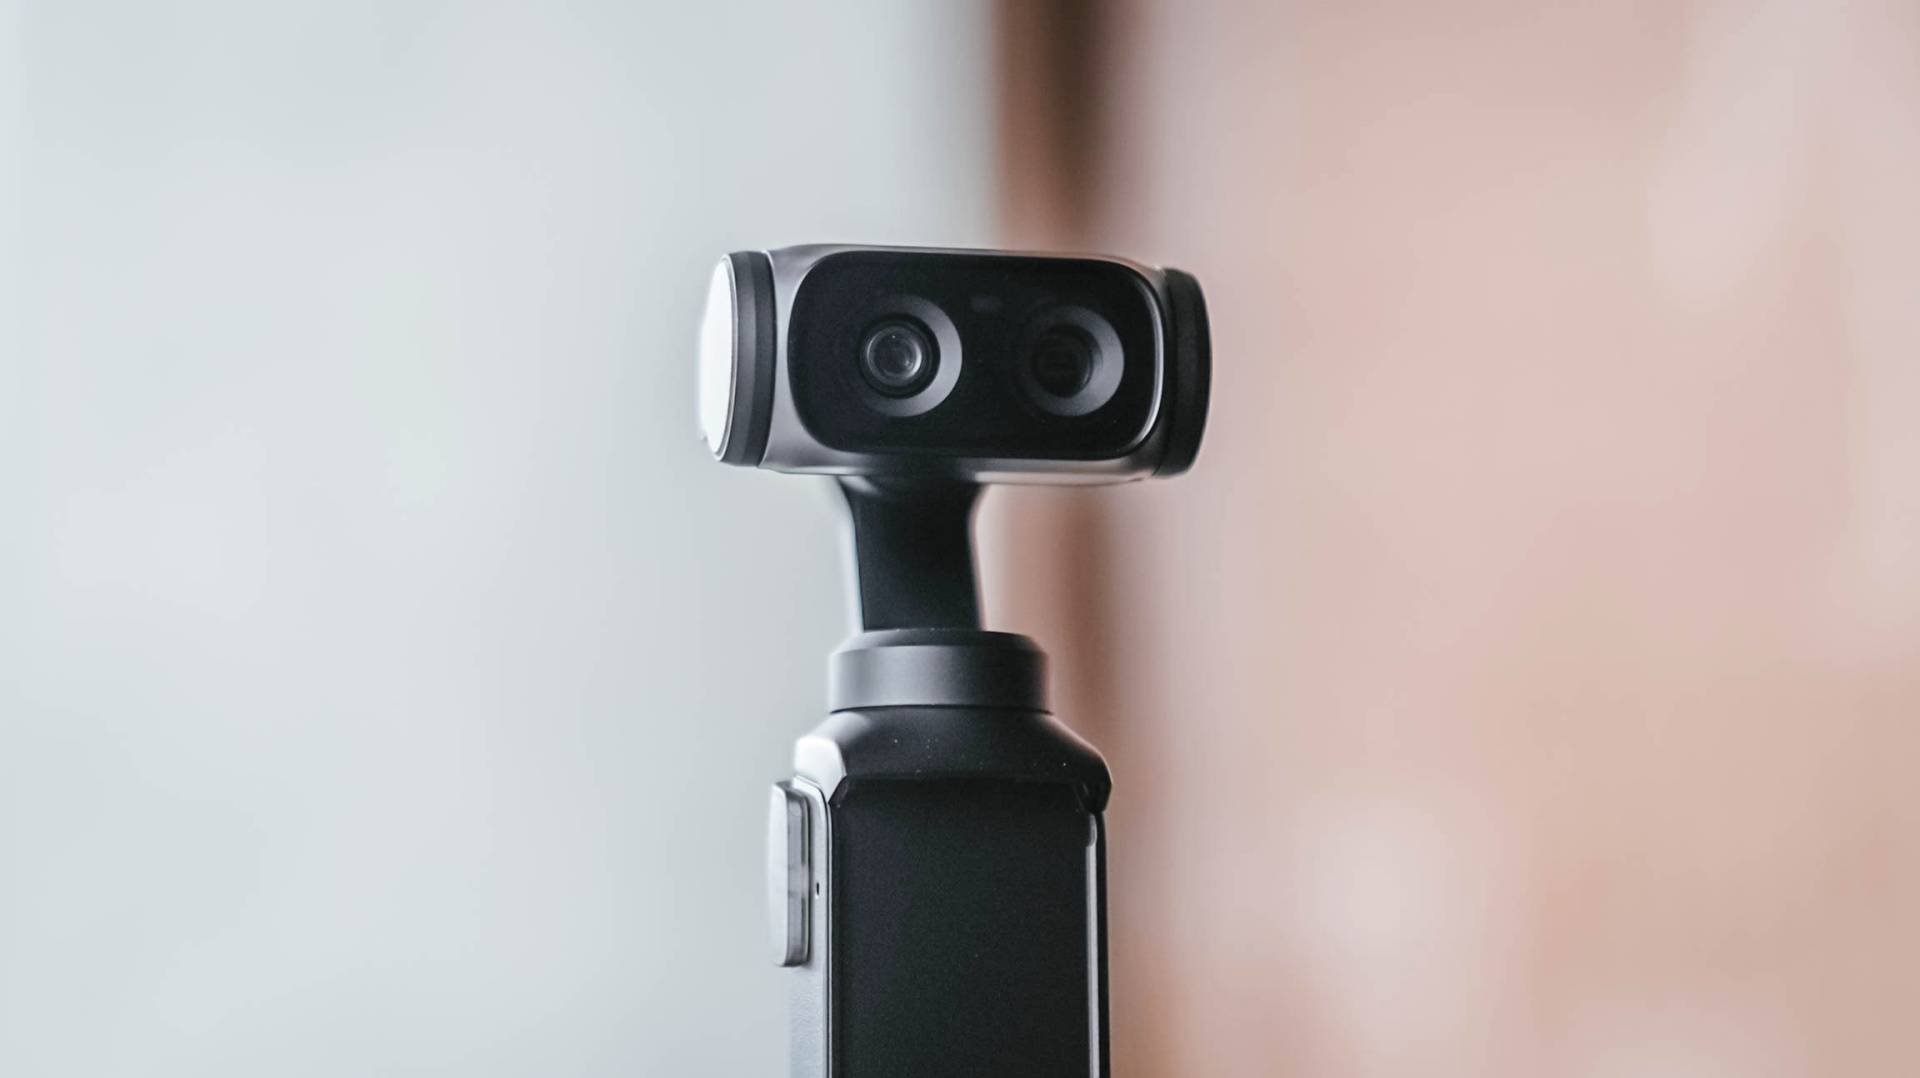
My usual event workflow is pretty straightforward. I secure the device, then get as much footage of it as possible from different angles, show different use cases, and capture its features as quickly as I can.
The Luna Ultra fit into that workflow better than I expected.
For one, I can include myself in the frame while still being able to preview what I’m shooting. That’s something I couldn’t easily do with my old reliable setup.
It’s also much lighter and thinner, making it easy to position in ways I couldn’t with my old setup.
I think the video quality is overall better than the smartphones I use, too. The bokeh I get is also natural.
That doesn’t mean my Sony a6500 is suddenly obsolete.
I think dedicated mirrorless cameras, paired with the right lenses, just have a certain look to them that I generally prefer. I’d definitely still reach for the a6500 for photos and shoots where I have a team with me.

But for solo coverage, my go-to video gear will now be the Luna Ultra.
That’s the biggest change for me.
The Luna Ultra didn’t necessarily change what I consider worth shooting at an event. That’s still a case-by-case thing.
Instead, it enabled me to shoot better even when I’m on my own, which honestly isn’t always the case.
There’s still room to grow
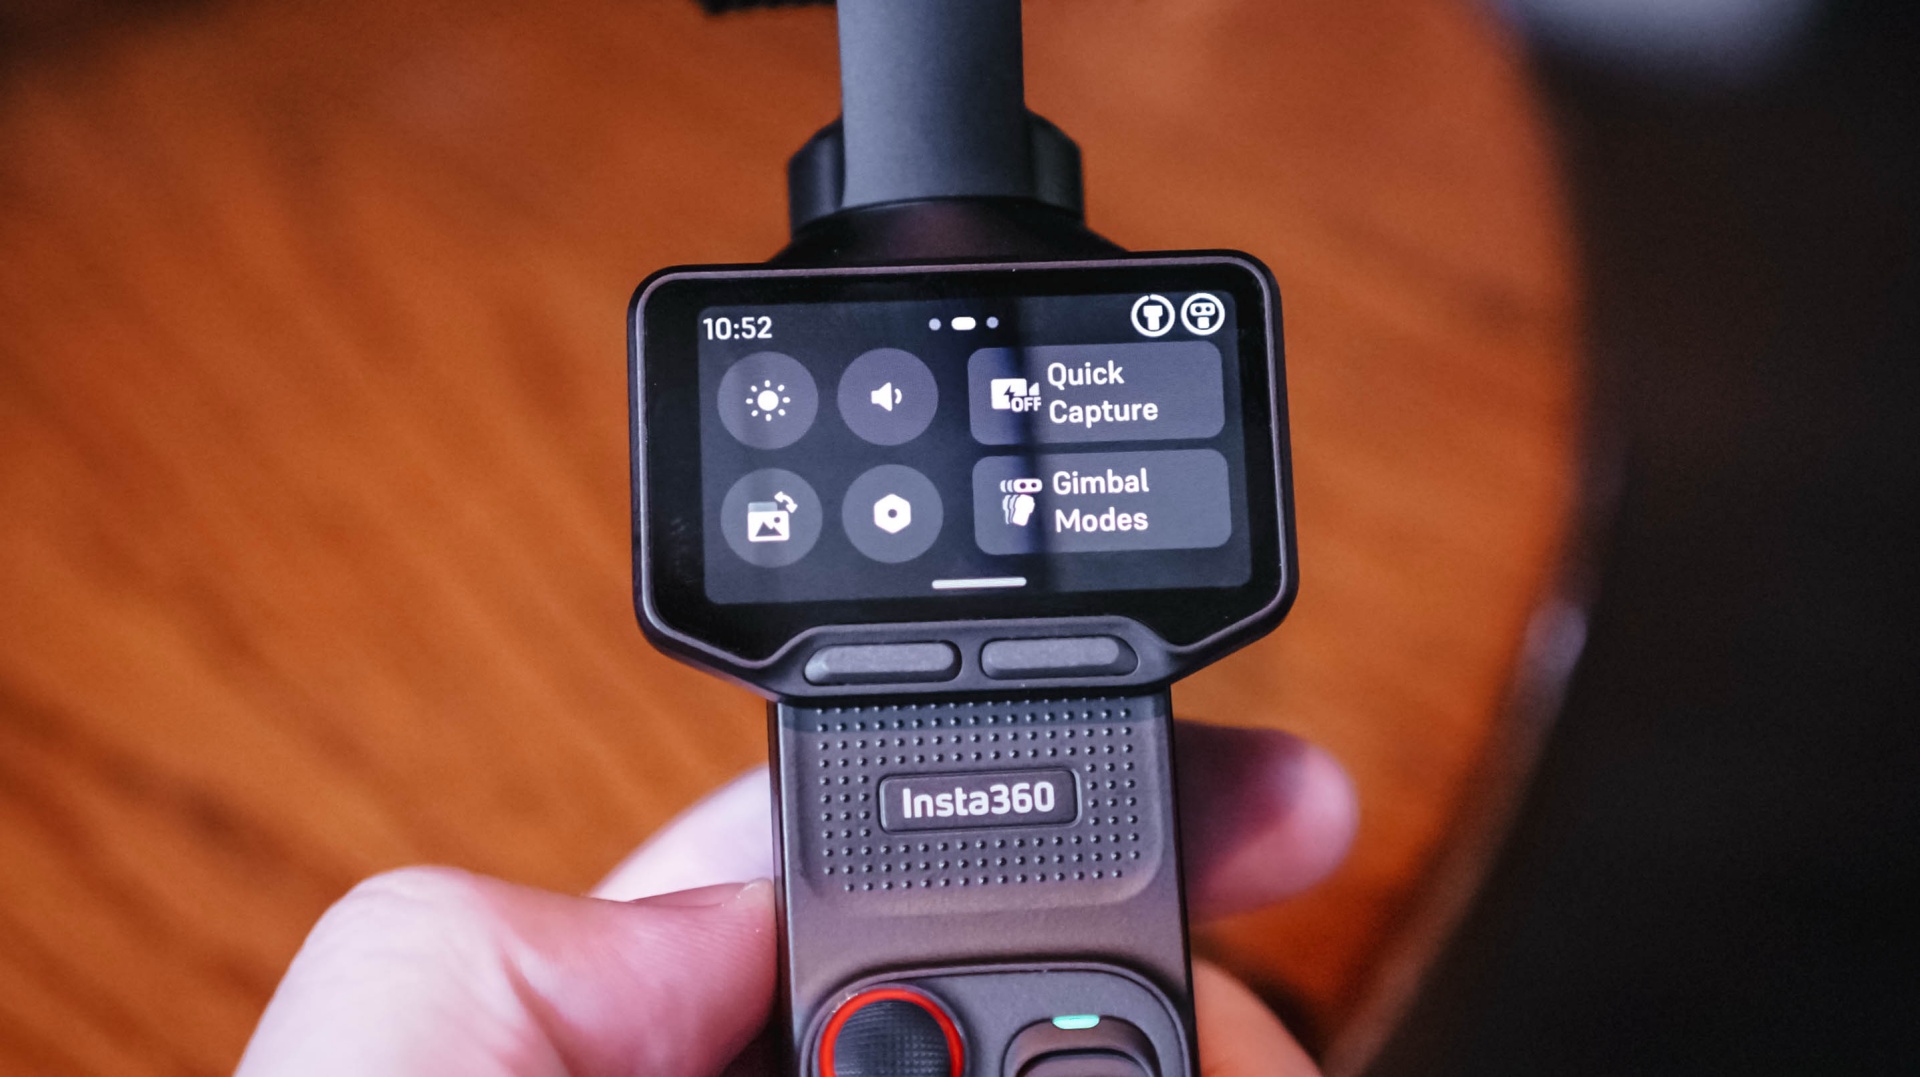
I don’t think I’ve come close to unlocking everything the Luna Ultra can do.
I-LOG is one obvious example. But that feels like something for a different type of project rather than the generally news-type Reels we do.
Our workflow is built for speed with quality, and the Luna Ultra, even when using its basic settings, fulfills that.
I definitely want to try more experimental shots, more shots with movement, and the like. I just haven’t found the right opportunity for them yet.
There are also some things I’d like to see improved.
As mentioned earlier, hands-free and preset shooting automations could help, especially for solo creators. That could make it easier to capture activities without having to comb through too much footage with enormous file sizes.
I also wish it had some form of open-gate recording. That would give the footage more versatility and make it easier to use the same footage for multiple aspect ratios.
And while the Luna Ultra is now my preferred tool for solo video coverage, I’d still choose the a6500 for photography or when I have another team member shooting with me.
Is the Insta630 Luna Ultra your GadgetMatch?
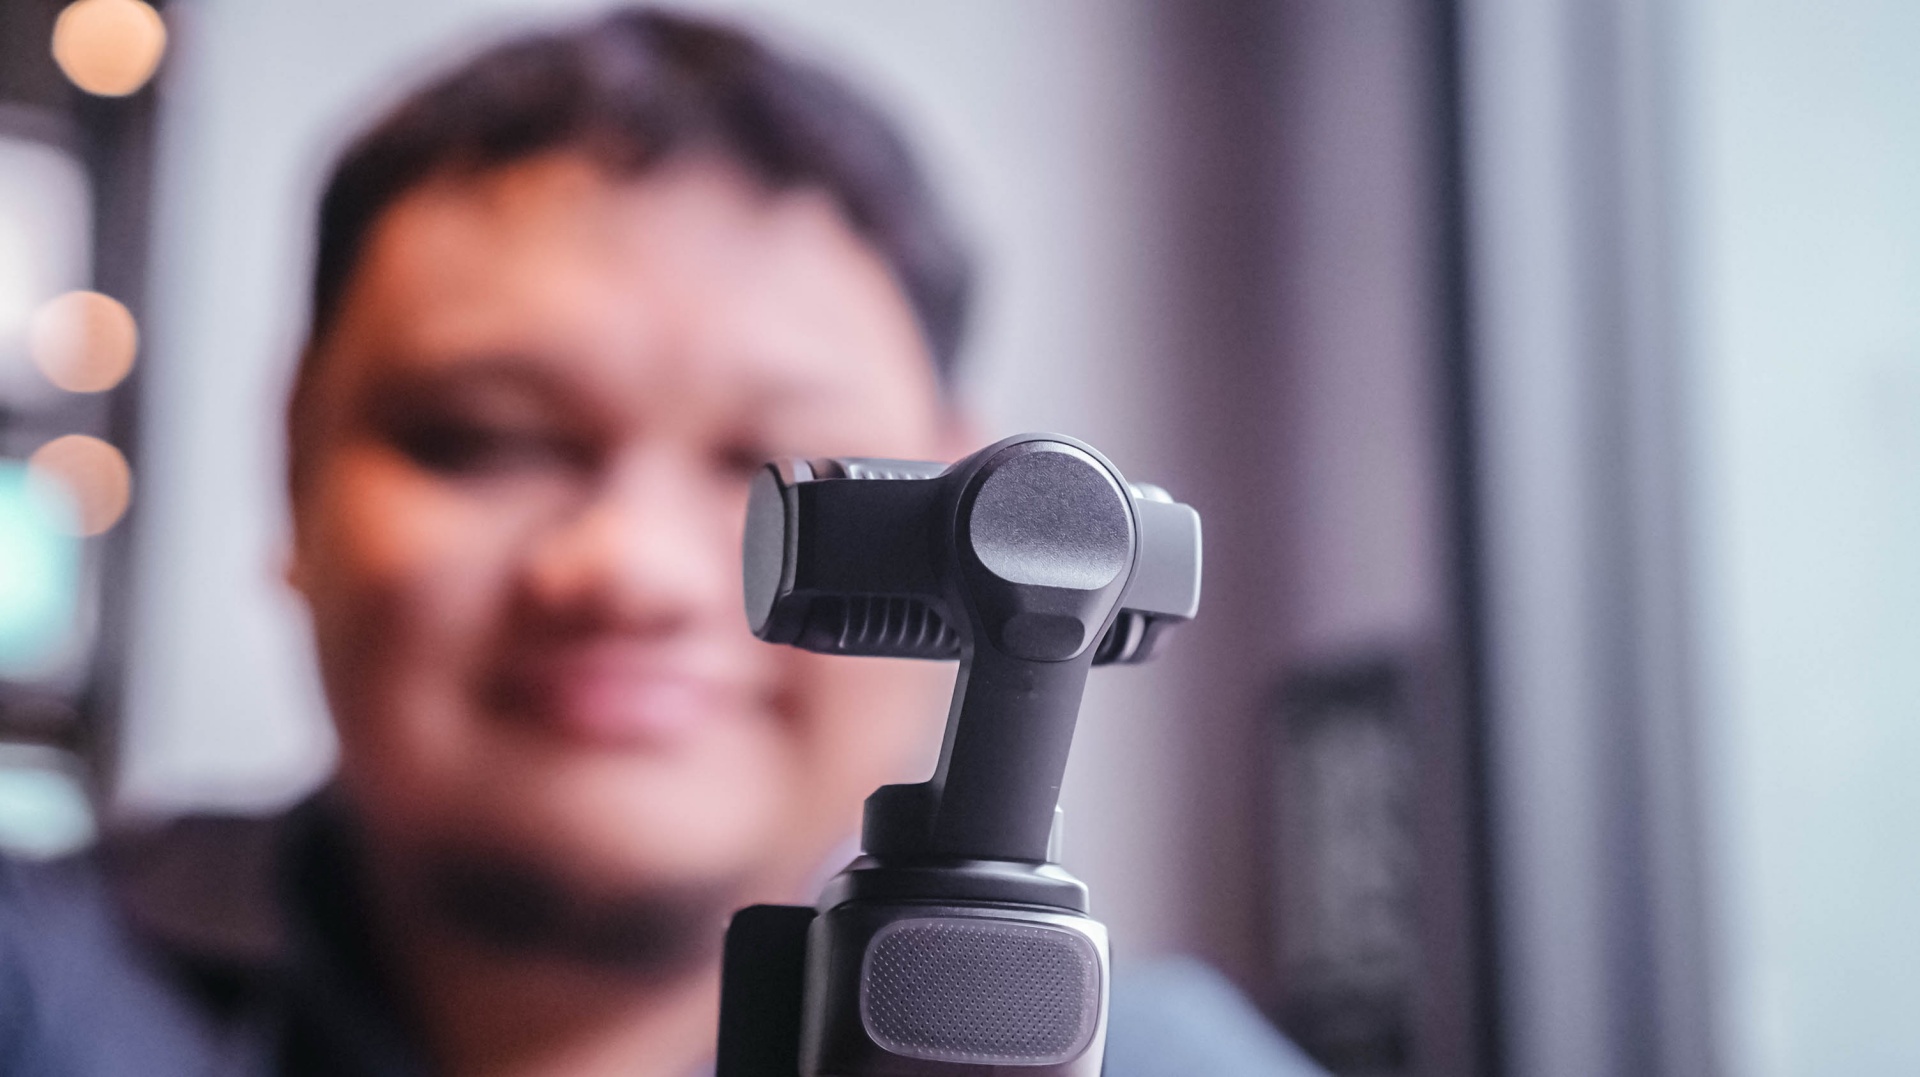
For anyone looking for a dedicated video-taking tool.
Content creation focused on video has skyrocketed. If you’re part of that movement, the Insta360 Luna Ultra is certainly a good investment to add a little extra to your videos.
It’s fairly easy to use, but it also supports deeper features that can elevate your footage and your content.
I think you should consider the Luna Ultra if you want to upgrade from shooting primarily with a smartphone, or if you want a video-shooting device that’s much easier and lighter to carry around than most traditional mirrorless cameras.
For me, the answer is a little more specific.
It’ll be my go-to now, especially for solo coverage trips.
If you asked me to leave just one camera at home tomorrow, though? Oof. Just one?
Maybe still the a6500. It’s hard to break a habit.
But the Luna Ultra is a very close second.
Still discovering what’s possible
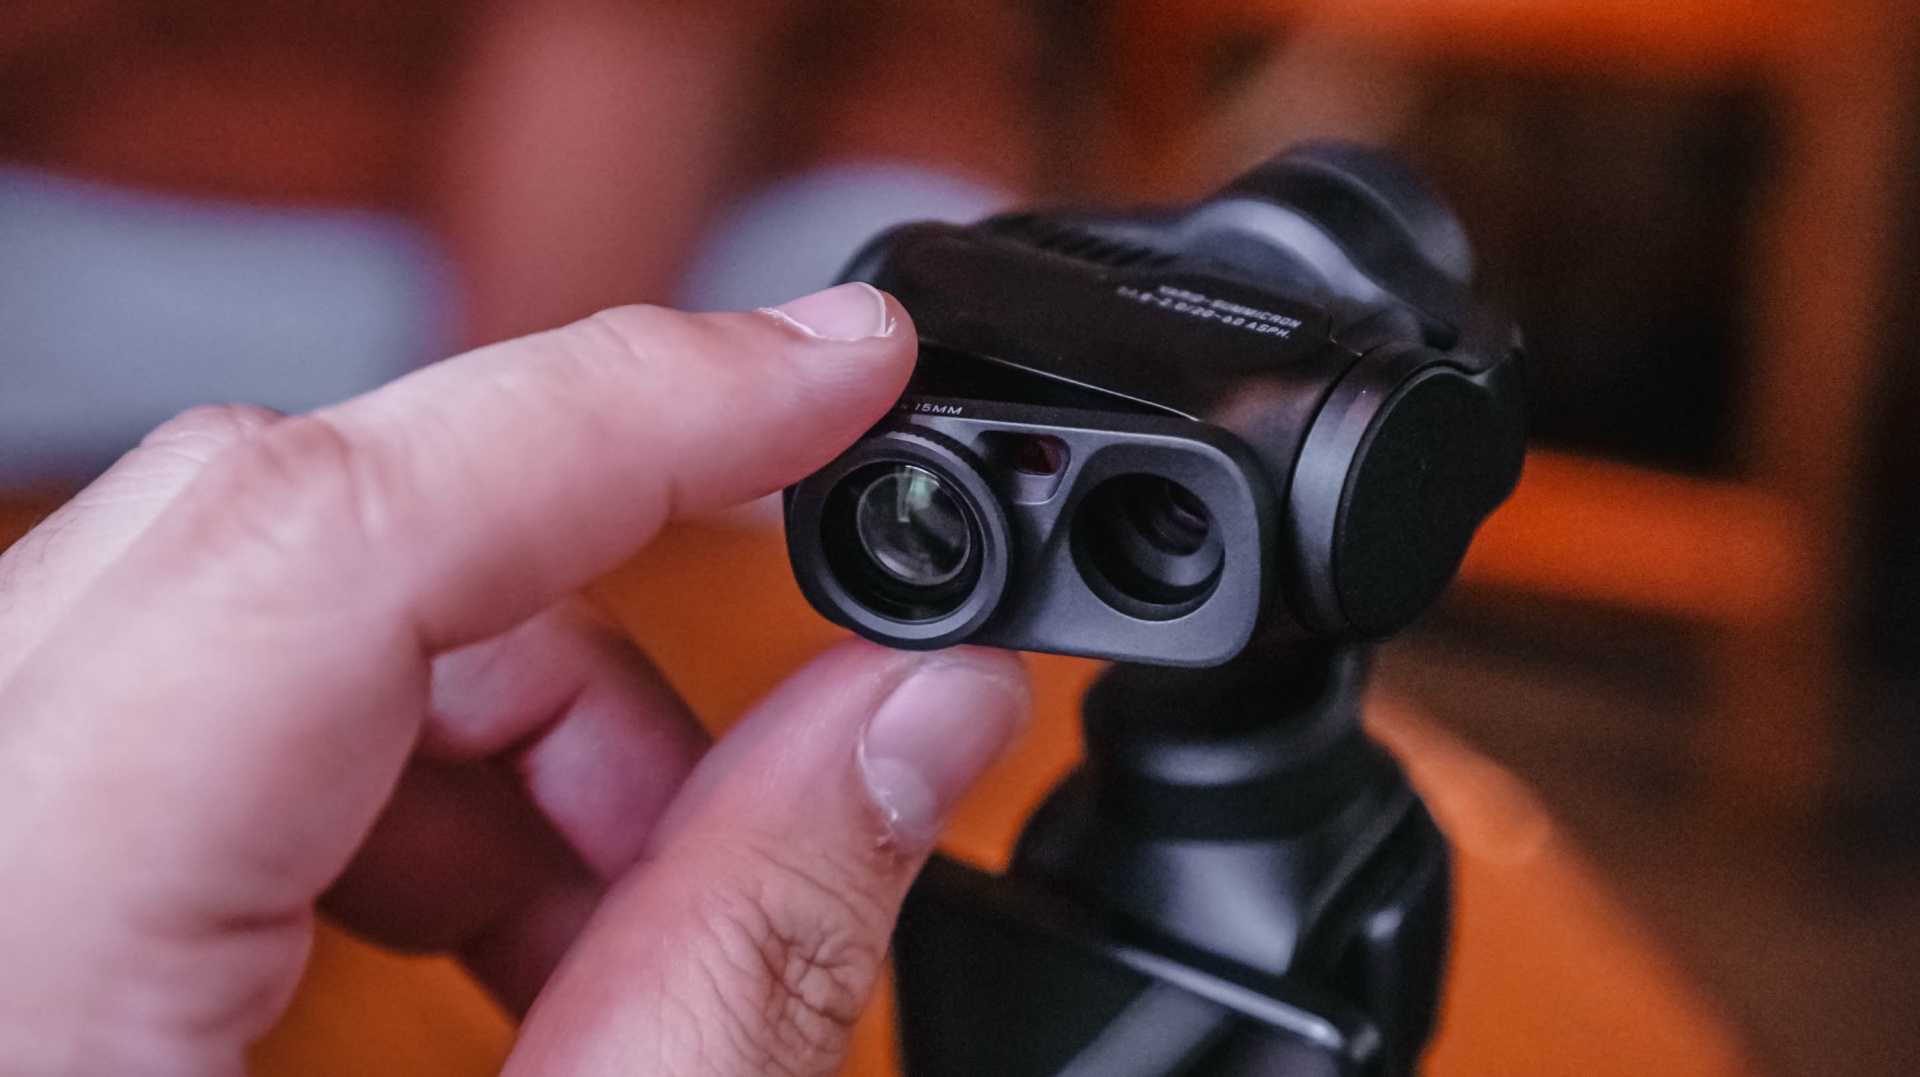
After using the Luna Ultra for all of this, I think it’s opened up new possibilities for the way I personally handle solo shoots.
It’s unlocked certain shots for me, and I haven’t even used it to its full potential.
That’s what excites me most.
I already found a workflow that suits the way I cover events. I already know I can leave my old reliable behind when the priority is video.
Now I want to see what happens when I actually learn everything else the Luna Ultra can do — that makes this an easy Swipe Right for me.
Pricing and availability
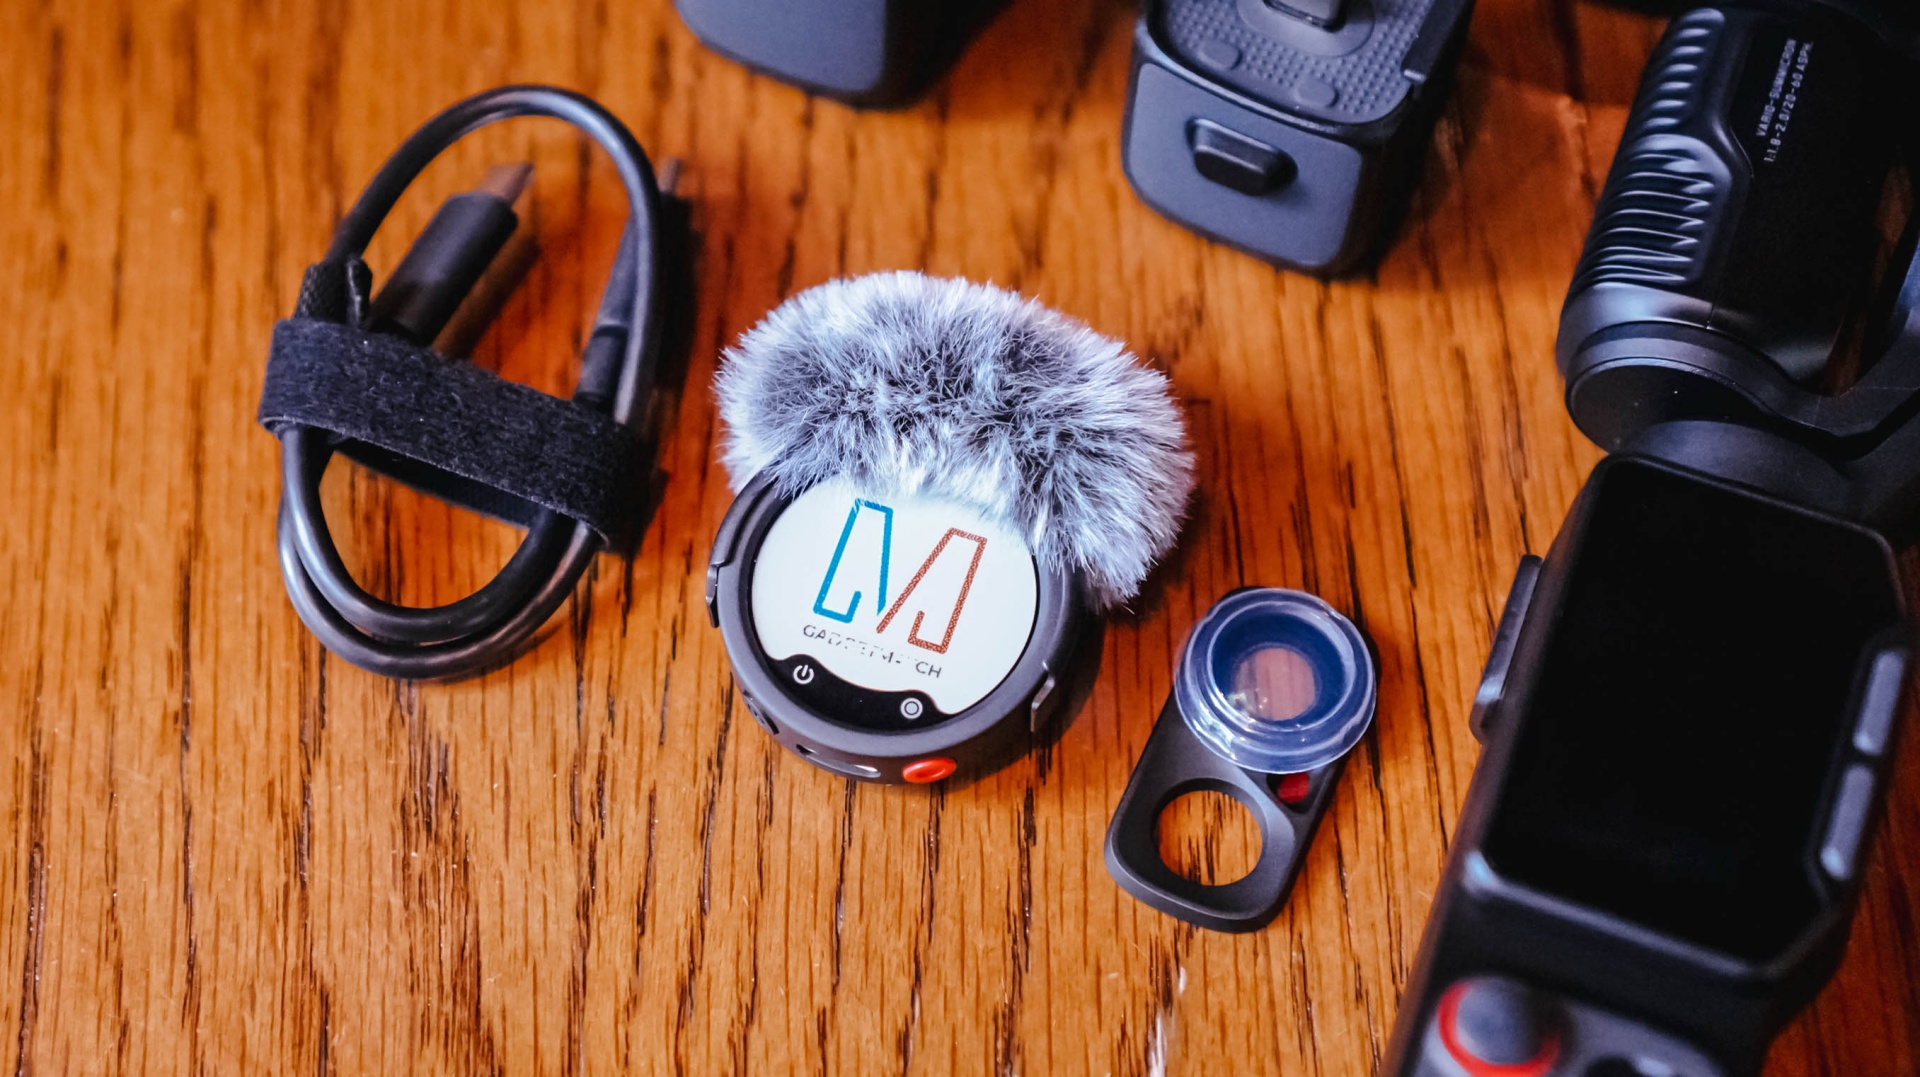
The Creator Bundle comes with the Insta360 Mic Pro which is great but I haven’t had the chance to use all that much because I am not a yapper on video.
The Insta360 Luna Ultra starts at US$799 (₱46,790) for the Standard Bundle, while the Creator Bundle retails for US$999 (₱59,490). It is available now through Insta360’s official channels and authorized retailers.

DJI Lito X1 review: Is this the best lightweight drone for creators?
Making a strong case as a travel companion and a capable B-cam!
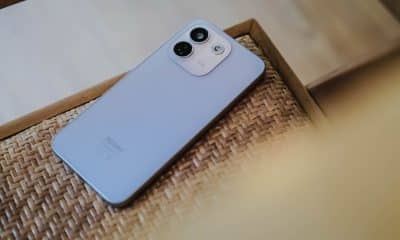

REDMI Note 17 Pro Max review: A new breed born from AI greed
Welcome to the new normal


Marvel’s Wolverine review: When the claws come out
A brutal, cinematic superhero adventure

Epson Lifestudio Grand Plus EH-LS970B with 4K projection, more launches

Jackery Explorer 300D: Power and portability in one

Nike’s Alphafly 4 is built for the part of the marathon ~that actually hurts~

SEGA, Netflix announce Crazy Taxi film adaptation

Smart launches LiveSmart App for exclusive deals

TECNO MEGAPAD 2 review: Eyes on the size

realme 16T 5G with 8000mAh battery, IP69 Pro rating launches in PH

HUAWEI Pura X View is 2026’s first WIDE slab-type smartphone

REDMI reveals the refreshed Note 17 and Note 17 Pro series

REDMI Note 17 Series: Price, availability in Singapore


-
 News2 weeks ago
HUAWEI Pura X View is 2026’s first WIDE slab-type smartphone
-

 News2 weeks ago
The CAMON Slim 5G is TECNO’s latest ultra-slim smartphone
-
 News2 weeks ago
iPhone 18 Pro series: Price, availability in the Philippines
-
 Singapore2 weeks ago
iPhone 18 Pro series: Price, availability in Singapore
-

 News2 weeks ago
iPhone Duo: Price, availability in the Philippines
-
 News2 weeks ago
HUAWEI Mate XT 2 tri-fold launches with Kirin 9050 Pro
-
 News2 weeks ago
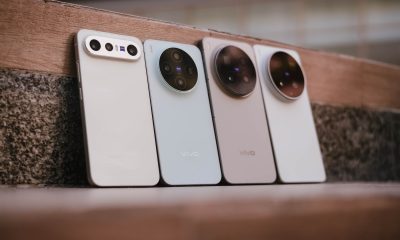
vivo introduces refurbished versions of X300 FE, X300 Ultra for less
-

 News2 weeks ago
iPhone Duo: Price, availability in Singapore