


When you’re running out of storage, what do you do? You back up the files you don’t need anymore. But for someone working in a tech-oriented industry, I’ve been a bit old-school.
I used to copy my photos to an external hard drive to preserve my memories and to save space. Before, I didn’t know how to back up my photos using cloud services. Then three years ago, my best friend introduced me to Google Photos.
ICYDK, Google Photos is a photo-sharing and storage service that lets you back up unlimited photos and videos. When I learned how easy it was to back up, it became essential to my life — as a reviewer and as a modern millennial.
Just like some millennials (and partly, the first wave of Generation Z), I have a severe obsession with taking selfies and capturing multiple shots of a single scene. This results in photographs taking a huge chunk of my phone’s internal storage.
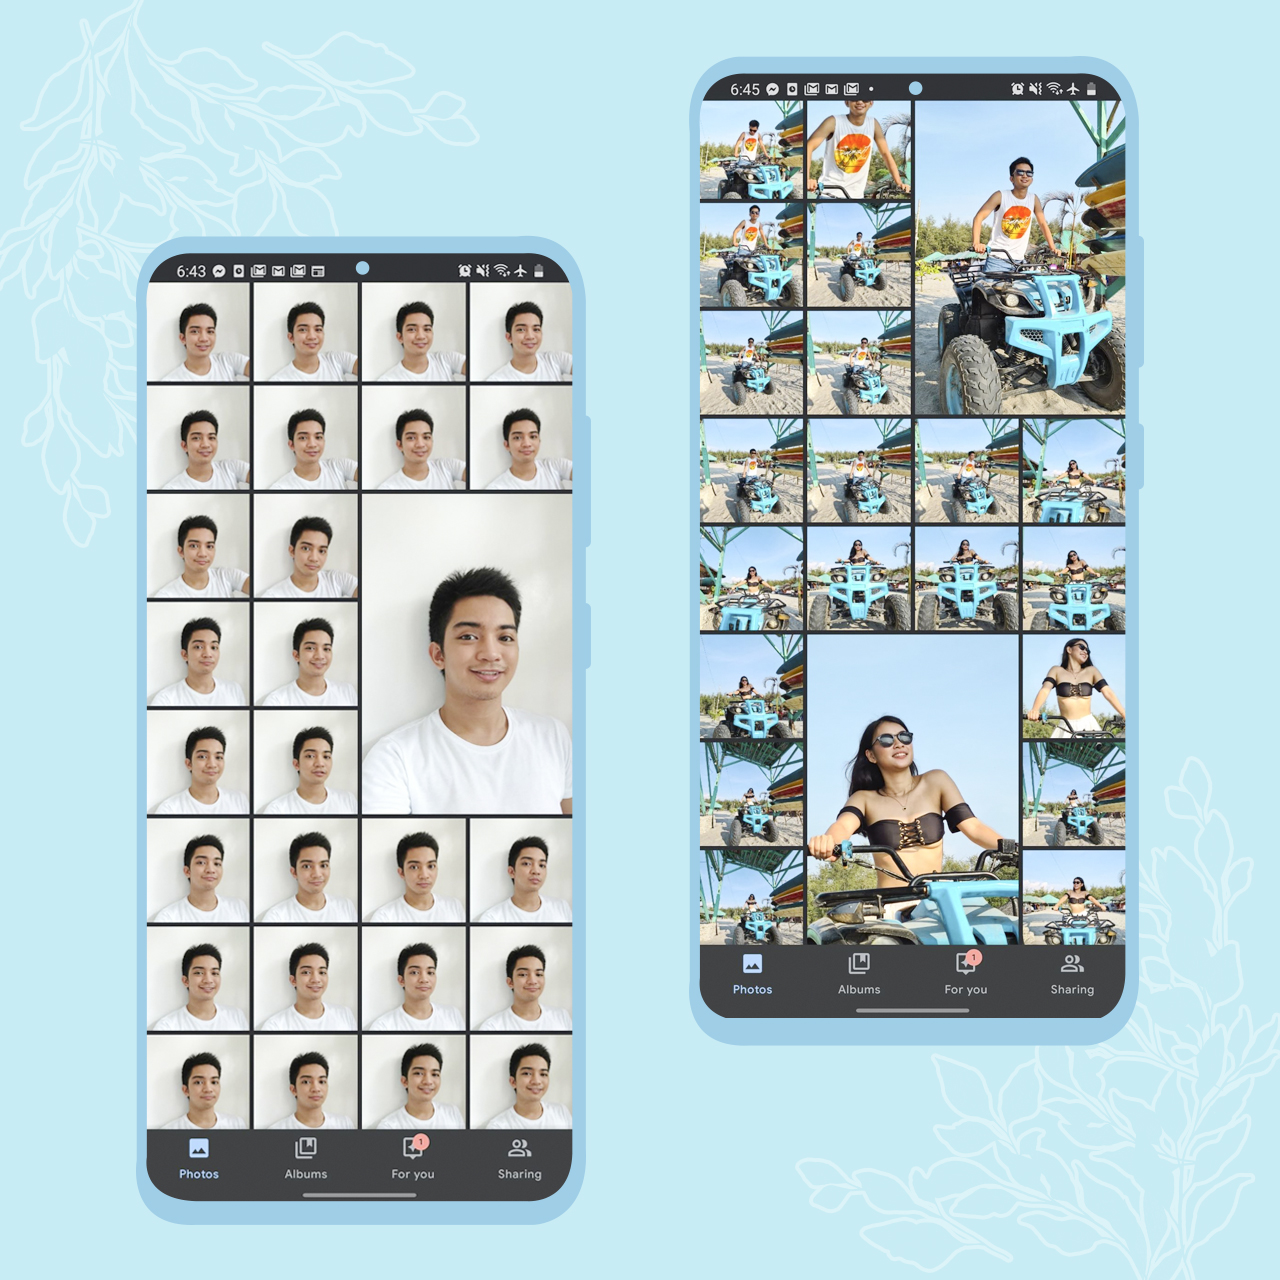
A barrage of selfies and photographs I took from a recent trip
Thankfully, Google Photos has my back (up). It helps me with storing, organizing, archiving, and sharing my files. Best of all, I can do all of it for free albeit there’s a compromise. Still, it’s high time you use this app to do some digital de-cluttering. Here’s how you can do it:
Download Google Photos
It’s currently available in Google’s Play Store and the App Store. Older Huawei models still have access to Google, so you don’t have to worry. But if you’re relying on AppGallery, you can only preview and download your photos through a browser. Stock Android users don’t have to do this anymore since their photos and videos are automatically synced to Google Photos — which they already have on their phones.
Choose a backup setting
When you’ve successfully installed Google Photos, open it, and sign in using your Google account. You’ll get an option to back up high-quality photos in exchange for free unlimited storage. If you choose this setting, you can still enjoy great quality but its file size will be reduced. For photos, you can save up to 16 megapixels and for videos, you save up to 1080p HD. Not bad, right?
If you opt to back up the original size, the number of photos and videos you can save will be limited to your account storage. Since this setting will save the full resolution of your files, it’s best to use if you have increased the storage available via Google Drive.
Back up & sync

Backed up flat lays of my cooking adventures while on a lockdown
Upon installation, Google Photos will ask you to turn on “back up & sync”. If you allow it, the app will do its work by backing up your photos to the cloud. Once done, you can sync your photos and videos automatically every time you use Google Photos. It’s just a matter of regularly checking it!
Additionally, you can access Google Photos anywhere. Be it your smartphone, tablet, or even your laptop — this app is definitely a match made in heaven for those struggling with organizing their photos and videos. Just sign in to photos.google.com via your browser or use the app on any device with Google Services. You can also easily search your photos by people, places, and things since Google Photos automatically sort them for you.
Free up space
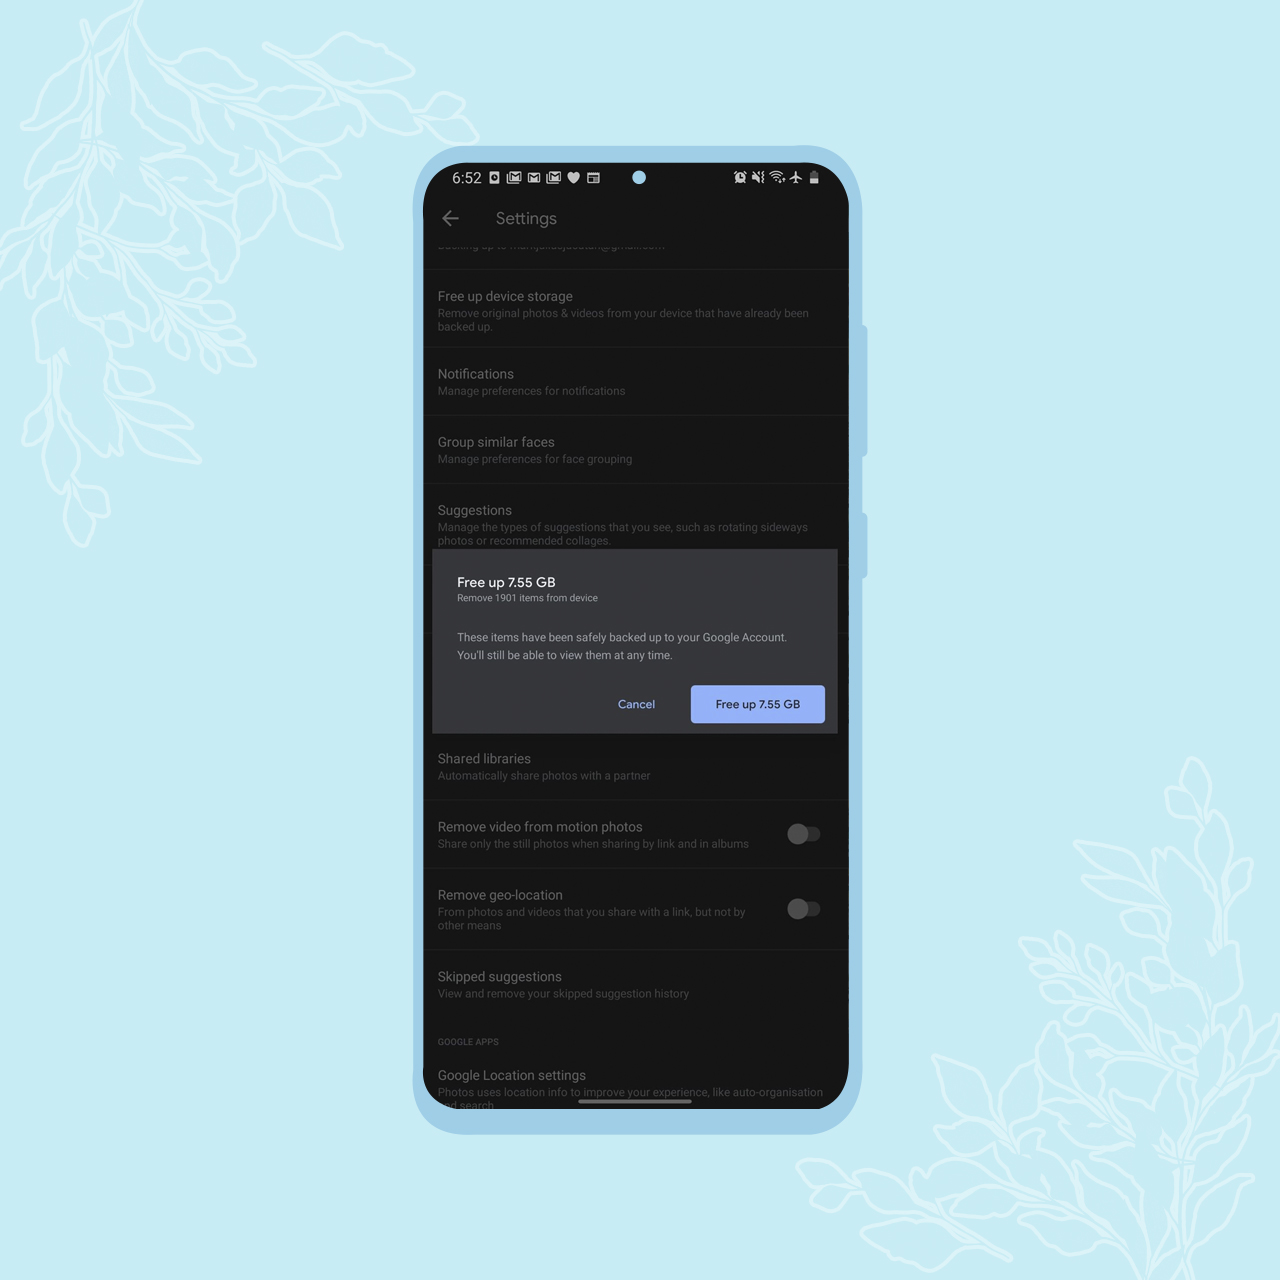
If you’re done backing up, you can free up space by going to Google Photos’ settings. If it’s backed up, you can remove the photos and videos on your device. Now, you don’t have to run out of space for new memories!
Making and sharing albums
For an even more organized life, you can sort your photos and videos into albums (and make it private even more, though you’re the only one who can really see it).
If you intend to share select photos/videos or an entire album, people can only access the content you want them to see through a magic link.
Totally safe and secure
While there have been issues surrounding cloud services and Google Photos, the app has been safe and secure so far. No one can access your photos and videos except you unless someone has access to your Google account. The photos and videos you shared with friends and the people you know can only preview what you’ve shared unless someone got hold of the link provided.
There are so many things you can do with Google Photos, and there are more features that we could talk about some time. But, for now, get yourself introduced to the app first. Do some digital decluttering and Marie Kondo your gallery. Your phone will thank you in the long run.
SEE ALSO: How to purge your social media accounts | How to download full-resolution Instagram photos on desktop | How to upload Instagram photos on desktop


Doomscrolling is the greatest enemy to everyone’s productivity today. The temptation to keep on scrolling for hours is an ever-present temptation. Taking a very strong stance against the phenomenon, the European Commission is now investigating TikTok for having an addictive interface.
Via Politico, Brussels is now prodding TikTok to change its interface. Very technically, the European Commission is not out to get doomscrolling, specifically. However, the major changes that they want to introduce “disabling infinite scrolling, setting strict screen time breaks, and changing its recommender systems.”
App addiction is a persistent problem today. Besides concerned parents, governments around the world have been trying to regulate addiction, especially when it comes to children. The European Commission, as is apparent from this new initiative, is at the forefront of preventing addiction.
Though the target is explicitly TikTok right now, changing addictive interfaces will also affect other social media platforms including Facebook, Instagram, and X. Most platforms nowadays thrive on encouraging users to keep scrolling through more content.
Right now, TikTok isn’t set to change just yet. However, the report states that the European Commission is willing to work with platforms for a better, non-addictive interface. It’s less abrasive than the region’s recent privacy initiatives, which requires users to verify their age before accessing mature content.
Apps
Breaking up with Adobe Photoshop after 20 years
Wedding planning and Apple Creator Studio made me realize it was time

Planning a wedding, even a small and intimate one, has a way of sharpening your sense of priorities. Right as my fiancé and I were making decisions for our city hall wedding here in New York City, Apple announced Creator Studio.
Creator Studio is a subscription service that gets you access to eight creative pro and productivity apps for US$12.99 a month, or US$2.99 if you’re a student or educator. The design app included in the subscription, Pixelmator Pro, is also available as a standalone purchase for US$49.99. Adobe Photoshop, my design software of choice for over two decades costs me US$22.99 a month.
Seeing those numbers next to each other made me pause. It’s not that I was unhappy with Photoshop. I was just suddenly made aware how expensive it is. I’d been paying more for a single tool than I could for an entire creative ecosystem.
Adobe Photoshop was my first foray into the world of graphic design
Creative Studio’s lower price point, along with the free trial, made me consider switching to Pixelmator Pro altogether. That’s something I never thought I would do. Photoshop was how I got into graphic design. It was my first love, and up until recently, I truly thought it would be my ride or die.
Getting to know Pixelmator Pro
If you’re not familiar, Apple’s Pixelmator Pro is a graphic design and image editing app that’s similar to Adobe Photoshop. In practice, it covers a huge amount of the same ground but with a very different philosophy around usability and design.
I tried Pixelmator Pro, mostly as a challenge because we were doing a YouTube video on Apple Creator Studio. Personally, I was lowkey excited to try something new.
![]()
The first time I loaded the app, I recreated our YouTube thumbnail template — all within 10 minutes — and I haven’t looked back since.
Familiar enough to feel effortless
One of the biggest reasons my transition to Pixelmator Pro was so easy is muscle memory. Many shortcuts behave the same way: cmd+T for transform, cmd+R to show rulers, cmd+J to duplicate layers, just to name a few.
Having used Photoshop since high school, it felt familiar and intuitive — the complete opposite of how it felt to try and switch to Adobe Illustrator many years ago.
Photoshop is how I got into graphic design. It was my first love, and up until recently, I truly thought it would be my ride or die.
Later, I learned that you can import PSD (Photoshop) files directly to Pixelmator Pro. Apparently I didn’t even need to recreate the GadgetMatch assets. It does a good job of converting and preserving layers.
Photoshop now feels archaic
![]()
After using Pixelmator Pro for a few days, going back to Photoshop felt jarring. The sharp edges of the UI felt cold and rigid. Everything was layered with popups, panels, and tiny interruptions.
Pixelmator Pro, in comparison feels warm, smooth and frictionless. Its user interface is very Apple-like — rounded edges, softer icons and buttons. The Creator Studio version also gets the new Liquid Design touch, with transparent menus and elements that feel dynamic.
I especially love the little things. Color adjustments live in one simple panel instead of being scattered across different windows. There’s an eyedropper tool beside every color picker with a magnifier built-in.
When you hover over tools, it shows you the shortcut (e.g. “R” for Repair). There are also subtle animations, like when you use the Color Fill tool to change your canvas color.
Pixelmator Pro’s UI is warm, snappy, and approachable
The differences in user experience are stark. Photoshop’s animations either don’t exist or are too abrupt for one to notice.
Smart tools without the noise
Photoshop has one clear advantage over Pixelmator Pro: Generative AI. It’s great and powerful especially when you need to save time.
I personally used it a couple of times before to save time on cloning, erasing, or expanding elements. Am I going to miss it with this switch? Something tells me I won’t.
Pixelmator Pro’s clone and repair tools, though seemingly so simple, work like a charm. And for how I usually manipulate images, those two are more than enough.
From digital to physical
If Pixelmator Pro was going to replace Photoshop in my workflow, wedding prep was the perfect time to give it a real world test — and it more than held its own. Its ease of use gave me permission to think outside the box, because I knew I had a reliable tool that can help me make it happen.
On the left, a Kufic-inspired wedding logo designed on Pixelmator Pro; on the right, 3D printed stamps
Since my fiancé is half-Iranian, I designed a logo combining our names, inspired by Kufic calligraphy, and I did it entirely in Pixelmator Pro. I developed that same logo further and designed a save the date, with color, also inspired by Kufic calligraphy. I went through a few iterations to come up with the final designs, which were made easier by the Shape tool and grid overlays.
My fiancé then took the logo I designed in Pixelmator Pro, converted it to 3D on Revit, and printed it into stamps in different sizes. One way we’re using it is to deboss the handmade pottery he’s making as one of our party favors.
There are a few more wedding pieces I’m designing on Pixelmator Pro in the coming weeks: our final invitation, and the custom stationery for the dinner that follows the ceremony.
Through this whole process, Pixelmator Pro never felt like it got in the way, or that it was limited. On the contrary, it feels like that enabler friend who says yes to every idea I have, and can actually help make them real.
Powerful, but approachable
The best way I can describe what using Pixelmator Pro is like is this: it’s a mix of Photoshop’s professional tools, Canva’s free library of assets, and Apple’s UI sensibility.
Shortly after Apple announced Creator Studio, Adobe rolled out significant Creative Cloud discounts. Are they threatened? They better be.
That makes it great for beginners, small business owners, and casual creators. Like Canva, it comes with some beautiful templates to help someone with zero experience come up with something good.
But unlike Canva, it still feels like a serious design tool. I can do so much of what I need using Pixelmator Pro but with UI that’s so much more approachable compared to Photoshop.
As the great philosopher Ariana Grande once said, “Thank U, Next”
I remember meeting Canva’s founders before launch and not fully understanding their mission to make graphic design accessible to everyone. Now I do.
It was never about replacing Adobe products and pro designers. What Canva did was fill a huge void we didn’t know existed. They democratized something that used to be reserved only for the privileged few.
Pixelmator Pro comes with free templates, assets, and mockups like this MacBook Pro and coffee packaging
Pixelmator Pro’s lower barrier to entry has potential to make a significant impact. My hope is it opens doors for people who were previously shut out of the graphic design world, and that it becomes something they can grow with, just as I did with Photoshop.
Adobe is still the industry standard
Switching to Pixelmator Pro wasn’t about rejecting Adobe, in the same way that Canva’s success did not kill Photoshop.
It’s worth noting that Adobe products are still the standard in the industry. A lot of companies rely on them, and most schools teach them. In a traditional design or agency environment, Photoshop and Illustrator are still the default language.
![]()
Even on Apple’s own Design Resources site for developers, the official design templates are built for Adobe Photoshop and Illustrator, not Pixelmator Pro. That says a lot about how embedded Adobe is in professional workflows.
Competition makes the space better
Apple Creator Studio, and tools like Pixelmator Pro, challenge Adobe’s near-monopoly in a really healthy way.
It’s not lost on me that trading Photoshop with Apple software actually keeps me locked into one ecosystem. But having more pro creatives try Pixelmator Pro can put pressure on the industry. A strong alternative that’s more cost effective can force titans and dinosaurs to evolve in a way the likes of Corel was never able to do.
Ideally, that means better products and fairer pricing for everyone. Shortly after Apple announced Creator Studio, Adobe rolled out significant Creative Cloud discounts. Are they threatened? They better be.
Pixelmator Pro’s intuitive UI makes switching from Photoshop easy peasy
Access matters, and at the end of the day, with a healthy competition in the market, it’s consumers that win. Canva is a great example of this. It made design tools accessible to those who aren’t professionals. It didn’t make everyone a great designer, just as a novice who tries Final Cut Pro today won’t become a pro video editor tomorrow. Design is still a craft you develop over time with practice.
Is Pixelmator Pro my GadgetMatch?
Photoshop still has its place. But for my everyday work, and occasional personal projects, Pixelmator Pro can do everything that I need to accomplish, at a fraction of the cost.
It feels faster, lighter, and more alive. Honestly learning my way around new software has been so enjoyable — so much so that I feel a renewed sense of eagerness to try other design software like Blender and Figma.
Pixelmator Pro never felt like it got in the way, or that it was limited. On the contrary, it feels like that enabler friend who says yes to every idea I have, and can actually help make them real.
Wedding planning and Apple Creator Studio didn’t just make me switch to a new software. They also made me question how much I’ve been missing out on. How much of what I do is simply due to inertia?
![]()
Ending my longest relationship doesn’t mean it failed. I’m grateful for what Photoshop taught me. It helped shape the creative professional that I am today.
But alas, this is one area where my practicality wins over loyalty. Relationships — with people or with tools — only work when both parties keep showing up. There’s no room for complacency, despite the history.
Walking away from something that taught me so much feels bittersweet, but Pixelmator Pro fits the way I work now, and I hope it grows with me as I turn the next page.
Apps
Apple Creator Studio: Creative apps bundled into single subscription
All the tools you need, one payment

Apple has officially streamlined its popular creative apps into one single subscription suite with the introduction of Apple Creator Studio.
The collection includes some of the most useful apps for today’s creators: Final Cut Pro, Logic Pro, Pixelmator Pro, Motion, Compressor, and MainStage.
New AI features and premium content in Keynote, Pages, and Numbers also make the Apple Creator Studio an exciting subscription suite. Freeform will eventually be added to the lineup.
The groundbreaking collection is designed to put studio-grade power into the hands of everyone. It builds on the essential role Apple devices play in the lives of millions of creators worldwide.
![]()
The apps included cover video editing, music making, creative imaging, and visual productivity to give modern creators the features and capabilities they need.
Final Cut Pro introduces exceptional new video editing tools and intelligent features for Mac and iPad.
For the first time, Pixelmator Pro is also coming to iPad with a uniquely crafted experience optimized for touch and Apple Pencil.
Logic Pro, meanwhile, for Mac and iPad introduces more intelligent features like Synth Player and Chord ID.
Apple Creator Studio will be available on the App Store beginning January 29. In the Philippines, the rates are PhP 399 a month or PhP 3,990 annually.
There is also a free one-month trial which includes access to:
- Final Cut Pro, Logic Pro, and Pixelmator Pro on Mac and iPad
- Motion, Compressor, and MainStage on Mac
- Intelligent features and premium content for Keynote, Pages, Numbers, and later Freeform for iPhone, iPad, and Mac
College students and educators can subscribe for a discounted price of PhP 149 per month or PhP 1,490 per year.


Now Playing: Iron Lung
The premise will leave you wanting for more.


Infinix NOTE Edge: Stellar at street photography
Despite trailing in other specs, the Infinix NOTE Edge was built for point-and-shoot photography.


OPPO Reno15 Pro: Camera Review
Why is this even considered a "Reno"?

Smart opens pre-orders for Samsung Galaxy S26 series
Now Playing: Iron Lung

TECNO resurrects modular phones with this new concept

Privacy Display | Galaxy S26 Ultra

Audio Eraser now works on third-party apps | Galaxy S26 Ultra

Breaking up with Adobe Photoshop after 20 years

TECNO will showcase the CAMON 50 and POVA 8 series at MWC 2026

PlayStation, LE SSERAFIM Chaewon team for the ‘Love of Play’ campaign

VinFast updates battery subscription policy for large upfront savings

Xiaomi SU7 Ultra makes Gran Turismo 7 debut


-

 Reviews2 weeks ago
The art of being in and behind the frame
-

 Gaming2 weeks ago
New Resident Evil Requiem trailer teases a return to the RPD
-

 Accessories2 weeks ago
Apple AirTag 2 Review
-

 First Look1 week ago
Match Pulse: Infinix NOTE 60 Pro
-

 Cameras1 week ago
Osmo Pocket 4 makes a surprising appearance in public
-
Camera Walkthrough6 days ago
OPPO Reno15 Pro: Camera Review
-

 Gaming2 weeks ago
Star Wars: Galactic Racer shows off new gameplay at State of Play
-
 News1 week ago
iPhone 17 Pro Max is somehow the most traded-in phone today