

If you’re looking for a step-by-step tutorial on how to repair your iPhone by yourself, this isn’t iFixit nor JerryRigEverything. But if you came here out of curiosity (and for some tips), I’m here to share my first ever iPhone repair experience.
I’ve been dealing with tech mishaps over the years. From faulty PCs and laptops, all the way to a completely dead iPhone 3Gs and Samsung Galaxy Note5, it’s not something new to me. In fact, it was frustrating to deal with it as I’ve experienced having no computer when I was in high school — and even being phoneless for three months back in college.
If you’re too clumsy or you can’t see small parts clearly, your next best option is to:
- Bring it to a repair shop
- Find a friend (like me) who knows how to replace phone parts
- Find a substitute phone instead
Disclaimer: Try at your own risk. Don’t do it if your device is still under warranty.
Check your phone’s defects
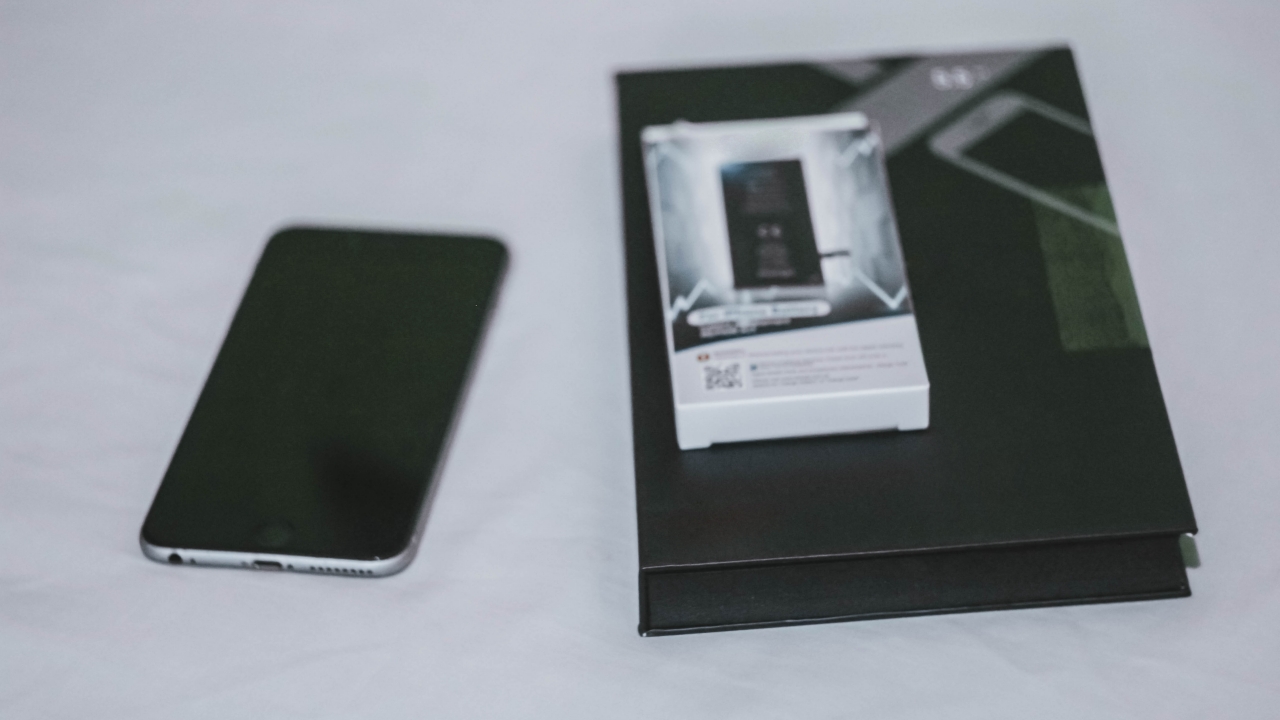
You can’t fix something if you don’t know what’s wrong with it. If you already know your phone’s situation, it’s easier to determine what parts you need to buy for the Do-it-yourself iPhone repair you’re planning to do.
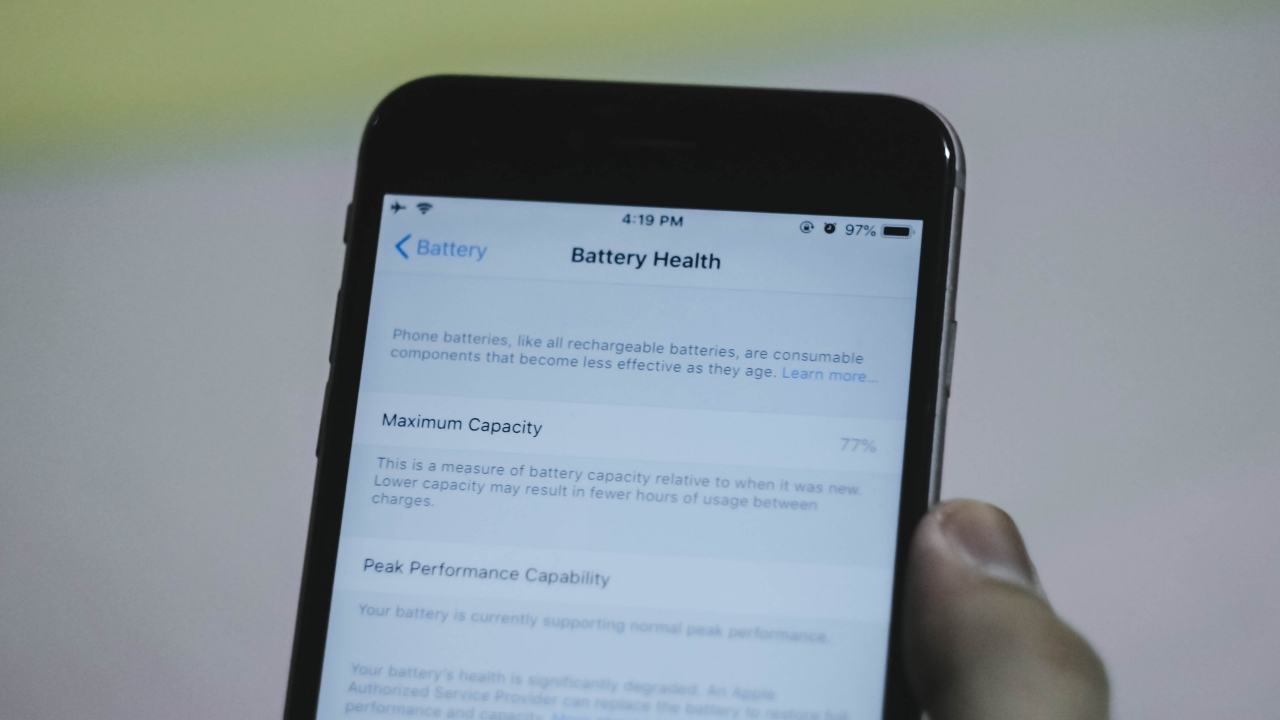
In my case, I already knew that my iPhone’s battery is not in its ideal shape. Apple iOS’ Battery Health feature is actually helpful as it states whether your battery is still functional or needs to be replaced. Other than that, my phone’s display also suffered from “ghost touches” that I needed to replace it too right away.
DIY repair is the cheapest option
Phone repairs really aren’t cheap. If you take your iPhone to an Authorized Service Center, you’re not just paying for those parts that need to be replaced, you’re also paying a hefty amount of diagnostics fee and even the repairman’s labor.
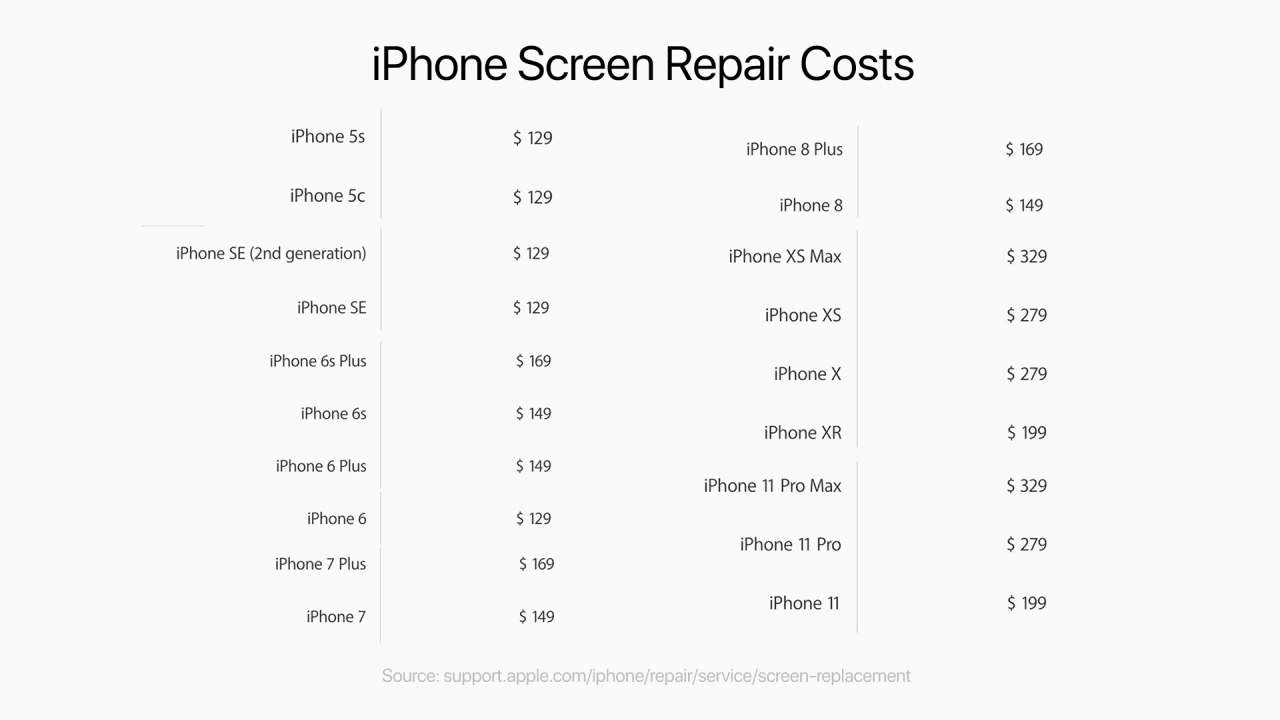
As I checked on Apple’s website, an out-of-warranty screen repair for the iPhone 6 Plus will cost me a whopping US$ 149 (which is around PhP 7,360 when converted). Other than that, Apple’s US$ 29 battery replacement is long overdue. Now, it’s back to its original replacement cost of US$ 79 (around PhP 3,900).
I know what you’re thinking. Third-party repair shops have cheaper services. Still, you’re gonna pay for labor and diagnostics fees. It will also consume much of your time — and just the thought of going out amid the pandemic isn’t safe at all.
Be knowledgeable enough
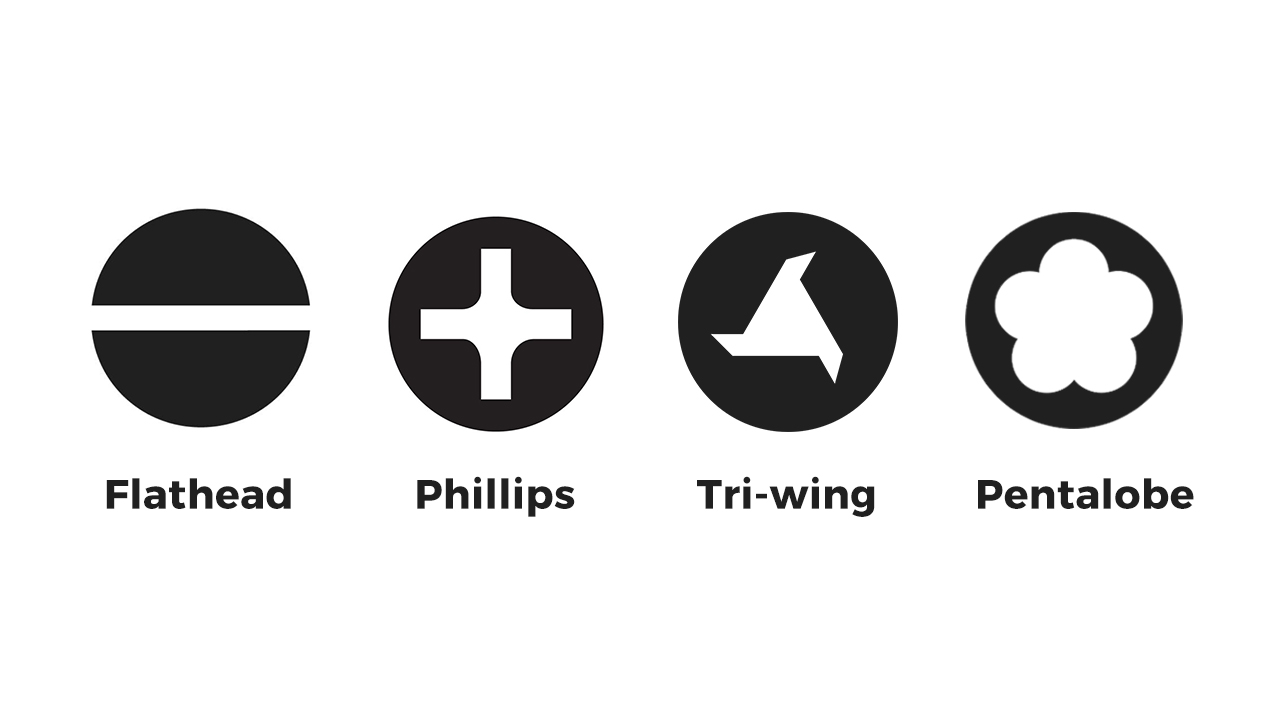
Image by GadgetMatch
DIY repair isn’t for everyone. As for myself, I’m confident enough to proceed as I’ve had numerous experiences repairing most laptops and CPUs. I was able to upgrade the RAM (memory) capacity as well as replacing old HDDs (hard disk drives) to a faster SSD (solid state drive).
Other than that, one should know how tools work. One mistake and you might damage the whole thing. Usual problems start when you don’t know what proper screw head to use — either between the common Phillips and flathead screw heads to a more complex Tri-wing and Pentalobe screws.
Not being vigilant and careful results to stripped screws, making future repairs harder. Other problems arise when you damage flex cables, IC chips, and other phone parts that are all vital in making the phone function — just like organs in the human body.
Finalize your decision
If you’re still holding onto your phone because you’re used to your phone’s ecosystem or you still need a lot of files with you and you don’t want to switch to a slower budget phone, this might be your final call.
But if you don’t actually care switching to a new phone without thinking of the hassle of moving files and several information, it’s not a bad decision. Just pick something that’s practical for you.
Choose the right parts and buy the exact tools needed
Now, it’s time to search for replacement parts. With the ongoing pandemic, it’s advisable to buy from reliable shopping apps. In the Philippines, you can find options on Shopee or Lazada. But if you still want to explore more, AliExpress offers parts for consumers and not just for wholesalers. The only downside is the pricey shipping fee compared to local operators.
As this is an old iPhone, buying third-party parts wasn’t a big deal as long as they’re functional. I was able to buy a replacement battery for just PhP 460 (US$ 9).
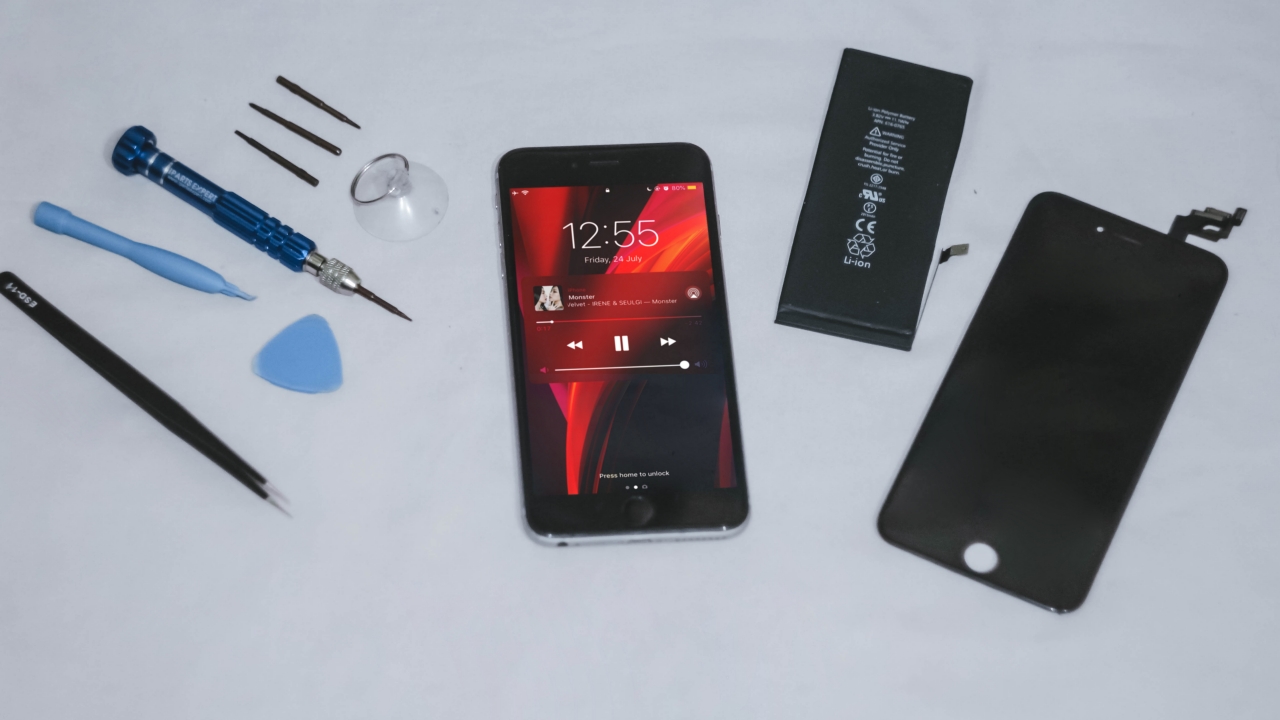
For the display replacement, I was able to purchase one for PhP 1086 (US$ 22). It even came with the right set of tools, from pliers, plastic spudger, suction cup, sim ejector tool, and a screwdriver with 4 detachable magnetic screw options that are commonly used for iPhone repairs.
Note: Most iPhones are assembled in China that’s why parts being sold online are sourced from them. If it looks sketchy to you, try checking customers’ feedback. It has always been my habit whenever I shop online. Luckily, I wasn’t scammed and received the items I ordered without damage.
Let’s get the work done
After receiving the replacement parts, I immediately went on with the repair. It’s common knowledge but just in case you forgot, you need to turn off your phone before repairing to avoid technical failures.
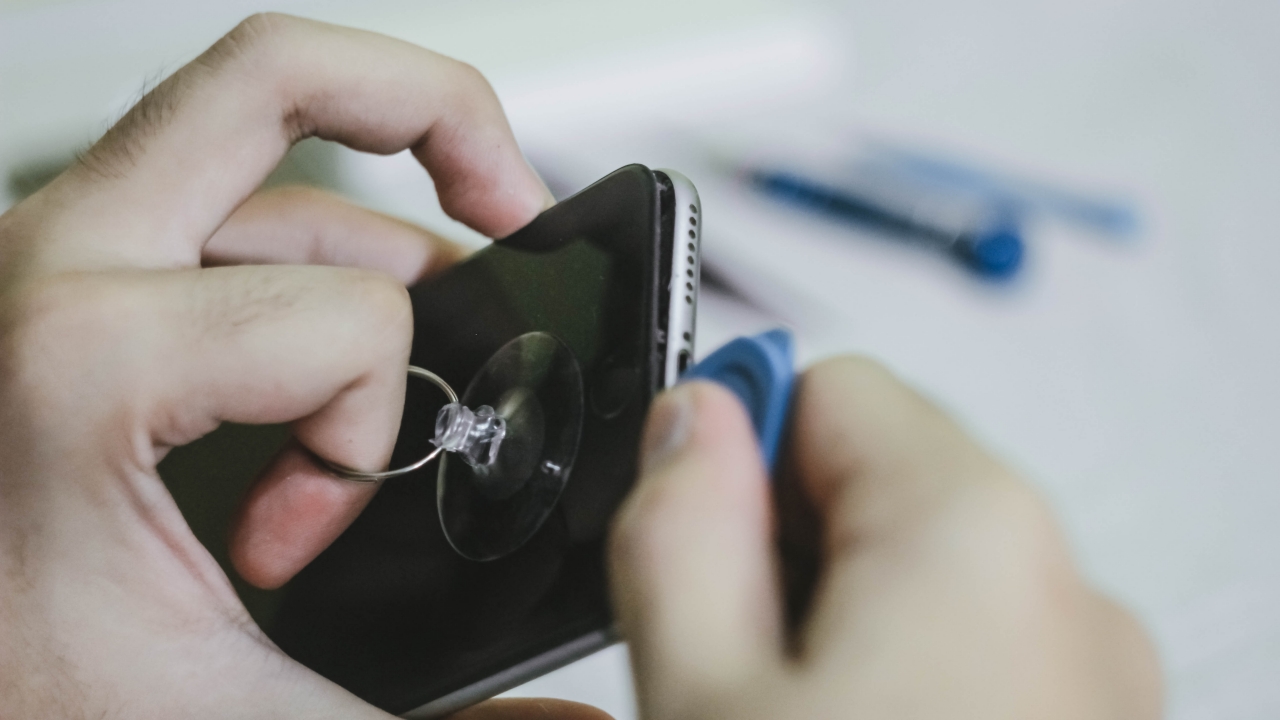
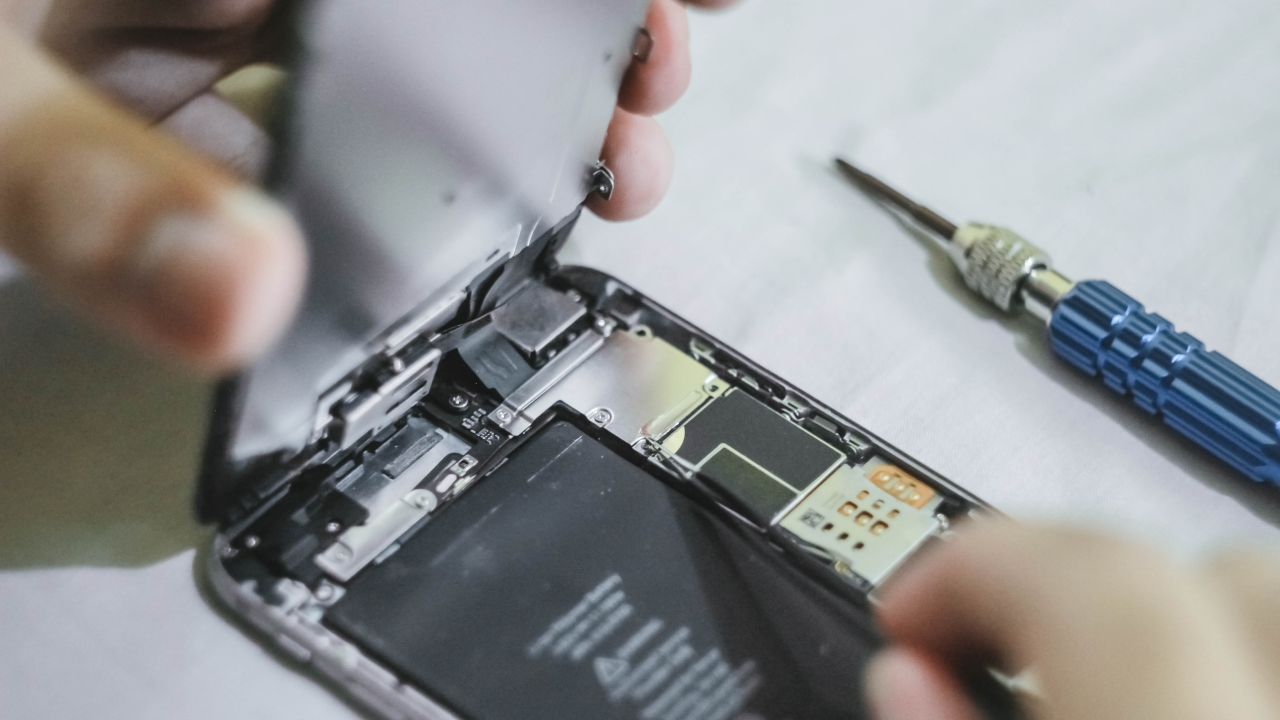
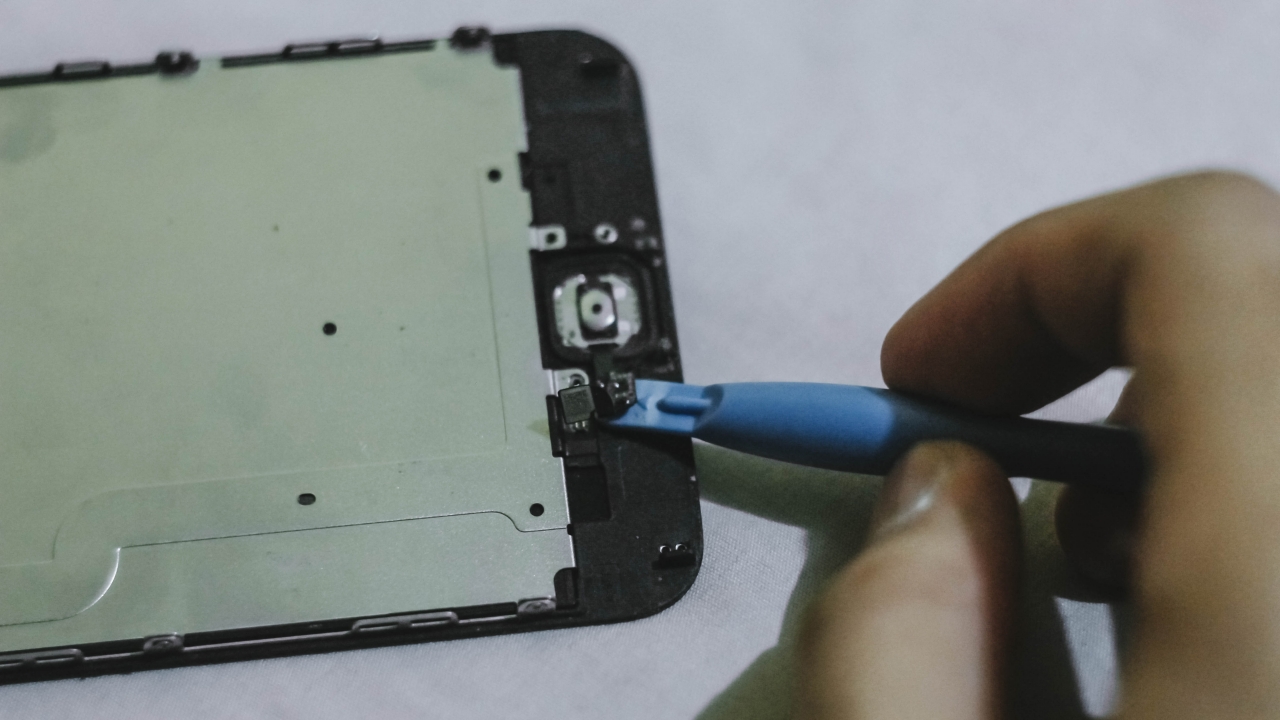
I started by plugging my hot blower into the socket and directly pointed it at my phone so it’s easier for me to separate the display from the aluminum unibody. Then, I started attaching the pentalobe attachment to the screwdriver and removed those two screws found between the Lightning (charging) port.
And with the help of the included suction cup, plastic spudger, and a little bit of my hand’s force, I was able to pry the phone’s display gently.
Not all iPhones are created equal
As my iPhone doesn’t have an IP rating, it doesn’t come with a waterproof gasket on its edges. For the iPhone 7 series and newer, prying the display will be more challenging because of the added adhesive for waterproofing.
Weird Flex but OK
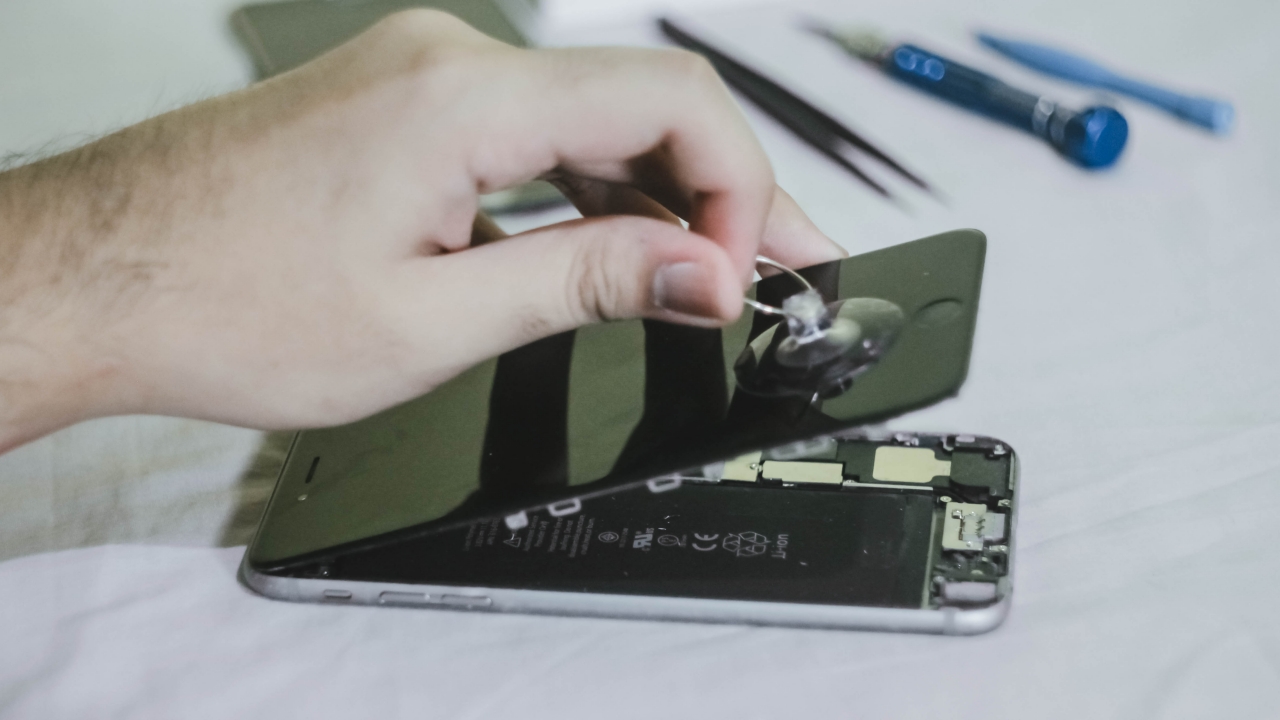
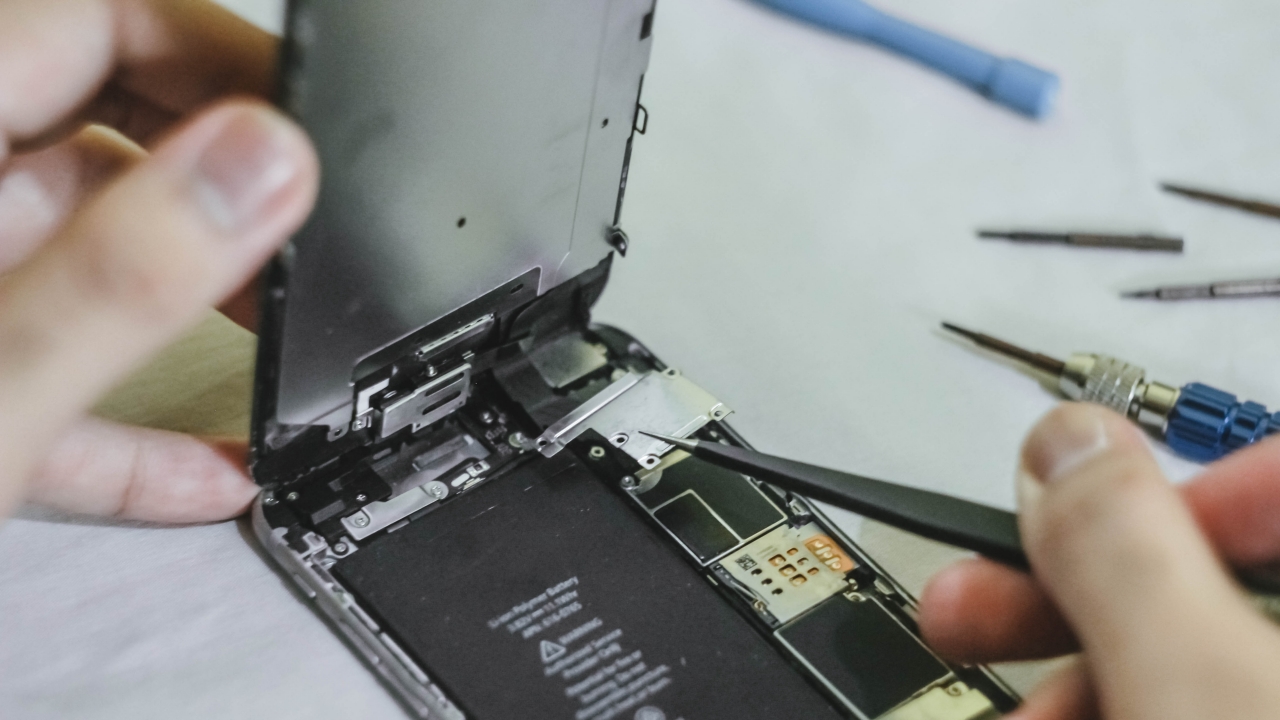
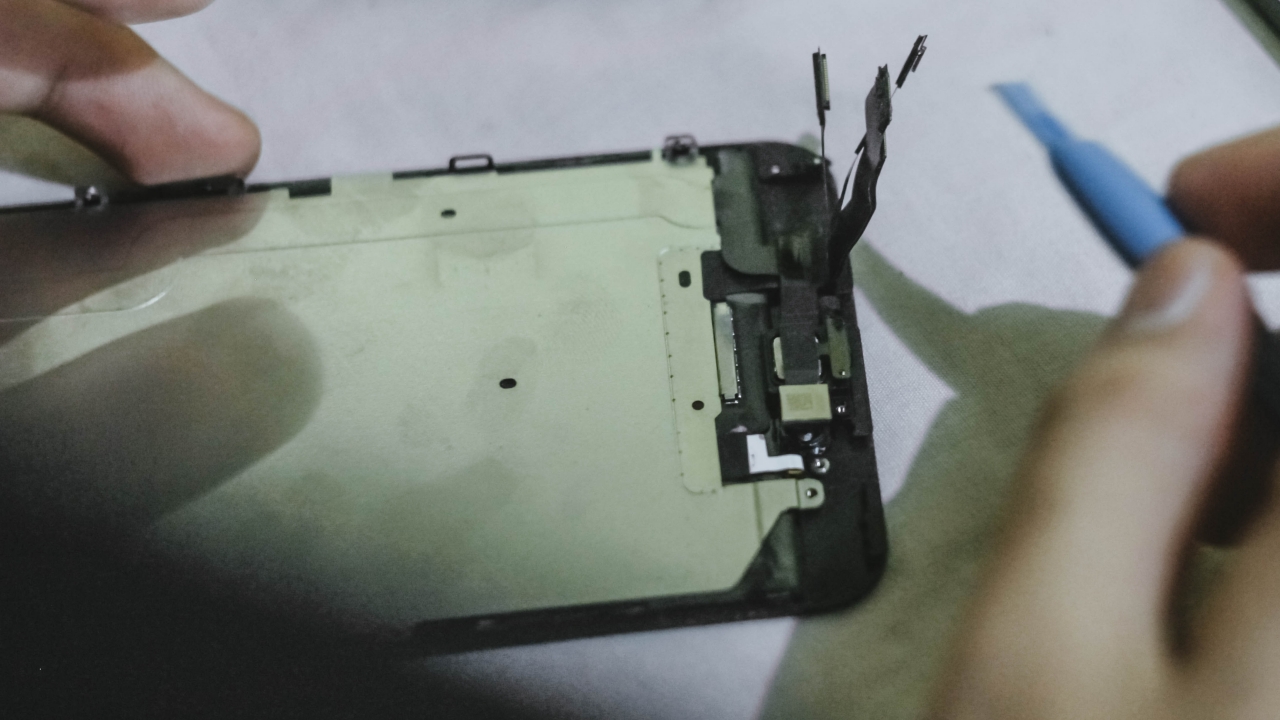
At last! I was able to lift my phone’s display. But don’t get too excited. You should still be careful with those flex cables that are still connected to the phone’s logic board. If you forcefully pull it hard, the worst thing that could happen is you ripping the flex cables — which you don’t want to do with your original display especially if you did not buy a replacement.
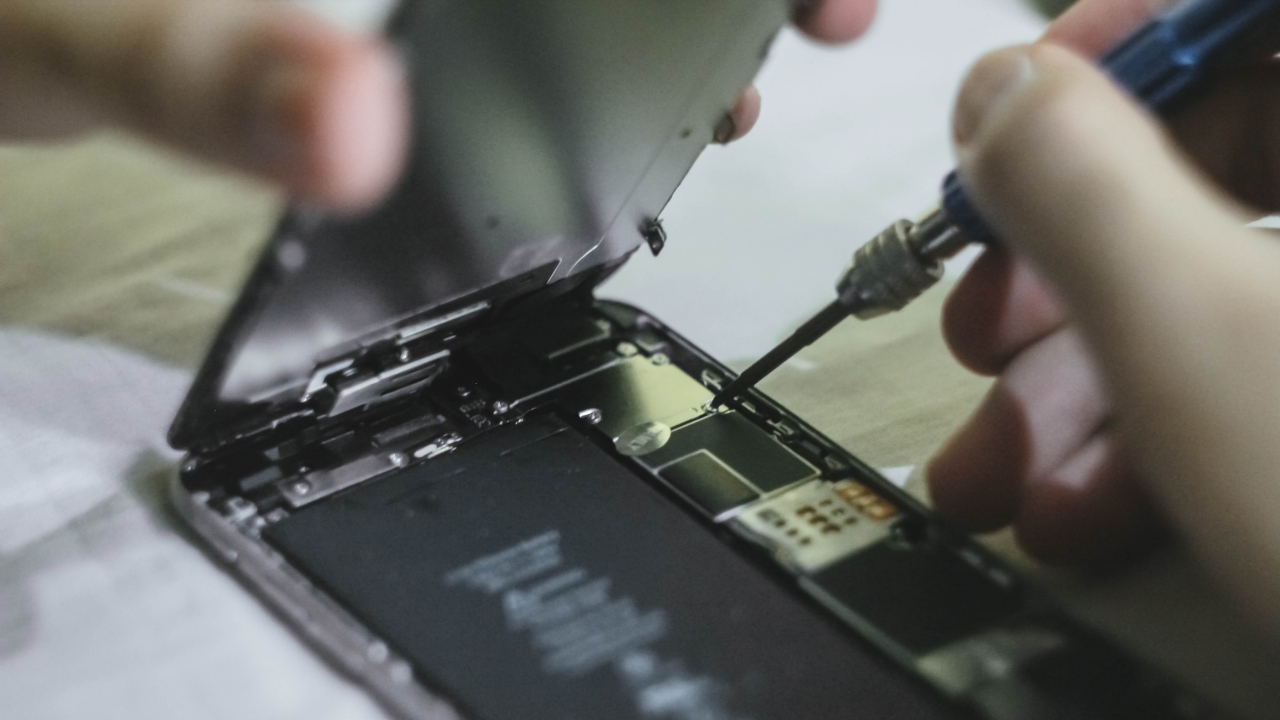
Usually, you only need to use a Phillips screwdriver to unscrew certain parts in the phone. But if you’re gonna disassemble the whole phone, you also need to use flathead and tri-wing screwdrivers to remove everything.
As for this part, I only needed the Phillips head to remove the metal plate that protects the display’s flex cables. Removing it will help me unsnap those cables.
Label your screws accordingly
As mentioned earlier, you might encounter screws that are completely different from one another. This isn’t totally required but it’s a helpful way to distinguish which screw parts go to which hole since not all screws have the same length and type.
You can do this by placing a piece of tape with numbers/labels on top of your working space and place them in an order you will remember. Things are always better when they’re labeled. 😉
Don’t use metal pliers when unsnapping cables
Be cautious or you might snap
You can use pliers to remove metal parts that aren’t electrically-charged. Still, you should be cautious as you can’t use metal pliers when unsnapping cables inside or it might damage the IC chips found on the logic board and will badly affect the phone. Doing so might not only damage your phone, but it can also make you snap hard.
Best way is to use a plastic spudger to prevent metal contacts from sparking. As JerryRigEverything always says in his videos, unsnapping them is as easy as removing LEGO bricks stacked on top of one another.
Battery removal is tedious but satisfying
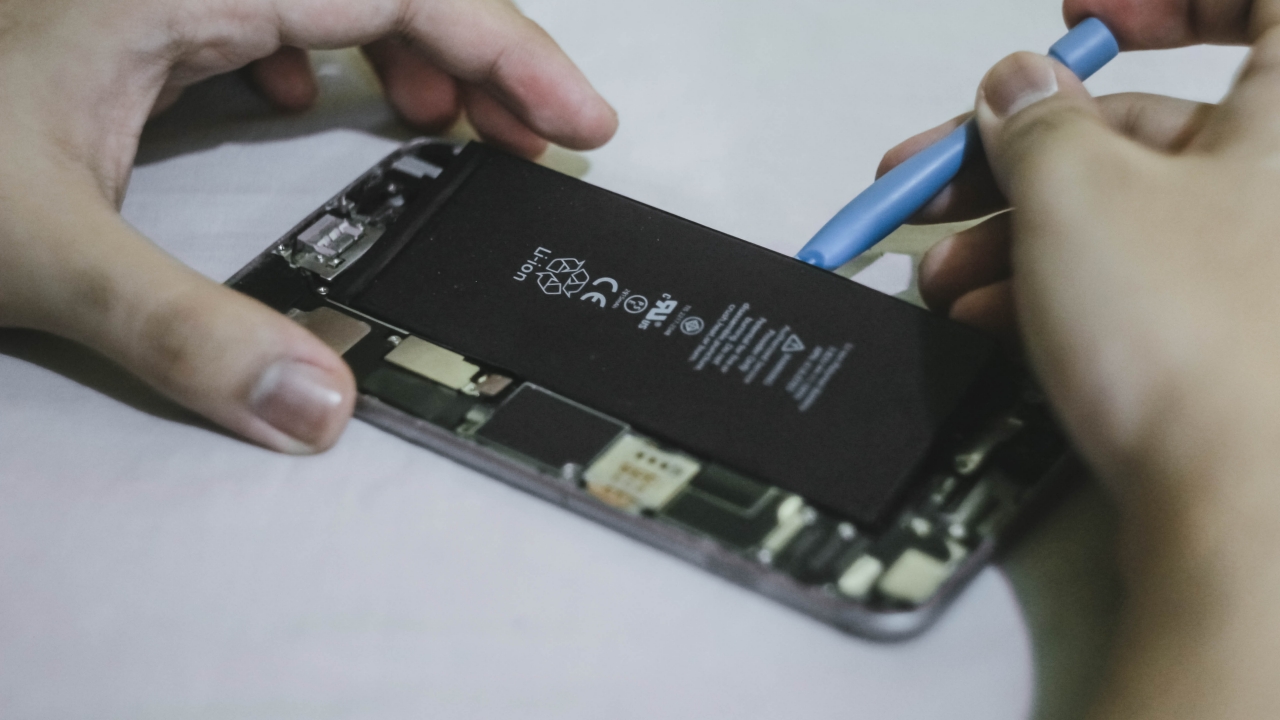
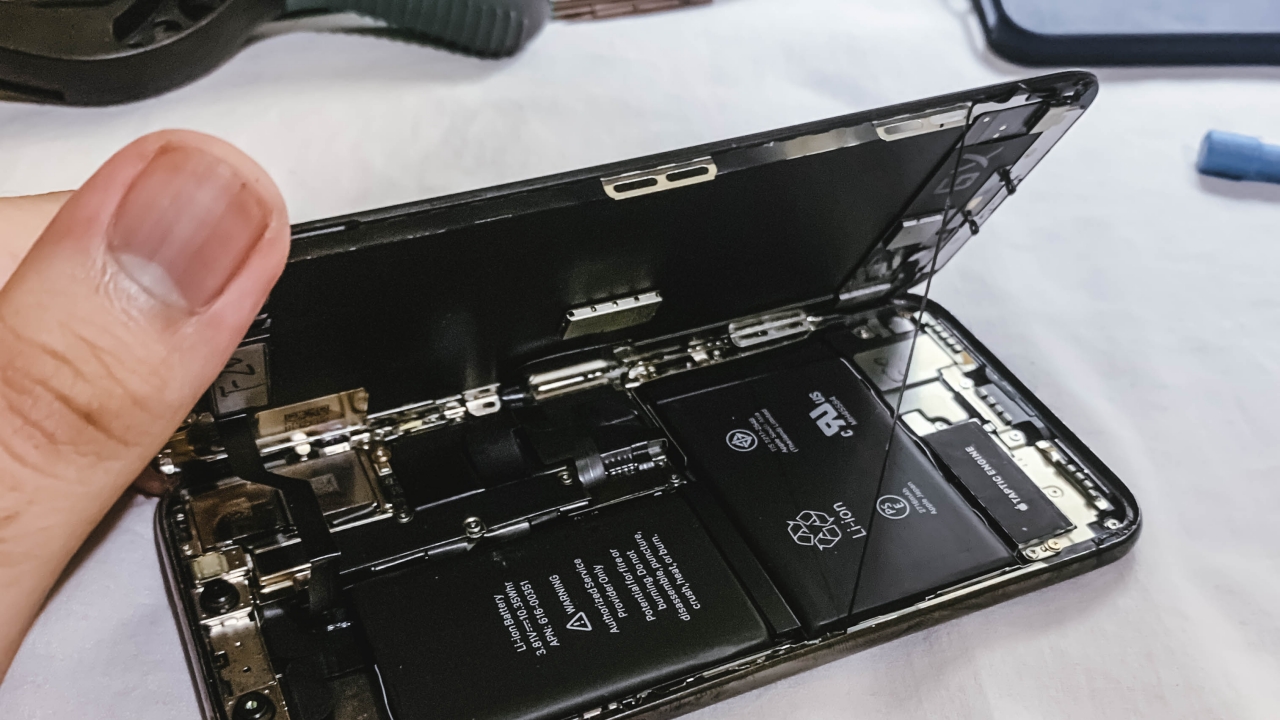
Usually, your iPhone’s battery has plenty of adhesive beneath it in order for it to stick even when you’re on the move. But before prying it up, you should remove the metal plate housing first on the lower right side. After doing so, unsnap the cables just like how you did with the display’s flex cables.
If you can’t find those black pull tabs that will easily help you remove the battery adhesive, you should grab your spudger and slowly lift the battery until you see the white adhesive and pull it as hard as you can. Once all the adhesive is pulled out, it’s safe to say you succeeded with the battery removal.
Start replacing those parts
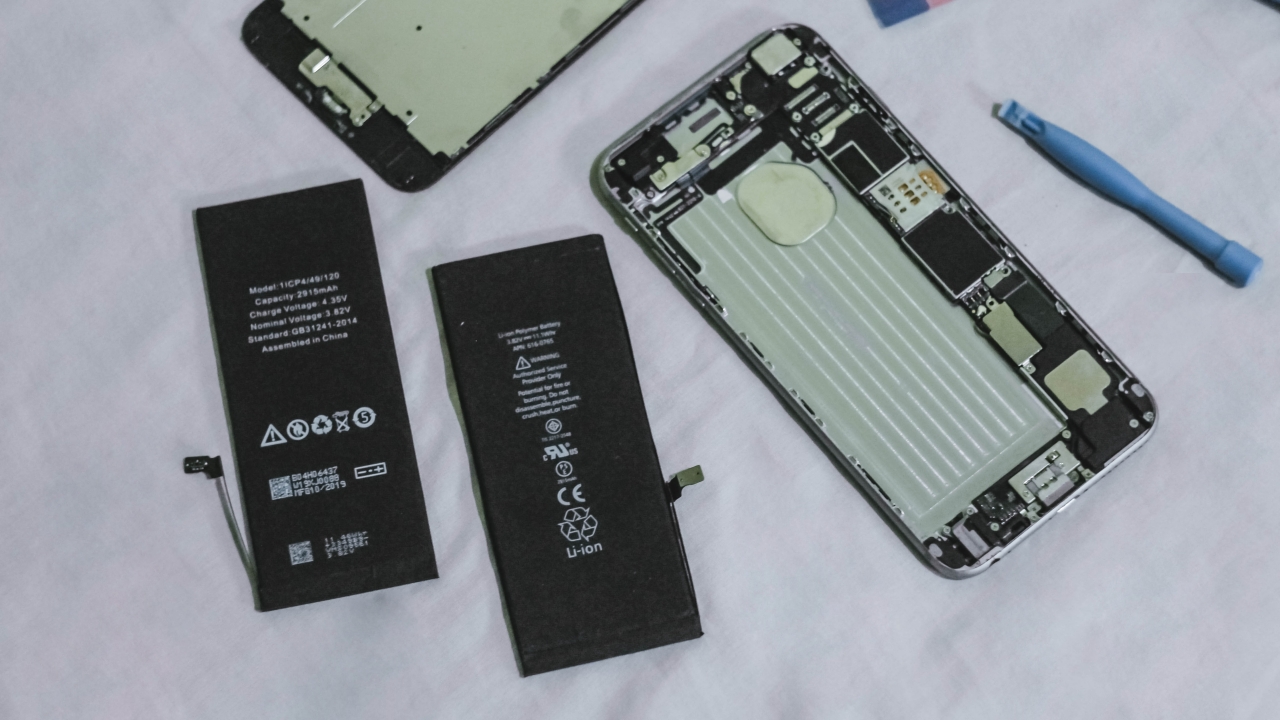
Unlike replacing your ex, replacing your phone’s parts is just a backward process. After getting the replacement parts ready, you should store the old parts in a safe place since they are still products that are electrically-charged and include chemicals that might pose a risk of fire hazard when not handled and stored in a closed container.
Remember to dispose technological devices and parts properly. Keep it out of reach children and pets as well.
Putting back what’s left

Unlike putting your trust back in another person, putting all the cables, plates, and screws back in place is easier especially when you know how and where to place them — that’s why labeling them is more important than you thought.
Some iPhone parts are designed for a single device only
Display, backplate, battery, cameras, microphones, speakers, and vibration motor can all be replaced. But for parts that require biometrics, there’s a 1:1 equivalent for every iPhone. If you’re proceeding with the display replacement of your old iPhone, you need to remember that it doesn’t come with a TouchID replacement. That iPhone part is made for a single device only. You need to transfer that part from your original display to the replacement.
If you break your TouchID (or even FaceID in newer iPhones), you can’t have replacement parts for them. Breaking these precious parts will result into complete biometrics malfunction.
Fun fact: The best way to know whether an iPhone was repaired is by checking the True Tone Display setting. If it doesn’t show that setting, your iPhone’s display is most likely replaced. Even original iPhone display replacements are not exceptions to Apple’s repair mishap.
It wasn’t a perfect repair
When you’re not careful, you can immediately break something — whether it’s someone’s heart or just the flex cables in your display.
I overdid the unsnapping of the LCD backplate’s flex cable that connects the TouchID. Luckily, the fingerprint sensor is still in its original shape that I only needed to order a new LCD backplate for PhP 261 (US$ 5). It came two weeks after because it was directly sourced from China.
But it was still a successful repair

After waiting for weeks to get my LCD backplate replacement, I successfully repaired my old iPhone 6 Plus — all with working buttons, a better touch input, and of course, the TouchID works as well. With the faulty battery, it usually lasted for around two to three hours but now, it lasts for at least a day of moderate to heavy use. Standby time lasts a whole week.
The original cost of repair was around US$ 228 (or more than PhP 10,000) — where you can find and buy a brand new budget smartphone instead. Thinking about the money I saved actually motivated me to push this through. Combining the parts I paid for (including their shipping fees), that’s a total of just PhP 1807 (US$ 36) just in case you forgot to do the math.
BONUS: I also repaired my friend’s iPhone X
After sharing my story on how I successfully repaired my old iPhone 6 Plus to my friends, I was dared to repair an iPhone X. I took it as another iPhone repair challenge.
At first, I thought the logic board was dead. Not until I tried charging it wirelessly. Eventually, it powered on — which made me think that only the charging port was defective as it was submerged in water.
The repair process is completely different — from the placement of display flex cables, all the way to the complete removal of the battery, logic board, Taptic Engine, and the cameras as the charging port hides beneath those parts. The best thing is that, the Lightning port replacement plus waterproofing and battery adhesive only cost around PhP 916 (around US$ 19). It will cost more if it was brought to a service center considering they will run several diagnostic tests that add up to its total repair cost.

Making the long story short, it was another successful iPhone repair! With little background and experience to phone repairs, I was astounded that I can replace phone parts even without needing to go out and head to a service center.


India
TECNO’s POVA 8 5G is both futuristic and future-ready
8000mAh battery, Sony LYTIA 600 camera, Alive Matrix display, and more
Four months after the POVA Curve 2 5G, TECNO adds the POVA 8 5G to their performance-focused arsenal.
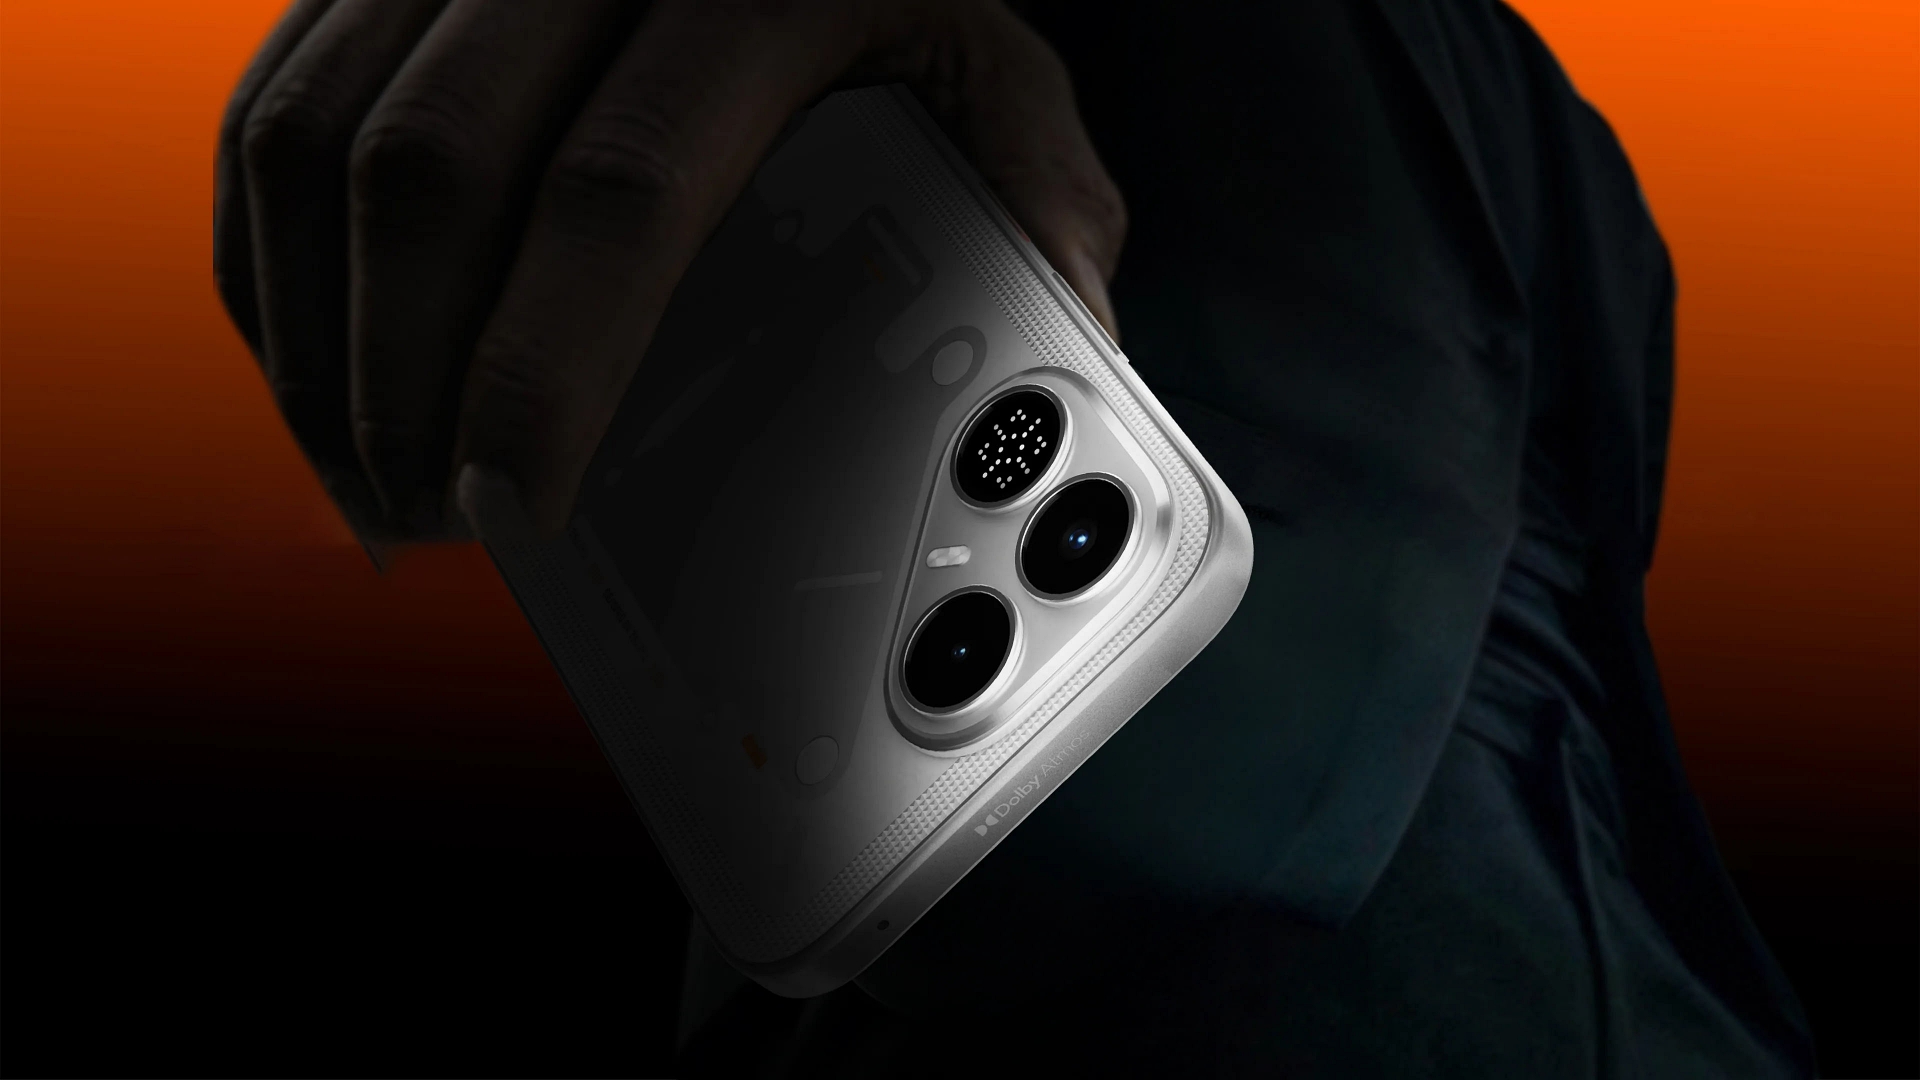
Futuristic vibe
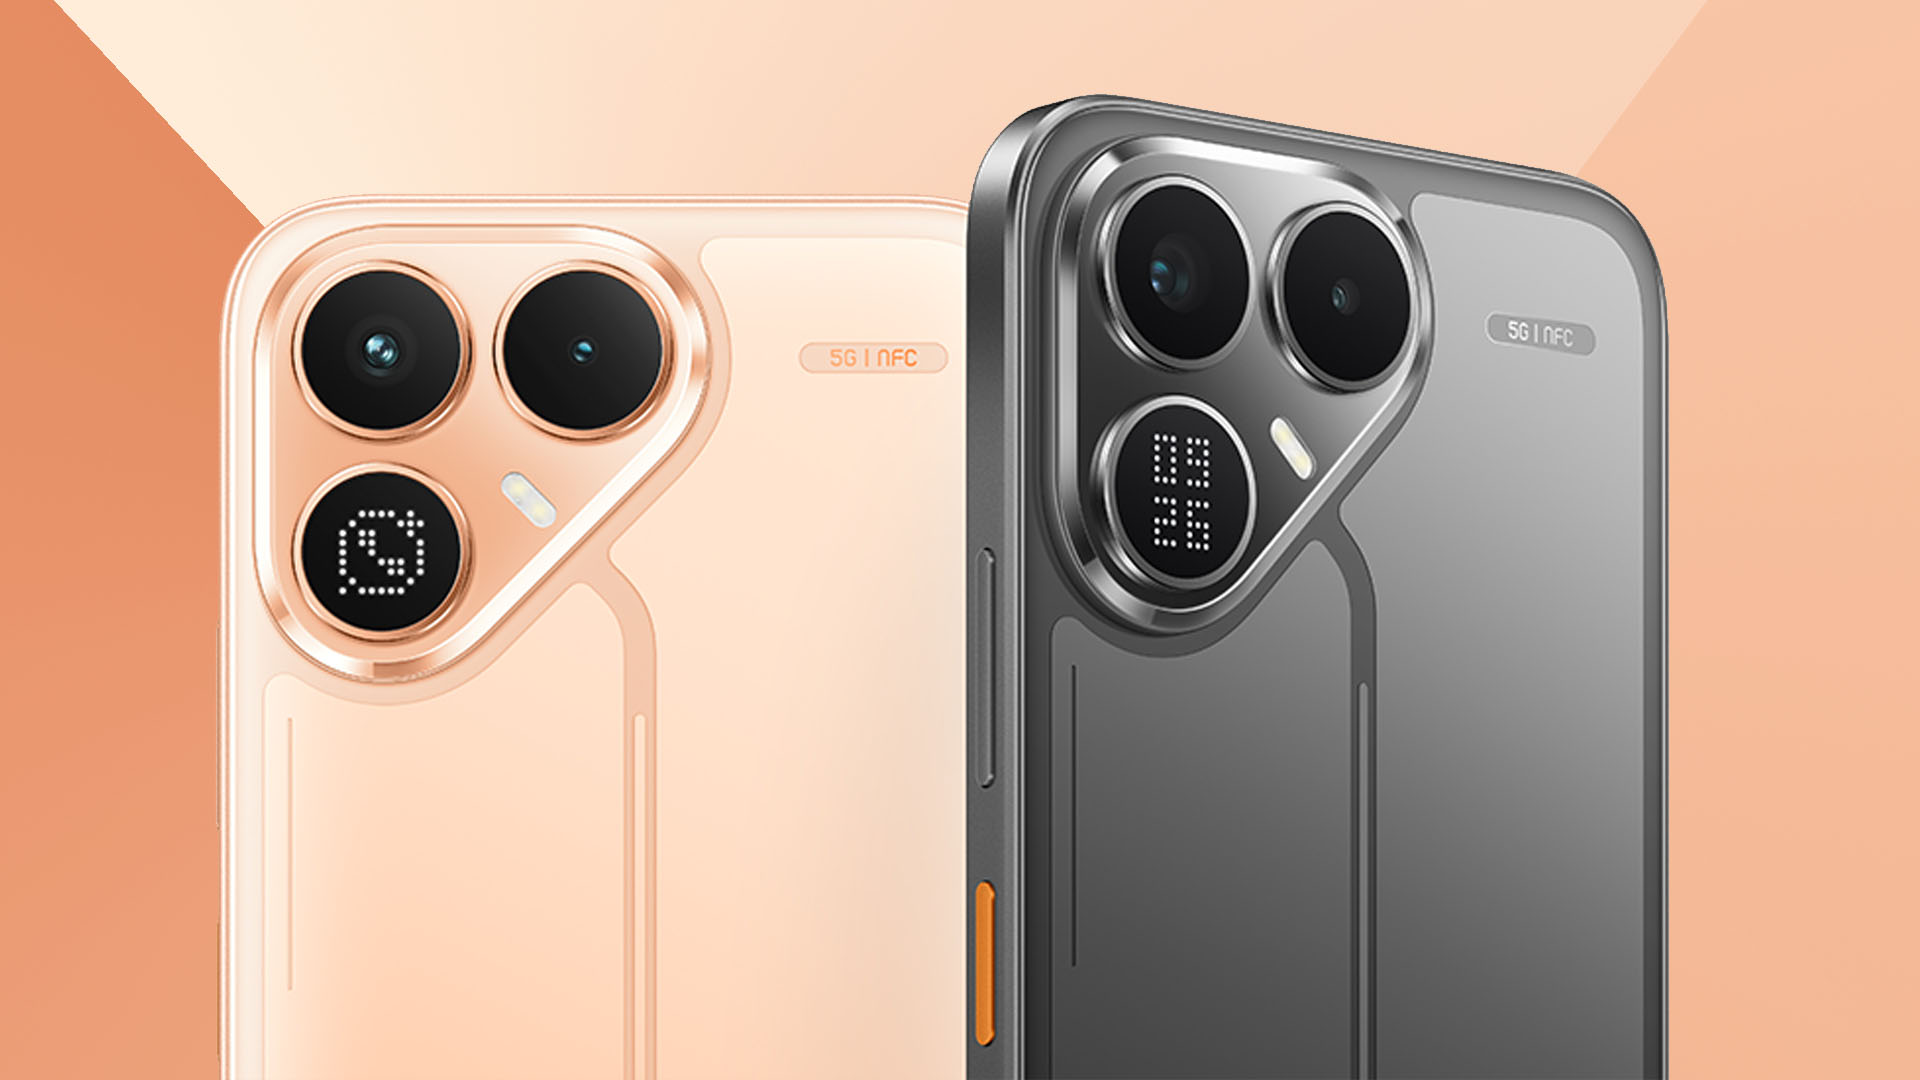
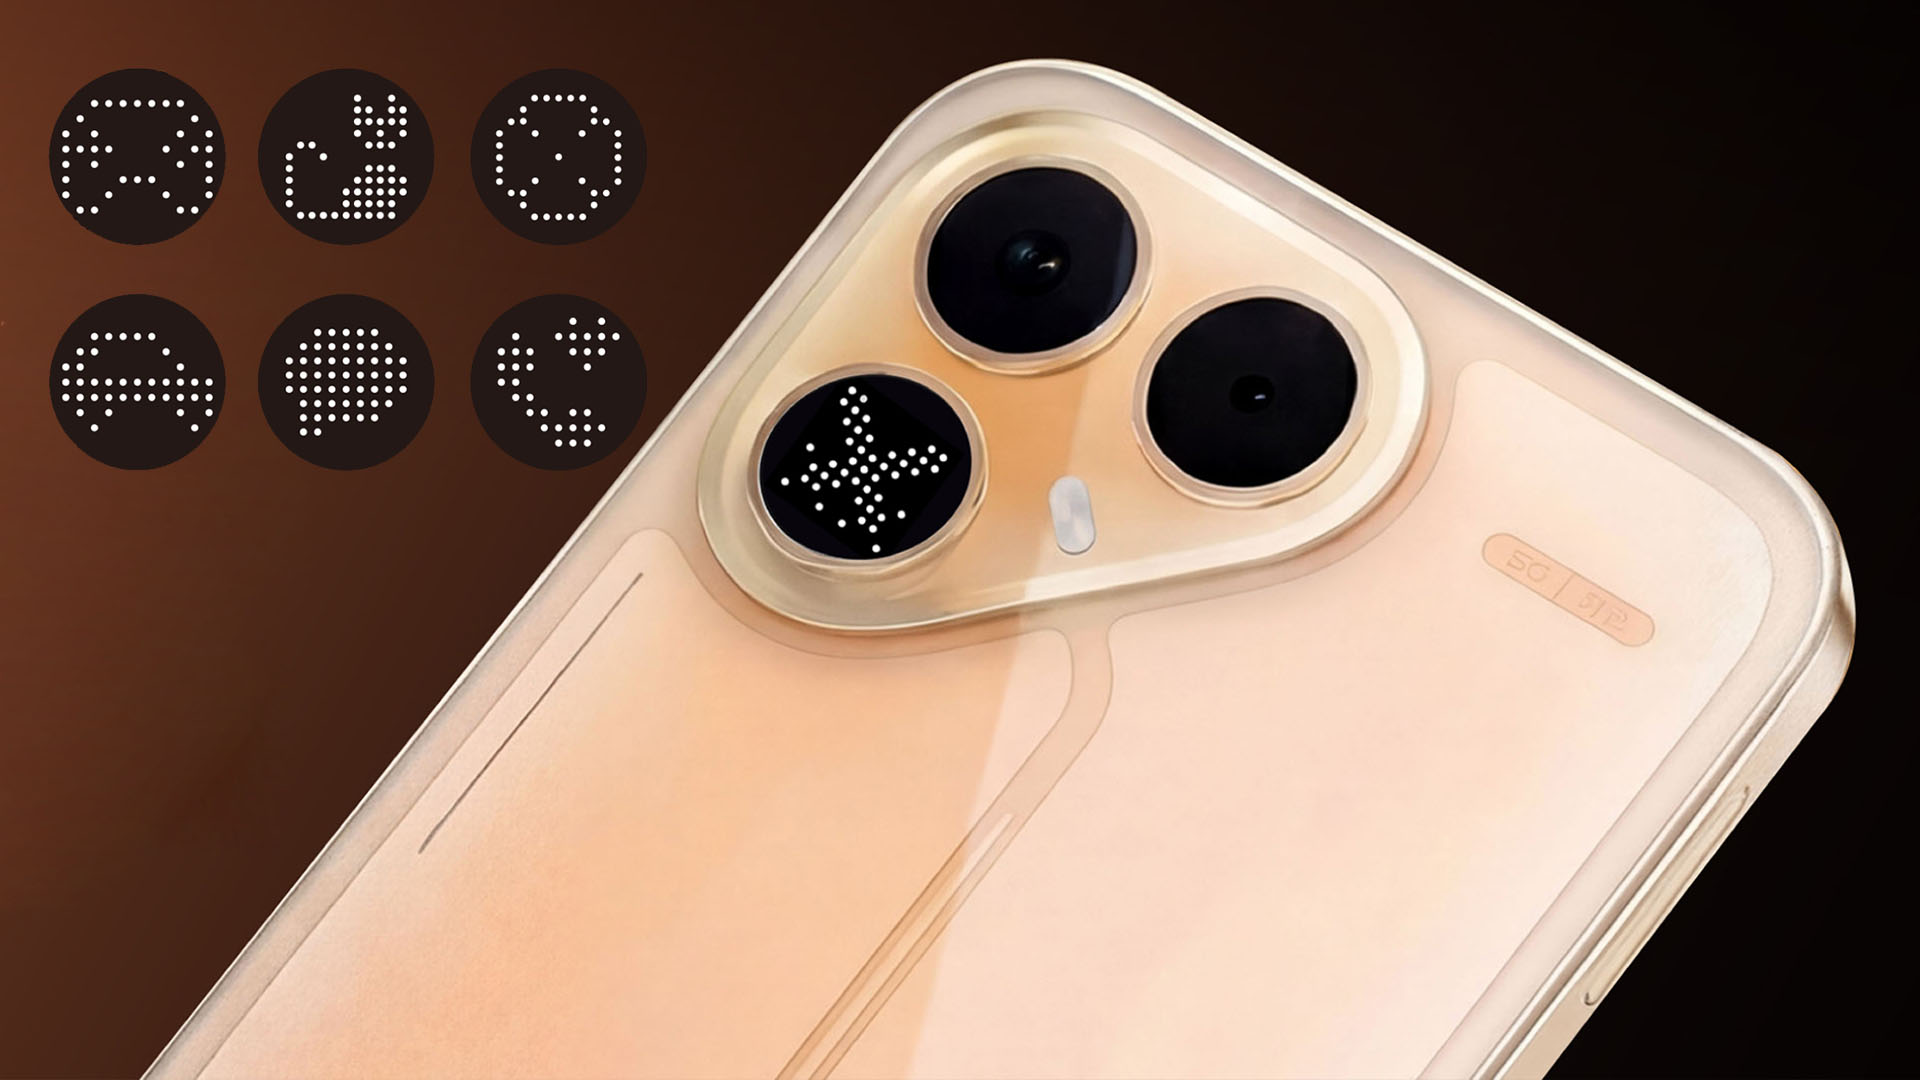
TECNO’s POVA 8 5G continues the series’ signature sci-fi-inspired design language. The latest smartphone features sharp geometric elements and a semi-transparent rear panel.
Graphics by Vincenz Lee | GadgetMatch
One of its standout features is none other than the new Alive Matrix Display. It’s a customizable light panel on the back that can display 49 pre-loaded lighting effects for incoming calls, notifications, charging status, gaming sessions, and more. Prospective users can also personalize scenarios to match their style and could actually store many more customized effects aside from the pre-loaded ones.
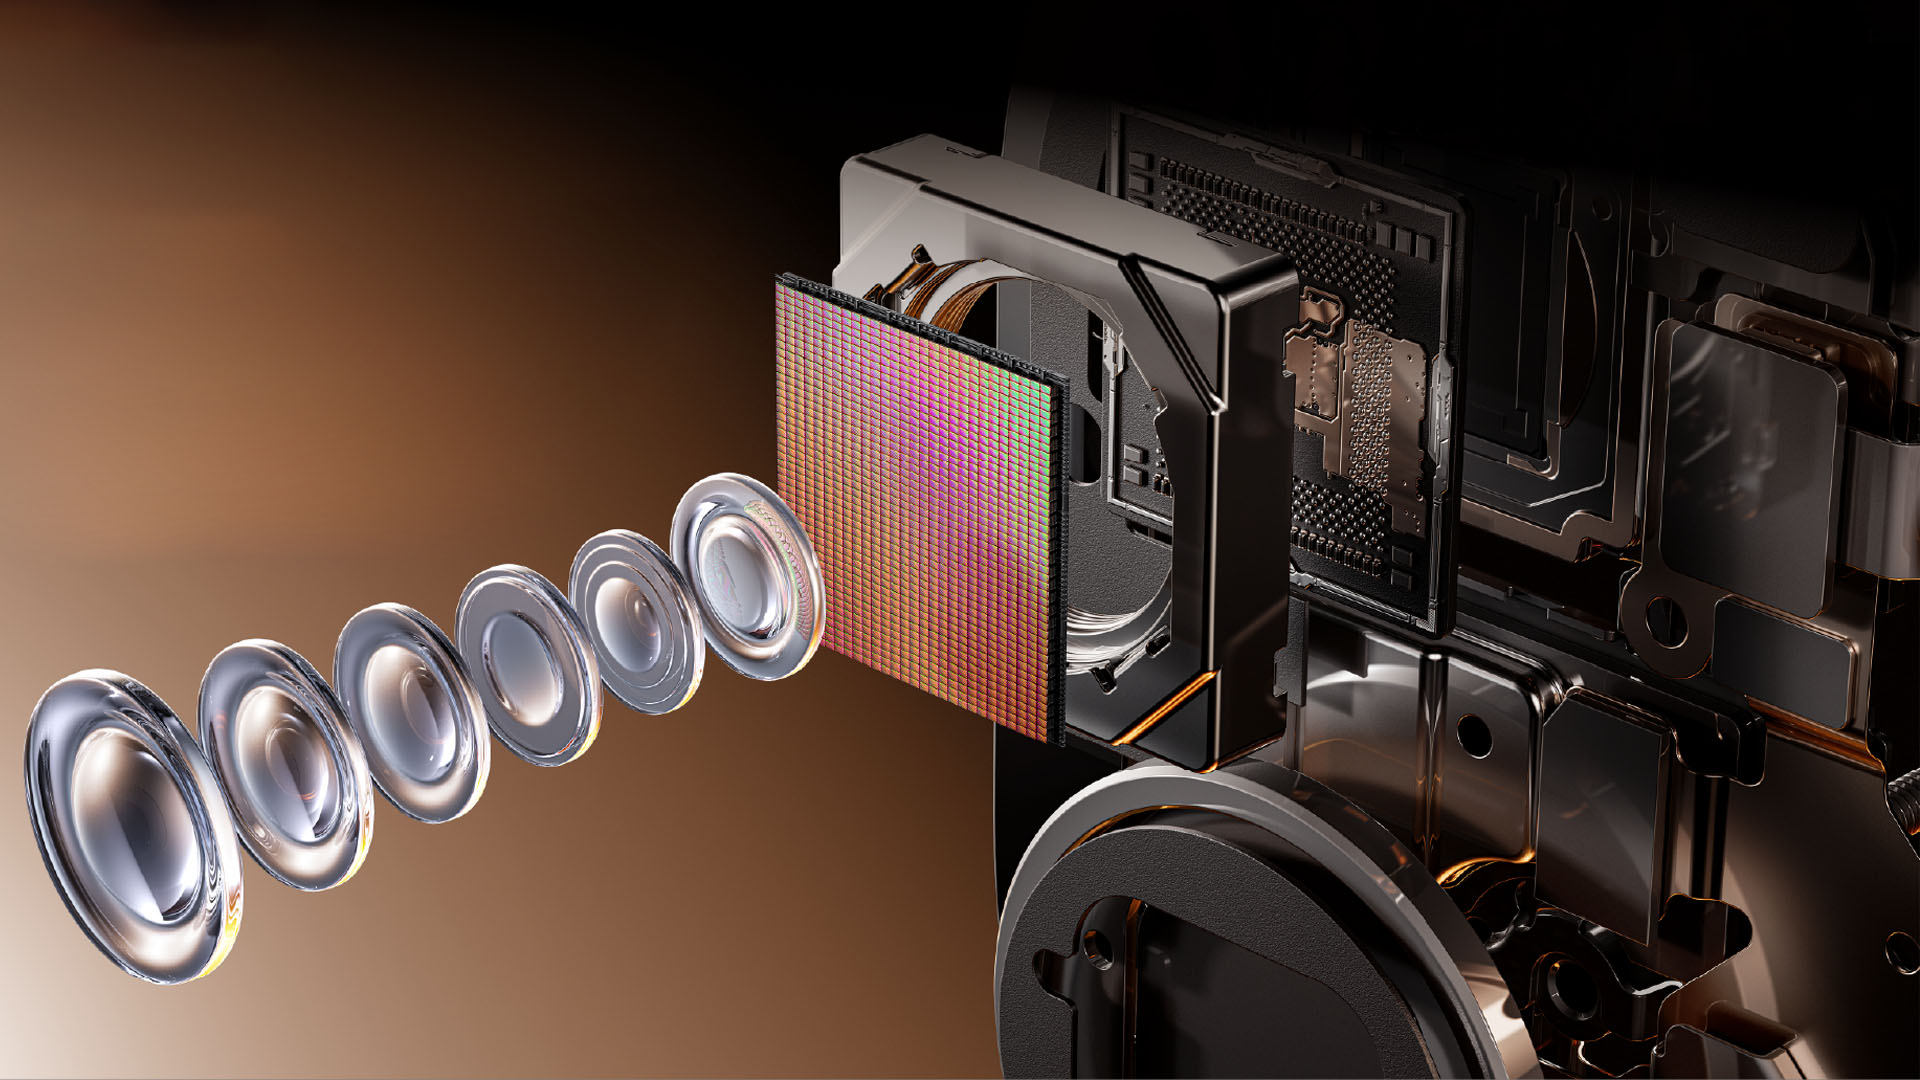
Beside that LED display lies the 50MP main rear camera based on Sony’s LYTIA 600 (or LYT-600) sensor. The said sensor offers improved light capture for brighter and more detailed photos. It also supports 2x lossless zoom. Up front, you’ll get a 13MP front-facing shooter.
Graphics by Vincenz Lee | GadgetMatch
Powering the device is MediaTek’s Dimensity 7100 SoC. That’s paired together with TECNO’s in-house G1 Signal Enhancement Chip and SE1 Wi-Fi Enhancement Chip — making it a triple chipset smartphone.
TECNO says these chips help improve connectivity in challenging environments such as elevators and basements while boosting Wi-Fi reception.
The phone also features a 144Hz display with TÜV Rheinland Low Blue Light Certification and military-grade durability.
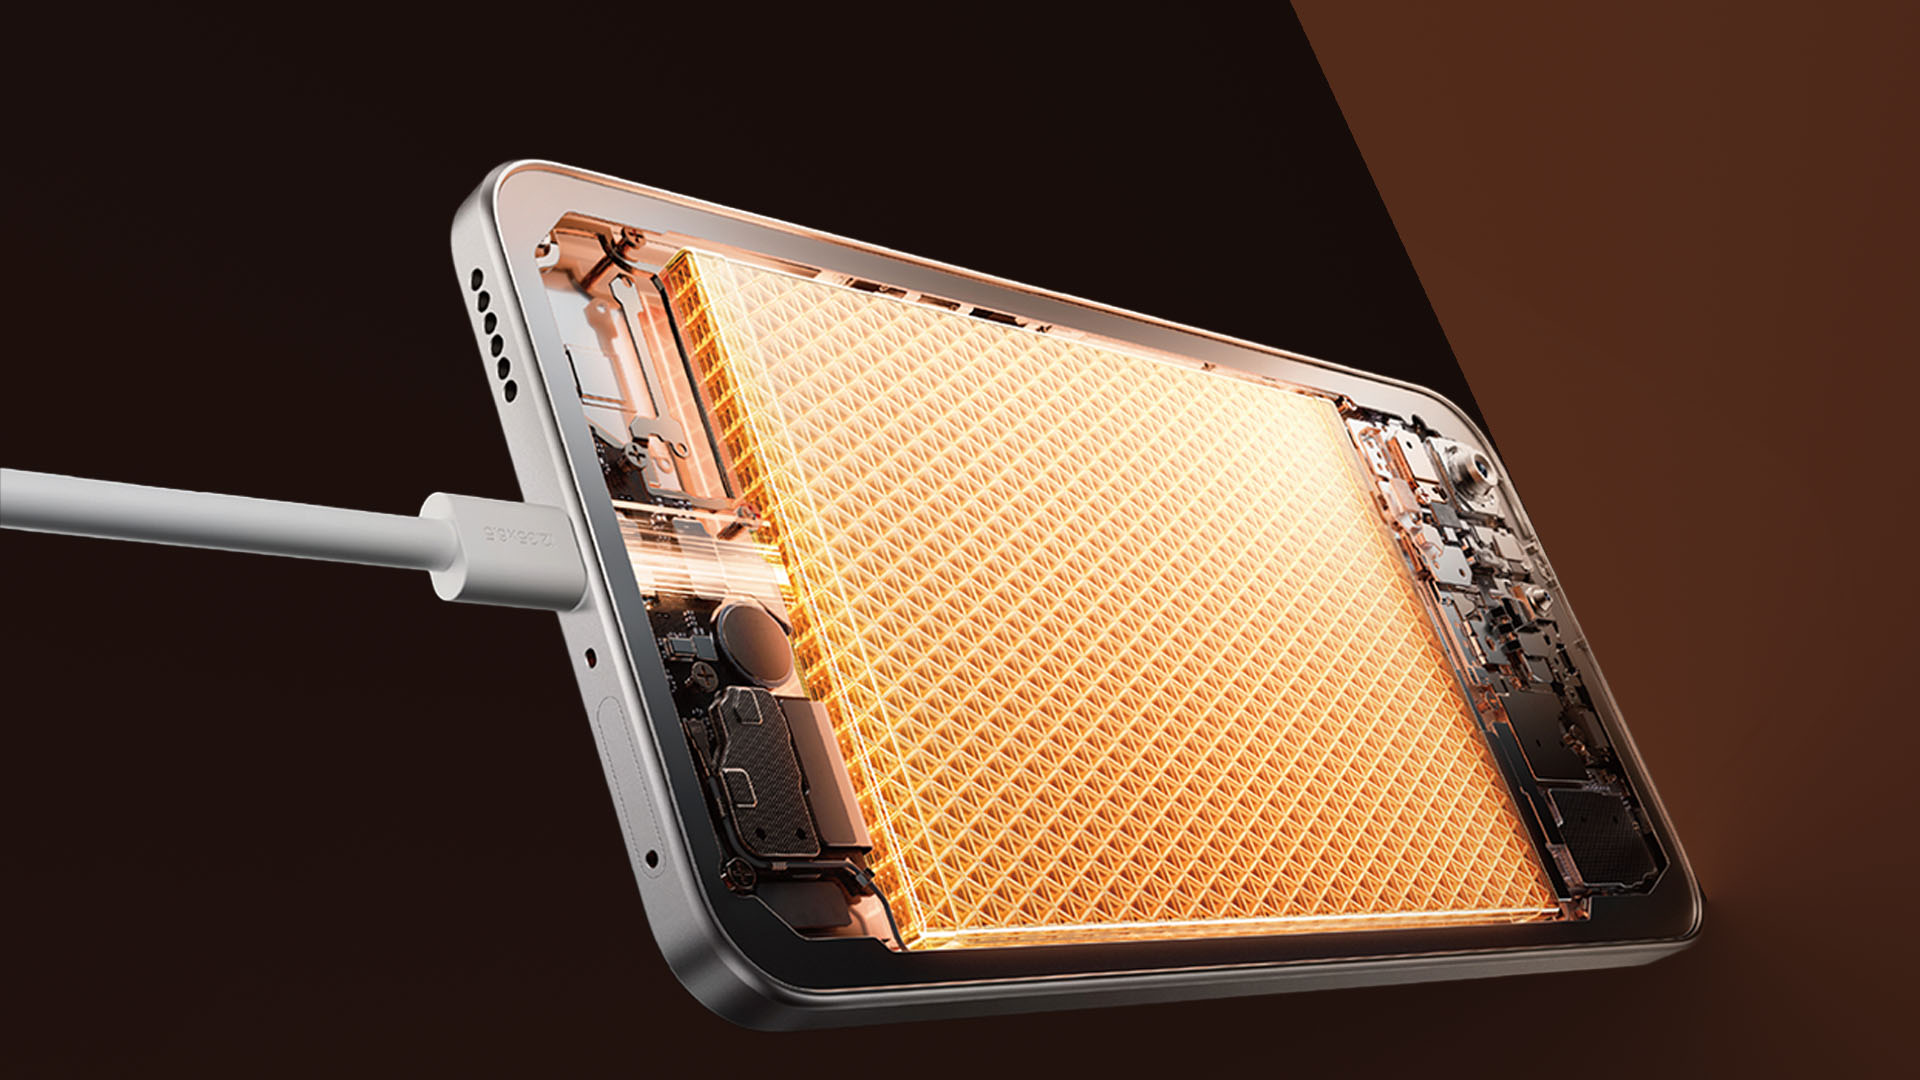
Last but definitely not the least, its 8000mAh battery that can last as much as two days. For some measure, TECNO says the phone can last up to 85+ hours of music playback, 29+ hours of YouTube streaming, 26+ hours of WhatsApp, or 14+ hours of playing Mobile Legends: Bang Bang (MLBB).
Future-ready
Aside from the beastly battery packed inside, TECNO is also bringing several practical AI tools to the POVA 8 5G.
Among them is AI YouTube Summary. This turns lengthy videos into concise notes with key points and timestamps. The device also features AI-powered noise cancellation that helps isolate the speaker’s voice during calls, recordings, and meetings.
Graphics by Vincenz Lee | GadgetMatch
For photography, AI LightMaster 2.0 can remove unwanted reflections, lens flare, and shadows. The phone also supports uploading Live Photos directly to Instagram as Boomerang.
In select markets, users can even access AI Health features that estimate metrics such as heart rate, blood oxygen levels, and respiration through facial scanning technology.
Graphics by Vincenz Lee | GadgetMatch
Further solidifying its future readiness, TECNO promises two major Android OS upgrades and three years of security updates.
The company is also bundling three years of FREE 256GB cloud storage for POVA 8 5G users. Eligible markets can also receive a 3-month Google AI Plus trial which includes 2TB of cloud storage.
Pricing and Availability
The TECNO POVA 8 5G debuts first in India and is available in 16-Bit White, Terminal Green, and Plasma Orange colorways.
Specific pricing and availability in global markets are yet to follow along these four color choices: Arc White, Graphite Black, Echo Green, and Helios Orange.
realme is gearing up to shake up the budget smartphone segment with the upcoming launch of the realme C100 Series on June 18.
realme will unveil the series, along with its official pricing and availability, through a livestream on its Facebook page.
Built around the tagline “One Charge, Endless Power,” the new lineup heavily champions two essential budget smartphone features: massive battery life and ruggedness.
The latest entry to the budget segment realme C series comes in the C100 and C100i variants.
The realme C100 comes with an 8,000mAh Titan Battery for up to one and a half days of uninterrupted usage.
With optimizations, the phone is also expected to retain up to 80% battery health after seven years, making it a sensible purchase for budget-conscious consumers.
This launches alongside the realme C100i, its smaller sibling with a 7,000mAh battery of its own and up to six yeats of optimal health.
Beyond the power, realme is introducing its proprietary ArmorShell Protection to the series.
Both smartphones have successfully cleared MIL-STD-810H military-grade shock resistance testing, ensuring they can survive drops from up to two meters.
The standard realme C100 goes a step further in the durability department by boasting an impressive IP69 Pro rating for dust, submersion, and high-pressure, high-temperature water jet resistance.
On the other hand, the C100i has an ample IP64 splash-resistance rating.
The realme C100 will debut in three distinct colorways: Glory White, Endurance Brown, and Victory Purple.
All three variants utilize realme’s new Blooming Design, which uses micron-level sculpting to create a premium shimmer finish that dynamically shifts whenever it catches the light.
The C100i will be available in Dawn Purple and Dusk Gray.
Before I learned when the HONOR Magic V6 review embargo would lift, I had already become aware of the possibility of upcoming wide foldables.
The idea immediately caught my attention because it seemed to address one of the few remaining questions I have about today’s book-style foldables.
They’re excellent productivity devices. The larger, almost square-like display is perfect for multitasking, reading, editing documents, and working with multiple apps at once.
But much of the content we consume today isn’t square.
It’s vertical: Reels. Shorts. TikToks. Fancams.
Or it’s widescreen: YouTube videos. Movies. TV shows.
Book-style foldables can absolutely play these types of content. But when unfolded, they don’t always make the best use of the additional screen space because of their aspect ratio.
That thought lingered in the back of my mind while testing the HONOR Magic V6.
What surprised me was that despite that lingering question, the Magic V6 still made a compelling case for the current form factor. In fact, if the goal is to create a foldable that feels as close as possible to a regular flagship smartphone while still unfolding into a tablet, HONOR may have come closer than anyone else.
The HONOR Magic V6 is priced at RM 7,699 in Malaysia, with pre-orders running from June 4 to 11, 2026 and bundled gifts worth up to RM 3,797.
That’s flagship foldable money. Fortunately, the Magic V6 spends very little time reminding you that it’s a foldable and most of its time convincing you it’s simply a very good smartphone.
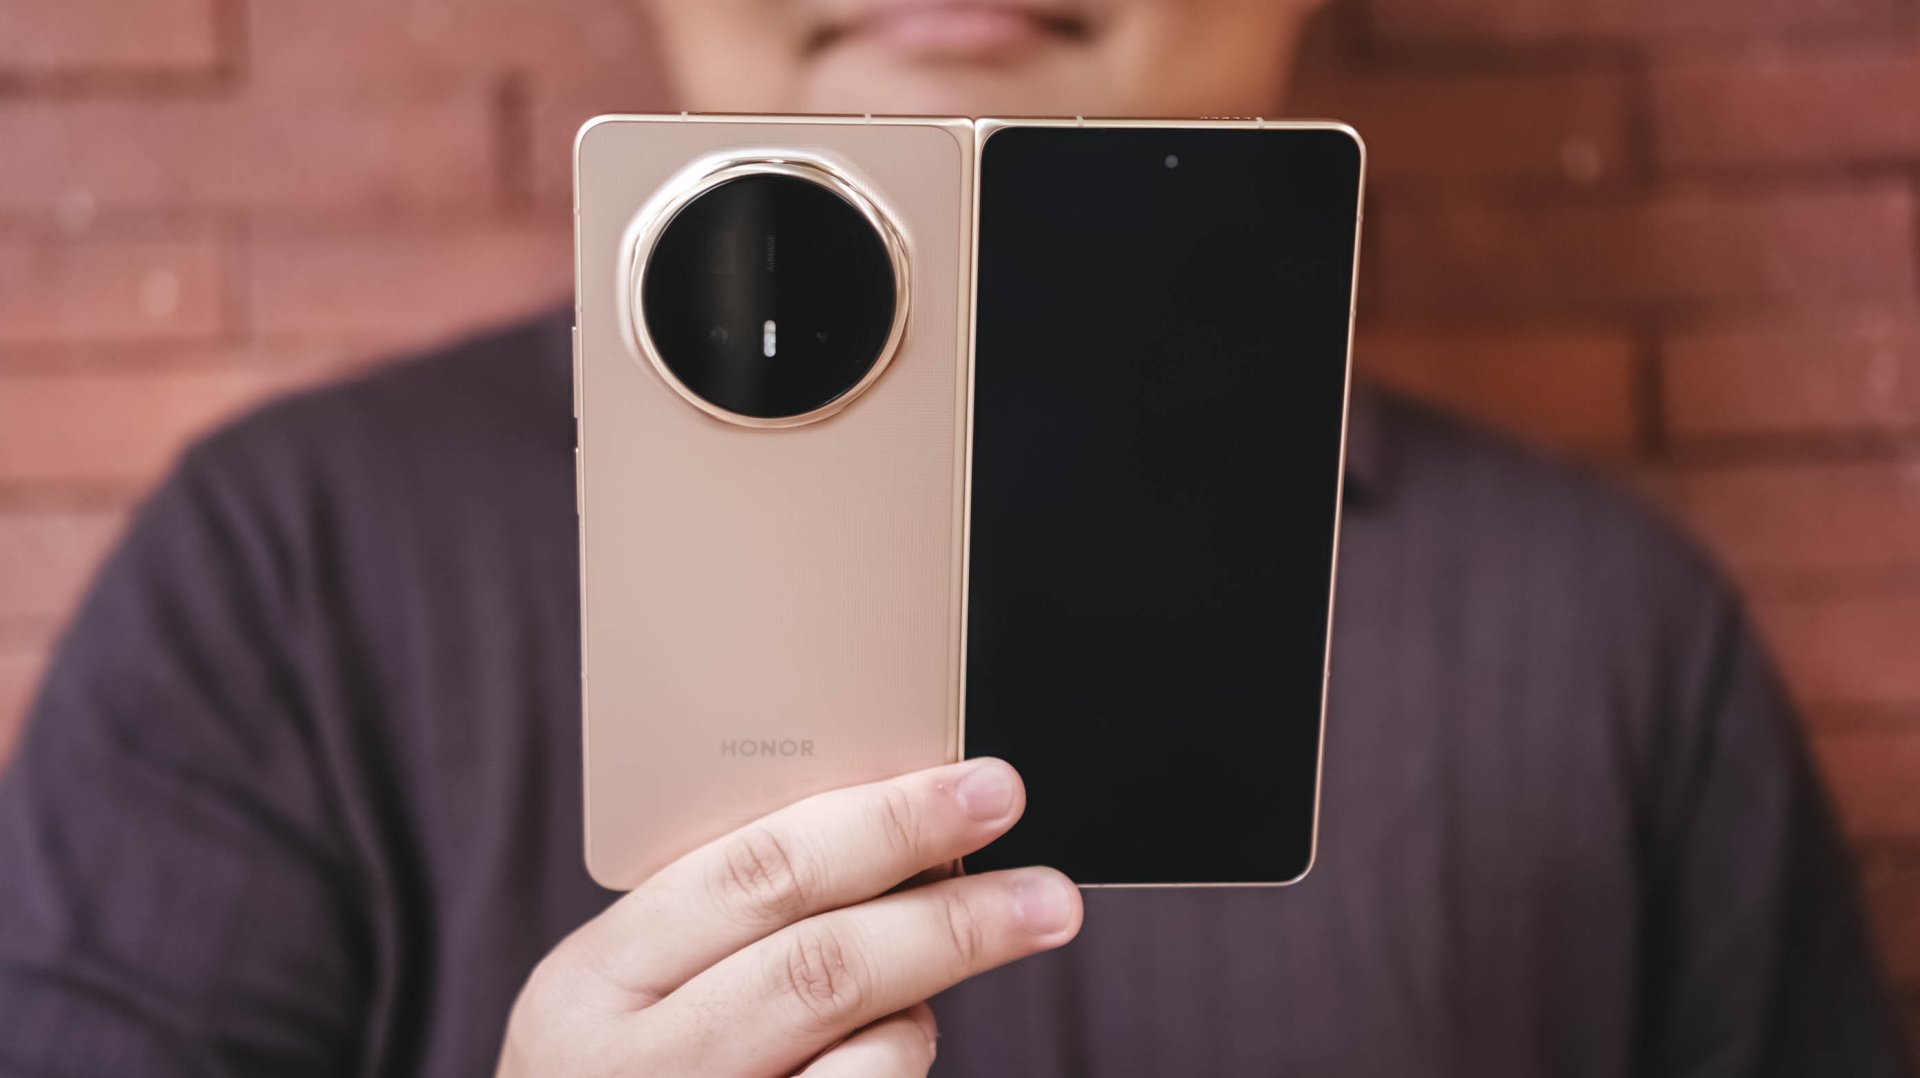
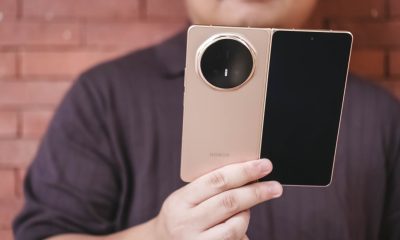
It feels like a regular smartphone
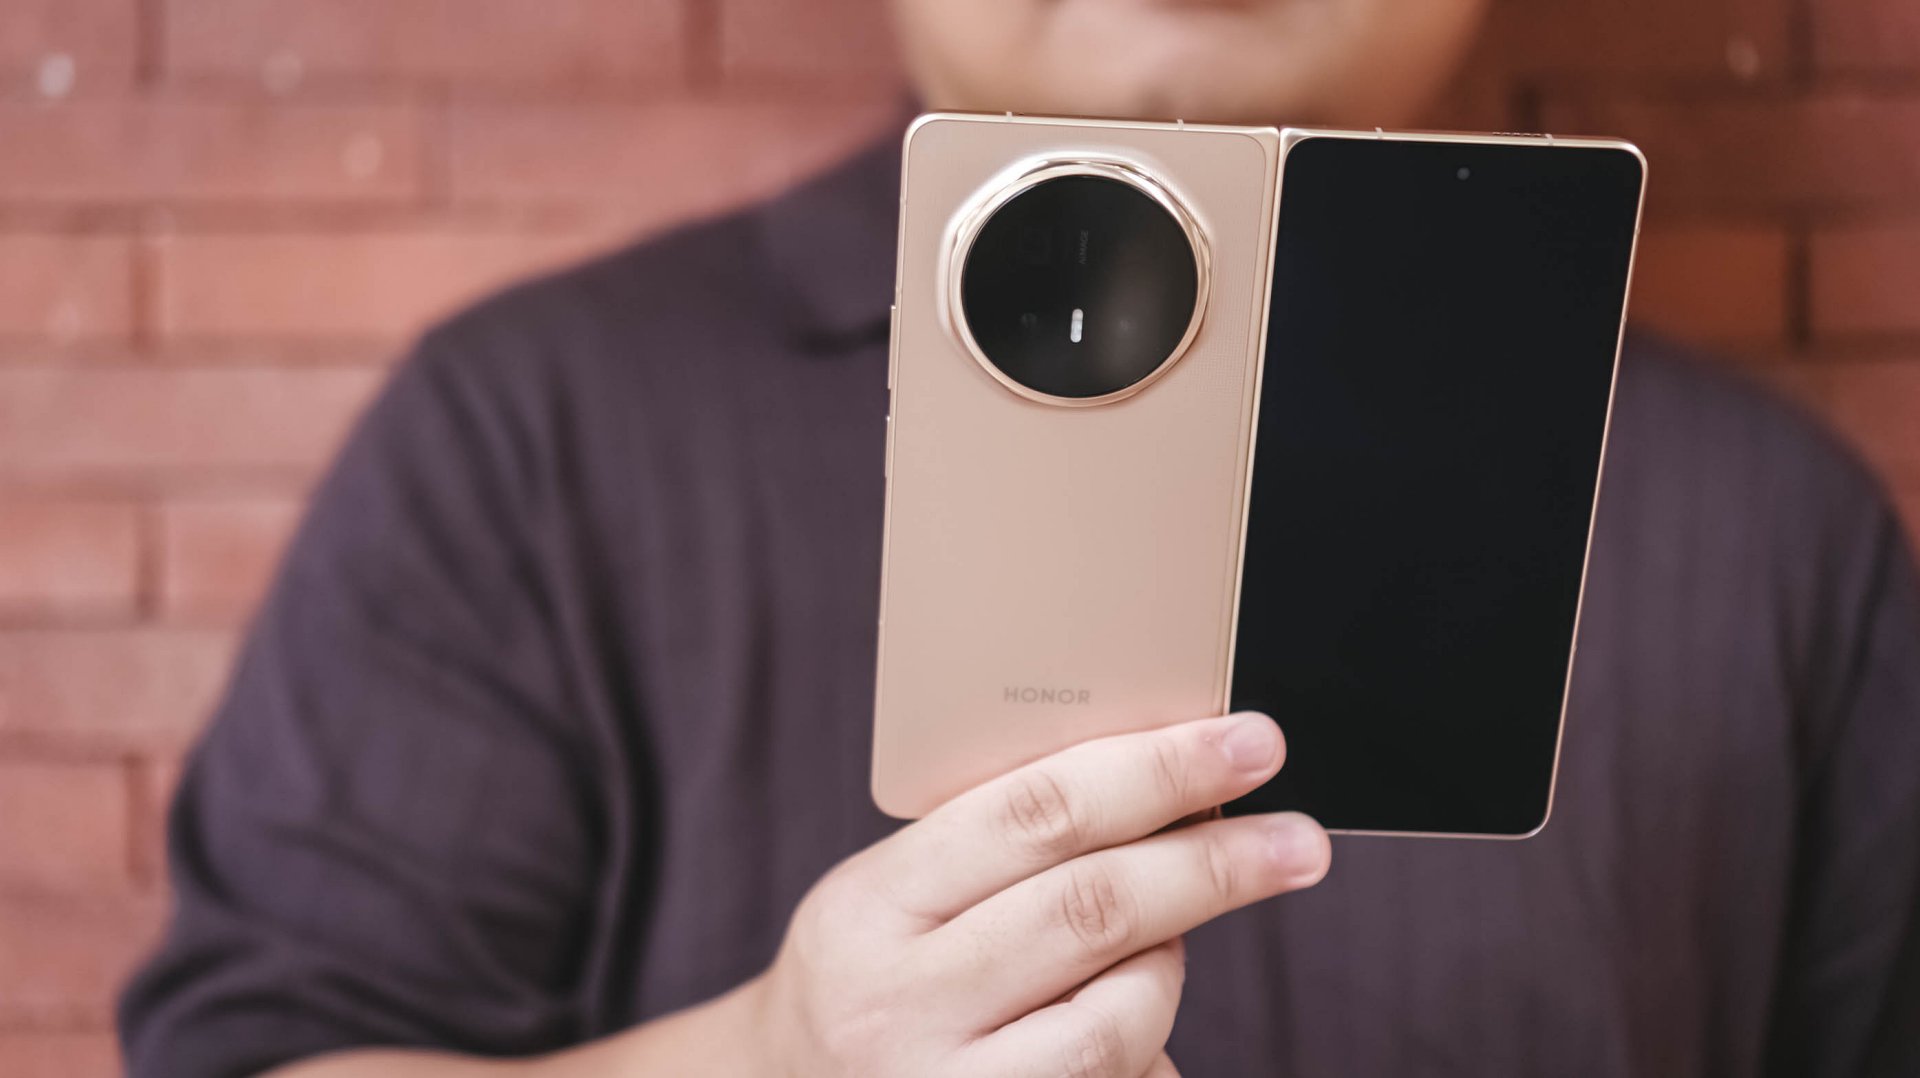
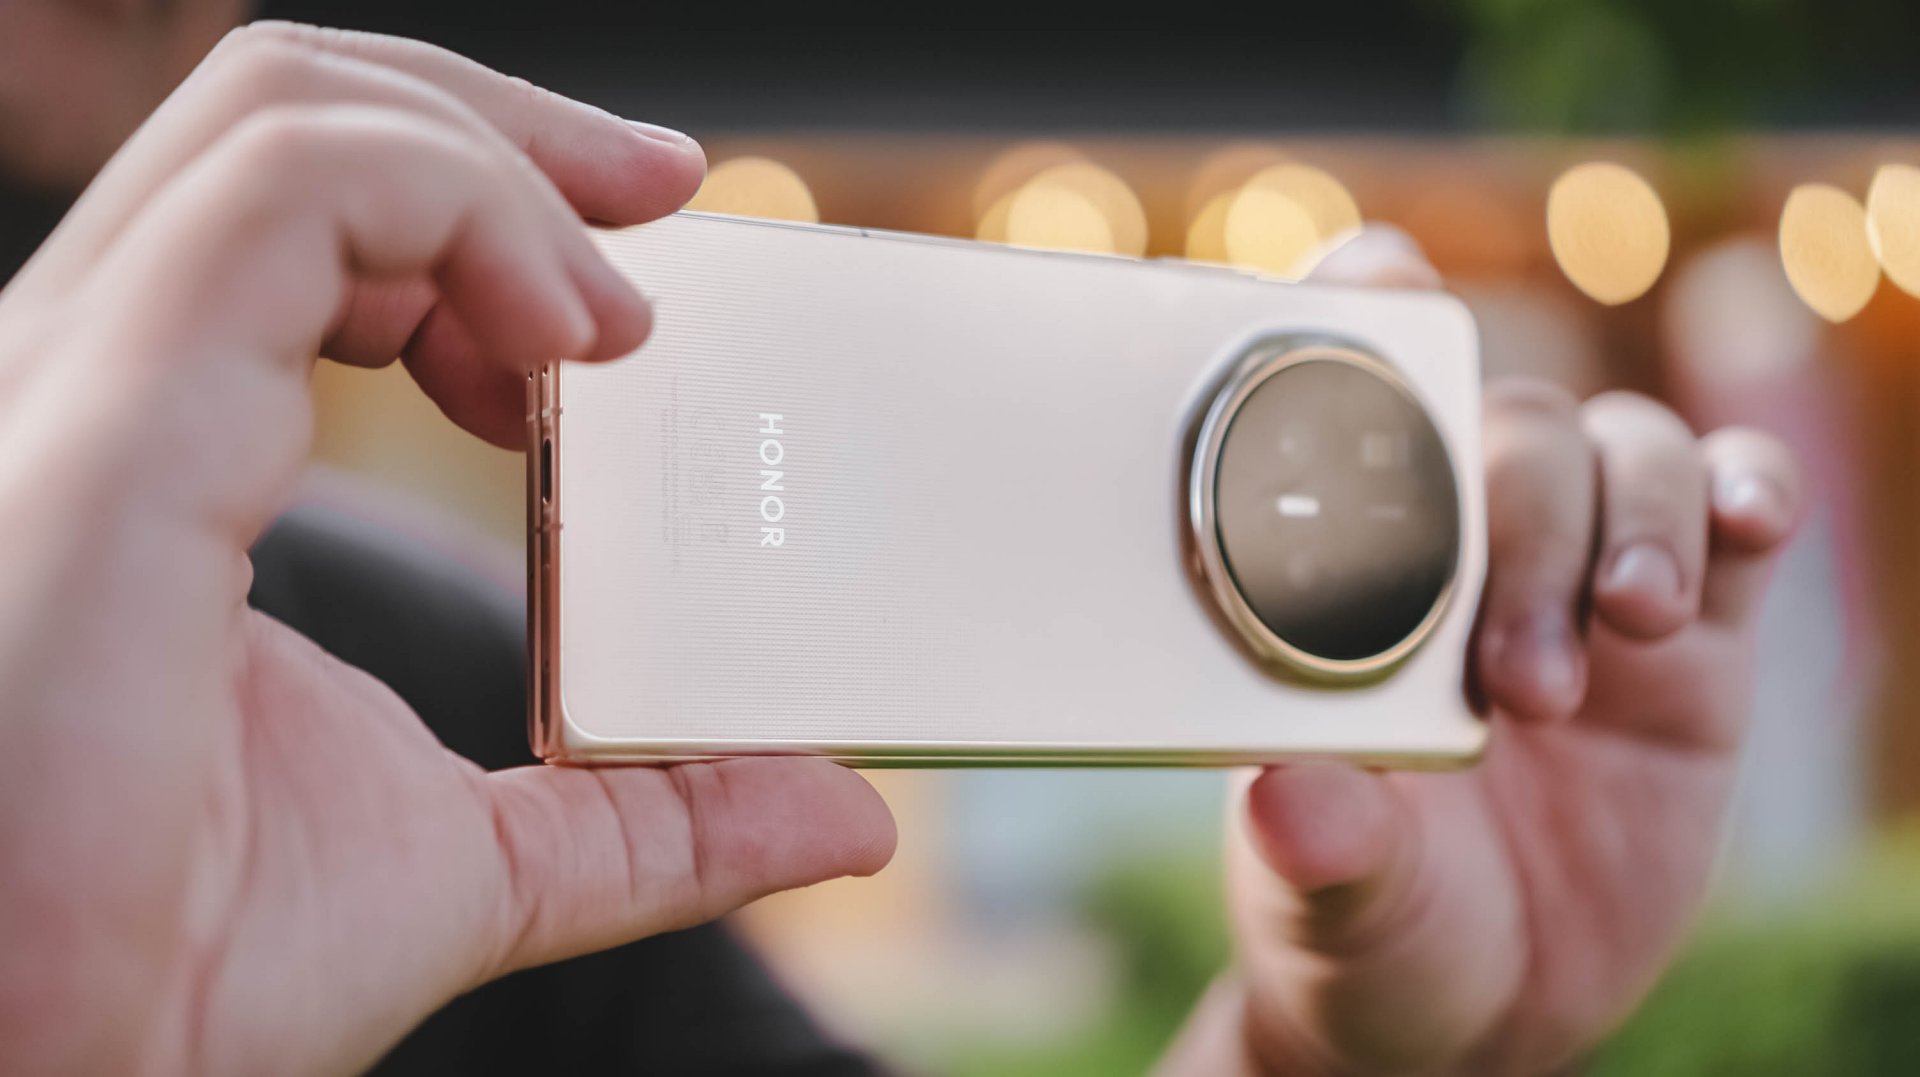
The HONOR Magic V6 looks and feels almost too much like a standard slab smartphone that you almost forget it can unfold into a larger screen.
That’s perhaps the most impressive thing about the device.
Most certainly, I felt the Galaxy S26 Ultra more when carrying it compared to the Magic V6. Despite being a foldable, it never feels cumbersome in daily use.
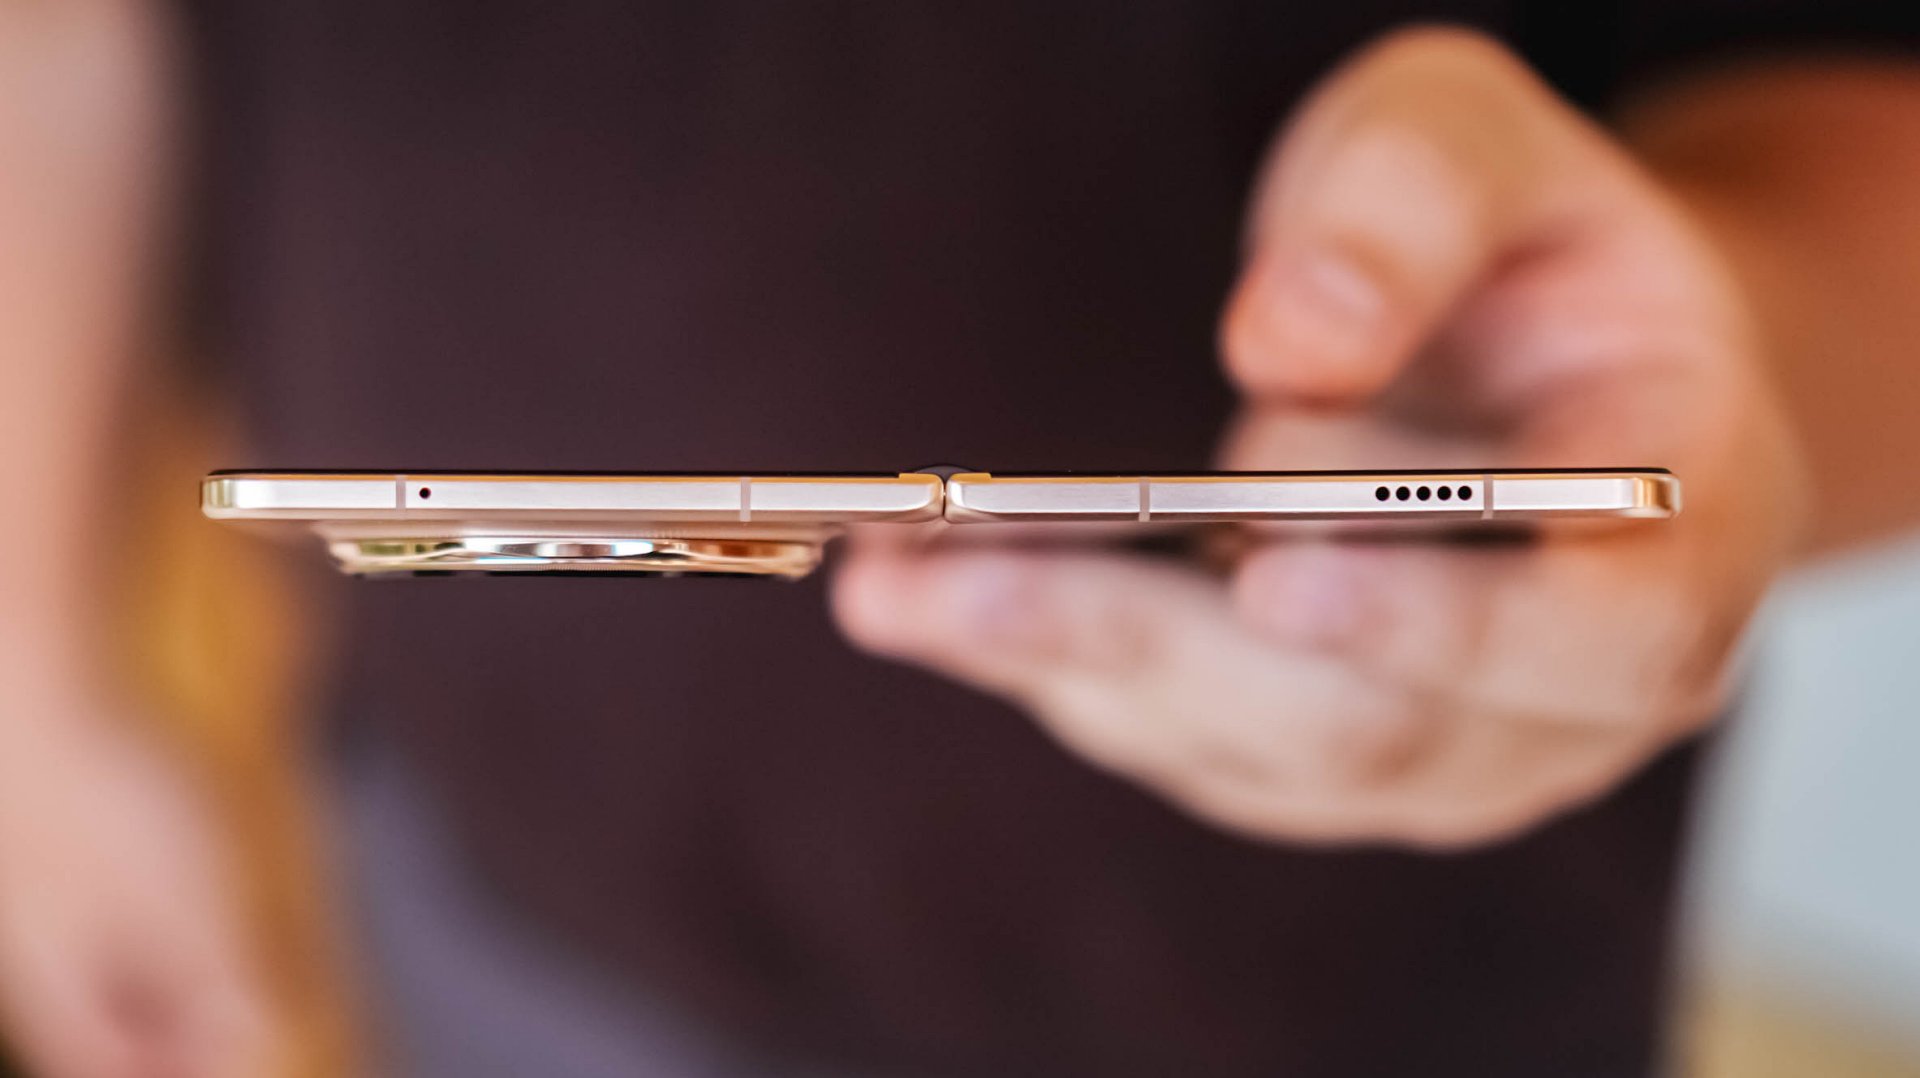
One of the subtle improvements I appreciated most was the button placement.
This is one of those low-key things you don’t really think about at first but becomes important over time. There’s little to no adjustment required when moving from a regular smartphone to the Magic V6 because the buttons sit exactly where you expect them to.
I use it alongside both the HONOR Magic8 Pro and Samsung Galaxy S26 Ultra and the transition feels seamless. That’s something I can’t quite say about the OPPO Find N6, whose power button still sits at a height that feels a little awkward.
Folded, the Magic V6 doesn’t feel like a compromise compared to a traditional flagship.
It simply feels like a regular flagship smartphone.
Unfolded, it feels natural too. The display even feels larger than the Galaxy Z Fold7 and HONOR Magic V5 that I used previously.
And that’s where the appeal of a book-style foldable continues to shine.
Productivity remains the killer feature
The larger display became particularly useful during several production shoots.
I found myself timekeeping to make sure we stayed on schedule while simultaneously checking scripts and production notes. It’s one of those situations where the larger screen immediately proves its value.
On another occasion, I handed the unfolded device to a project lead so she could review a script while planning shots for the day.
It immediately made her stop and consider whether she should get a foldable herself.
Moments like these highlight the unique advantage of book-style foldables.

The larger screen doesn’t just exist for the sake of being larger. It enables workflows that simply aren’t as comfortable on a conventional smartphone.
That’s why, despite my growing curiosity about where foldables go next, the Magic V6 reminded me why this category became appealing in the first place.
Battery confidence is underrated
An overwhelming yes.
That’s my answer when asked whether the battery capacity translates into confidence.
The Magic V6 is an endurance beast.
I never worried about using it folded or unfolded throughout the day. I never worried about taking photos, multitasking, or spending extended periods on the larger display.
For the most part, I simply knew that no matter what I did during a normal day, I’d still have enough battery to get home or reach somewhere I could recharge.
As someone who tends to become conscious about battery life once it drops below 50 percent, that’s saying something.

I also noticed myself worrying about the battery less the more time I spent with the device. I got used to how much power it consumed depending on what I was doing throughout the day.
Compared to the Galaxy Z Fold7 and HONOR Magic V5, the Magic V6 feels like it has more endurance.
It also charges faster.
The media consumption question
Did the Magic V6 make me watch more videos than I normally would on a phone?
Not really.
Most of my phone-based video consumption consists of Reels, Shorts, and the occasional K-pop fancam. Longer content usually happens elsewhere. If I’m watching a movie, a series, or even a lengthy YouTube video, I’d much rather do it on a TV or tablet.
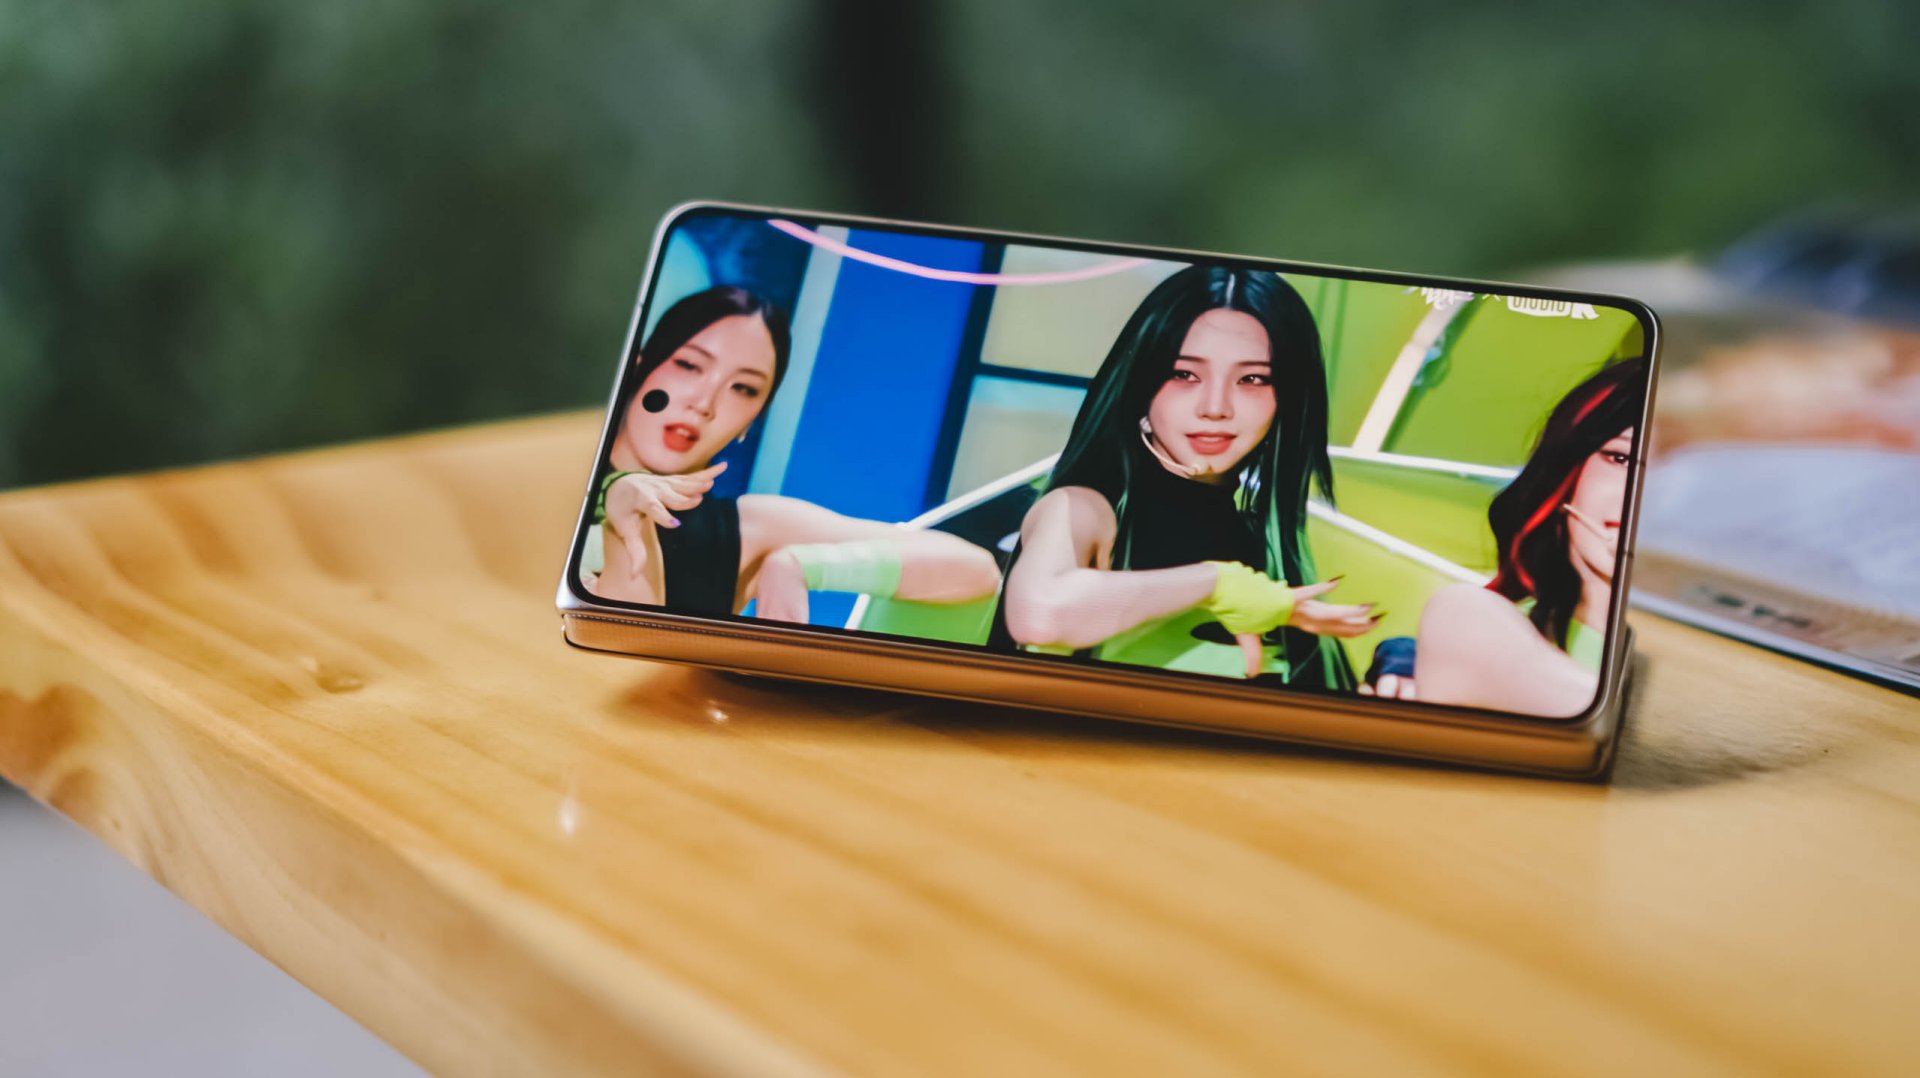
For the purposes of this review, I spent some time watching aespa Karina’s “Lemonade” facecam. I figured if there was any content I’d naturally watch on a phone, it would be that.
Folded and held in hand, it’s your typical smartphone viewing affair. In fact, the cover display is still a little narrower than I personally prefer.
You can also prop it up in Flex Mode and watch hands-free, which works surprisingly well when you’re sitting at a desk or table.
When unfolded, things become a little more complicated.
You can watch content in its original aspect ratio and live with the black bars. At night, they practically disappear. In brighter environments, they’re much more noticeable.
You can also pinch to zoom and fill more of the display. This works particularly well for content where the subject stays near the center of the frame. Facecams like Karina’s are a perfect example.

Why is Karina giving so much Shego vibes here?
The challenge is that much of today’s content exists in either 9:16 or 16:9 formats, while book-style foldables unfold into something much closer to a square.
The result is that the additional screen space isn’t always utilized as efficiently as you might expect.
That’s not really a criticism of the Magic V6 itself.
Rather, it’s one of the reasons I’ve become interested in the idea of wide foldables. The Magic V6 excels at productivity because of its aspect ratio. Whether that same aspect ratio remains ideal for modern media consumption is a question I continue to think about.
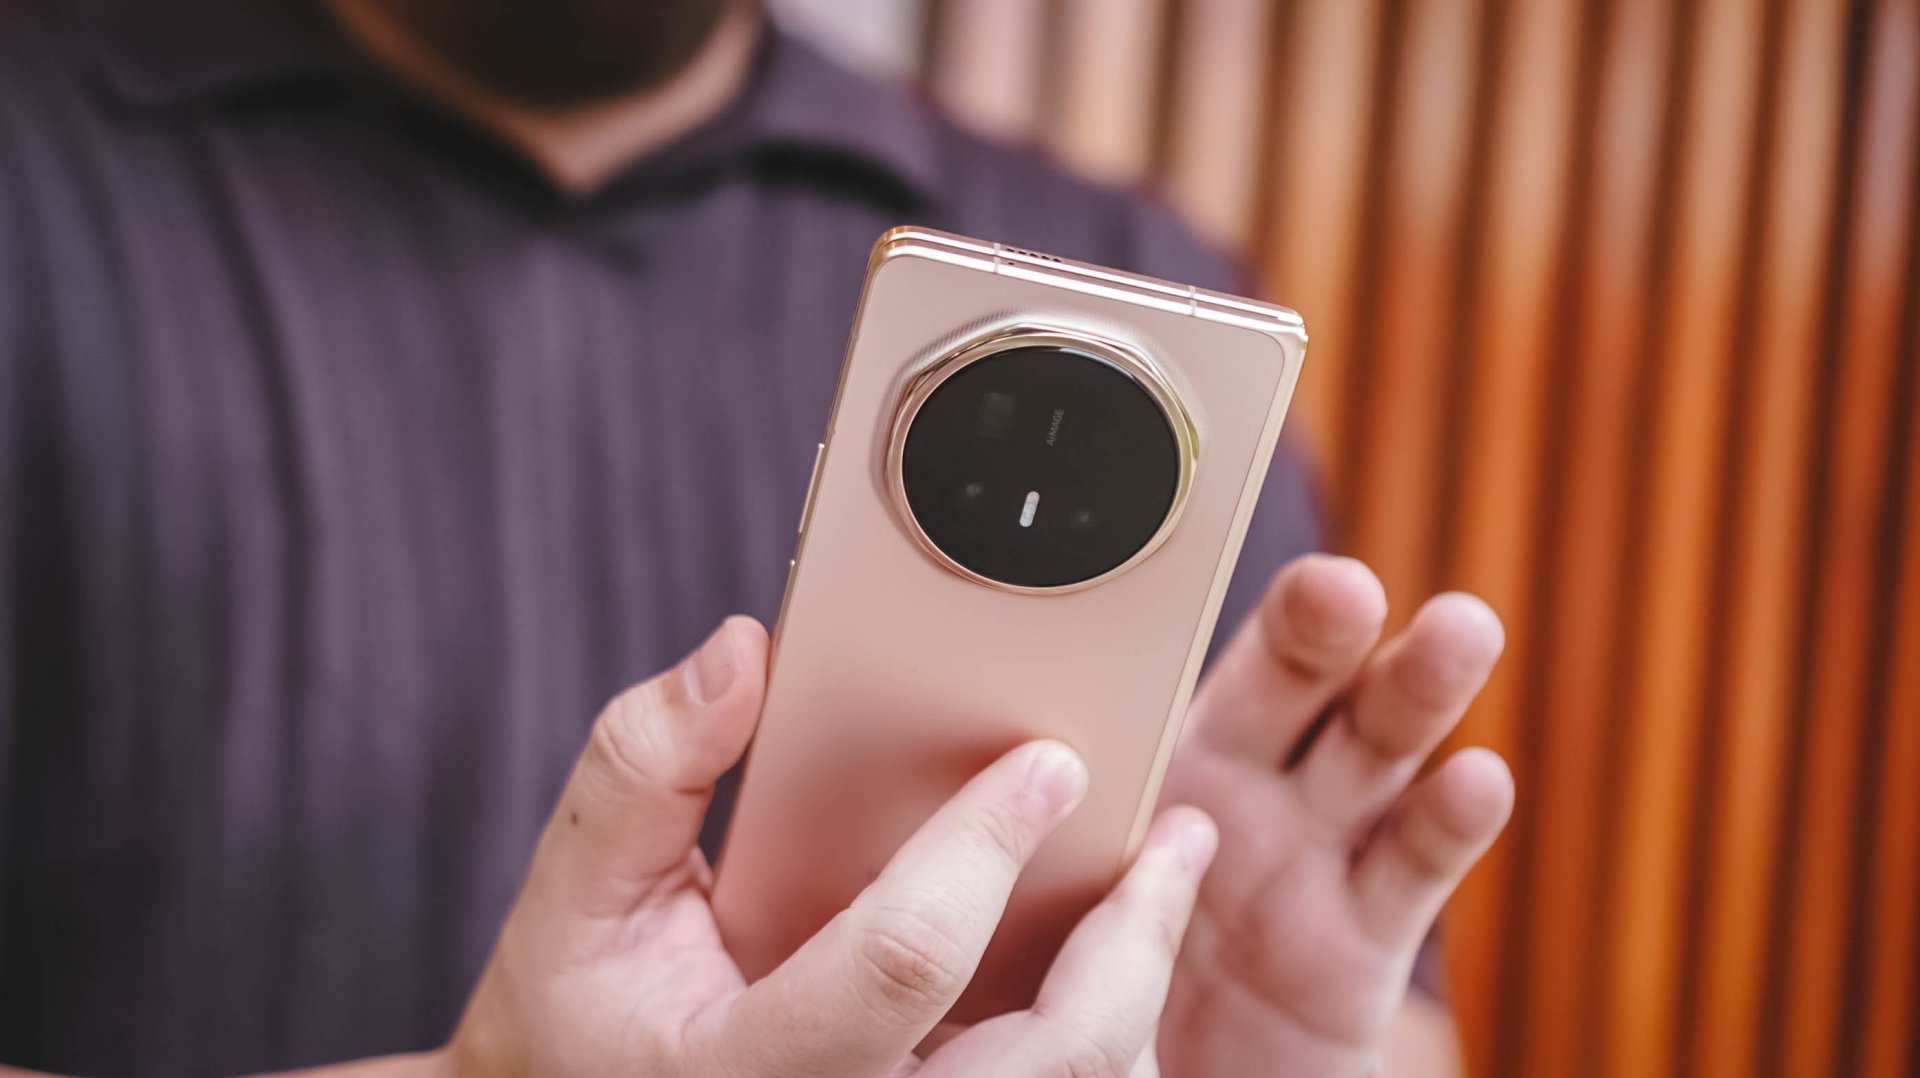
Cameras that don’t feel like a compromise
The camera system is one of the standout features of the device.
For a foldable, it takes really good photos. Photos I wouldn’t hesitate to post immediately on social media.
I’ve become particularly fond of HONOR’s Authentic Filter and used it extensively throughout my testing. The images look excellent and carry a look that I genuinely enjoy.
I still notice some limitations once I move beyond 6x zoom, but realistically, most users won’t spend much time there.
For everyday photography, the Magic V6 delivers more than enough.
That’s important because it removes one of the traditional compromises associated with foldables. Check out the samples below.
Witcher in Concert night


Food with friends


Taipei streets part 1


Middle Name Coffee and Space


Taipei streets part 2


Instil Coffee


Taipei streets part 3


Taipei at night + Bar Shock


Taipei at night + Backstreet Bar


Side gig


Sushi Party


Apple-friendly and easy to live with
One of the more pleasant surprises was how useful the Apple ecosystem features turned out to be.
Funny story.
I attended a sushi party where one of the guests happened to be an engineer who liked tinkering with hardware. He brought a small development board loaded with chips and components. When powered on, it mimicked the pairing process of AirPods and attempted to communicate with nearby Apple devices.
As he was scanning the room for iPhones, he was surprised to see his setup interacting with the HONOR Magic V6 I was carrying.
It’s a small anecdote, but it serves as a real-world reminder of how much effort HONOR has put into making the device work alongside Apple’s ecosystem.

More practically, I’ve regularly used the Magic V6 to move files between the phone and my MacBook Pro M4. The process is straightforward and useful enough that it naturally became part of my workflow.
The same can be said about durability.
The funny thing is people often comment about how not-so-careful I am with my devices. It’s not that I don’t take care of them. I simply carry a lot of gear at once and sometimes toss things into my bag without thinking too much about it.
Despite that less-than-careful handling, the Magic V6 hasn’t sustained any significant or noticeable damage.
Is the HONOR Magic V6 your GadgetMatch?
The HONOR Magic V6 is the fulfillment of the book-style foldable promise.
It’s a standard-sized smartphone that unfolds into something larger. It unlocks productivity and multitasking capabilities exactly the way you imagine it would.

The weight, thickness, and handling are about as close as you’re going to get to a regular smartphone. What’s remarkable is that HONOR achieved this while also delivering excellent battery life, fast charging, and a camera system that rarely feels like a compromise.
It won’t stop me from being curious about where foldables go next.
But it did remind me how good today’s foldables have already become.
If we’re judging the HONOR Magic V6 based on what a book-style foldable is supposed to be, there is very little left to sacrifice. That’s why I’m giving the Magic V6 the GadgetMatch Seal of Approval.
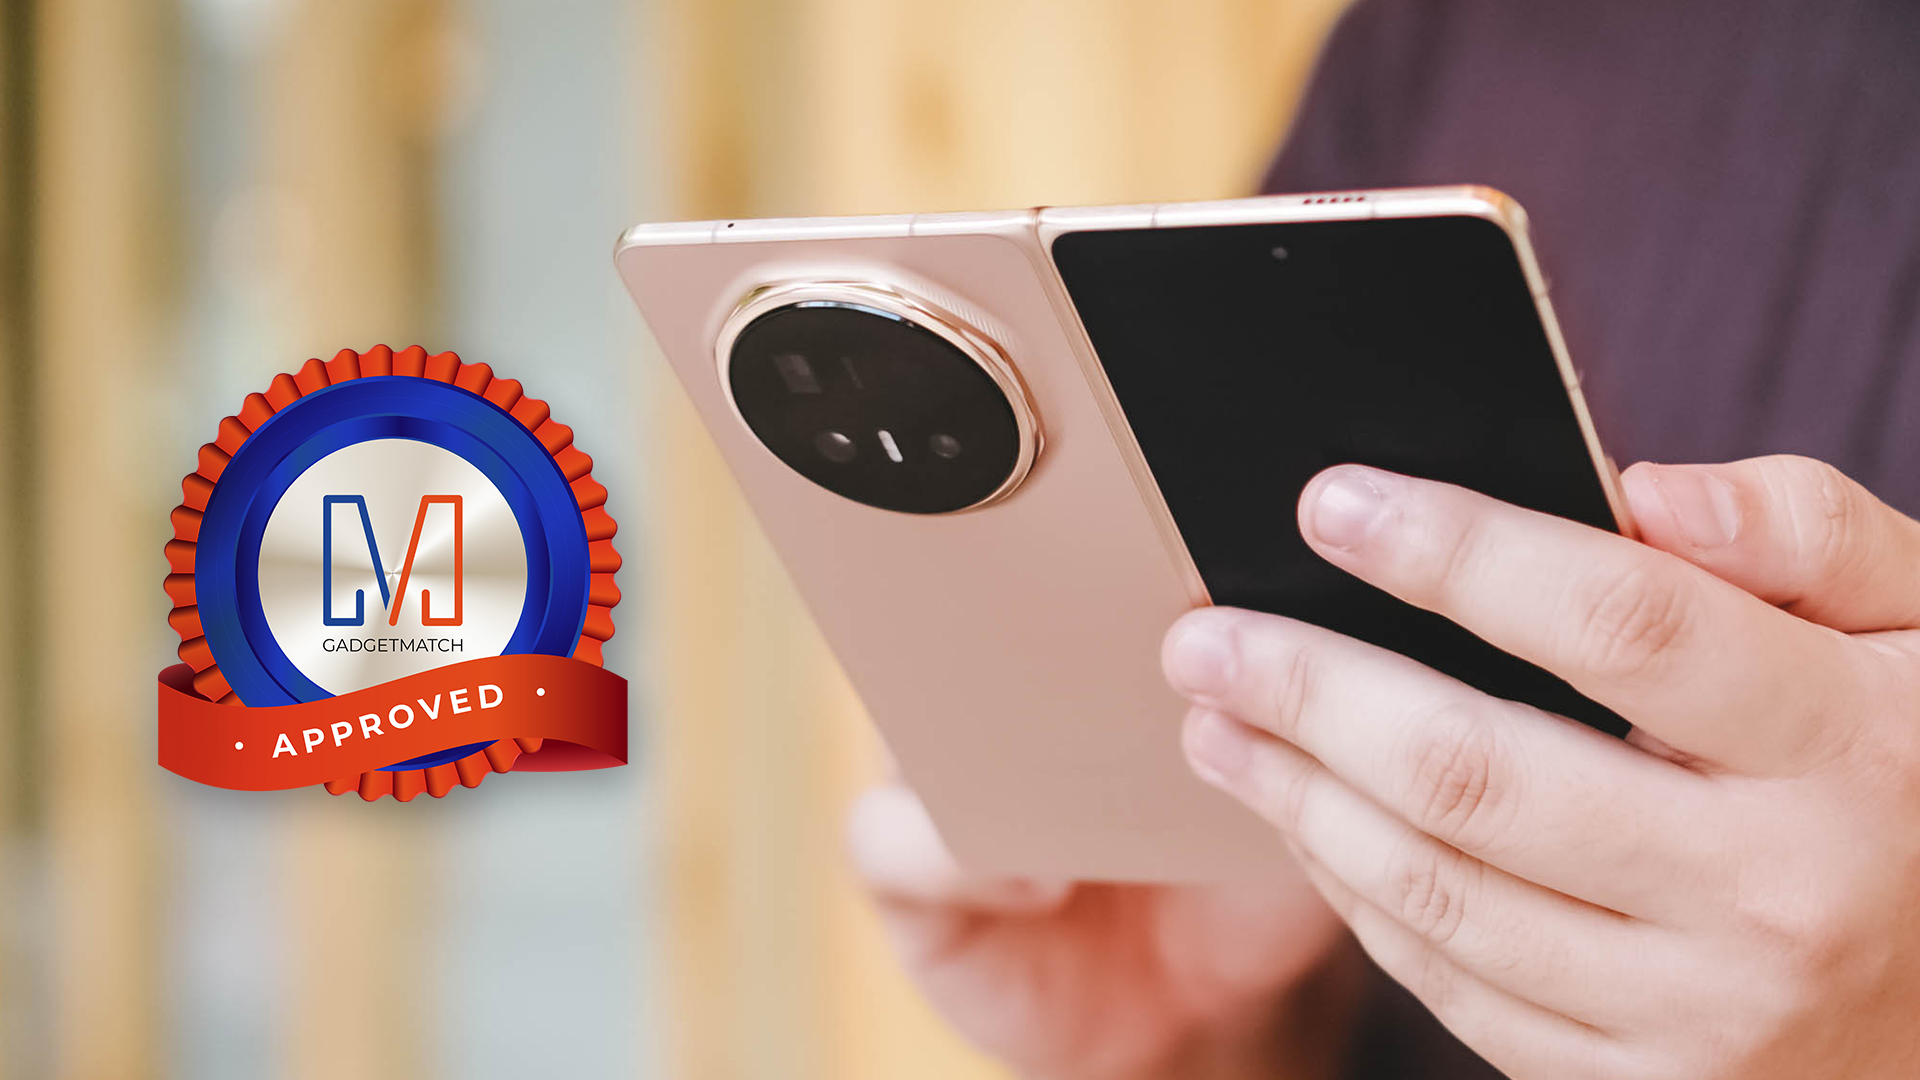

HONOR Magic V6 review: The best version of a book-style foldable?
Little left to sacrifice


Close without crossing: A Xiaomi 17T Pro photo essay
Distance and closeness are not always opposites.


Spring reset: Growing more at home with Auk Mini
From kitchen counter experiment to everyday habit

Nothing is coming to over 500 Best Buy stores in the United States

This is the history of basketball videogames since the ’73 Knicks

Kingdom Hearts IV gets new trailer, confirms Switch 2 release

Final Fantasy fans have two big reasons to look forward to 2026

TECNO’s POVA 8 5G is both futuristic and future-ready

The Infinix GT 50 Pro has the most inspired design for a gaming phone

UGREEN MagFlow Air review: Airy Yet Mighty
Spring reset: Growing more at home with Auk Mini

The UGREEN Nexode Air 65W is the only charger I travel with now
TECNO’s POVA 8 5G is both futuristic and future-ready


-
 India5 days ago
TECNO’s POVA 8 5G is both futuristic and future-ready
-

 News2 weeks ago
realme launches P4 Series 5G, including Power with 10,001mAh battery
-

 Hands-On2 weeks ago
The Xiaomi Watch S5 proves you don’t have to take it off
-

 Gaming2 weeks ago
God of War Laufey puts Faye in the spotlight
-

 Buyer's Guide1 week ago
Buyer’s Guide: Xiaomi Pad 8 Series
-

 Gaming2 weeks ago
Marvel’s Wolverine showcases brutal combat, confirms Jean Grey
-
Reviews5 days ago
HONOR Magic V6 review: The best version of a book-style foldable?
-

 Gaming1 week ago
Final Fantasy VII Revelation arrives in Spring 2027