
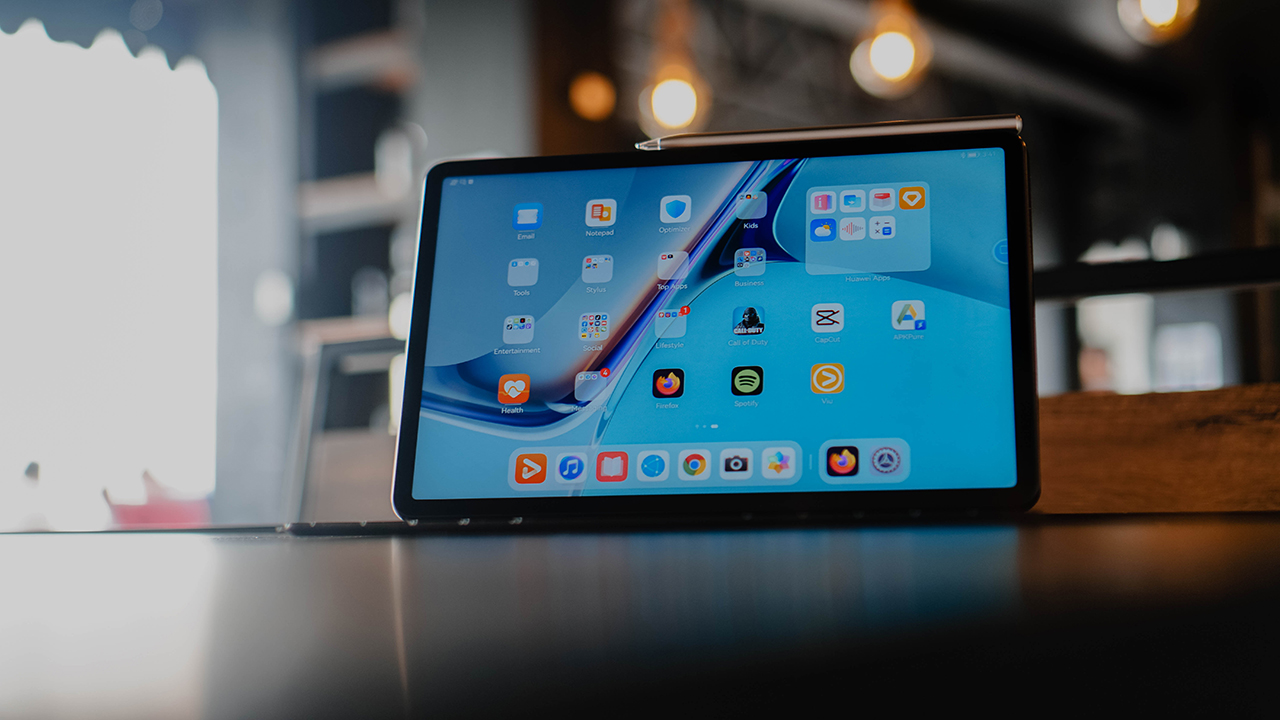

It’s always a little tricky trying to find a spot for a tablet in your life especially if you’re not exactly the artsy, doodling type. But time and time again, Huawei makes devices that make you really want one. This is the case with the Huawei MatePad 11.
If you’re already considering one, we put together a quick list that just might make you click checkout on your cart.
Gorgeous display
One of the primary reasons for getting a tablet is the larger display — at least one that’s larger than your smartphone but still more mobile than a laptop. But what good is a larger display if it doesn’t perform well? That’s not the case with the MatePad 11. This thing is packing.
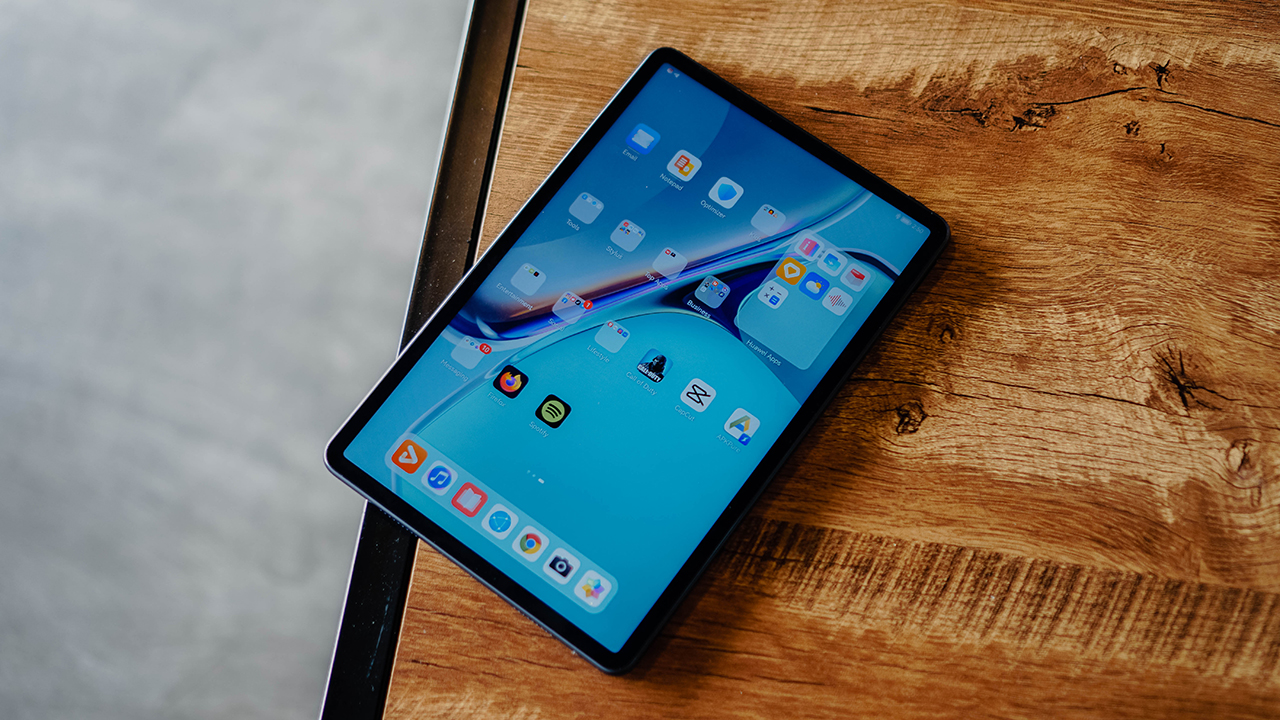
You’re getting a 10.95-inch display with an 86 percent screen-to-body ratio. That display also has a 120Hz refresh rate for a buttery smooth experience. Not to mention the DCI-P3 colour gamut for accurate colors. The 8MP front-facing camera is situated at the bezel so you get an uninterrupted screen experience.
Perfect for reading
The Huawei MatePad 11’s display is also easy on the eyes. It’s certified by TUV Rheinland for low blue light. This means it’s still friendly to your eyes even during extended sessions with the device.
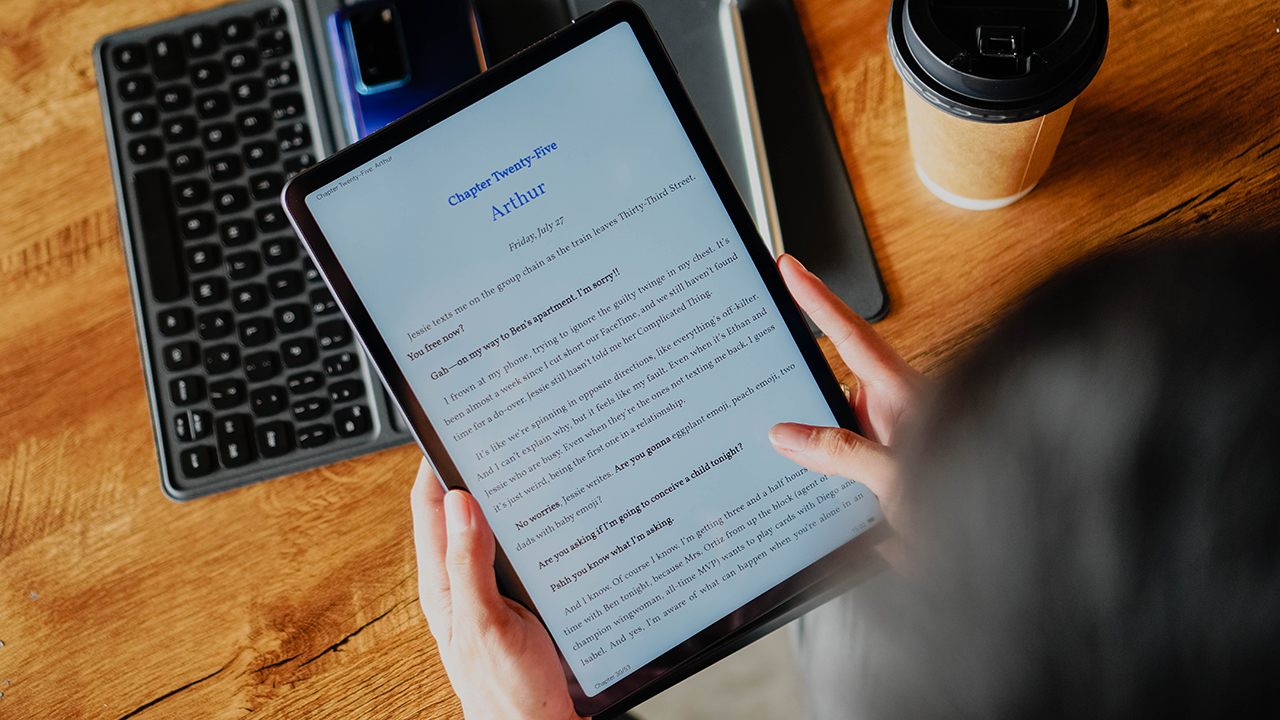
That extended session can mean going through the collection you’ll find on the pre-installed Huawei Books. Naturally, you can also install whatever reading app you fancy.
Fantastic for watching

Noze of WAYB on Street Woman Fighter 😍
Speaking of apps, you’ll find plenty of streaming ones you can enjoy on the MatePad 11. We’ve been on Viu quite a lot watching episodes of Slam Dunk and this new Dance variety show Street Woman Fighter — our Managing Editor is especially rooting for Noze of WAYB.
M-Pencil is included
You know how you have to buy the stylus separately for most other tablets? Not the case with the MatePad 11. The M Pencil (2nd gen) is included in the packaging. It’s a handy tool for many things, even if you’re not art-inclined.
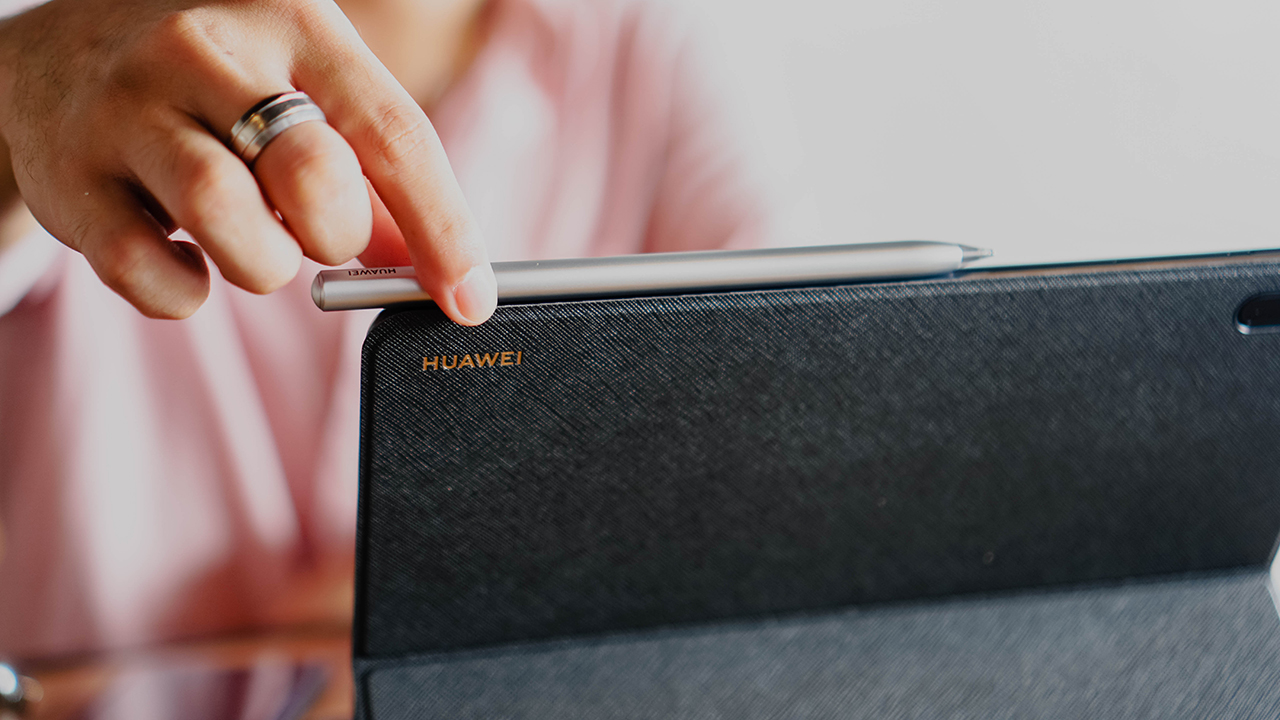
The M-Pencil (2nd Gen) sits magnetically on this part of the MatePad 11
We’ve used this for signing documents, precise skimming of videos we need to preview, and many more tasks. The 2ms low latency makes for a really good writing experience.
And there’s sufficient app support
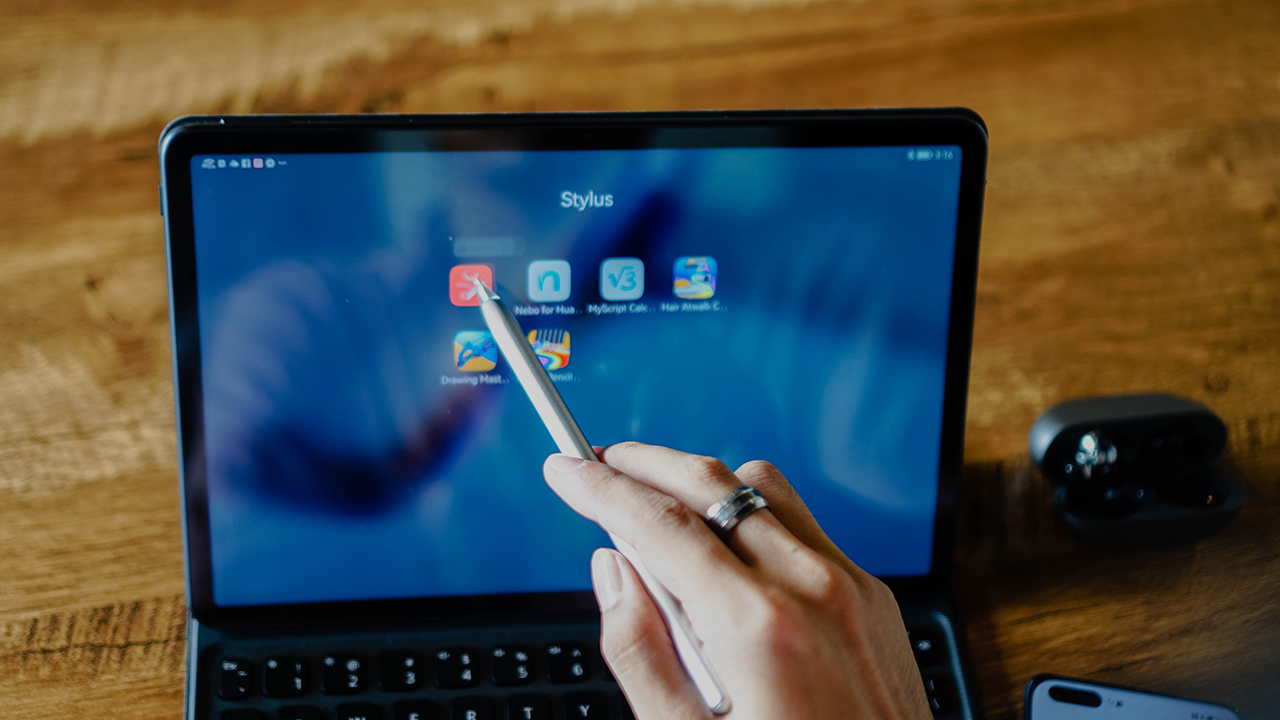
But of course, if you are on the artsy side, there’s no shortage of apps that you can use this with. When you boot the device with the clean-looking HarmonyOS 2.0, there’s a folder with suggested apps you can install made especially for taking advantage of the M Pencil (2nd gen).
But if the suggested apps aren’t to your liking, there are a bunch more that you can look for and download on the Huawei App Gallery and Petal Search. Want quick access to good design work? Get Canva. Need something reliable for note-taking? Download Nebo and jot down things to your heart’s desire!
The Smart Magnetic Keyboard is better than we expected
What surprised us the most is perhaps how you can really get things done on the MatePad 11. This is especially true when used in conjunction with the Smart Magnetic Keyboard.

Despite its tiny look, it’s a full-sized keyboard with a decent amount of travel for a satisfying typing experience. Whether you’re writing a lengthy email or composing a rant tweet that you probably shouldn’t post, this tablet-keyboard combo is made for typing productively.
This one is sold separately, but it’s worth the addition! Oh and more thing, tapping the Shift button will automatically project your Huawei phone’s screen on the tablet — a feature will dive more into shortly.
Huawei Share is convenient
Are you the type who sends links and files to your own chat box so you can access it on your other devices? Huawei has made it so much simpler in their family of devices with Huawei Share.
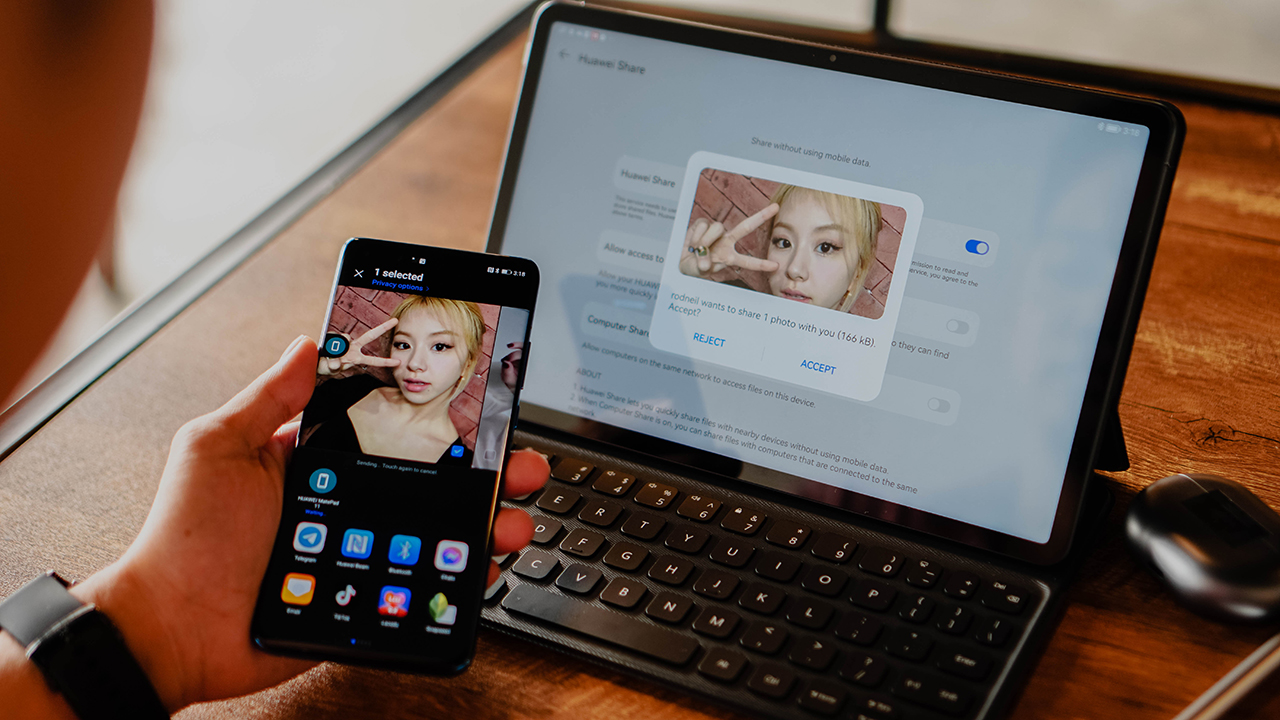
Just pick the file or photo you want to share, and it’ll instantly detect the other Huawei device in the vicinity. Convenient.
Works great with your Huawei phone
If you wanna take that connection a little bit further, you can do so. Just like how it works on laptops, you can make it so that your phone’s screen is visible on the MatePad 11.
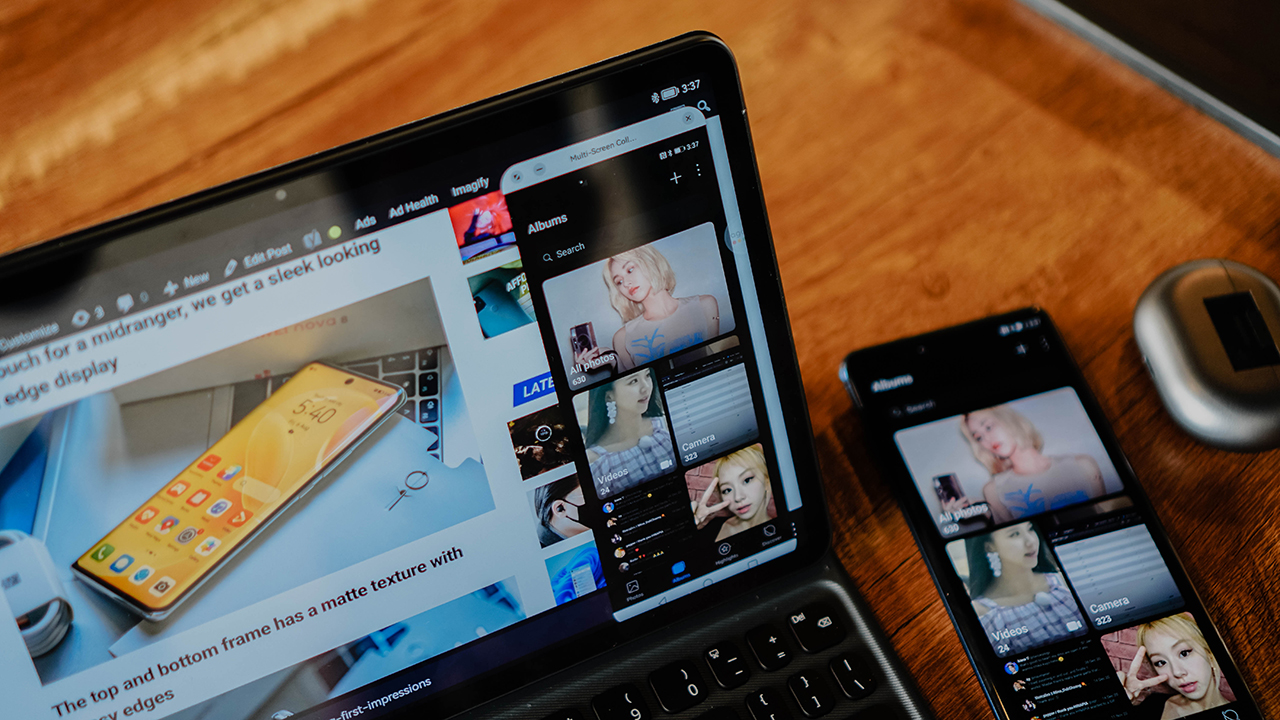
When this feature is enabled, you can control your phone without physically lifting it. Easier and faster access for messaging or if you wanna swipe on dating apps in between work tasks.
Multi-window is helpful
That floating window works not just when you connect your phone. It also works on certain apps. This way, you can easily reference other apps you might need for whatever you’re working on.

No need to leave the main app you’re working on just to take a quick glance at what’s happening on another app. This is a time-saver.
Floating apps is a godsend
When those floating apps are inactive, they sit in the right-hand side of the screen. The most recent app you used for multi-window is the icon that will show up on top. But the rest will be right there for easy access.
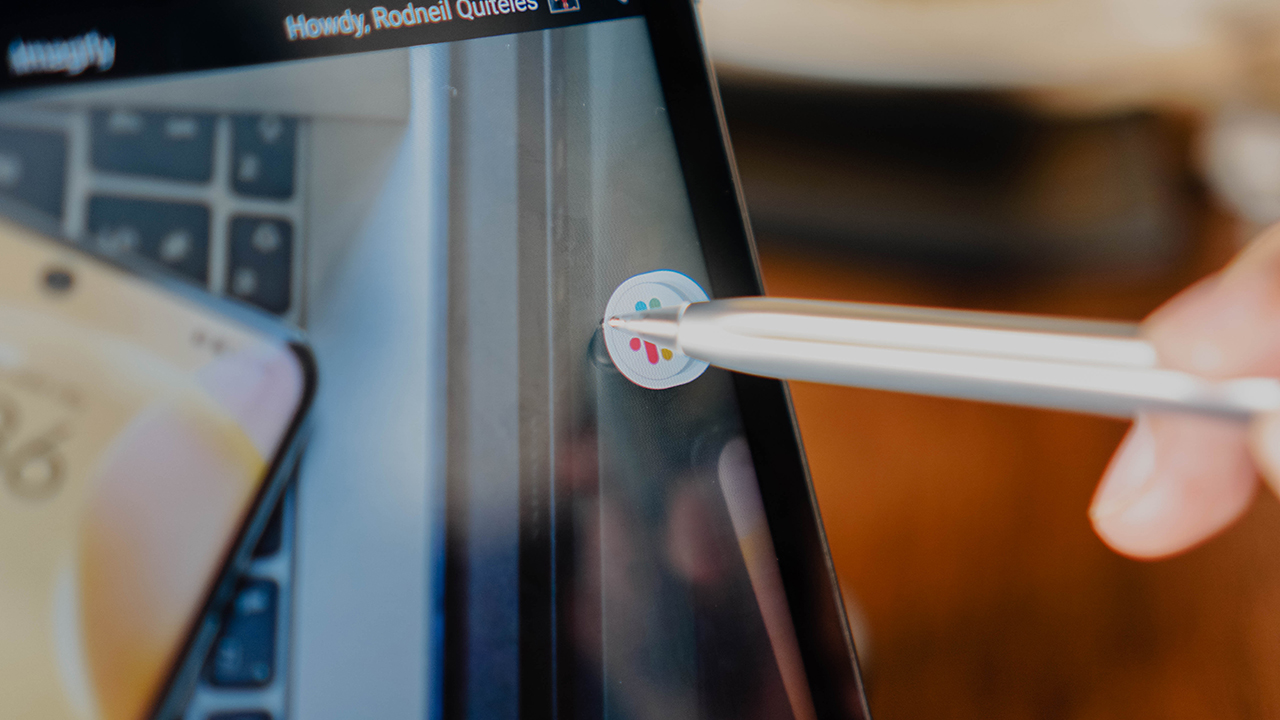
This is great for toggling between multiple messaging apps. So whether you’re coordinating with your team on Slack or exchanging messages on Telegram, it’s quick and easy to do so without being completely distracted from what you’re working on.
It’s a great addition to your Huawei life
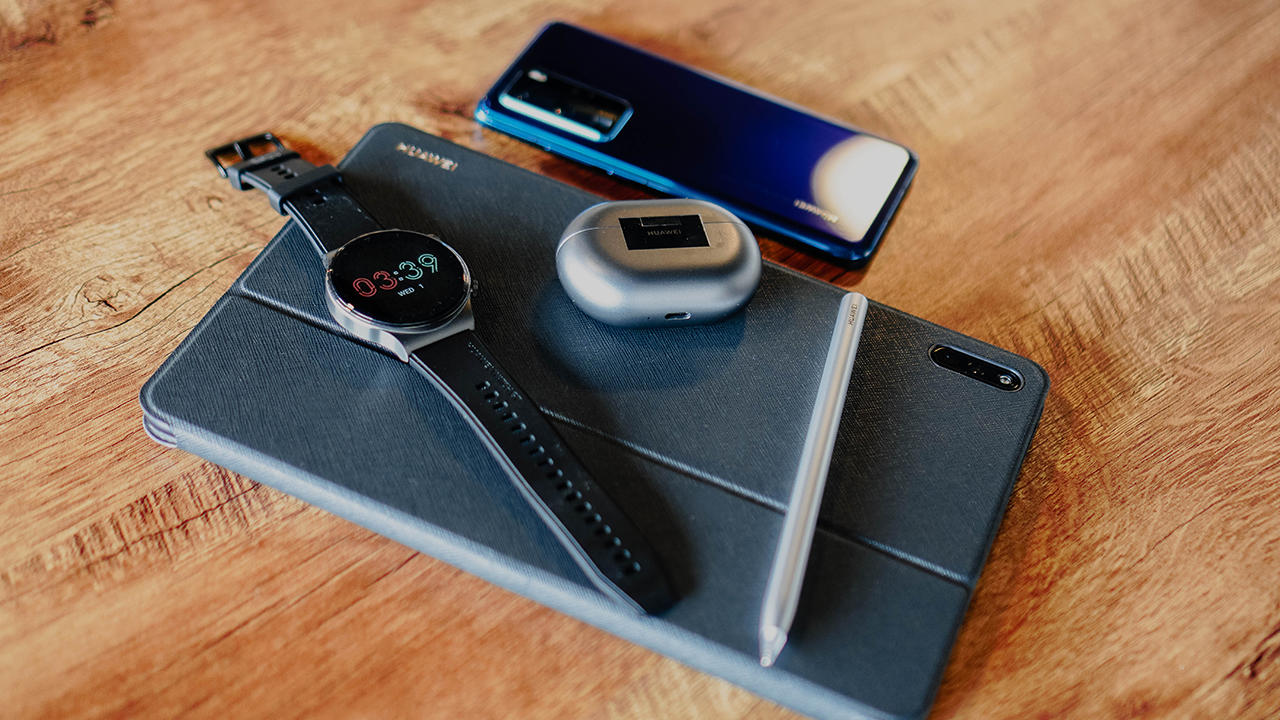
The MatePad 11 is a big part of Huawei’s 1+8+N strategy where you can build your Huawei life starting with one of their smartphones. This extends to the secondary devices and accessories like the Huawei Watch GT 2 Pro and Freebuds Pro. If you add the MatePad 11 to that equation, it makes for a seamlessly connected set of devices that’ll elevate your quality of life.
Price and availability
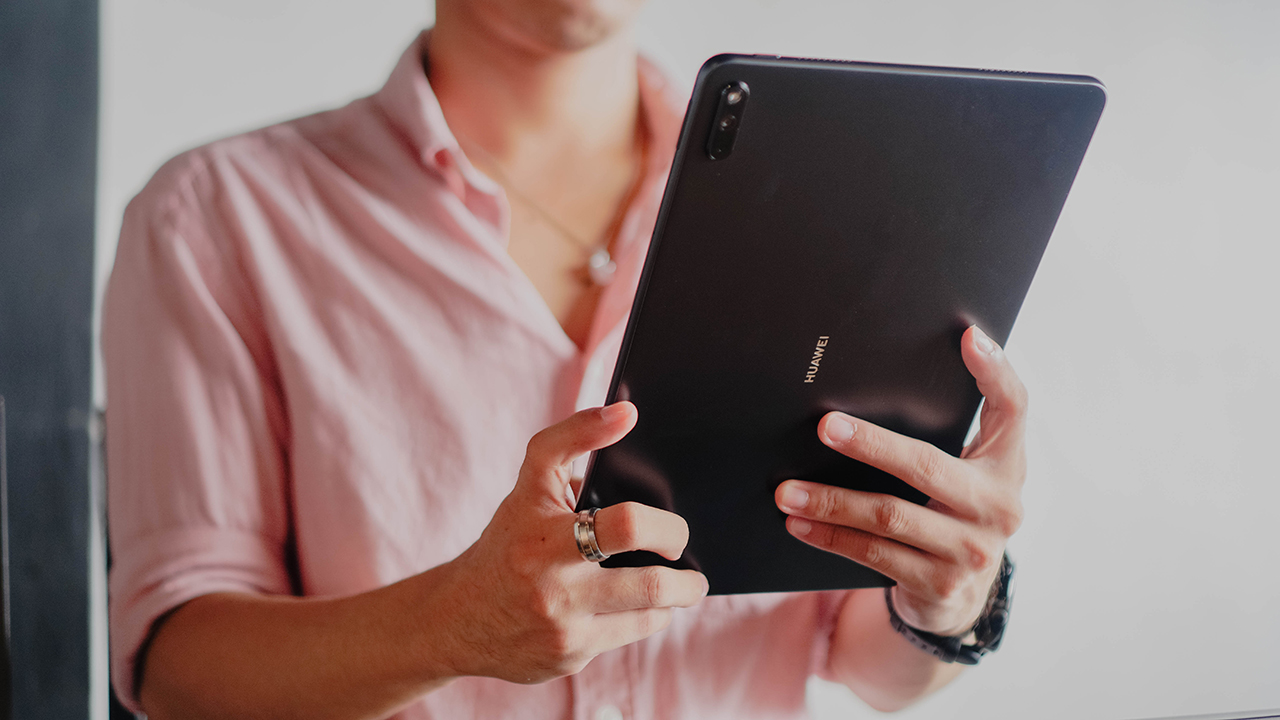
The Huawei MatePad 11 retails for PhP 26,999. If you purchase now, you’ll get a Dark Grey Cover (PhP 999) for free.
You can get the device on the Huawei Online Store or the official Huawei Store on Lazada and Shopee.
This feature is a collaboration between GadgetMatch and Huawei Philippines.




Features
How did new CEO John Ternus do for his first Apple event?
Is a new golden age coming for Apple?


For a brief moment, I thought Tim Cook was refusing to step down as Apple’s CEO.
Apple’s “Surprise and shine” event, which heralded the coming of the foldable iPhone Duo, started bombastically with a montage of cinematic moments spanning different genres. The main point was: “what’s the best way to start an opening scene?”
After what felt like an age, the all-too-familiar voice of Tim Cook came on, perhaps for the very last time. But rather than overstaying his exit as the former CEO, he describes that the perfect opener should be classic, as a car that is, quite symbolically, riding off into the sunset. He then explains that he’s not the main character anymore.

Last shot of Tim Cook at the Surprise and Shine event
“That’s your guy,” he said, before pointing to John Ternus, who steps into frame without an introduction or even a name card. It’s hard to image that this guy is the new face of Apple.
It’s the perfect end to Tim Cook’s tenure and as perfect a start for John Ternus’s.
Moving from an age of crisis to a golden age
After a decade and a half of being the face of the brand, Tim Cook stepped down from his tenure as CEO. He leaves the company in a much better state than when he took over. Thanks to him, the iPhone is now a household item. It’s a ubiquitous phone that draws millions of fans every time a new one comes out every year.
But his tenure didn’t start on a bed of roses. When he took over in 2011, it was in response to Steve Jobs’s failing health, who passed away soon after. He inherited a company constantly threatened by competitors trying to eat into Apple’s slice of the pie.
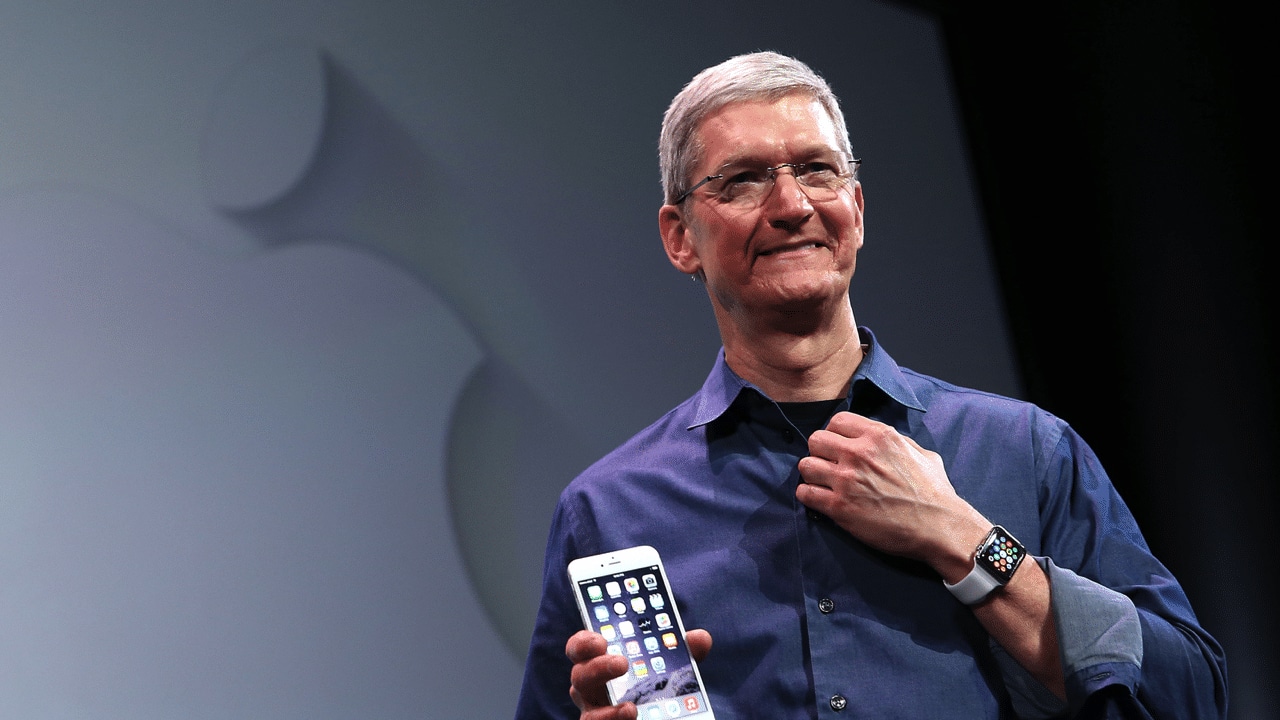
Indeed, Cook’s tenure was peppered with crises. He had to navigate Trump’s first reign, destructive as it was towards relationships in China. He had to figure out survival during the tempestuous pandemic years. Finally, he had to carefully build a strategy for the dawn of AI.
Cook is, first and foremost, a businessman. While the Jobs era was typified by innovation after innovation, Cook built upwards, turning Apple into a trillion-dollar company. Although we didn’t see a lot of new exciting segments introduced, the company built on what it was already good at, delivering a premium and refined experience.
John Ternus comes at an opportune time. Though the brand will always have a healthy share of diehard fans, Apple must now find the next big thing and rediscover the spice of years past.
A time for AI?
After his nonchalant introduction, Ternus immediately goes on the offensive and describes his vision for Apple Intelligence. Rather than dwell on NPUs, TOPS, and other metrics that a regular user can’t make heads or tails of, he described Apple Intelligence and Siri AI as a personal assistant. Usage versus performance, in other words.
If you’re an AI enthusiast, the renewed push towards Apple Intelligence should give you hope that the iPhone won’t just be a receptacle for other AI software. Rather, it’s building its own. Wherever the AI industry is going, Apple looks like it can keep up.
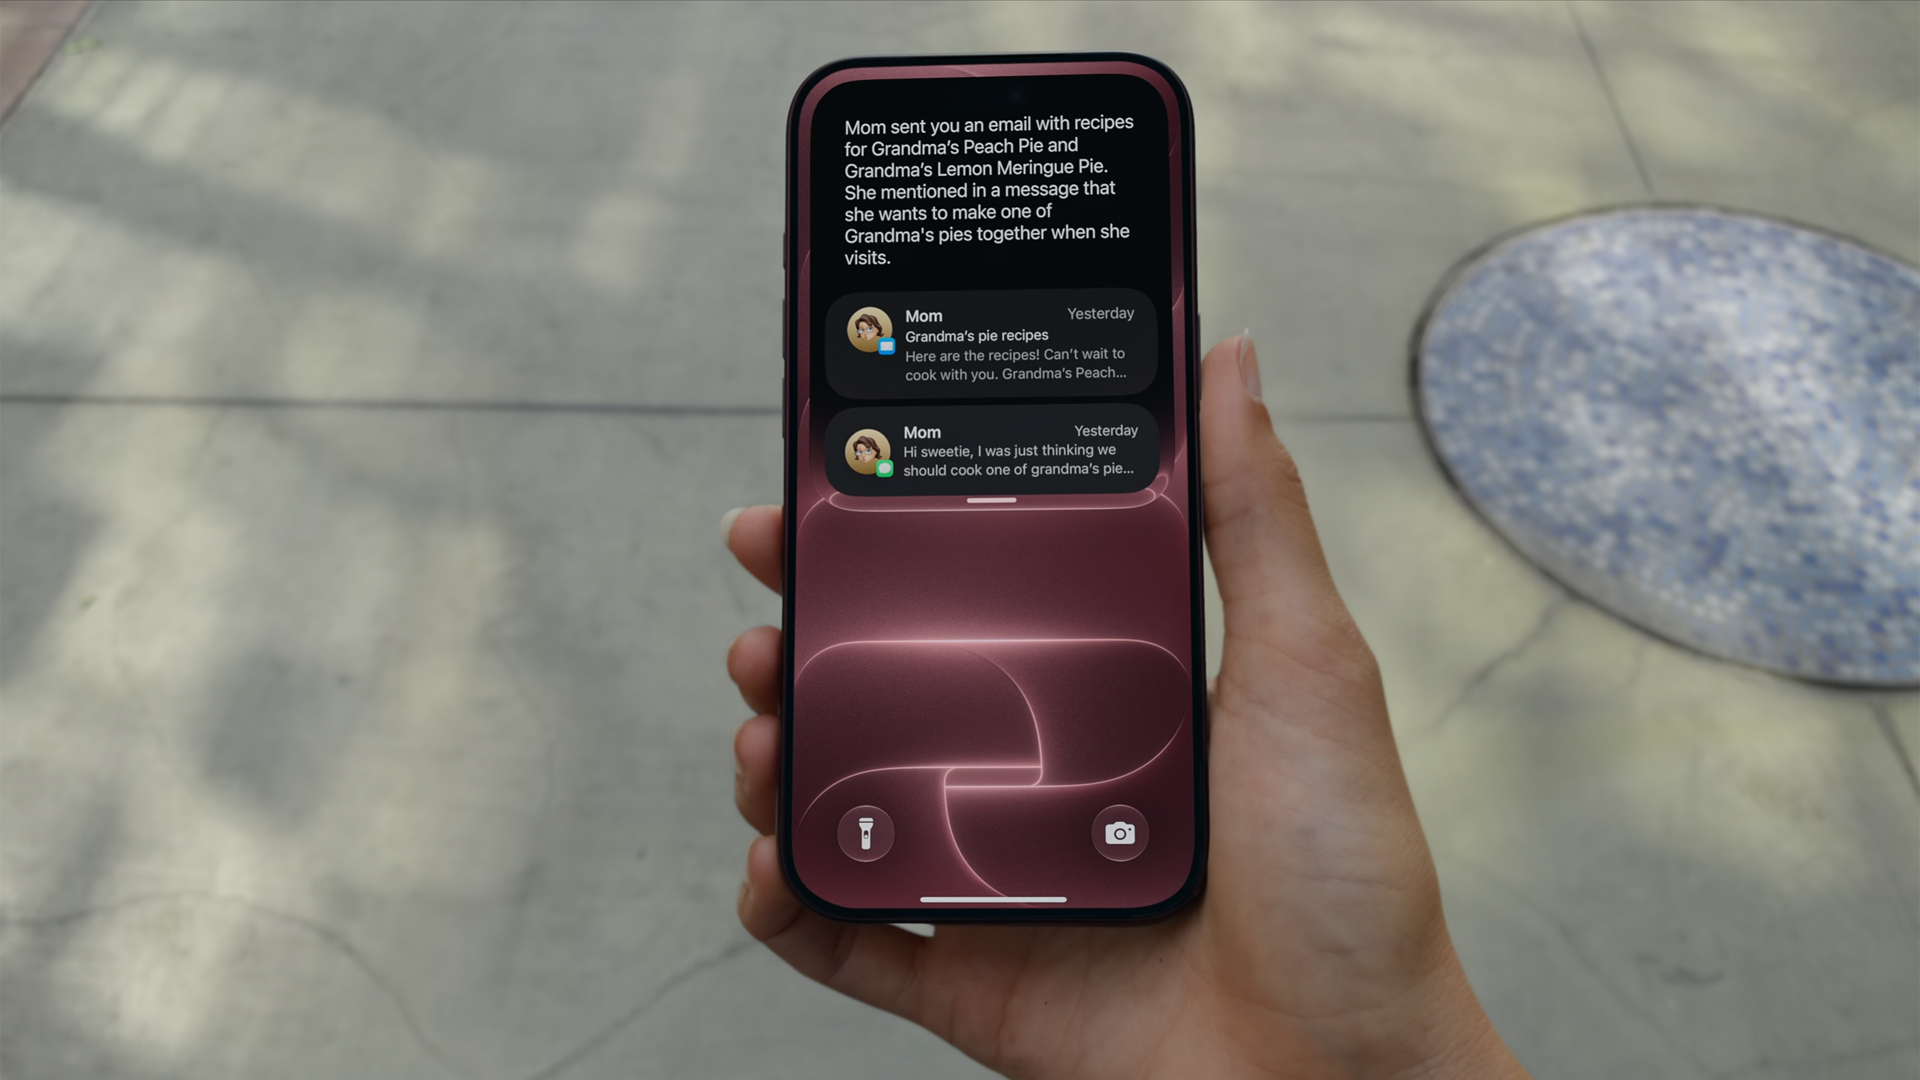
Now, if you don’t like AI at all, that’s fine, too. Ternus isn’t there just for the AI.
Unlike Jobs or Cook, Ternus comes from a strictly engineering background. In today’s world, hardware complements AI. The software must use NPUs after all. But, when the AI bubble finally pops, Ternus isn’t out of a job. In fact, if his track record is any indication, it’s just getting started.
Or a time for new hardware?
This year is absolutely monumental for Apple. Earlier this year, the company launched the MacBook Neo, its first budget-friendly notebook built for everyone. If you were looking to get into the MacBook lifestyle, now is the perfect time to buy in. A lot of users felt a subtle changing of the guard.
From there, you can feel Ternus’s influence already seeping in. And if it wasn’t obvious back then, it’s more than apparent now.
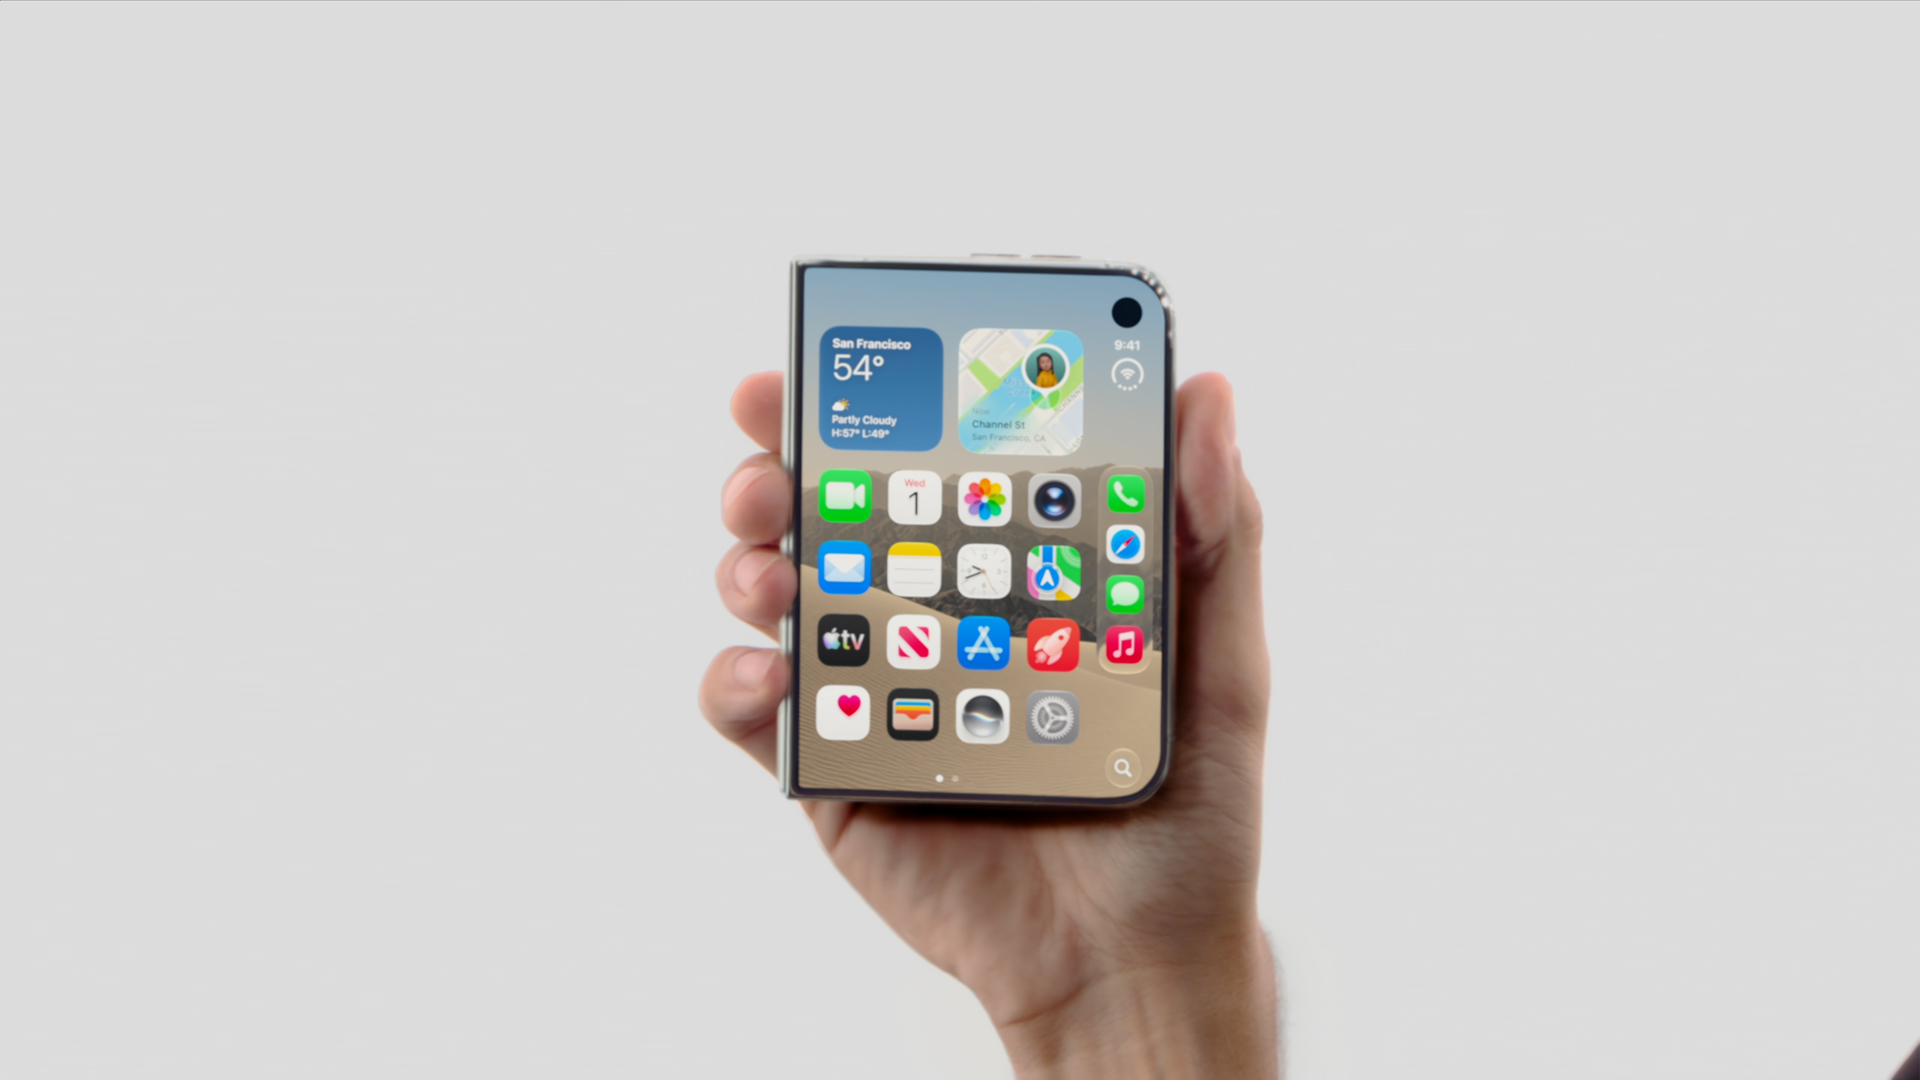
In his first ever “One More Thing,” Ternus started his tenure strong with the introduction of the iPhone Duo. Almost twelve hours since the phone’s announcement, I’ve never seen a more visceral reaction to the launch of a new iPhone.
Whereas most of their annual releases reveled in more incremental improvements that primarily tickled already dedicated fan, the iPhone Duo is something new. Everyone’s talking about it. It’s gotten so crazy that even Samsung, often more nonchalant with its prodding, openly attacked the foldable after teasing the brand to go foldable last year.
Though it’s technically not a new segment, the iPhone Duo is patching up the mistakes of past foldables. Rather than just pasting two screens together, Apple’s take feels like a unified whole, emphasized by an interface that seamlessly changes from folded to unfolded.
Where Tim Cook failed to illicit more than a modest ripple with the Vision Pro, Ternus flew to new heights with the iPhone Duo’s announcement. And the phone isn’t even out yet.
Now, there’s still a chance that the Duo won’t be a hit with sales, especially because of the price. But this is still a strong opener for Ternus.
Who is the main character?
“That’s your guy,” Tim Cook pointed.
I don’t think he was pointing in the right direction. Though the camera cut to Ternus himself, his first outing clearly states that the main character is no longer whoever is handling the reins. His decision to skip an official introduction feels intentional. The main character, after all, is the hardware itself: the iPhone 18 Pro, the iPhone Duo.
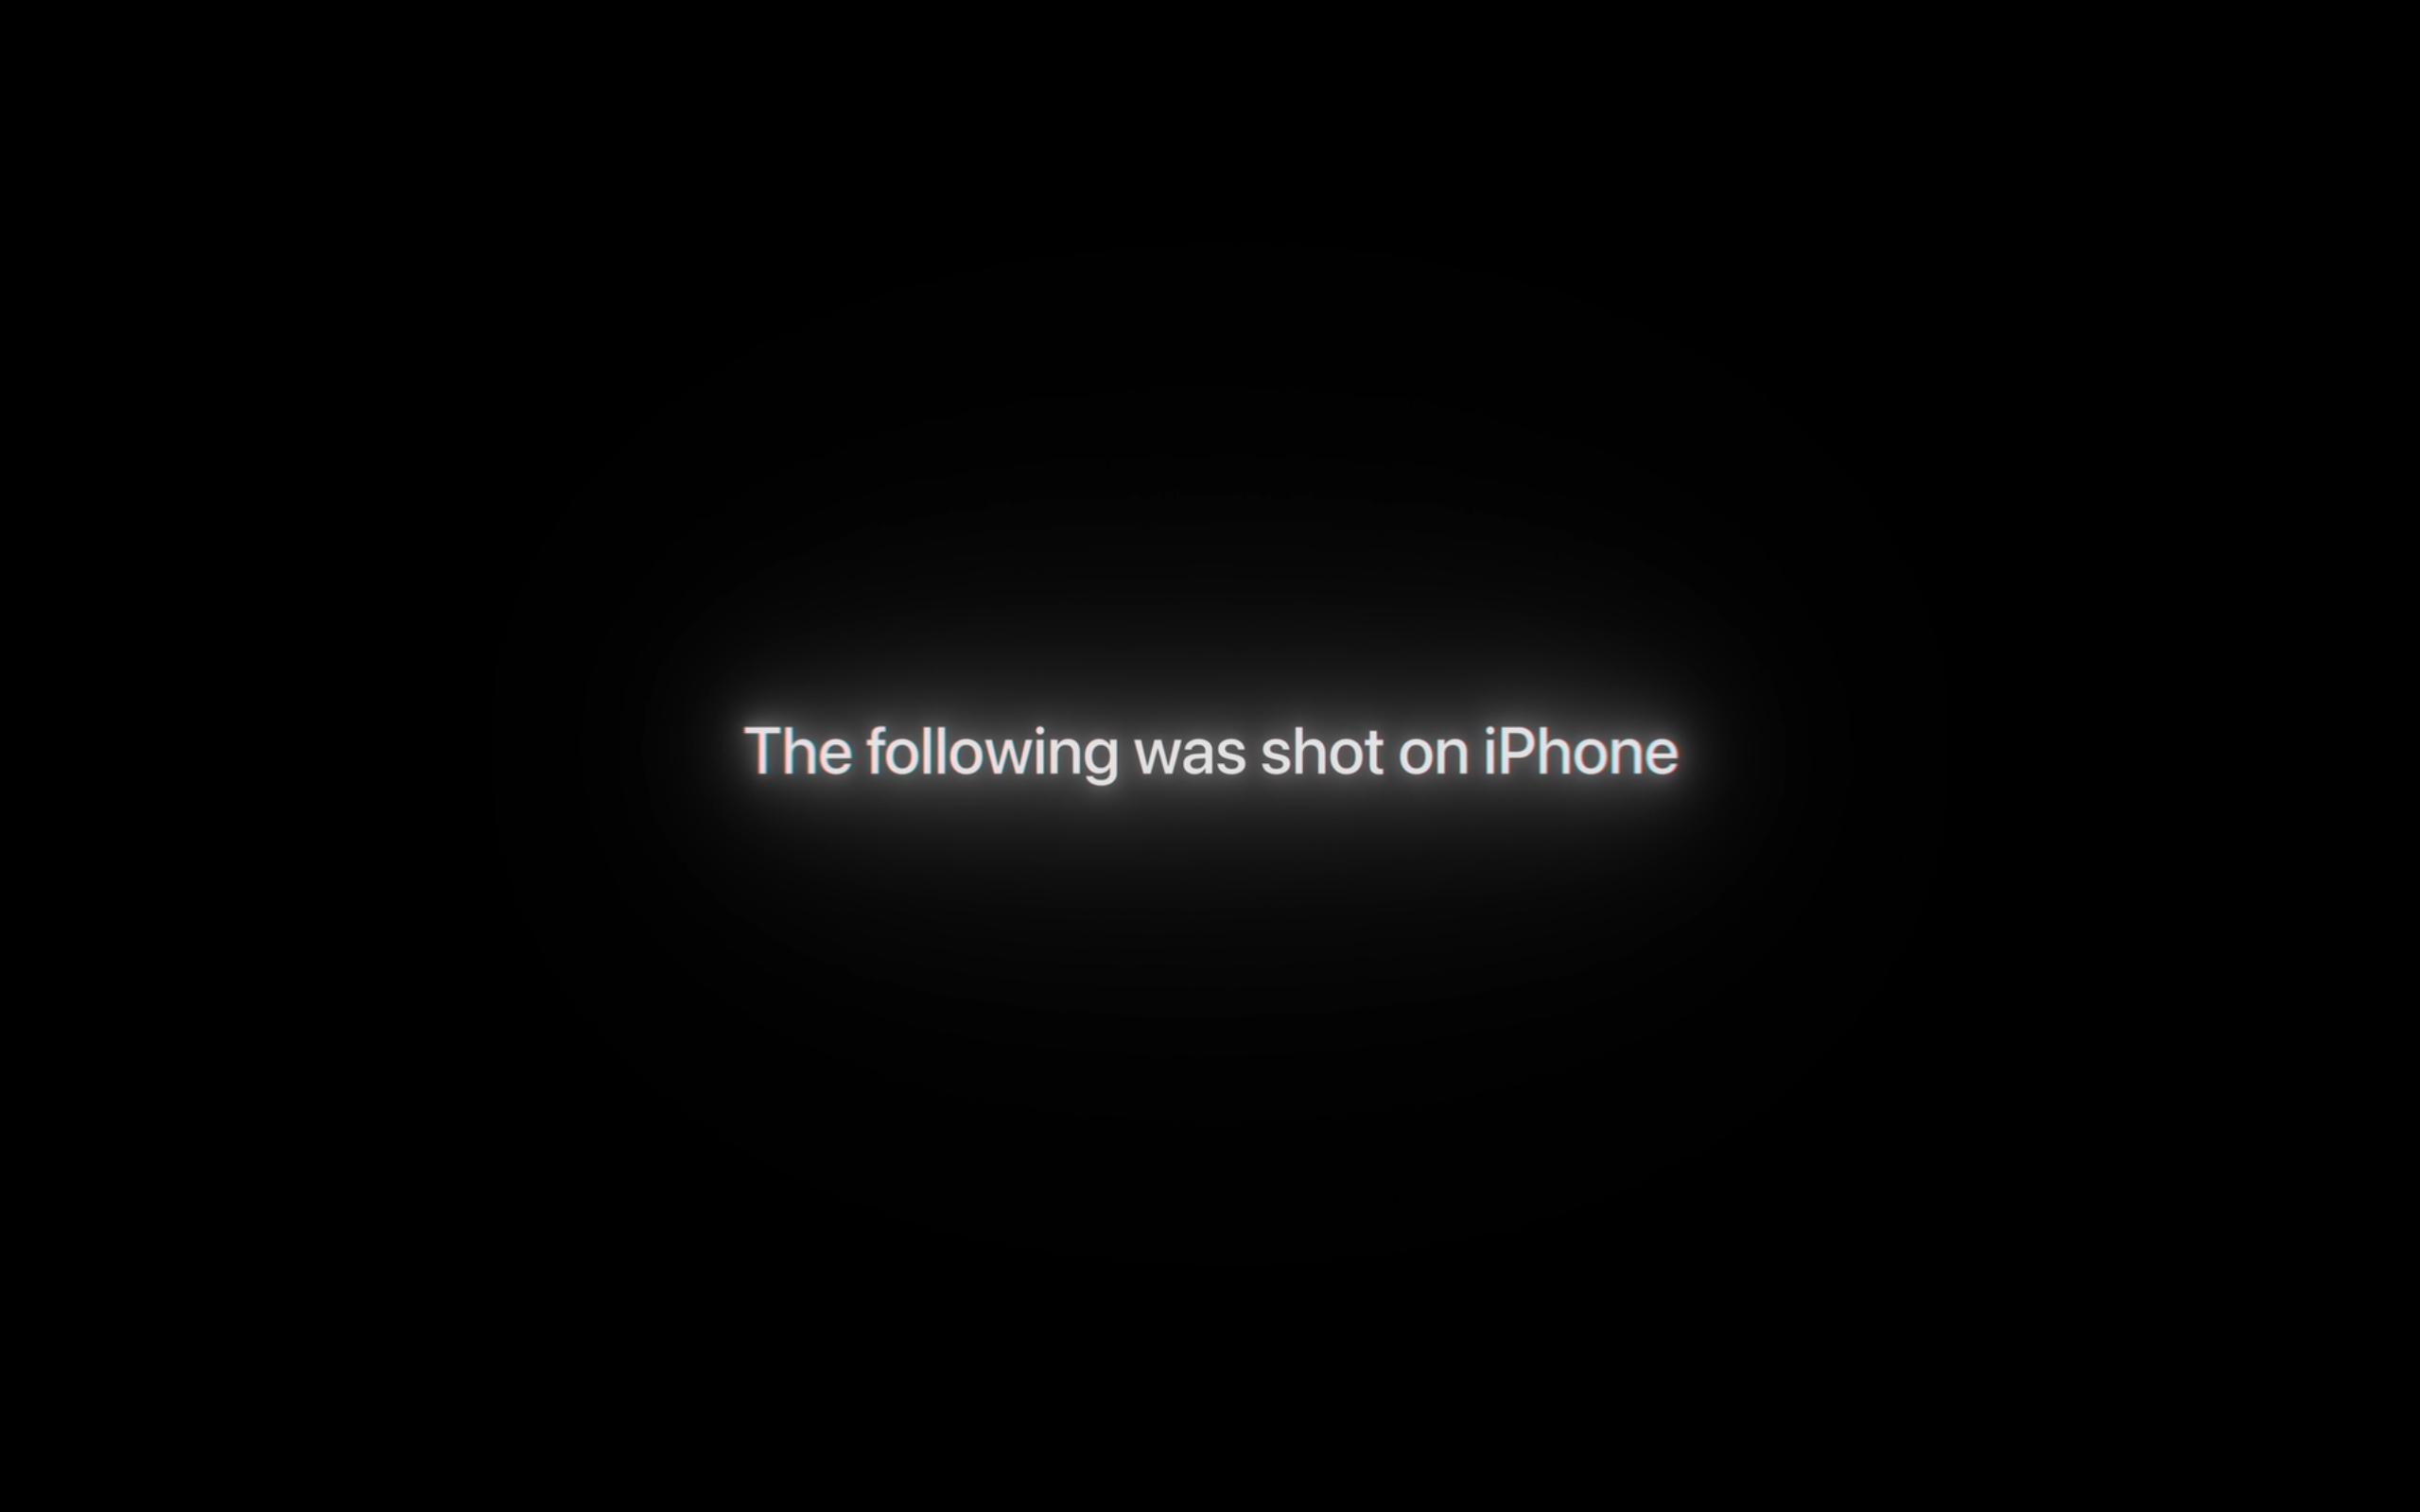
The entire event started with a bold declaration that everything was shot with an iPhone. It ended, in fact, with the same declaration. Channeling their inner Marshall McLuhan, Ternus’s Apple wants you to believe in the iPhone again.
Even as someone who doesn’t use Apple products mainly, I’m stoked to see what the new era will bring to the table. This is an exciting time for Apple. We might be in the first year of a new golden age.
Editors' Choice
GadgetMatch Awards: Best of IFA 2026
Xiaomi 18 Fold, Govee, XGIMI, ARZOPA, Cuktech and more!

We’re back at IFA 2026 in Berlin, checking out some of the coolest and most interesting tech on the show floor.
From smart home lighting and portable displays to projectors, power solutions, foldables, and more, these are some of the products and brands that caught our attention this year.
In this video, we take a look at:
- AI Lighting https://bit.ly/4xmY342
- Z3FC Portable Monitor https://bit.ly/4gRk7wD
- D14 Digital Photo Frame https://bit.ly/4qYlRJ6
- 30 Ultra Desktop Charging Station https://s.whaee.com/tXBornw
- 10 Ultra Charger https://s.whaee.com/UsWT4U2
** Use code CUKTECH09, valid until September 30
XGIMI
ASUS x NVIDIA RTX SPARK
- ProArt P16: https://asus.click/h7607_gm
- ProArt P14: https://asus.click/h7407_gm
- ProArt GR1X
Watch until the end for our favorite finds from IFA 2026!
Tutorials
How to spot scam emails and messages before they get you
Here are the telltale signs in a potential scam.

The brazenness of scammers often goes through fits and starts. Within the last few weeks, I’ve had three separate people in my immediate circle fall for three separate scams. I’ve received similar emails myself. With the Christmas season approaching, we’re living in a particularly brazen period, and it’s time for a very important PSA. Here’s how to spot a scam email today:
Check the contents of the message
Most scam or phishing attempts today will ask you to submit sensitive information like your log-in details or bank information to a seemingly innocuous platform. Obviously, these platforms are fake, and you’re surrendering your information to a malicious party. Unfortunately, these scams are getting much better with disguising their deception. If you put them side by side with a real email or message, you might find it hard to spot crucial differences. So, how do you clock them before it’s too late?
Start with the actual message. Companies will not ask you to submit your details on an email or on a message. It doesn’t matter if the message is claiming an issue (someone allegedly using your card) or a reward (your points are about to expire). If it’s not your usual way of logging in or submitting this information, then it’s likely fake.
Some might even include a highly suspicious link that leads to a log-in page. If that link is from a link shortener (like bit.ly) or looks nothing like the company’s real site, don’t click it. If you do click, check the URL for anomalies. In the below example, “Maya” claims that someone else tried to change the email on my account. Besides how unofficial the alert looks, the button does not lead to Maya’s website. 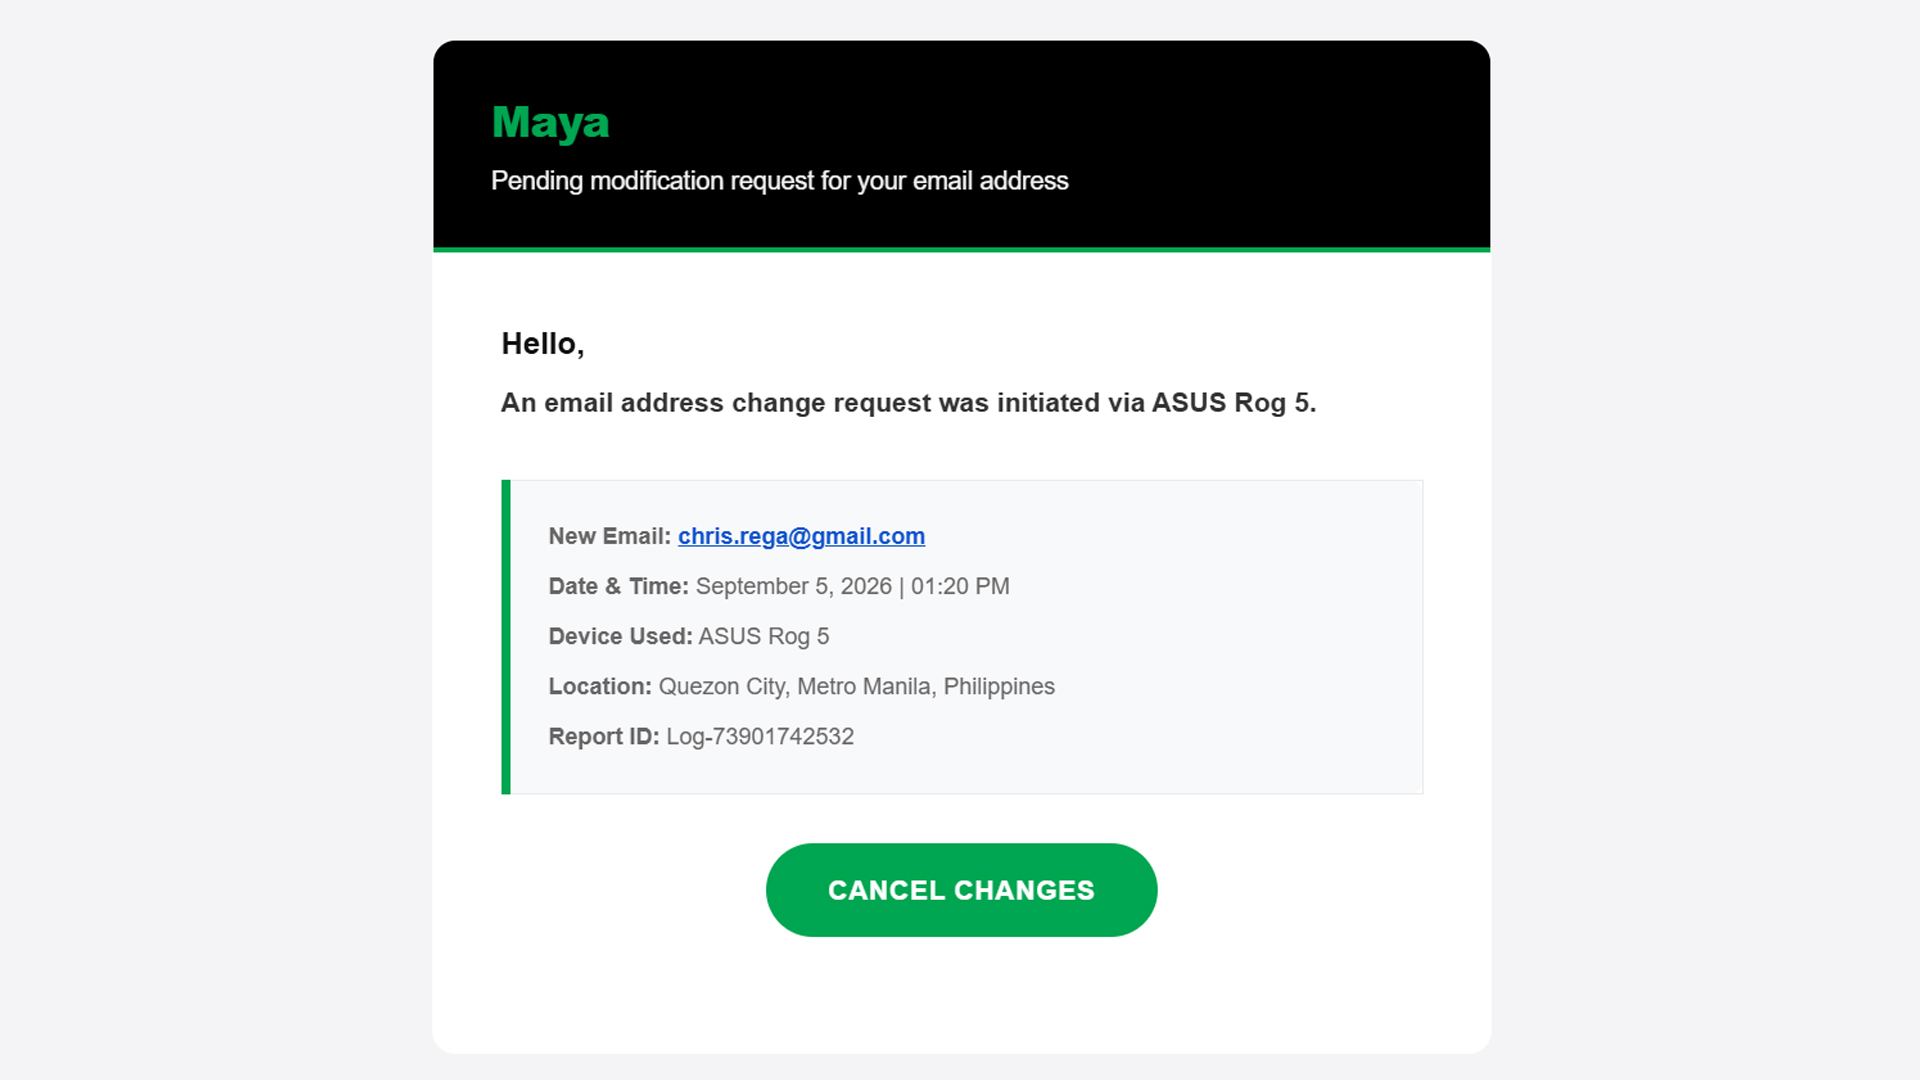
Now, on rarer occasions, the message itself has telltale signs of deception: typographical errors, missing words, extra spaces. A normal message should have already filtered these errors out, so there’s a good chance that it’s a fake message if it has any of these errors.
Basically, if something feels off straight from the get-go, cast doubt immediately and be vigilant.
Check the sender
Ensuring a fake message is clean should be easy stuff for scammers. A simple spell checker can trick a simple user into doing whatever the scammer wants. One aspect that’s way harder to change is the sender.
An email might have the cleanest copy, but one look at the sender dismantles all deception. In three of the four scam emails I’ve seen in the past two weeks, the sender was the ultimate telltale sign.
In the example below (the same one as above), the sender presents itself as “MayaPH.” If you weren’t paying attention, you would have been fooled into thinking that this is actually Maya. But, if you open the sender information, you’ll see that it’s coming from an unknown email, rather than an official Maya email address.

On a PC, this is easy to check because the email address automatically pops up beside the sender’s name when you open the email. On mobile, you’ll have to press the drop-down button below the sender’s name.
Verify the information yourself
Let’s move to the next level. What if the message looks official and seemingly comes from an official sender?
Unfortunately, scammers today can also spoof senders. Meaning, they are able to send official-looking messages and mask themselves as official senders. In the below example, “BPI” sent me an alert saying that someone tried to spend PhP 19,250 from my account. Take note: this is the same thread where I got real messages from the bank, which the scammer managed to hijack.
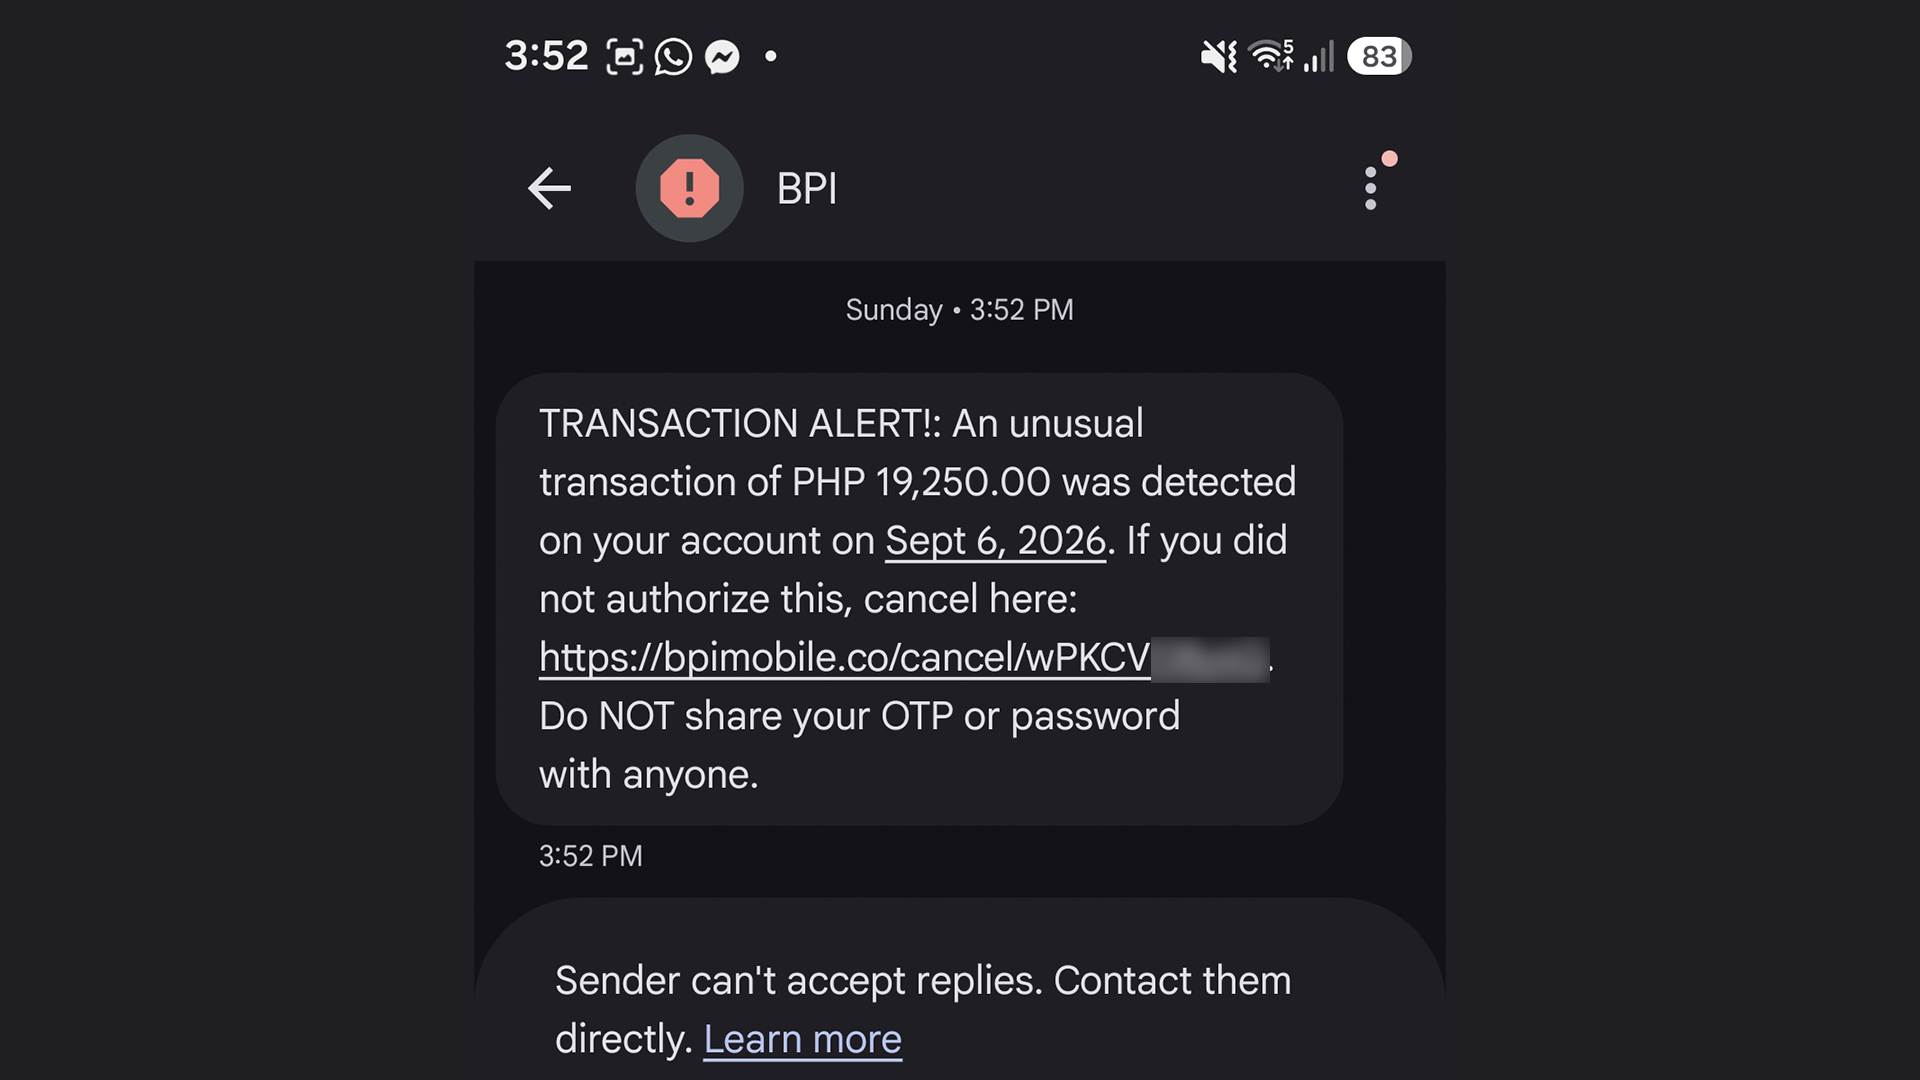
The message looks real. I can’t spot a single typo. Now, if you spotted this and thought it was real, you’d enter a state of panic and click the link out of instinct. The scammer is depending on your instinct to do so. Here’s why you shouldn’t click it: That’s not BPI’s official website. It looks like it, but it’s not.
Of course, you can’t be faulted for not memorizing official company websites. In fact, I had to Google the URL just to confirm that it was fake.
A surefire way to make sure, though, is checking the supposed information yourself. When I got the message, I checked my BPI app immediately. There was no trace of the transaction, so I knew it was fake. You can also call them yourself using their official numbers.
This isn’t limited to banks, either. Another example I’ve seen is one claiming that your Spotify subscription failed to renew. In this case, you can manually check your Spotify app to see if your subscription hasn’t been renewed.
Scammers are hopeful that you panic and run to them, rather than the official channels.
Sometimes, friends cannot be trusted
Though we can avoid falling for traps ourselves, other people still can. After an account is hacked, the hacker’s usual play is to message the account’s contact list to get other people.
Because it’s seemingly coming from a loved one’s account, a user is more likely to follow whatever the hacker wants, including clicking suspicious links.
In my experience, this type of scam is rarer these days, but it’s not completely gone. I’ve had one experience wherein a contact from Discord messaged me and tried getting me to play a game with them. The game itself was non-existent. The goal was to have me click a suspicious link and install malware on my computer. The malware can then give the hacker complete access to my PC and every account it’s logged into.
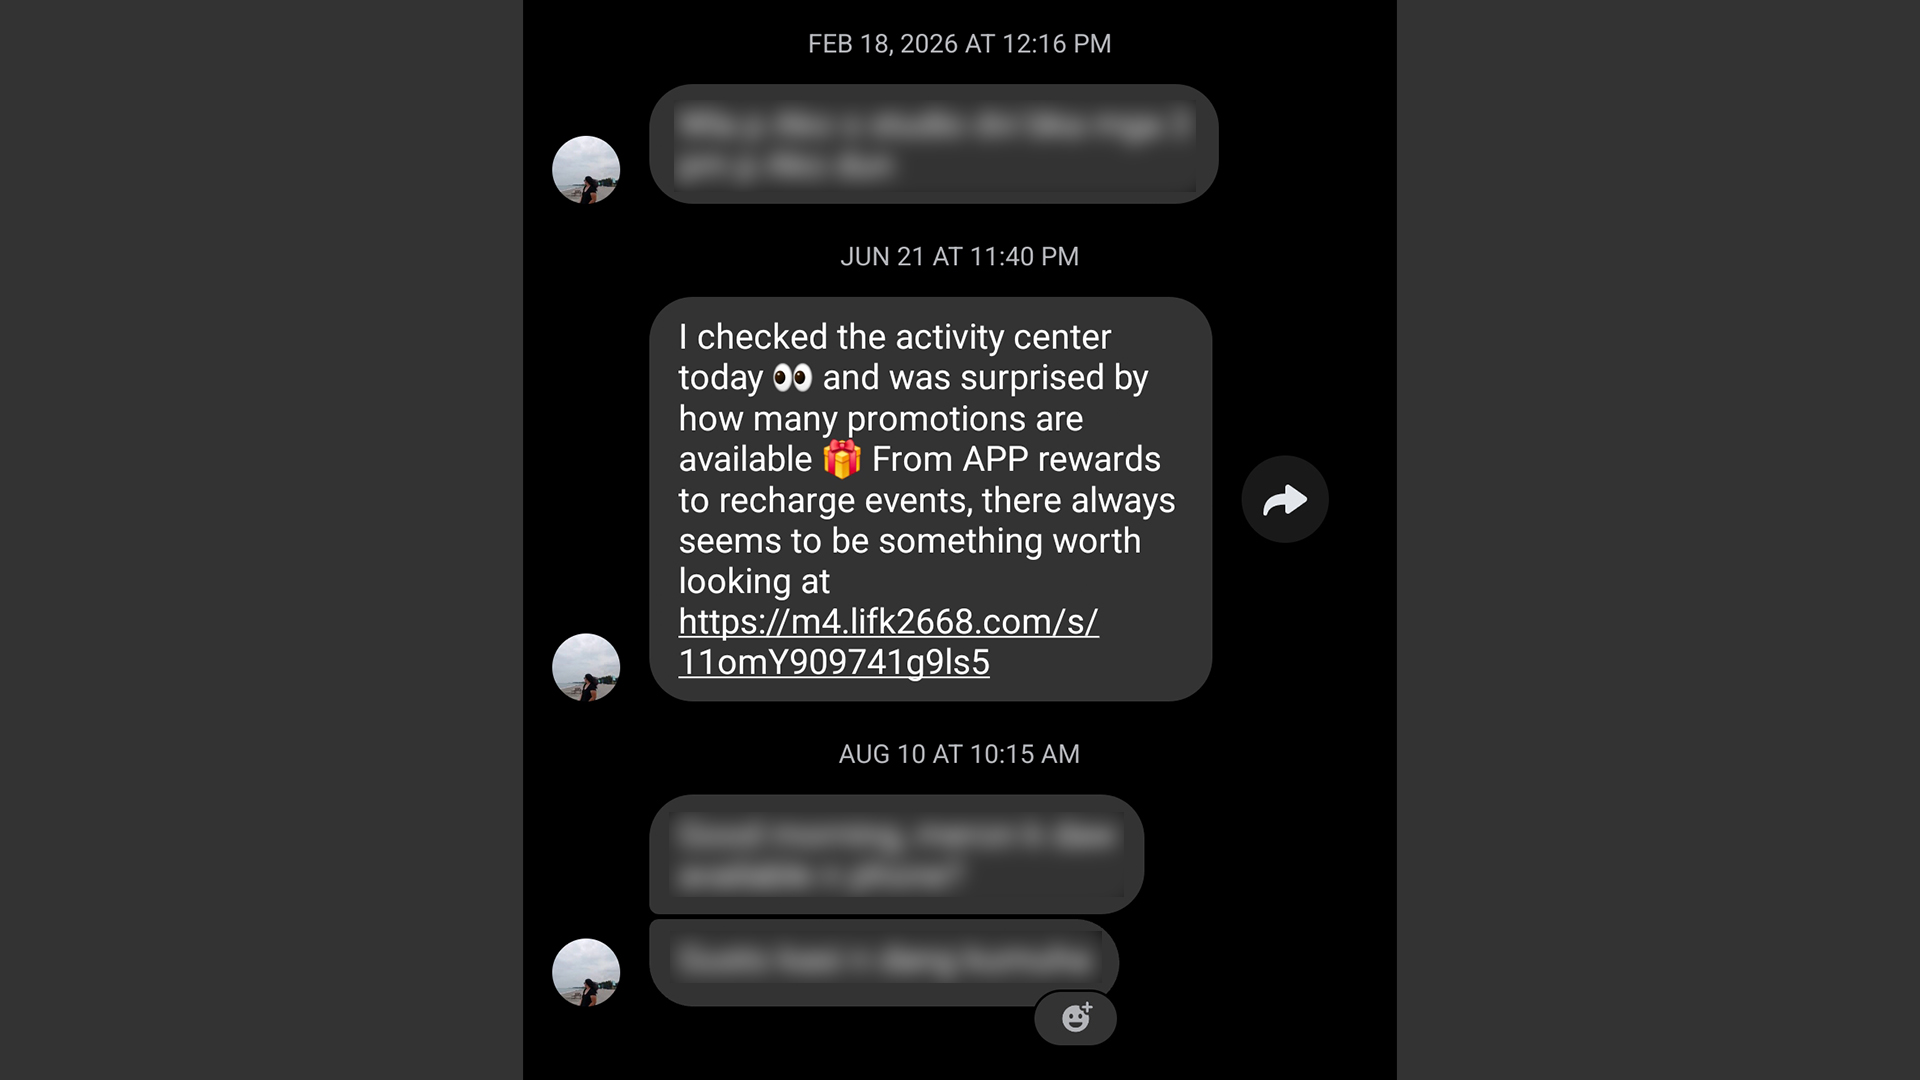
It’s a very nasty malware, but it’s fairly easy to prevent. If you get a message from a friend that isn’t their typical behavior, contact them on a separate platform, preferably on one that doesn’t rely on the net like SMS. If that’s not possible, contact someone near to them.
Address a potential hack immediately
Even with all these precautions, sometimes we can’t prevent ourselves from falling into these scams. If you find yourself victimized by scammers, respond immediately.
First of all, secure the targeted platform first. If it’s an app or a service, change passwords immediately and add two-factor authentication. If it’s a bank, call and appraise them of the situation. You might have to spend some time with a frozen account or without a card, but it beats having all your money sucked dry.
Now, if you suspect that your entire device was compromised, disconnect from the internet immediately. A hacker is toothless if they can’t connect to their prey. Then, using another device, reset every account that the hacker might have access to. If you know how, manually disconnect your accounts from the affected device. Once clear, do a clean install/reset of the device to hopefully weed out the malware.


Marvel’s Wolverine review: When the claws come out
A brutal, cinematic superhero adventure

Setting your bedsheets ablaze with the Lovense Solace Pro
The closest proxy I could find where I'm guilty as sin


Now Playing: Elden Ring Tarnished Edition
Is the Switch 2 port worth the price?

First Look: Apple iPhone Duo

Xbox saves Kojima’s PHYSINT after PlayStation drops support
Marvel’s Wolverine review: When the claws come out

PH to celebrate 1st ever National Cinema Day; movies start at less than $2

New AGON gaming monitor features up to 1000Hz refresh rate

TECNO MEGAPAD 2 review: Eyes on the size

realme 16T 5G with 8000mAh battery, IP69 Pro rating launches in PH

HUAWEI Pura X View is 2026’s first WIDE slab-type smartphone

REDMI Note 17 Series focuses on long-term reliability

REDMI reveals the refreshed Note 17 and Note 17 Pro series


-
 News2 weeks ago
realme 16T 5G with 8000mAh battery, IP69 Pro rating launches in PH
-
 News4 days ago
HUAWEI Pura X View is 2026’s first WIDE slab-type smartphone
-

 Cameras1 week ago
DJI Osmo 360 II review: Going all-in on the ecosystem
-

 News5 days ago
The CAMON Slim 5G is TECNO’s latest ultra-slim smartphone
-

 Features2 weeks ago
The designated photographer’s new favorite phone: OPPO Reno16 Series 5G
-

 IFA 20261 week ago
TECNO MEGABOOK T15 360 unveiled at IFA 2026
-

 Gaming1 week ago
NBA 2K27 review: A two-way All-Star
-
 Reviews2 weeks ago
Samsung Galaxy Z Fold8 Ultra review: It’s time to get a foldable